Started your first steps in e-commerce, only to find you can't activate payment methods or launch your store?
Every new merchant on Salla runs into this, and the reason is simple: your store isn't verified yet. Store verification is the first key that unlocks your store completely. Once it's done, you can activate payment methods, start selling right away, and help build a trusted, secure environment for you and your customers. In this guide, you'll learn how to verify your store step by step, according to your entity type.
To verify your store, open Wallet and invoices from your dashboard settings and click the incomplete verification status. Enter the store owner's details and confirm them through Absher, add the store manager's details, choose your entity type, attach the required documents, and submit the request for the Salla team to review.
Not sure which route fits you? This tool walks you through the best verification path step by step. If you're on the new platform experience, see verifying your store in the new experience instead.
📌 Article overview
- Why your store needs to be verified
- Verification stages by entity type
- How to verify your store step by step
- What happens after you submit
- Tips for getting approved the first time
- Important warnings
- Frequently asked questions
Why your store needs to be verified
Verifying your store brings several real benefits:
- Full access to every Salla feature, with no restrictions.
- More credibility with your customers.
- Faster activation of payment gateways and shipping services.
- Compliance with the legal and regulatory requirements for e-commerce.
✅ Note: This process is also called verification inside Salla, or verifying your store data on Salla. Either way, it's a core part of running your store officially.
🎥 Prefer to watch? See how verification works for each entity type — whether you're a company or an individual — and start selling with confidence.
🚀 Verification stages by entity type
The stages differ depending on your store's entity type. Here's the summary:
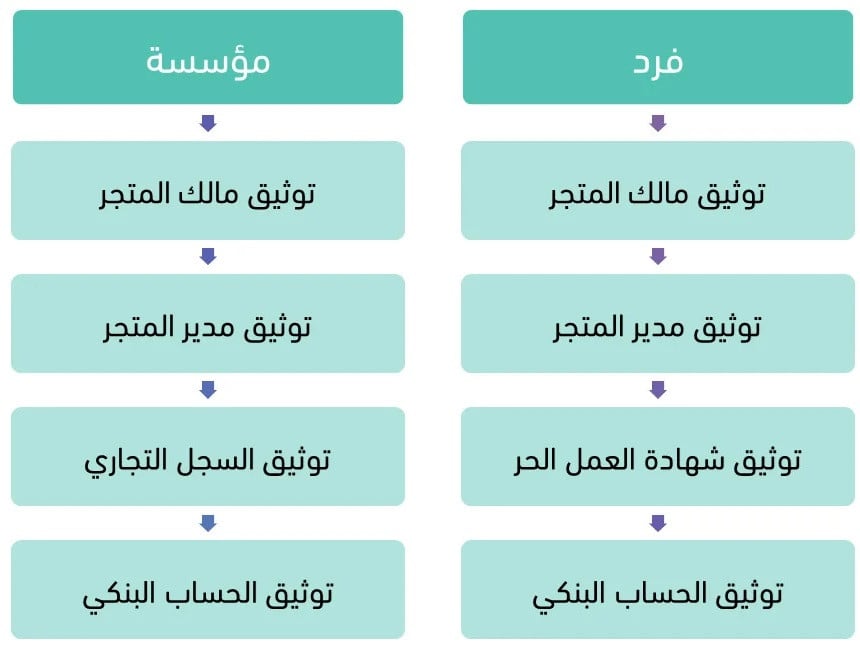
If you don't have a commercial registration yet, see the steps to get a commercial registration.
If you don't have a freelance document yet, see issuing a freelance certificate.
For more details, see how to get an IBAN certificate from your bank.
You can also read the frequently asked questions about store verification.
📝 Important notes
Verification for charity stores works a little differently. For more details, see creating and verifying a charity store.
👣 How to verify your store step by step
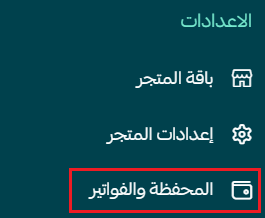
1. From the dashboard side menu, go to the settings section and click (Wallet and invoices).
2. Your verification status appears at the top of the wallet and invoices page. Click (Incomplete).

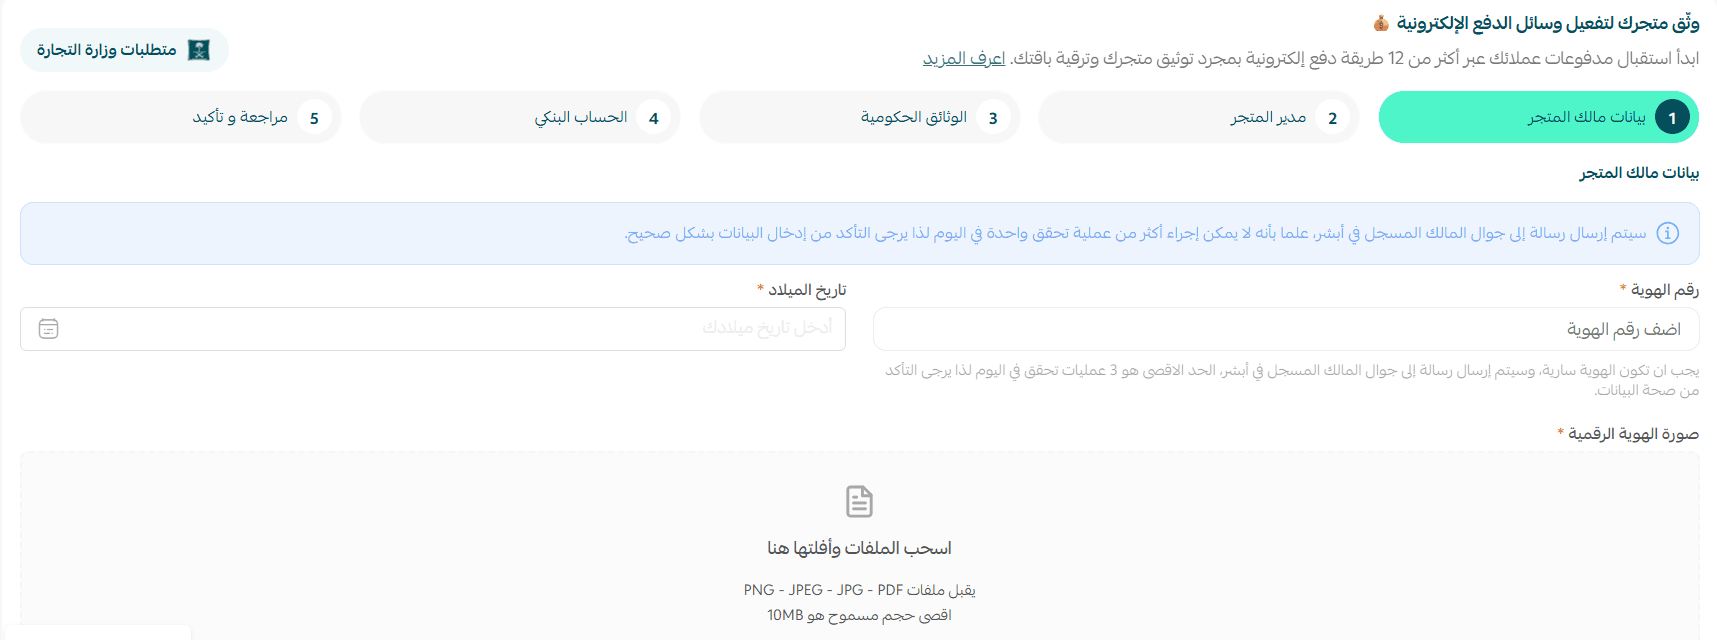
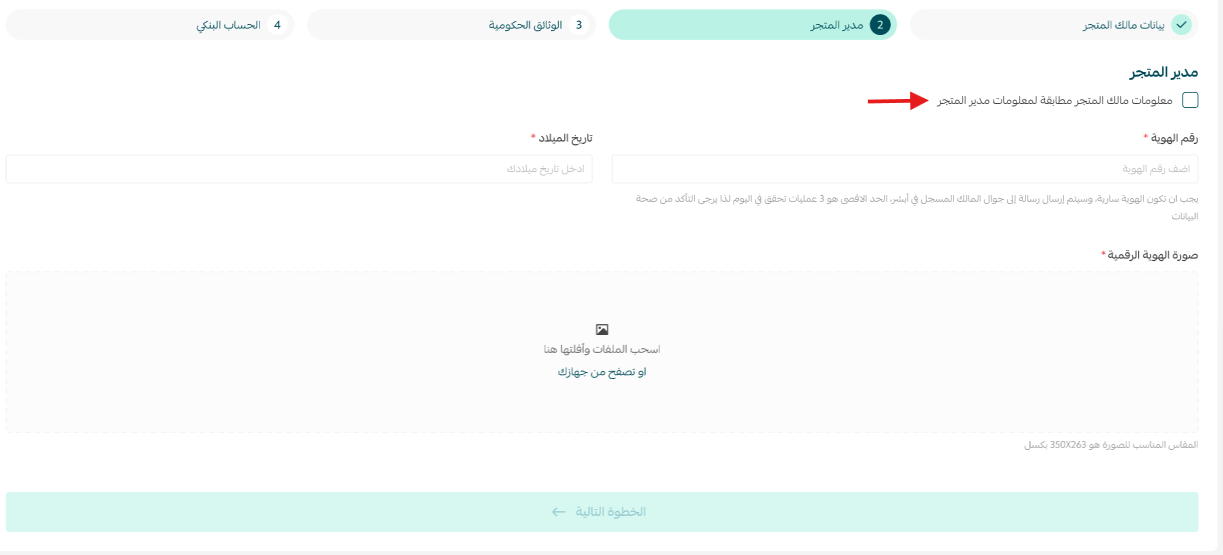
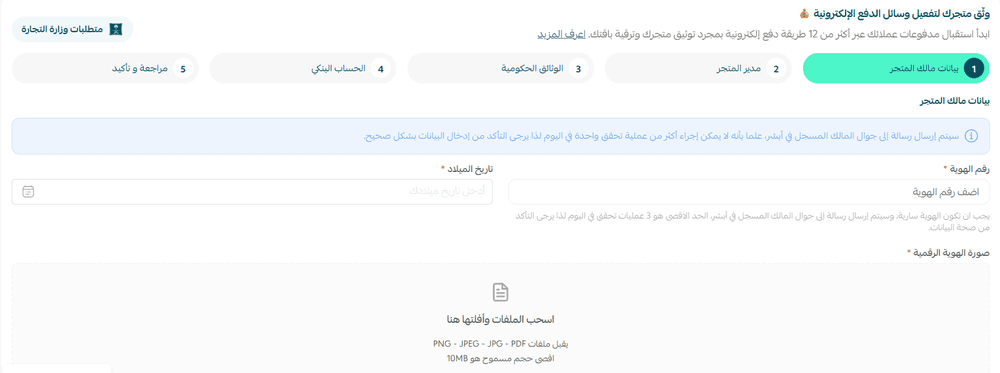
1. Enter the store owner's details carefully
You'll need:
- The store owner's ID number (10 digits). The national ID or residency permit must be valid and match the owner's details on Absher exactly.
- The store owner's date of birth (Hijri for citizens, Gregorian for residents).
- A photo of the store owner's digital ID.
Absher then sends a text message to the store owner's number from the previous step.
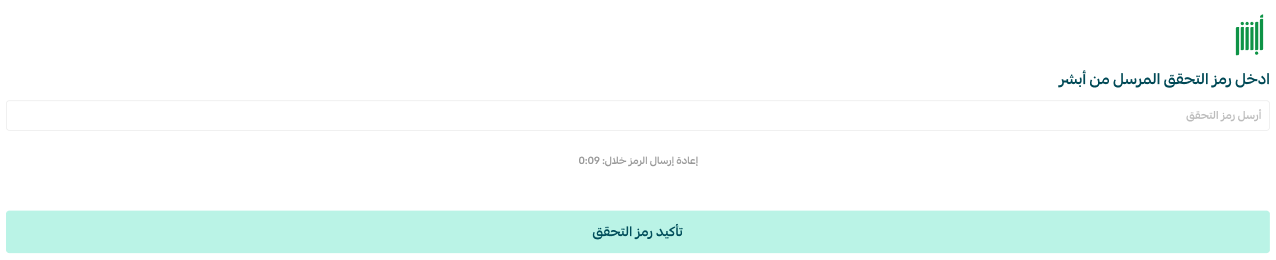
The store owner is now verified.
2. Enter the store manager's details
If the store owner is also the manager, turn on the (Store owner is the manager) option.
3. Choose your entity type
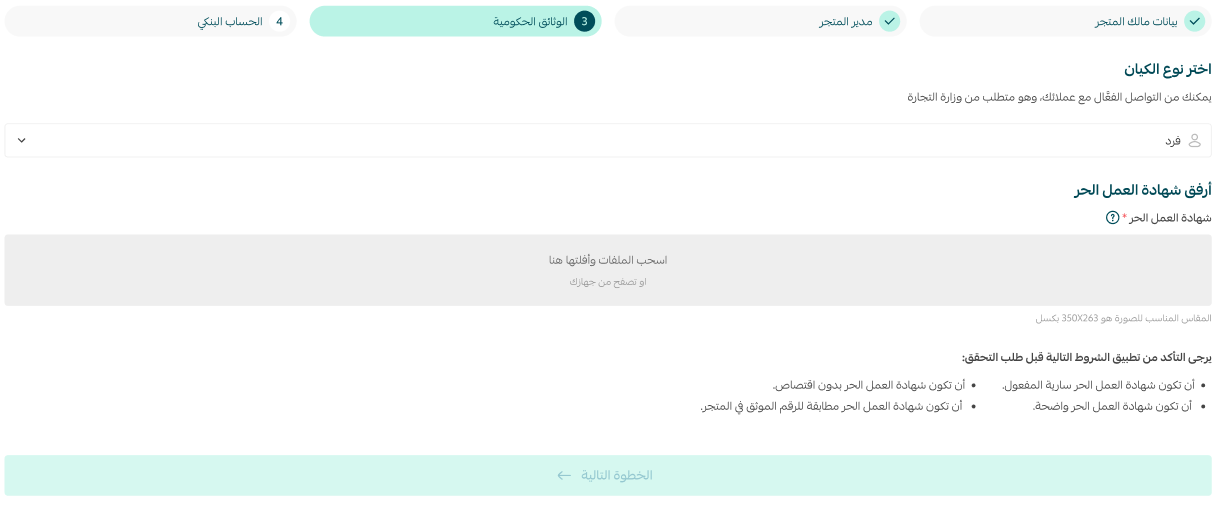
Your entity type decides which details you enter next — freelance document, commercial registration, or something else. Choose whether you're an individual, an establishment, a company, or a charity.

- Individual: a freelance document belonging to the store owner (Saudi citizens only).
- Establishment or company: a valid commercial registration for the company or establishment, belonging to the store owner (citizens and residents).
- Charity: the charity's registration certificate.
📝 Important notes
Productive families can use their productive families certificate to obtain a freelance document through the freelance website. It's a faster route — the document can be issued in around 24 hours.
The example below continues with freelance document details. Enter your freelance details, and check that they're valid and meet the conditions required for verification to succeed.
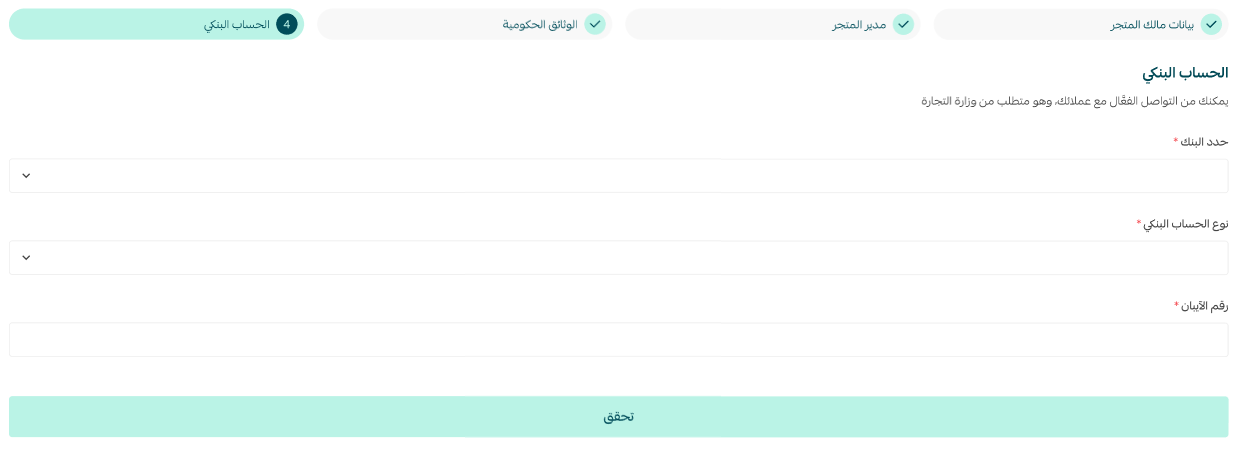
4. Enter your bank account details
📝 Important notes
- For an individual: the bank account holder's name must match the name on the IBAN certificate, not the name printed on the bank card. The account holder must also match the store owner's ID or their freelance document.
- For a company or establishment: add a business bank account in the name of the establishment or company, linked to the commercial registration.
Review everything you entered, then click (Submit request).
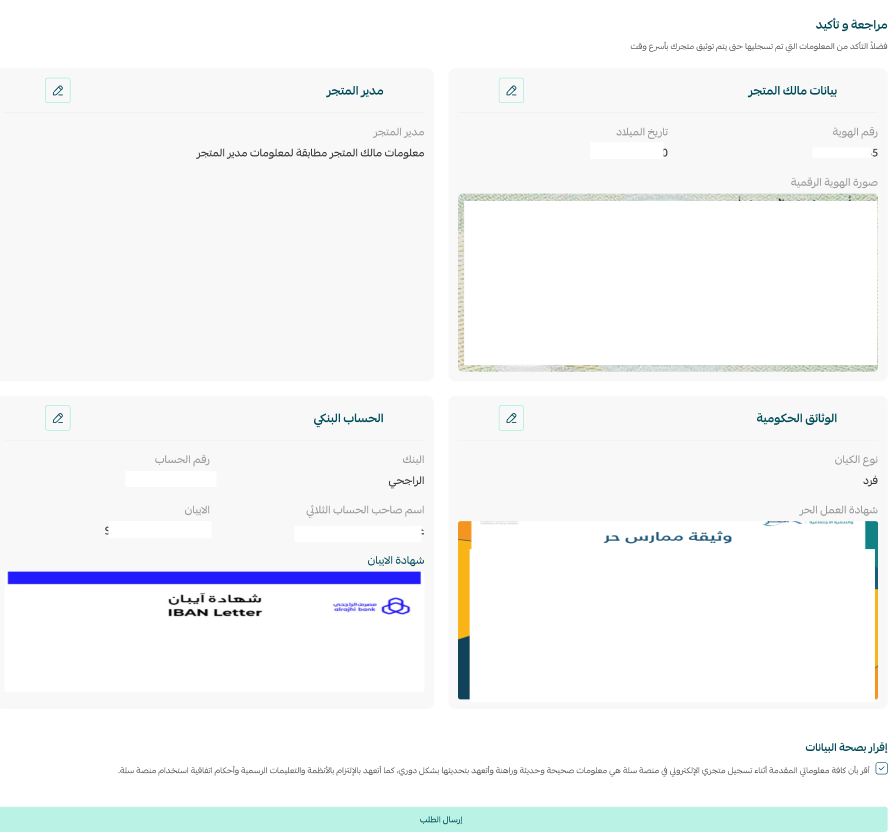
The Salla team reviews your request.
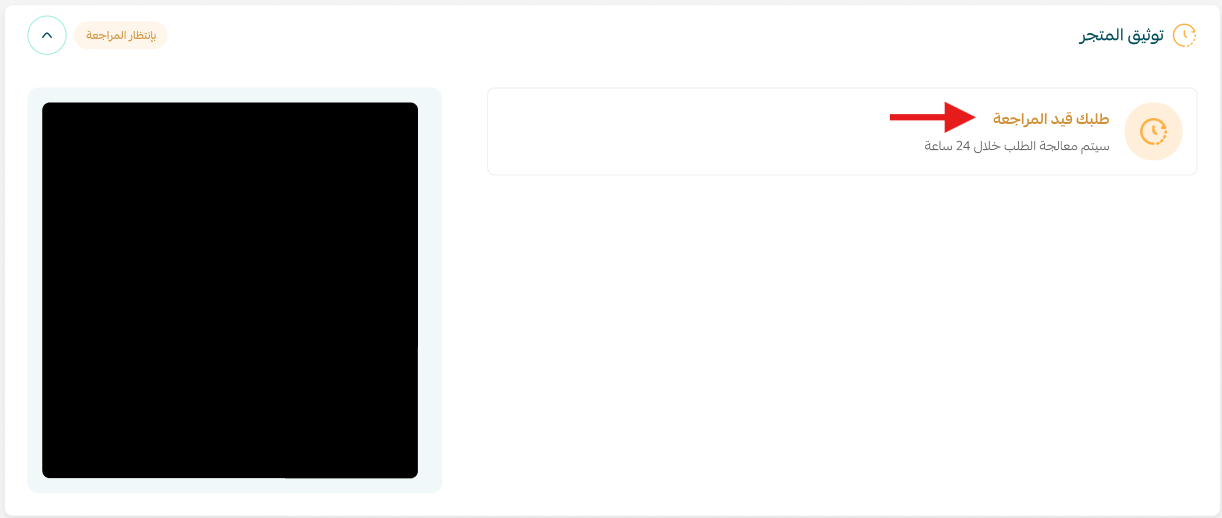
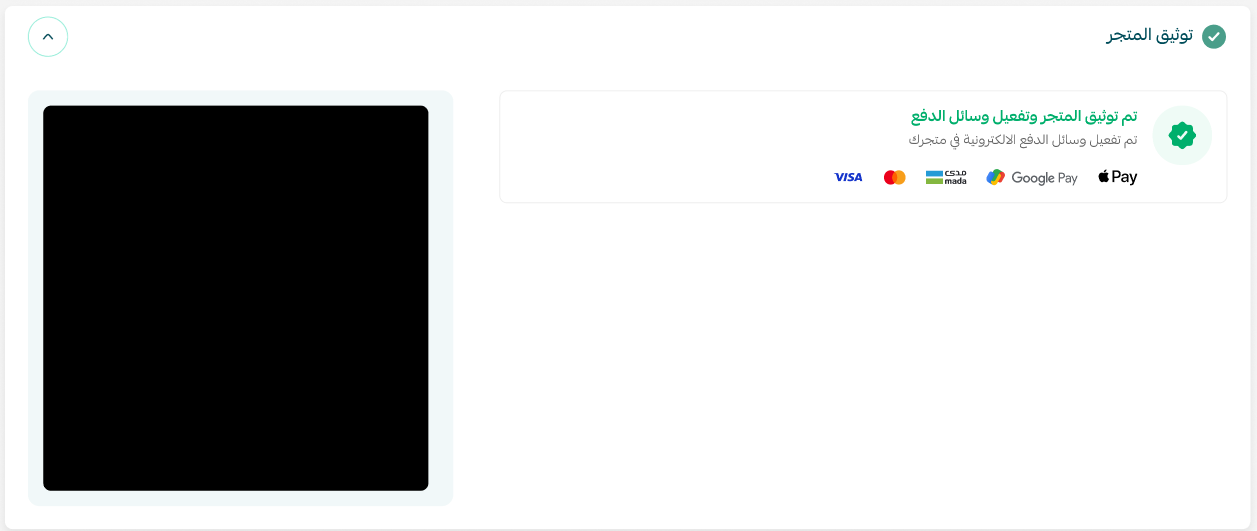
🎉 Your store is verified.
What happens after you submit
- The Salla team reviews your verification request.
- If your details are complete and correct, the request is approved.
- You'll get a message confirming that your store has been verified. 🎉
Tips for getting approved the first time
- Use clear, valid documents.
- Make sure the names on your ID, your documents, and your bank account all match.
- Enter your details without spelling or number errors.
- Review every step before you submit.
Important warnings
- Missing requirements can stop verification or leave you unable to complete the request.
- Submitting documents that aren't linked to the store owner's ID can get your request permanently rejected.
- For companies and establishments, a bank account not linked to the commercial registration cannot be used.
- Unclear or expired documents can get your request returned or rejected.
- Repeatedly entering incorrect details can get your request permanently rejected.
❓ Frequently asked questions
How do I verify my store on Salla?
Go to the store verification page, enter the store owner's details and confirm them through Absher, add the store manager's details if there are any, choose your entity type, attach the required documents, and submit the request for the Salla team to review.

✨ This keeps store verification on Salla clear and completely separate from anything else, such as business platform verification — less confusion, and a better shot at getting it right the first time.
Can I edit my details after submitting the verification request?
Yes. If the request is rejected or an edit is requested, you can update your details and submit again.
How long does store verification take?
Review time depends on how complete your details are, and you'll usually get a response quickly.
Support services
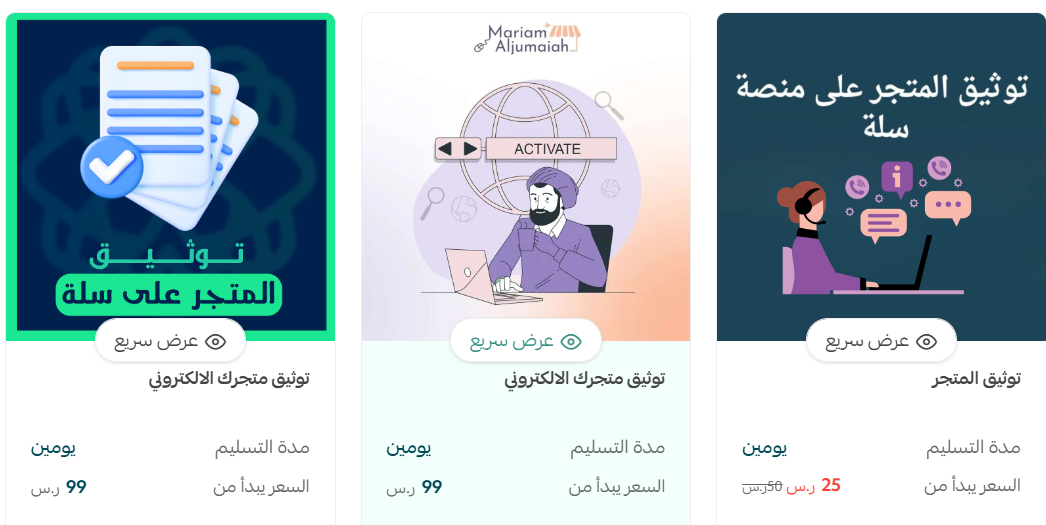
If you need a hand verifying your store, merchant services connect you with external providers for work like verifying your store or issuing a freelance document, so your business tasks get handled professionally.
✨ Verifying your store lays the right foundation for growing your e-commerce business with confidence. Finish the steps now and unlock everything Salla has to offer.