If your customers come from different countries, they likely prefer to shop and pay in their local currency. By enabling multiple currencies in your store, you create a smoother checkout experience and remove friction that can affect conversion rates.
This guide walks you through how to add and manage currencies in your store in just a few steps.
📌 Article overview
- How to add currencies to your store
- Frequently asked questions
How to add currencies to your store
- From the main menu, go to Sales Channels, then select Store.

2. Open the More menu and click Currencies.

3. Configure the currencies available in your store, then click Save.
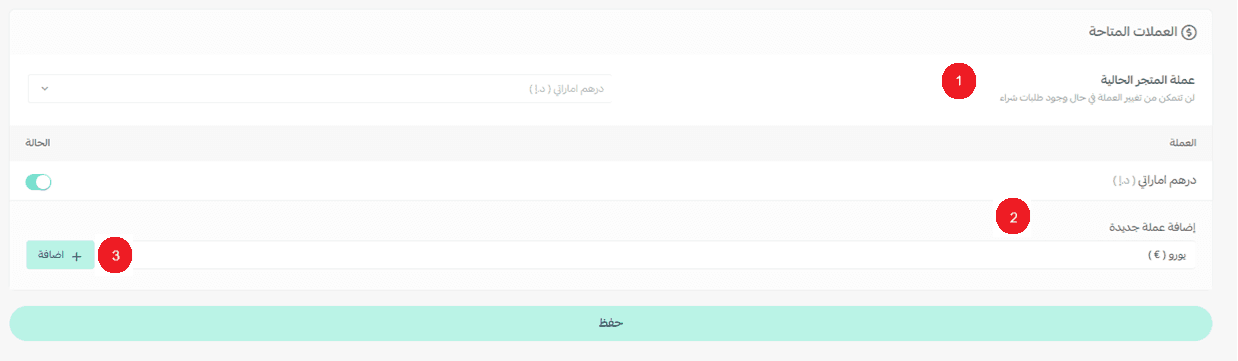
On the currency settings page, you can:
- Set the current store currency.
- Enable or disable available currencies based on your business needs.

3. Select a new currency and click Add to include it in your store.

Once saved, the selected currencies become available to customers.
Frequently asked questions
Can I change the default store currency later?
Yes, you can change the default currency as long as there are no existing customer orders in the system.
How can customers choose their preferred currency?
While browsing your store, customers can select their preferred currency from the currency selector located near the shopping cart at the top of the store.
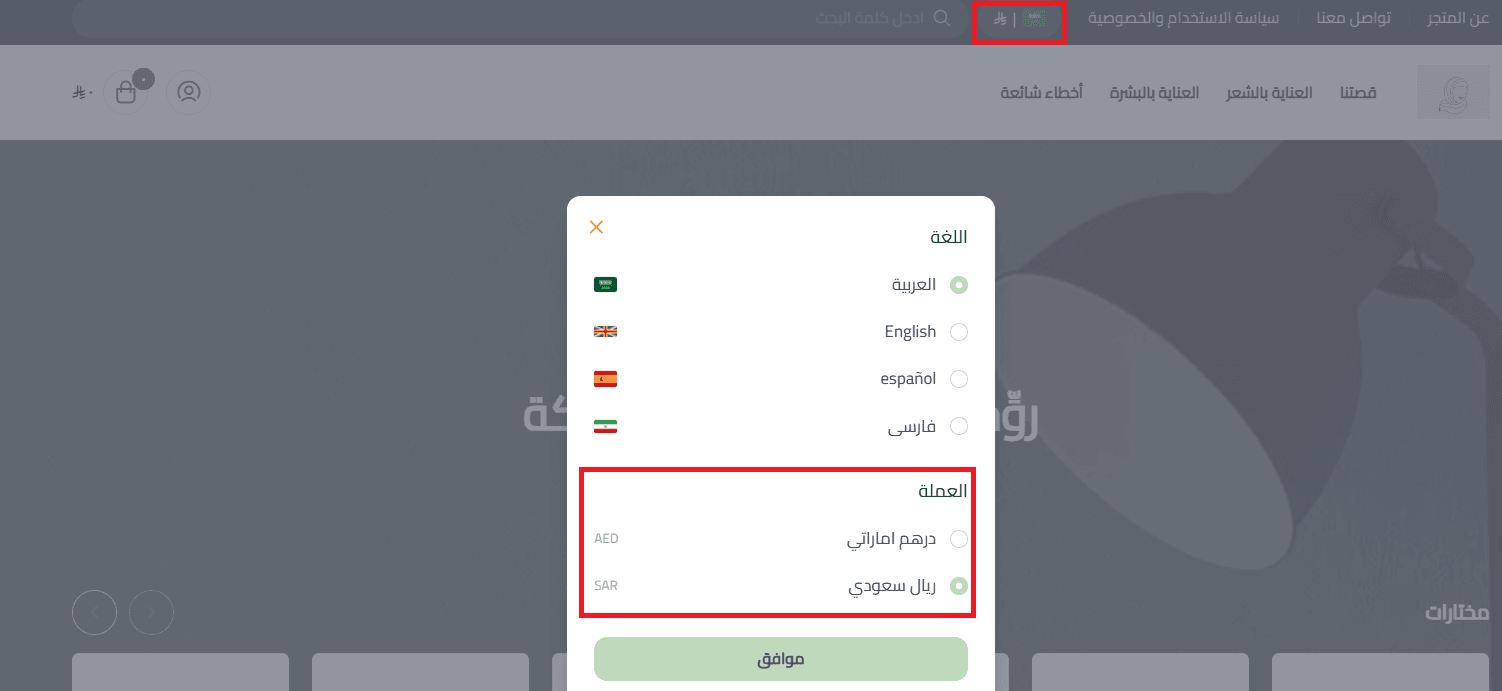
Product prices will automatically update and display in the selected currency.

Important clarification
The currency shown to customers by default is based on their geographic location, not the default currency set in your store settings. This allows prices to be displayed automatically in a local currency, creating a more comfortable and familiar shopping experience for international customers.