Your app doesn't go live the moment you hit publish - it moves through four stages, and each one has a way to fail.
If you're preparing to put your store app on the app stores, it pays to know every one of the app launch stages and what each one requires, so your app is accepted and published without a round trip. In this guide, you'll learn the full journey as a merchant, from entering your app data through to your app appearing on the App Store and Google Play.
Launching a store app on Salla takes four stages: you complete and publish your app data, Salla Team reviews it against the app stores' requirements, Apple and Google review the app itself, and then it is launched. Your subscription is not charged until the fourth stage.
📌 Article overview
- Stage 1: completing your app data
- Stage 2: Salla Team review
- Stage 3: Apple and Google review
- Stage 4: launching your app
- Frequently asked questions
🚀 Stage 1: completing your app data
This is the first of the launch stages. It's where you choose the data that will be published for your app on the stores: the name, description, icon, images and so on.
📝 Important notes
- Stage 1 is yours to complete and publish. You can get guidance through the technical support chat dedicated to apps.
- Your request has to be published and move into stage 2, Salla review, before the Salla support team starts working towards launch on the stores.
- Your subscription is not charged until the request is launched, which is stage 4. Take the time you need to enter and choose your data carefully.
- Data cannot be changed once the request is published and has moved to Salla review, unless there are errors in what you entered - the team reviews those and lets you correct them.
- You can change your data after it has been entered, published and launched on the stores, for an additional fee. For more detail, see buying an app data update.
1. App data
Enter your app data carefully - all of it is required, from the app icon through to the support page links - then click (Launch) or (Save as draft).
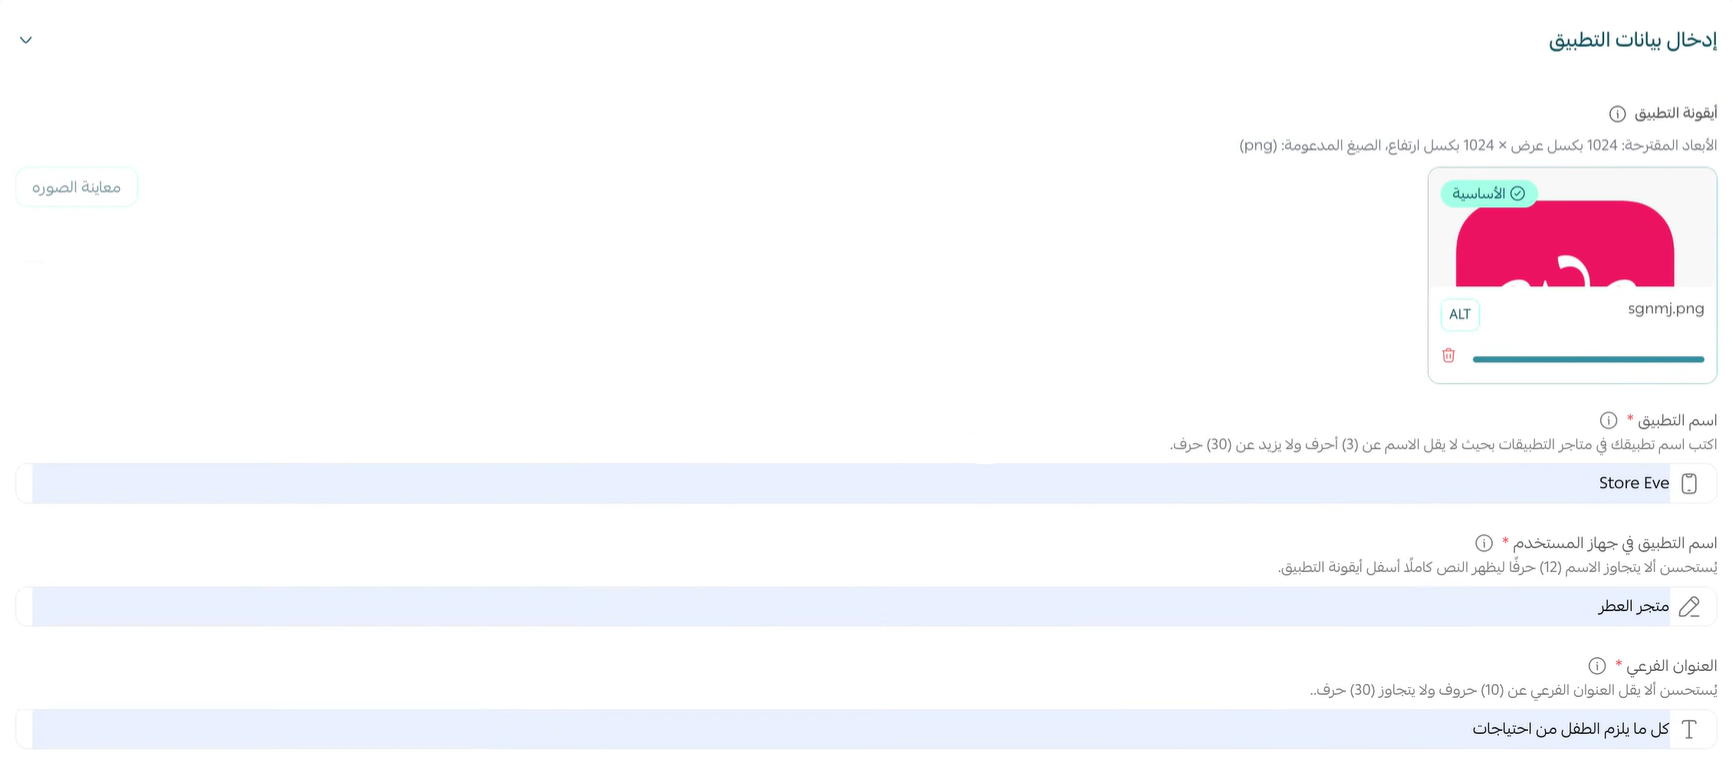
For more detail on step 1, see choosing your app icon, choosing your app name and choosing your app subtitle and description.
Every required field in this step has to be filled in. Required fields are marked with a red asterisk, and the request cannot be published without them.

2. General settings
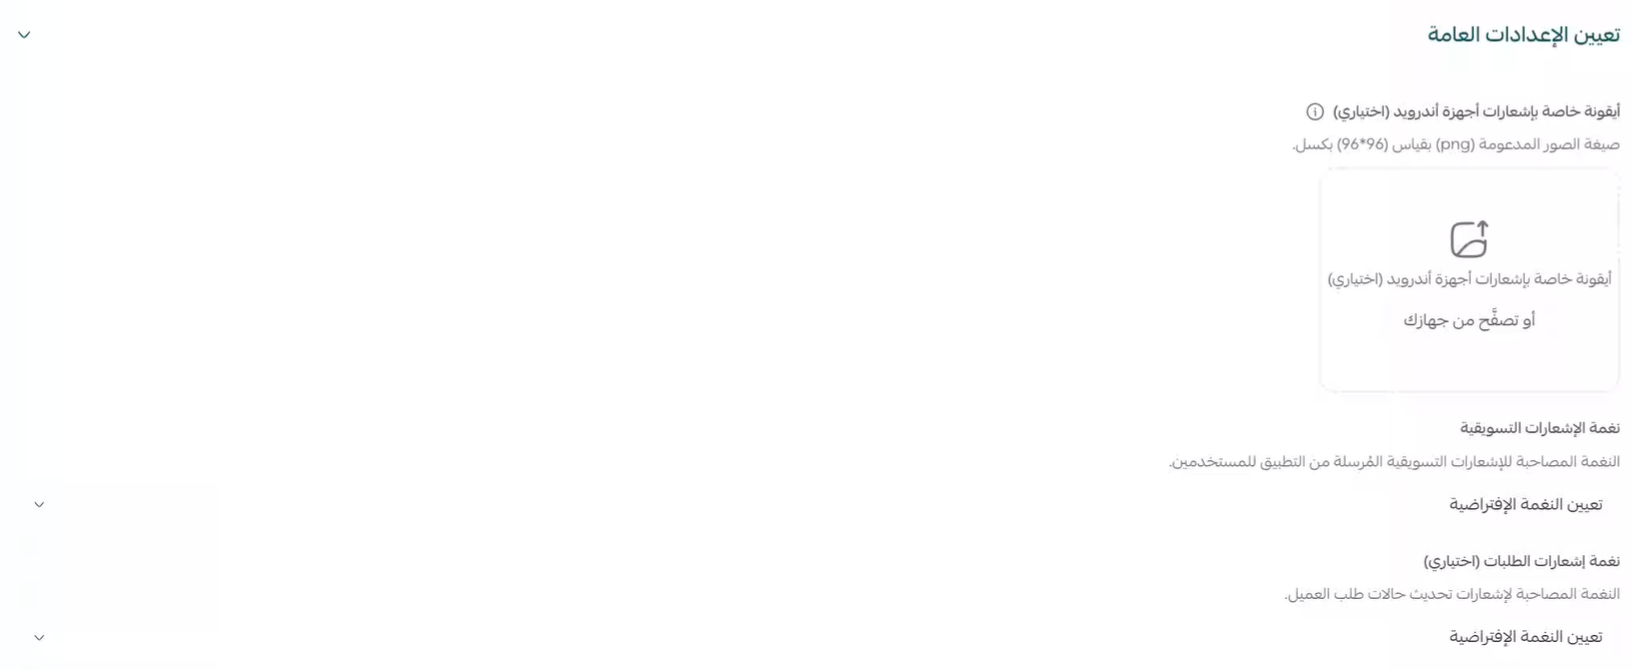
Here you can choose a dedicated notification icon for Android devices - this step is optional - and set the sounds for marketing notifications and order notifications.
3. App preview screenshots
Attach the preview screenshots required for the App Store and Google Play.
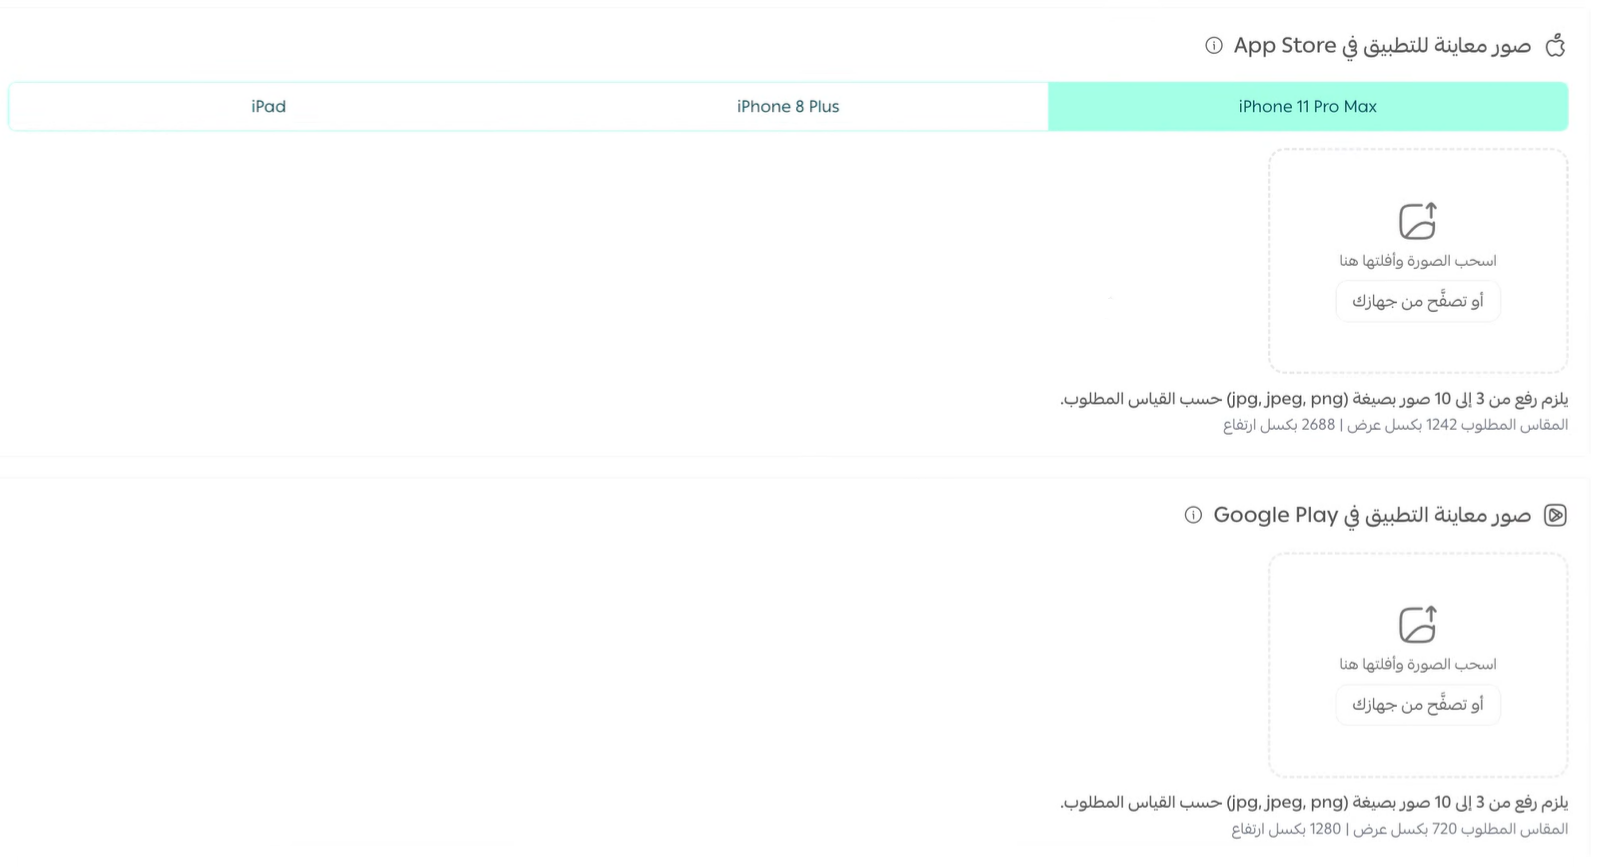
Click (Save) to keep your changes.

4. Customize the design
Finish customizing the design by clicking (Customize) next to the template you chose.
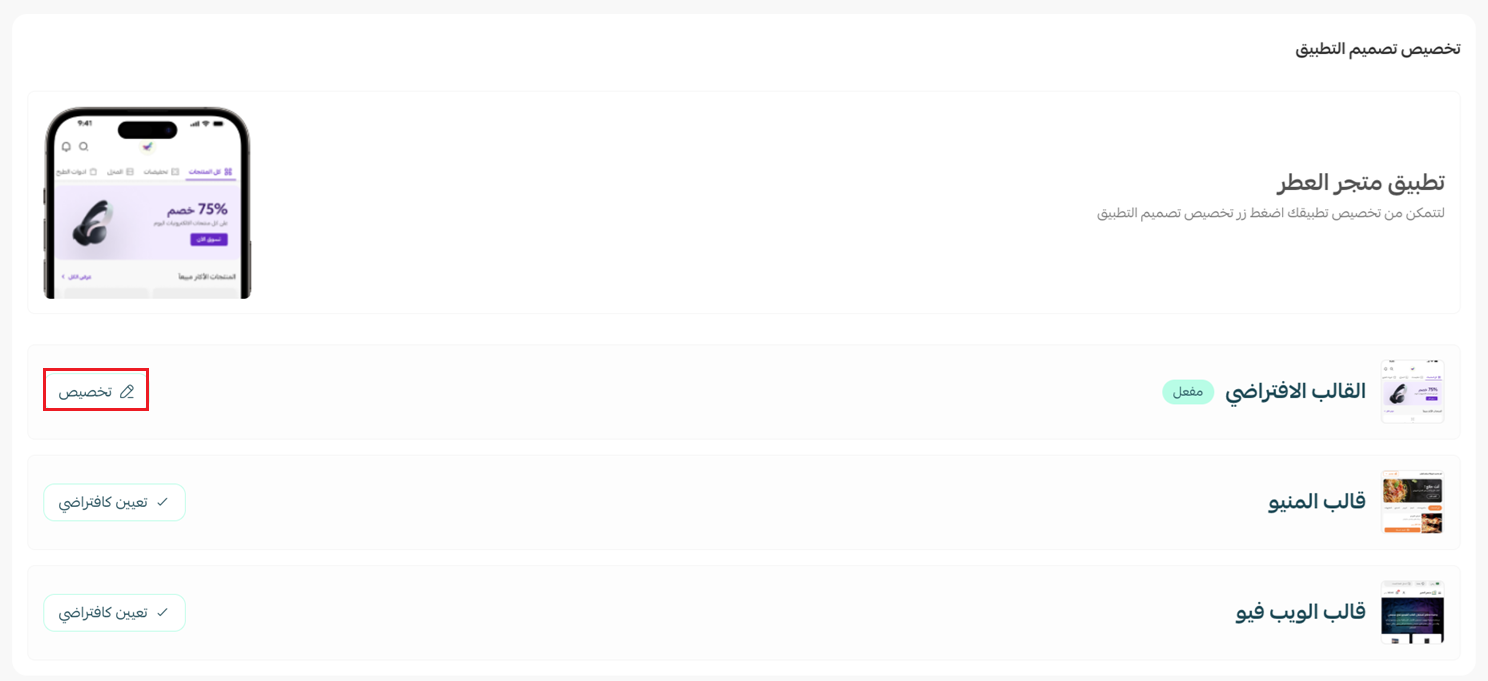
For more detail, see:
- designing your app with the default template
- designing your app with the menu template
- designing your app with the WebView template
5. Send the request
Click (Launch) to send the request.
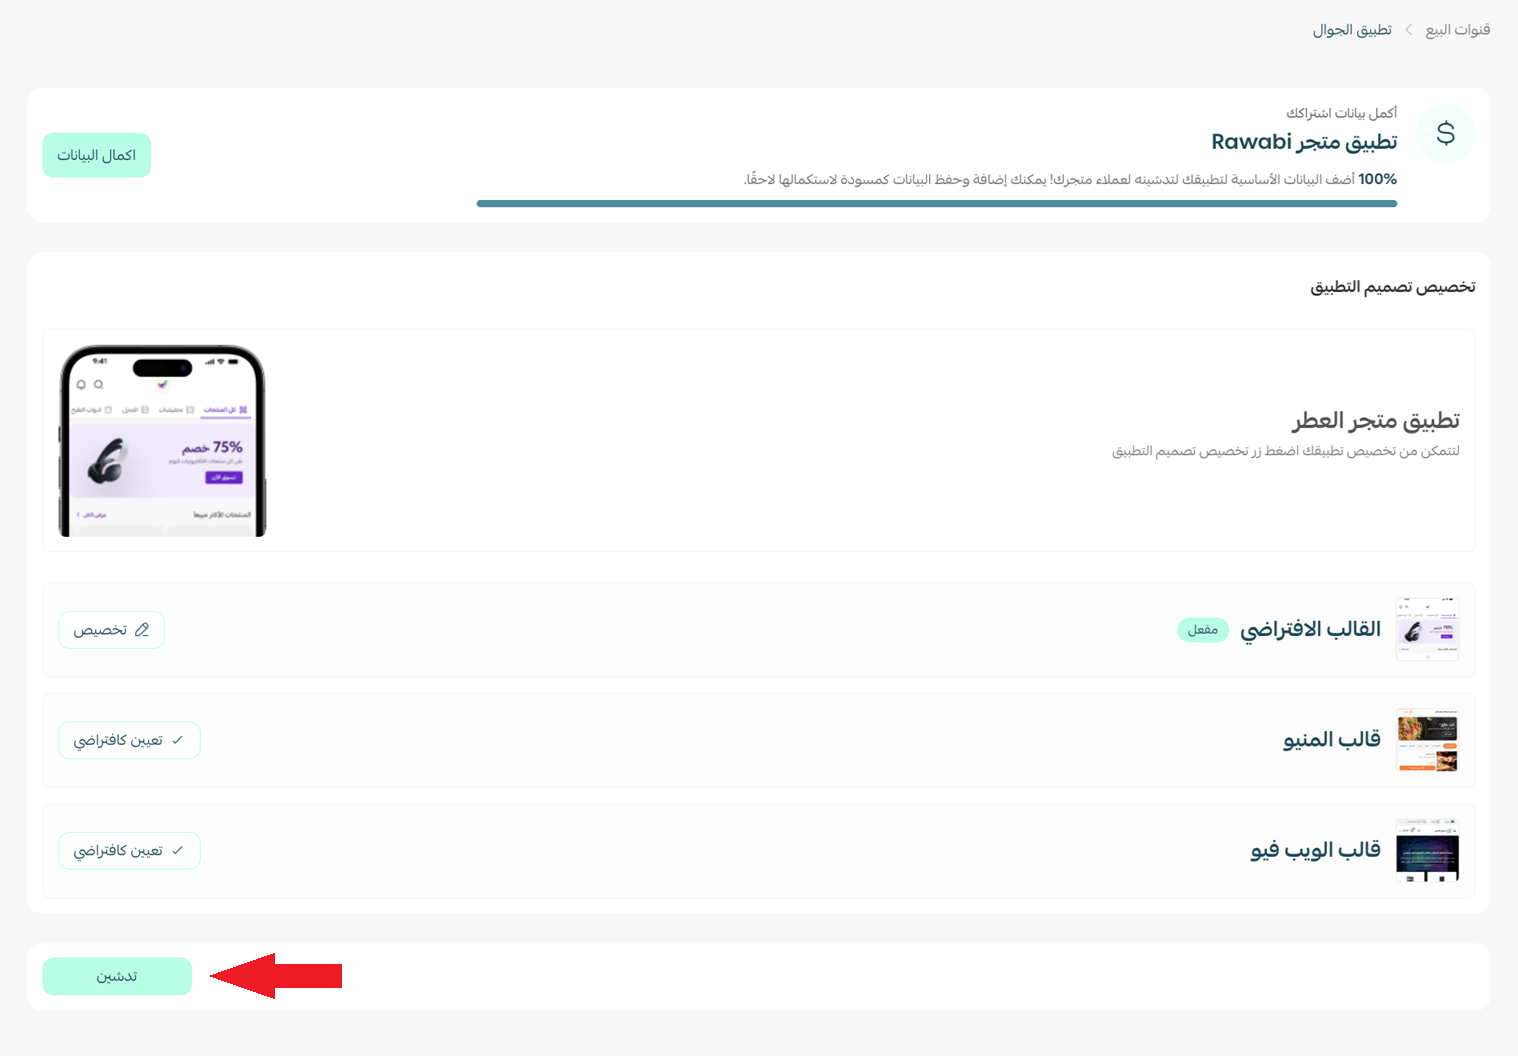
6. Confirm
Click (Confirm) to finish sending the request.
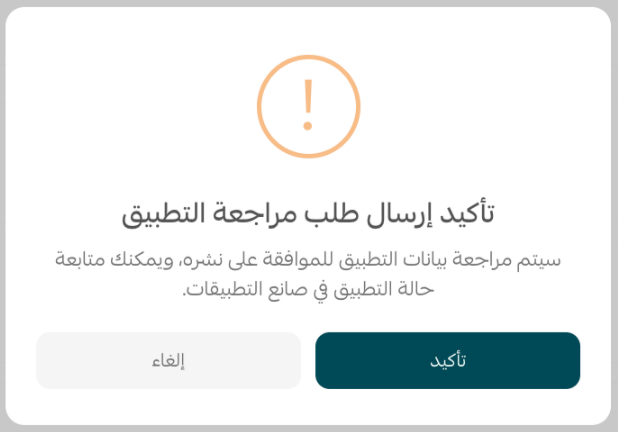
7. Follow the request
Once the request is published, your app status appears in App Maker. Salla Team updates the stage statuses as they go, and you can follow the launch process through App Maker and the messages sent through the technical support chat.
🔍 Stage 2: Salla Team review
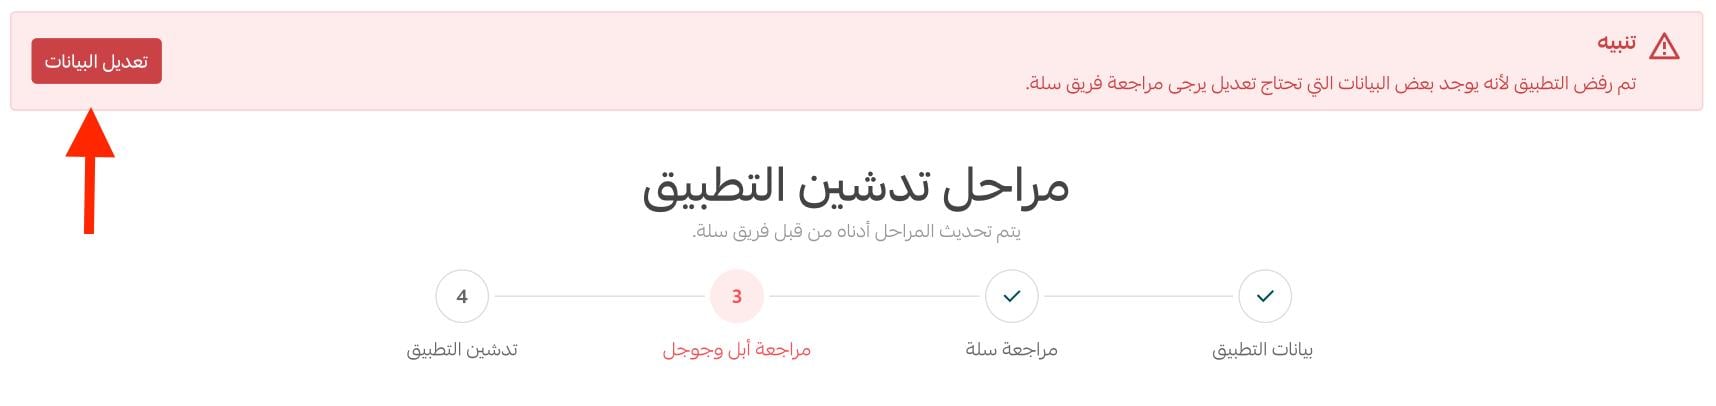
After you enter, save and publish your data, Salla Team checks it against the required conditions and specifications. If anything needs attention, the team contacts you and lets you edit the data again, so your app is accepted by the App Store and Google Play.
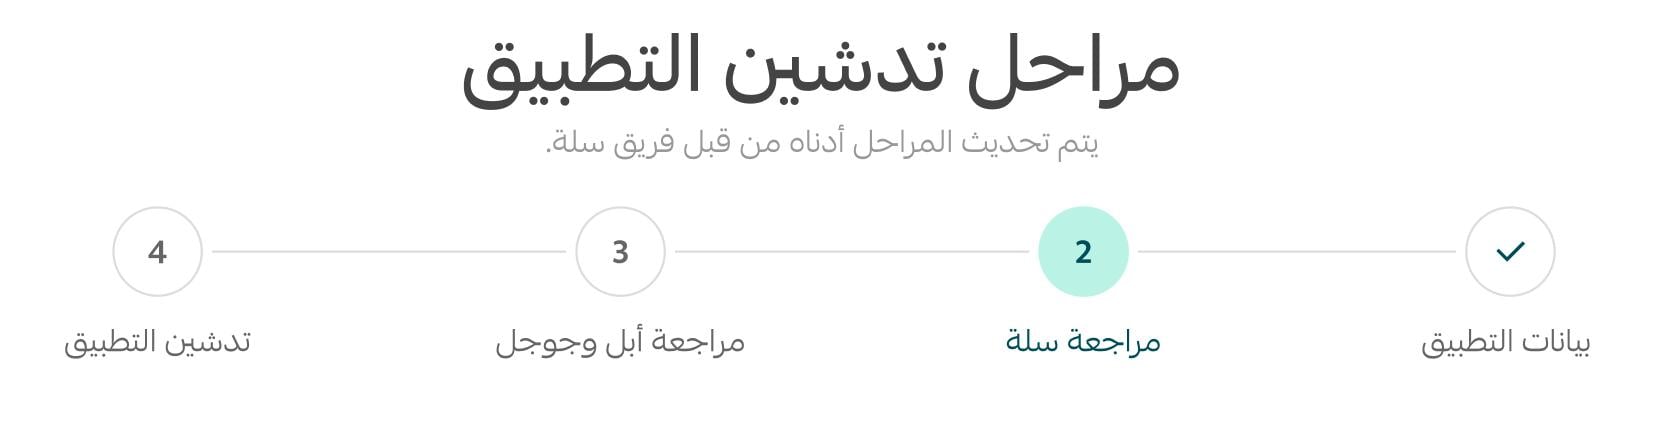
At this stage you are notified by an error message that explains exactly what needs changing. For example, if the team asks you to change the app icon, click edit data to go back to the input page, make the change and publish the request again.
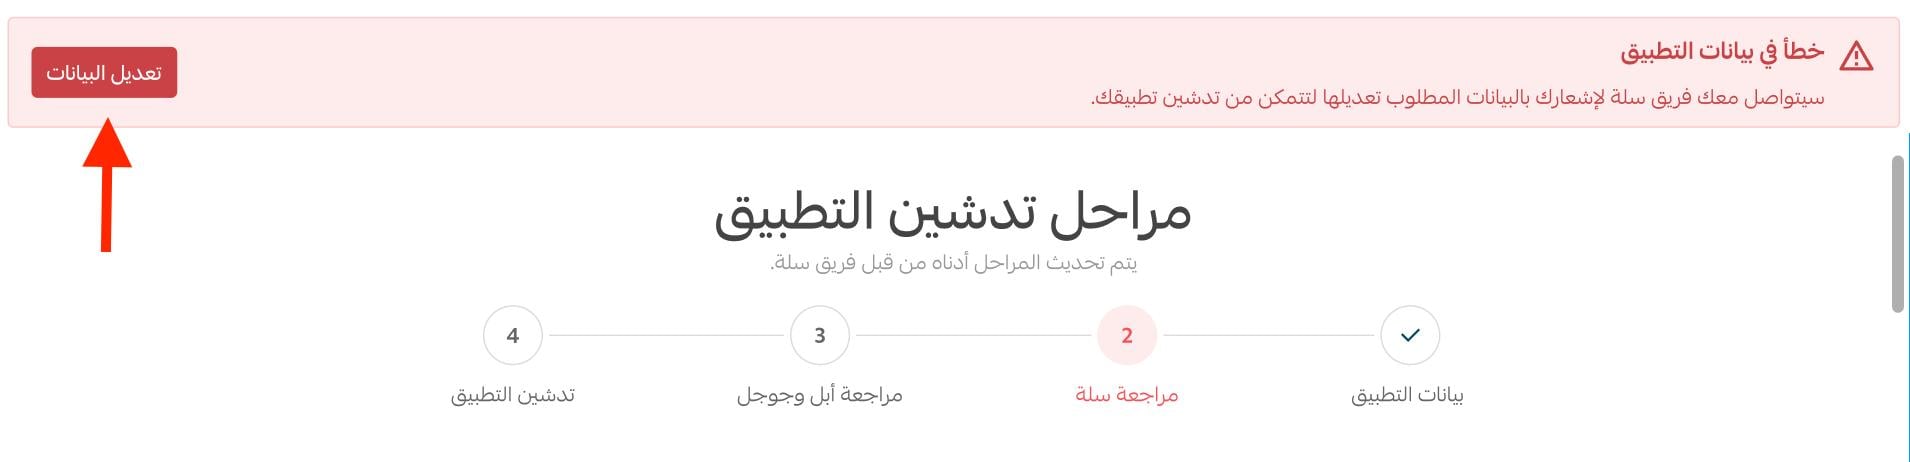
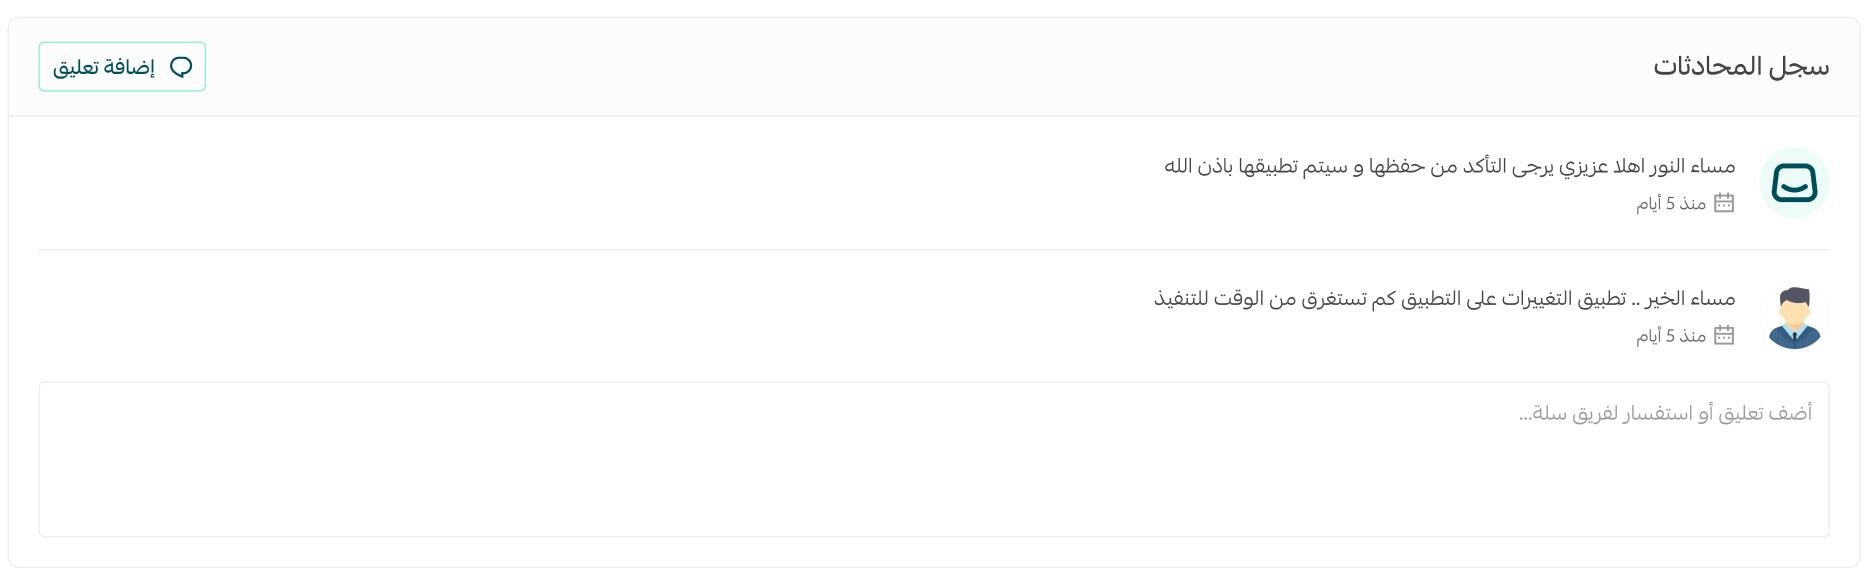
You are also notified through App Maker chat. The alert usually shows as a number of notifications in your store dashboard, under the App Maker tab, and the messages appear in the chat log section below your app design.
What Salla Team checks
1. The subscription type you chose (own developer accounts, or no accounts).
2. The app data you entered, and whether it meets the app stores' launch requirements.
3. The documents attached to the request, such as your commercial registration or ID.
4. Your store activity, products, shipping and payment methods, and every setting that affects launching the app on the stores.
5. The team may contact you to access the accounts and verify their status, to collect anything still missing, or to correct errors in what you entered.
How to avoid rejection during Salla review
1. Follow the input requirements shown during subscription and data entry, and read the app store launch policies carefully. For more detail, see app store publishing policy and frequently asked questions about the app.
2. Make sure your store is fully and properly set up. Apps are not launched for stores that are unfinished, still under construction, or filled with test data.
3. Complete your store verification and activate your own domain.
4. Activate at least one payment method in your store.
5. Activate at least one shipping method in your store.
6. Publish at least 5 products, and check that none of them contain test data or words like "test" or "trial" in the product details.
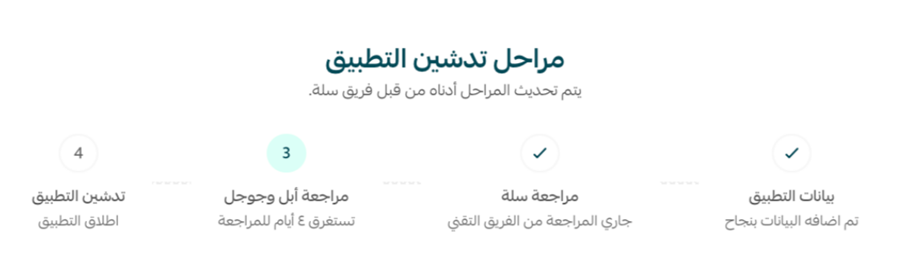
🏪 Stage 3: Apple and Google review
If developer accounts are not already in place, the team starts the activation process with you so the app can be launched on the Apple and Google app stores.
Here too you are notified by an error message that explains what needs changing. For example, the team may tell you the description was not accepted by Google. Click edit data to return to the input page, make the change and publish the request again, or contact support through the technical support chat for more detail on your case, based on the message you received.
🚩 Stage 4: launching your app
You are taken to the main page that holds the templates, where you can finish customizing your app design.
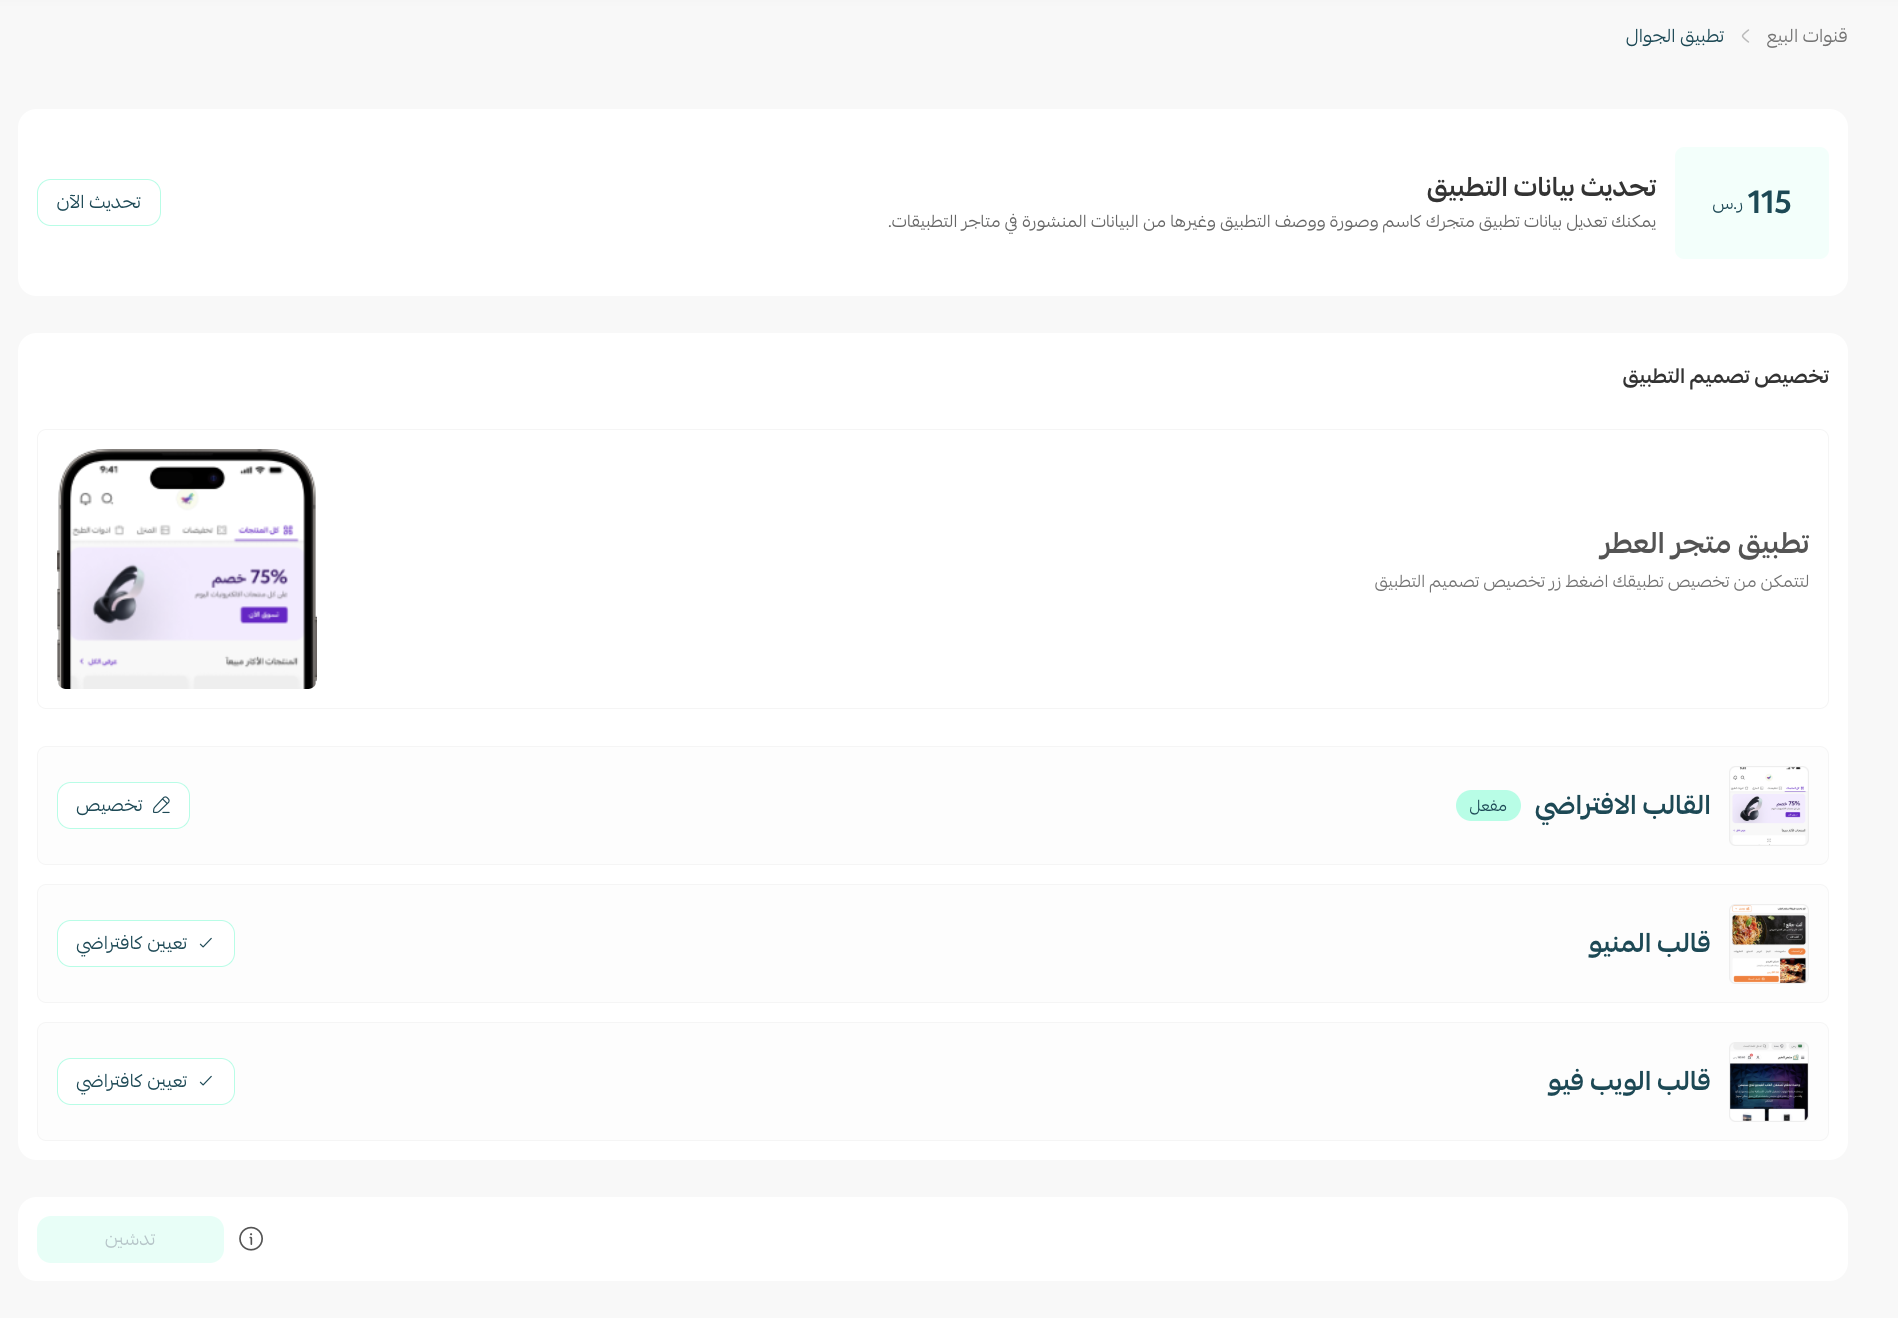
From here on, changing your data means buying the update service.
For more detail, see buying an app data update.
❓ Frequently asked questions
Why was my store app rejected?
The two most common reasons are:
- A duplicate app name - another app is already published on the stores under the same name. Change your app name, for example by adding a word to it.
- An outright breach of the app usage policies. In that case a specialist team at Salla takes it up with Apple and Google and tells you what you need to do.
What is a privacy policy, and can you provide a sample?
A privacy policy protects both your company and your users, and more importantly it builds trust. A direct, plainly written policy that describes concrete data protection gives your site an edge over competitors whose policies are complicated and confusing.
If you don't have a privacy page or a support page yet, add one through your store's information pages. For more detail, see creating a new information page.
When does my app subscription start being charged?
At stage 4, when the request is launched. Nothing is charged while you are entering data or waiting on review, so take the time you need in stage 1.
Can I change my app data after I publish the request?
Not while it is in review, unless the team finds errors and reopens the fields for you. Once the app is launched, changes are made by buying the app data update service.
Most of stage 1 is in your hands, and most rejections trace back to it - a store that isn't finished, a duplicate name, a required field left thin. Get that stage right and the remaining three are mostly waiting.