Using an email linked to your store domain helps enhance your brand's professionalism, build greater trust with your customers, and unify communication identity across all messages sent from your store.
In this article, you'll learn how to create an email linked to your store domain, how to link email services, and set up the necessary DNS records.
📌 Main topics
- What are email addresses linked to the store domain?
- Create email addresses linked to the store domain
- Steps to create email accounts for your domain name using Bluehost:
What are email addresses linked to the store domain?
Assuming my store domain is: Mydomainname.com
I can create various email addresses such as:
- Email for general inquiries info@Mydomainname.com
- Email for sales sales@Mydomainname.com
- Email for each user/employee username@Mydomainname.com
Create email addresses linked to the store domain
This can be done in two ways:
1. Email applications on the Salla store
2. Integration with external email services
First method: Email applications on the Salla store
Salla offers many email applications in the Salla App Store, including:
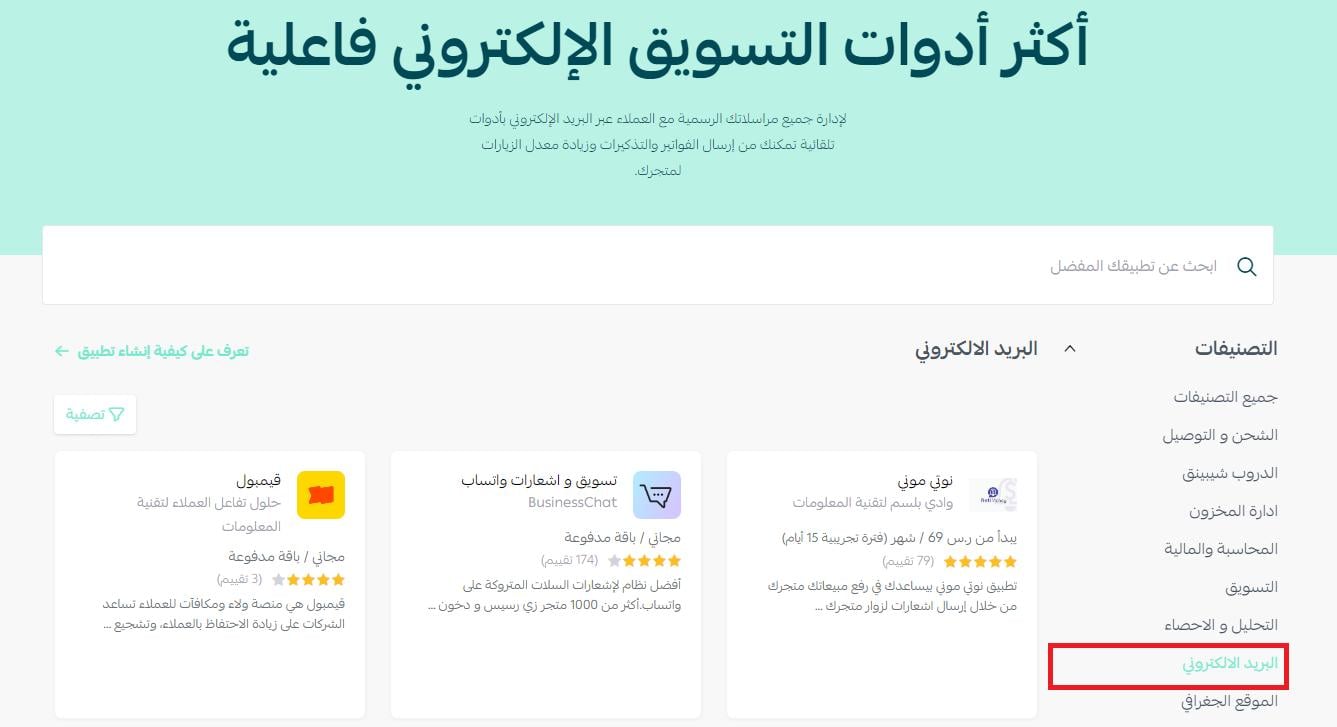
For more details on:
- Create a business email via Zoho
- Integration with Yandex Metrica
After successful integration, you can create multiple email addresses.
For example: Below, we'll explain creating addresses on Zoho Mail:
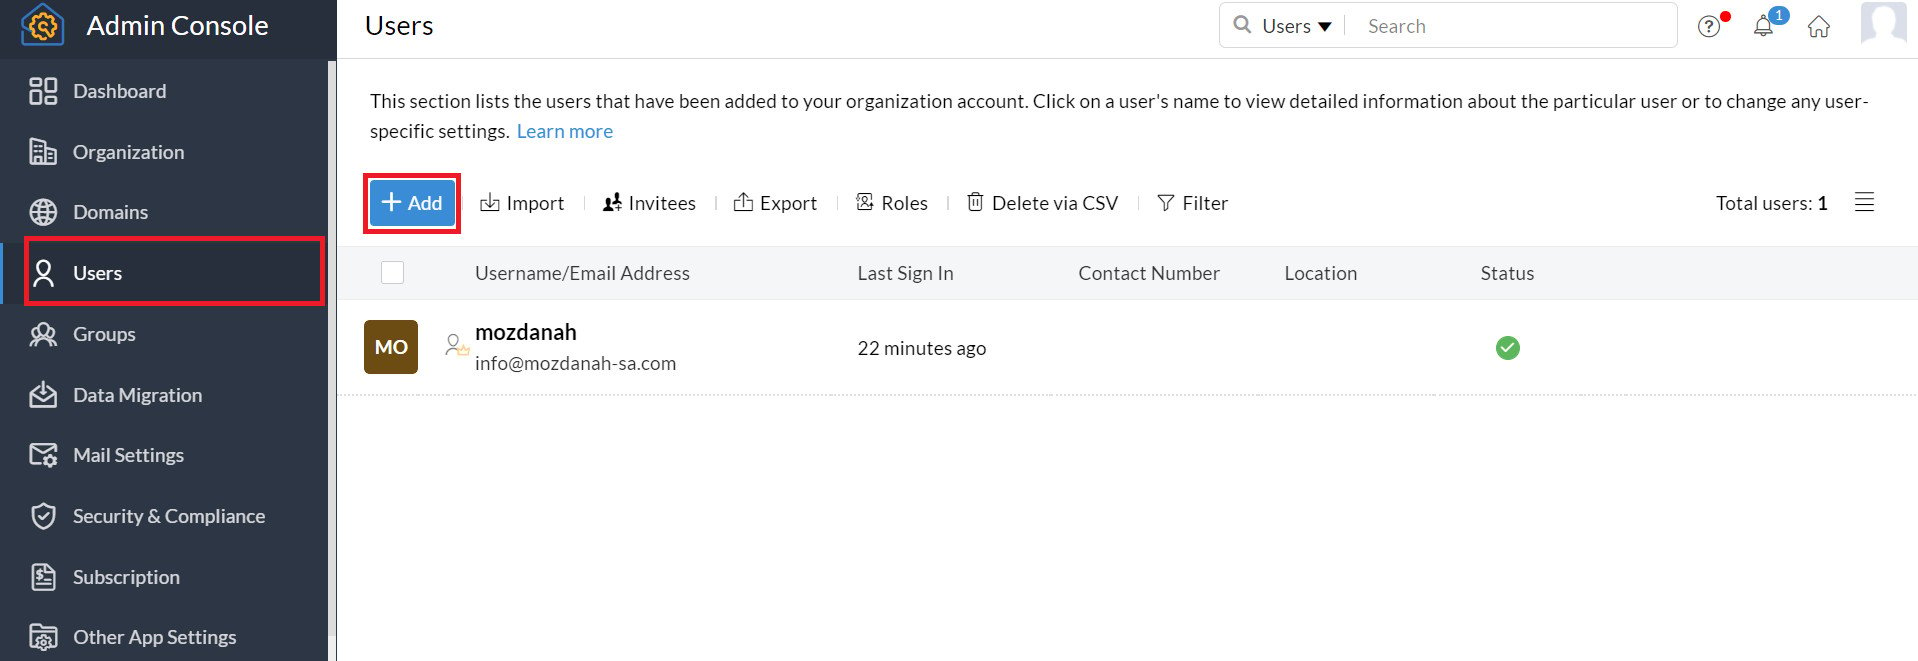
1. From the home page of your Zoho Mail, click (User Details) from the control panel, then click (Add User).
2. Enter the new email address information (first and last name, username, password, and confirmation), then click OK (Add).
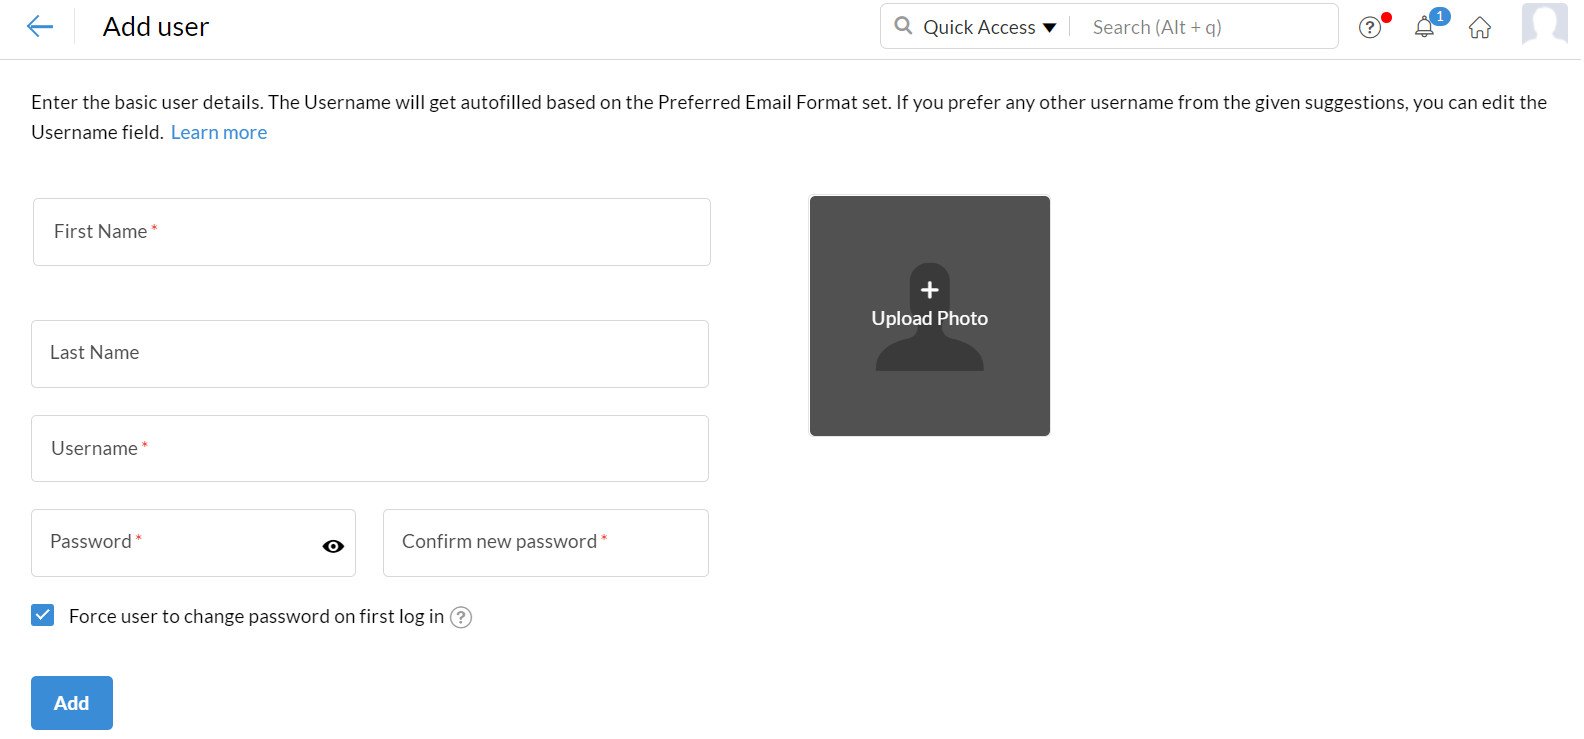
Thus, the new email address is ready for use and will have a storage space of 5GB.
Second method: Integration with external email services
Many major web hosting companies (such as GoDaddy, Bluehost) offer free email accounts to their customers.
The steps to integrate with these companies are in two phases:
Phase one:
Contact the domain provider and request email linking data to the domain using DNS.
This data can be in one of the following forms:
TXT: Add it through your store domain settings.
MX: Add it through your store domain settings.
SRV: Add it through your store domain settings.
Phase two:
Add the DNS data to your store domain settings:
1. From the (Store and Sales Channels) tab in the main menu, select (Store Domain).

2. Click (DNS Settings)
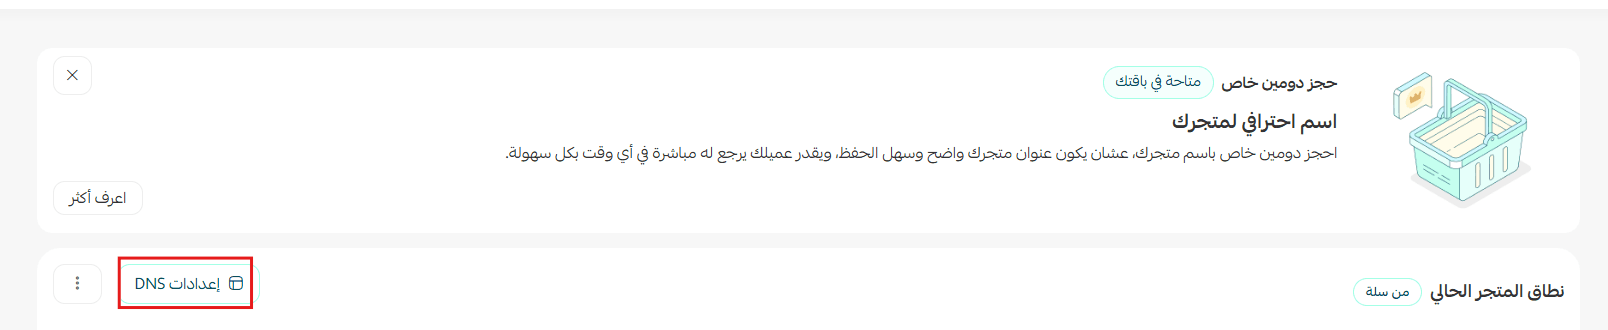
3. Click (+Add New Record).

Then add the following data:
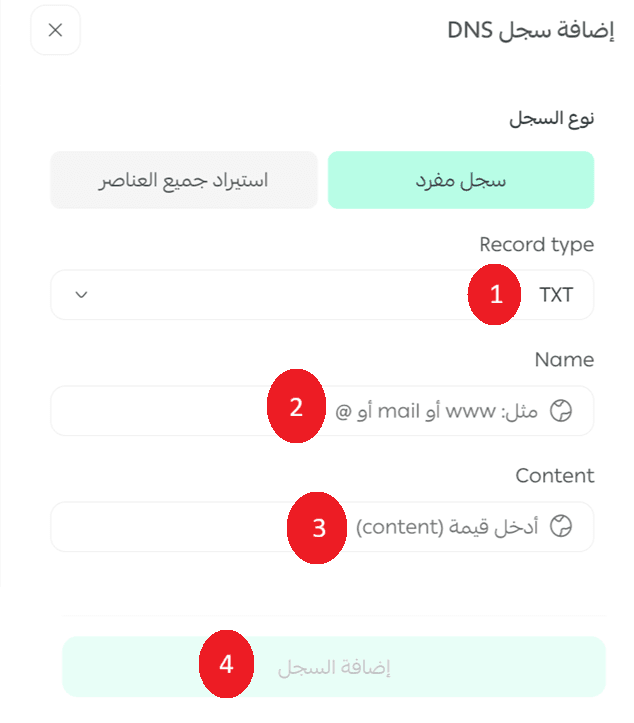
- Enter TXT or MX record data ...:
1-Type: Choose the TXT or MX ownership form...
2-Name: Enter (@) only.
3-Content: Paste the copied TXT or MX record from the DNS record.
Click (Add Record).
Repeat these steps for all DNS records provided by the service provider (in our previous example, we used Bluehost and needed to repeat the process twice).
Steps to create email accounts for your domain name using Bluehost:
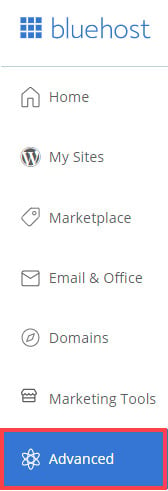
1. Log in to the Bluehost panel, then go to the Advanced tab from the main sidebar.
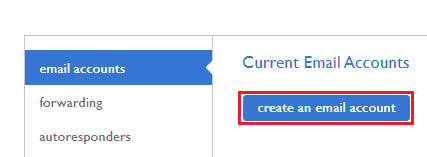
2. Under the (Email Accounts) section, click (create an email account).
3. Enter the user data then click Create.
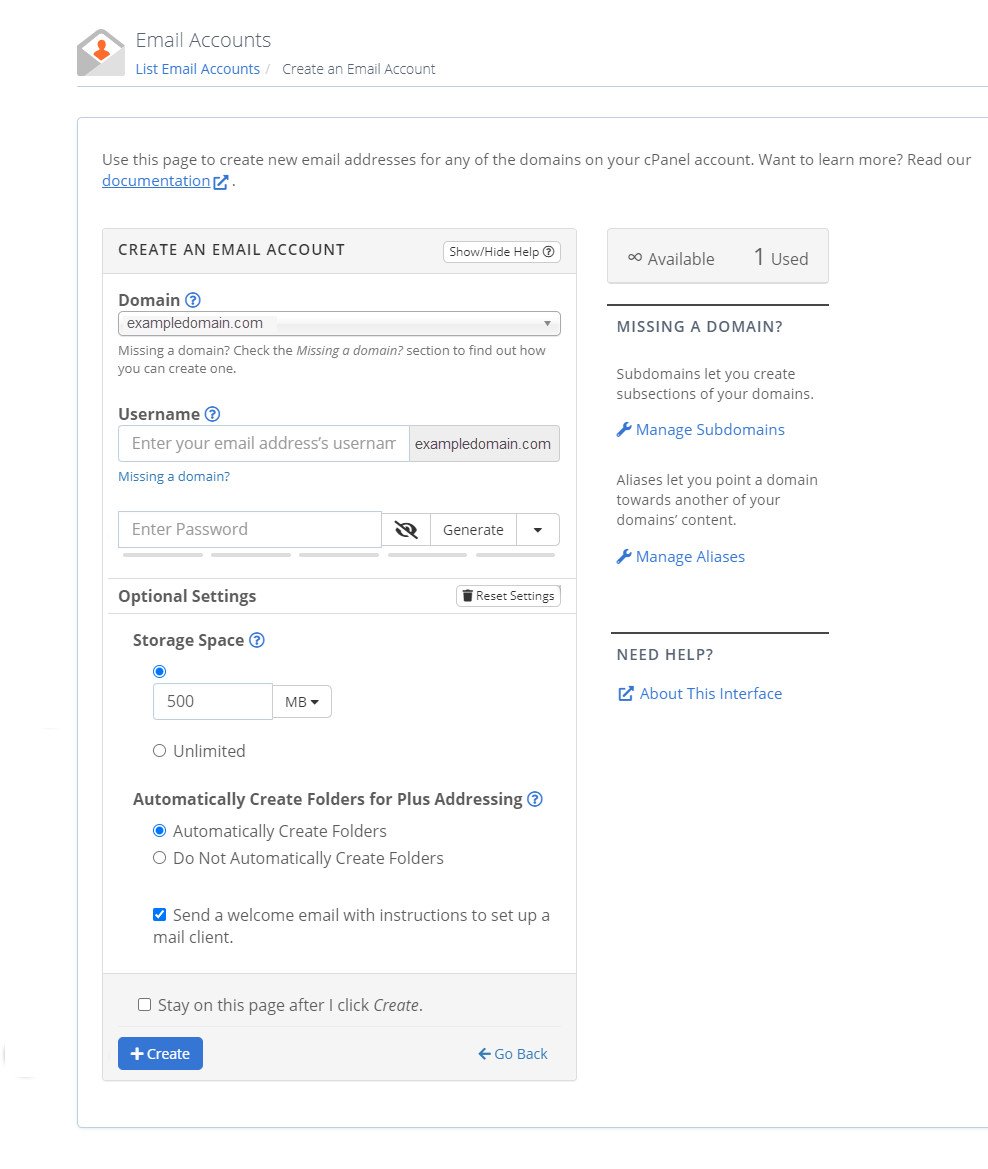
- Under domain, choose the specific domain where you want to create an email address.
- In the username text box, type the username you want to use (for example, Fatima.)
- In the password text box, type the password you want for this email account. The password strength meter will tell you if the password you entered is strong enough. We strongly recommend using a strong password.
- The mailbox quota text box (optional) is used to specify the amount of total hosting storage allocated to the specified email account. The default quota is 500 MB. You can increase or decrease this number as you wish, depending on the hosting package you currently have.
Congratulations, your email account has been created and will be ready to work.
💡 Use an email with your store name to enhance your brand's professionalism, provide a more reliable communication experience for your customers, and easily manage all your messages from an address that reflects your store's identity.