Google has announced account verification requirements that every developer with a Play Console account must meet, as part of its work to strengthen trust and transparency on Google Play and to make sure developers follow Play Console policies and requirements. Developers must complete these steps before the stated deadline to avoid having their profile and apps removed from Google Play.
If you publish your store's app through Salla, developer account verification is now something you have to finish yourself, as an individual, inside your own Play Console account. It is a documents exercise more than a technical one: an ID photo and a National Address that match each other exactly, entered into Play Console in a specific order. In this guide, you'll learn what to prepare and how to complete every step.
To verify an individual developer account, prepare a color photo of the account owner's ID and a valid National Address document, sign in to Play Console with the owner's email, choose the personal account type, create a payments profile, enter your details exactly as they appear on those documents, then upload both documents for review.
📌 Article overview
- What to prepare before you start verification
- Steps to verify an individual developer account
- Important notes
- Frequently asked questions
📌 What to prepare before you start verification
Get the following ready before you begin verifying as an individual:
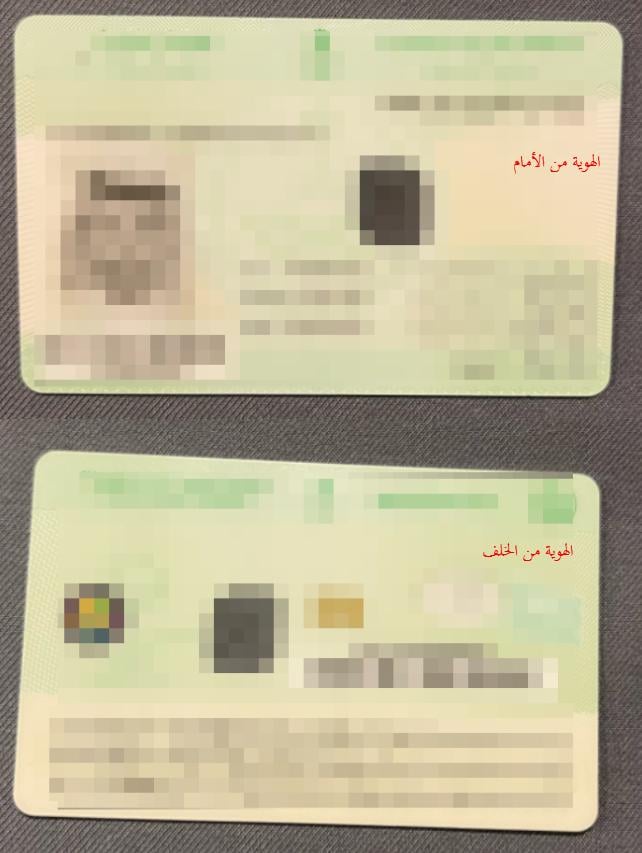
First: a photo of the account owner's ID. You normally choose the owner yourself, and it can be the same person who owns the commercial registration. For Google to accept the photo, it must meet all of the following:
1. Not expired.
2. Shows the name in both Arabic and English.
3. Photographed with a phone camera, front and back.
4. Clearly readable, with no part of the face or anything else covered.
5. Shows the document only.
6. Not dark, with no glare and no dim lighting.
7. In color, not black and white.
8. Shows the whole document, with all four corners visible.
An example of an acceptable ID photo:
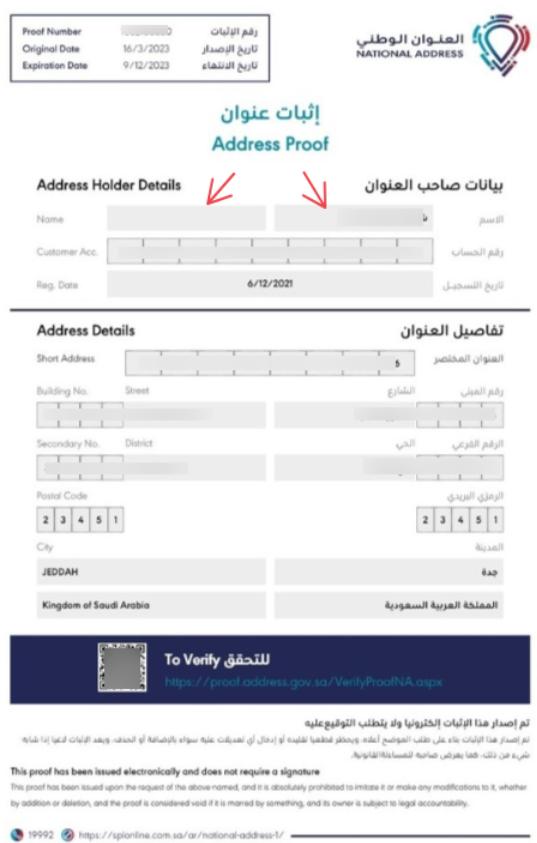
Second: the account owner's National Address, obtained through the National Address locator service or Saudi Post | SPL. Use the National Address registration service for individuals. For Google to accept it, the National Address must meet all of the following:
1. Not expired.
2. Shows the owner's name exactly matching the ID used for verification, in both Arabic and English.
3. Shows the address details clearly and in full.
An example of an acceptable National Address. The arrow points to the owner's name in both Arabic and English, which is what makes it acceptable.
Important note: if account verification is not completed before the deadline set by Google, Salla is not responsible for the state of the account or of the app hosted on it.
🚀 Steps to verify your developer account
1. Sign in through Play Console.
2. Sign in with the owner's email, the one already used to launch the app. Nobody other than the account owner can verify the developer account.
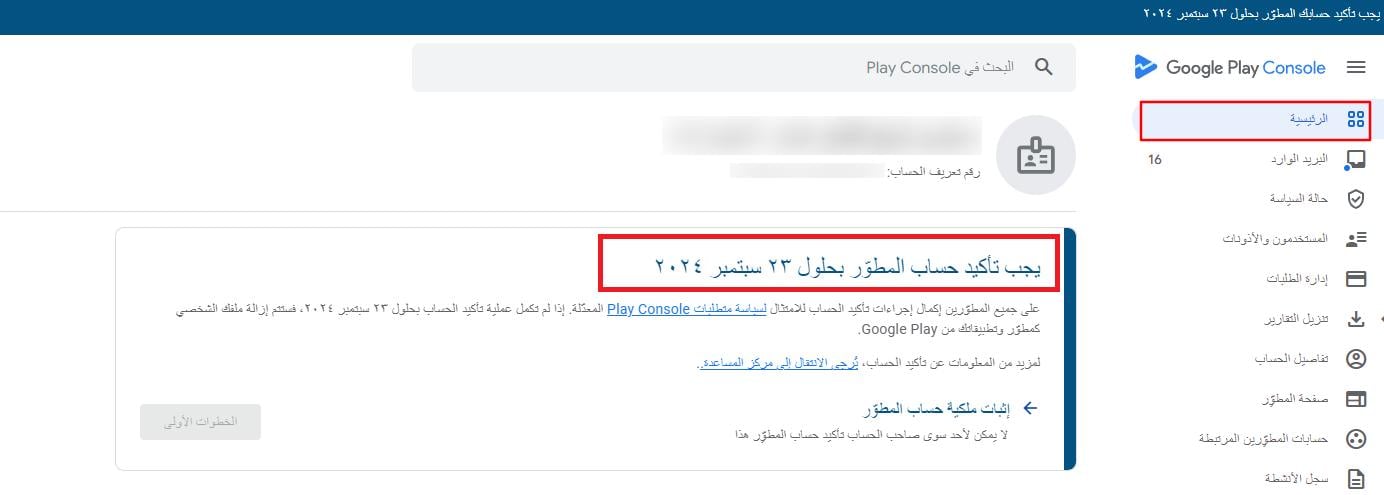
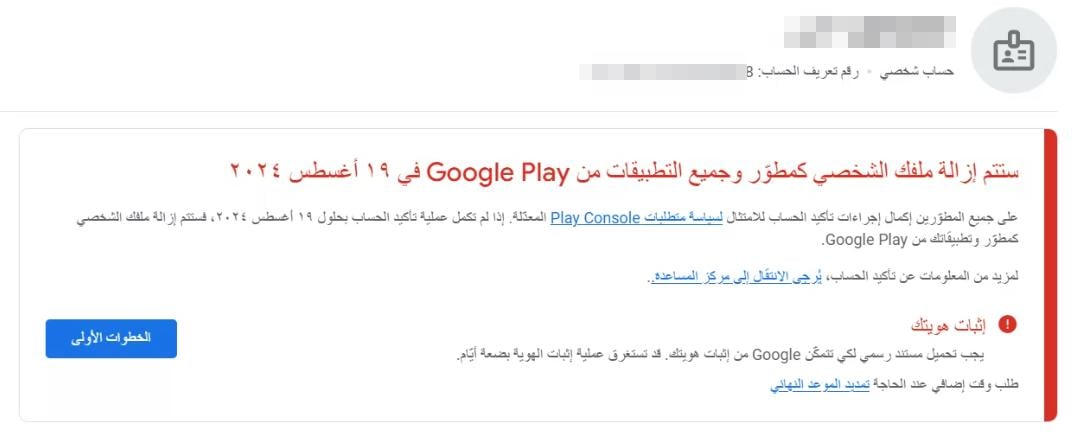
3. An alert showing the deadline for completing verification appears on the account's home page, like this:
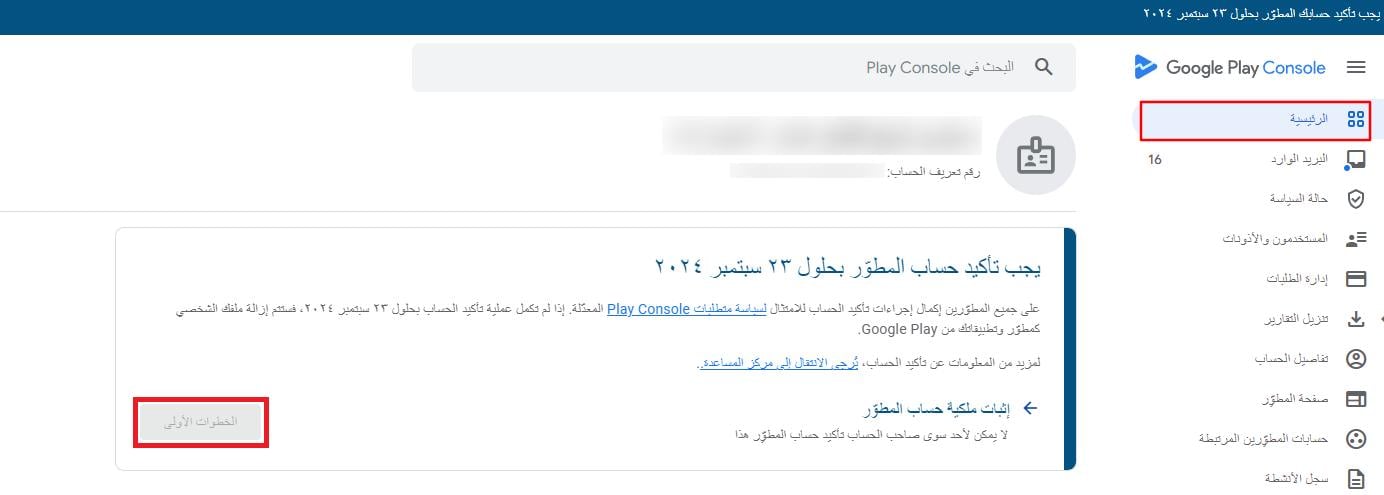
4. Click (Get started) to be taken to the account verification step. [Verify: the Arabic names this button "first steps"; confirm the exact wording Play Console uses in English.]
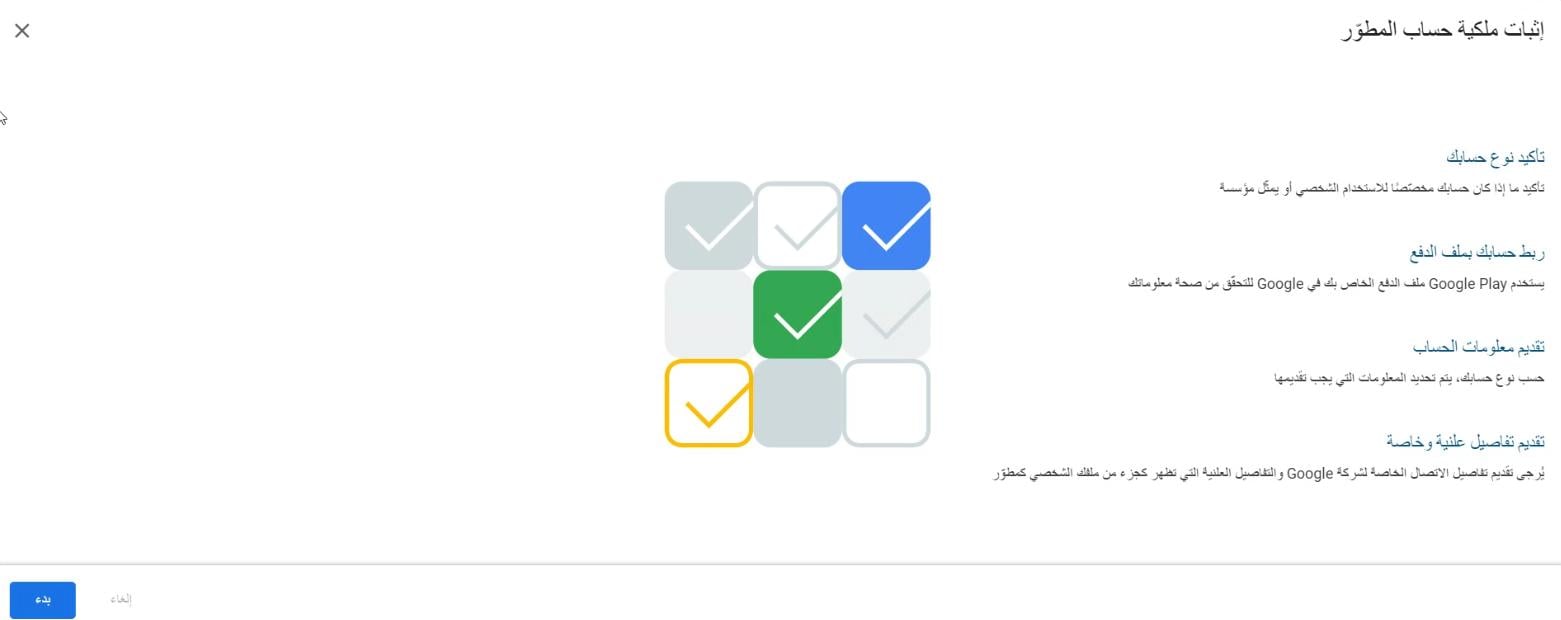
5. A page appears listing what is required: choosing the account type, linking a payments profile to the account, providing account information, and finally providing contact details. Click (Start).
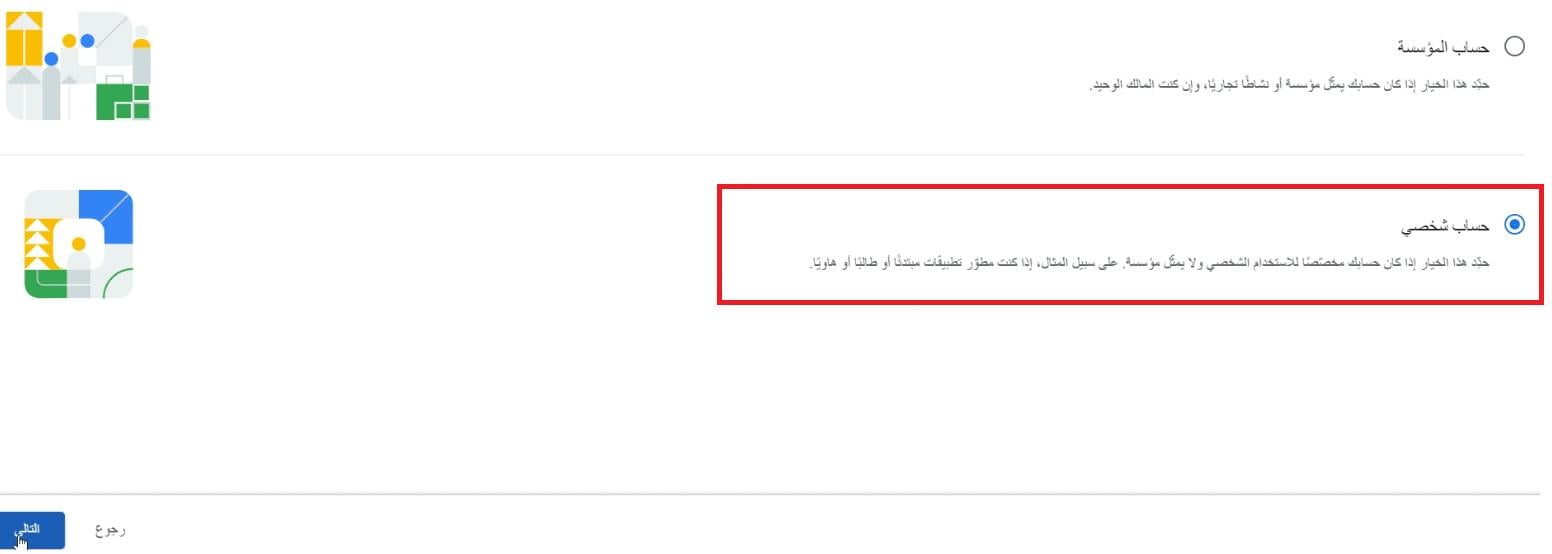
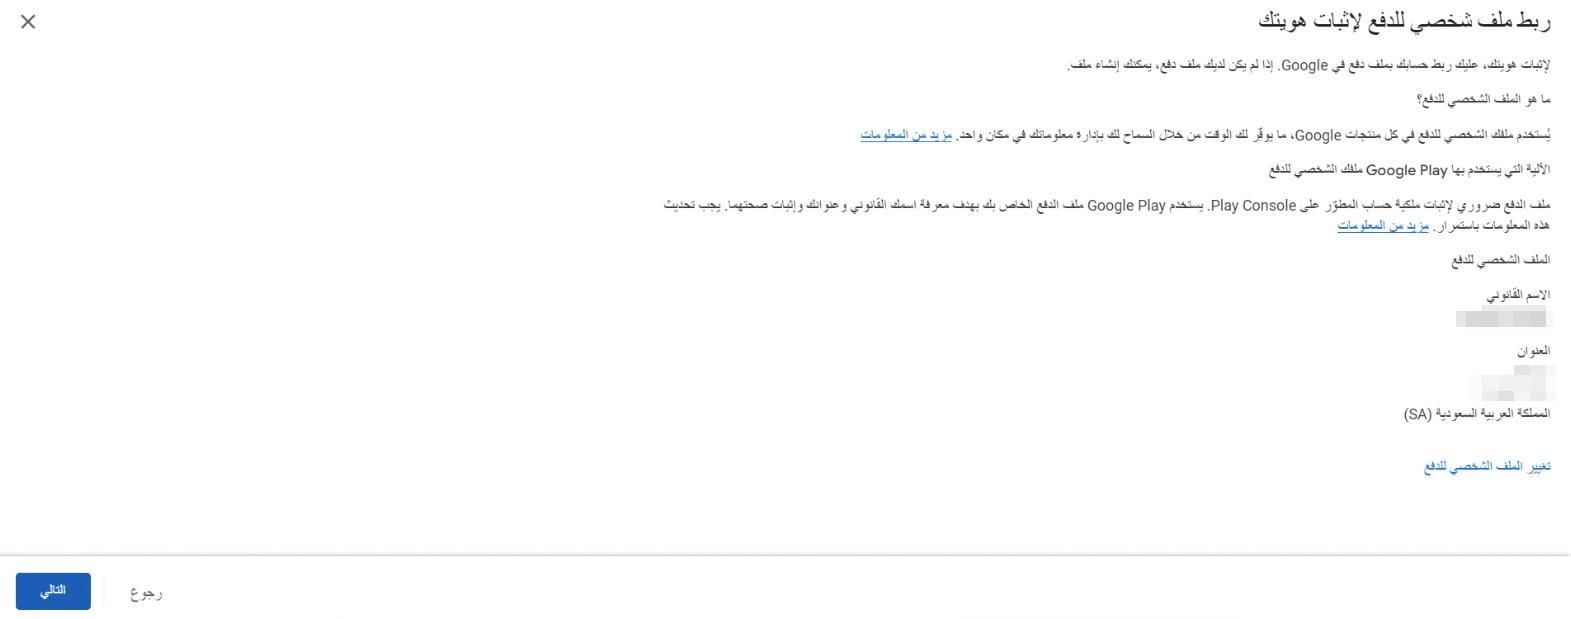
6. Choose the personal account type. You will only need the ID and the National Address of the ID holder. Note that this data appears publicly to users on the Google Play store.
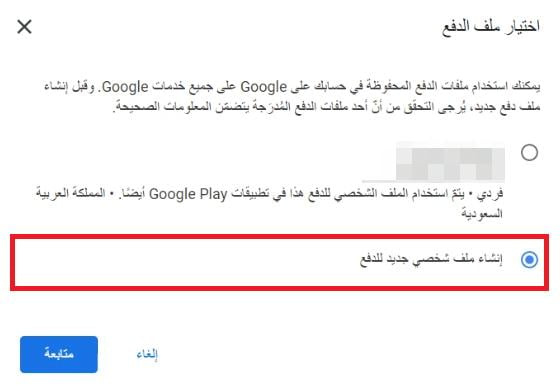
7. Choose to create a payments profile (or to change the payments profile), then create a new payments profile, then click (Continue). Note that this does not affect your existing account or your previous profile: the new profile you create is linked to the Google Play Console only.
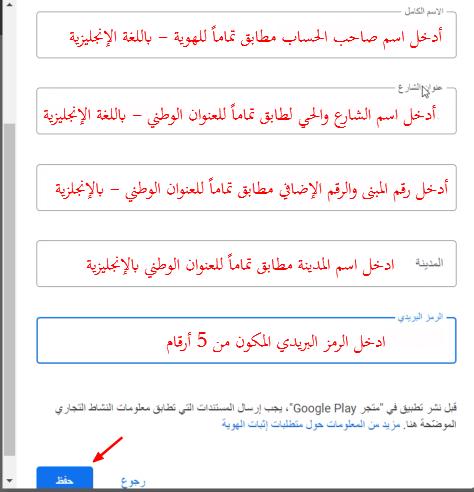
8. Enter the required details exactly as they appear on the ID and the National Address you prepared earlier, then click (Save).
9. Click (Next) after checking the account details and the legal name shown to you. If you want to make any edits, open the payments profile you just created through pay.google.com and choose the name or the address to edit.
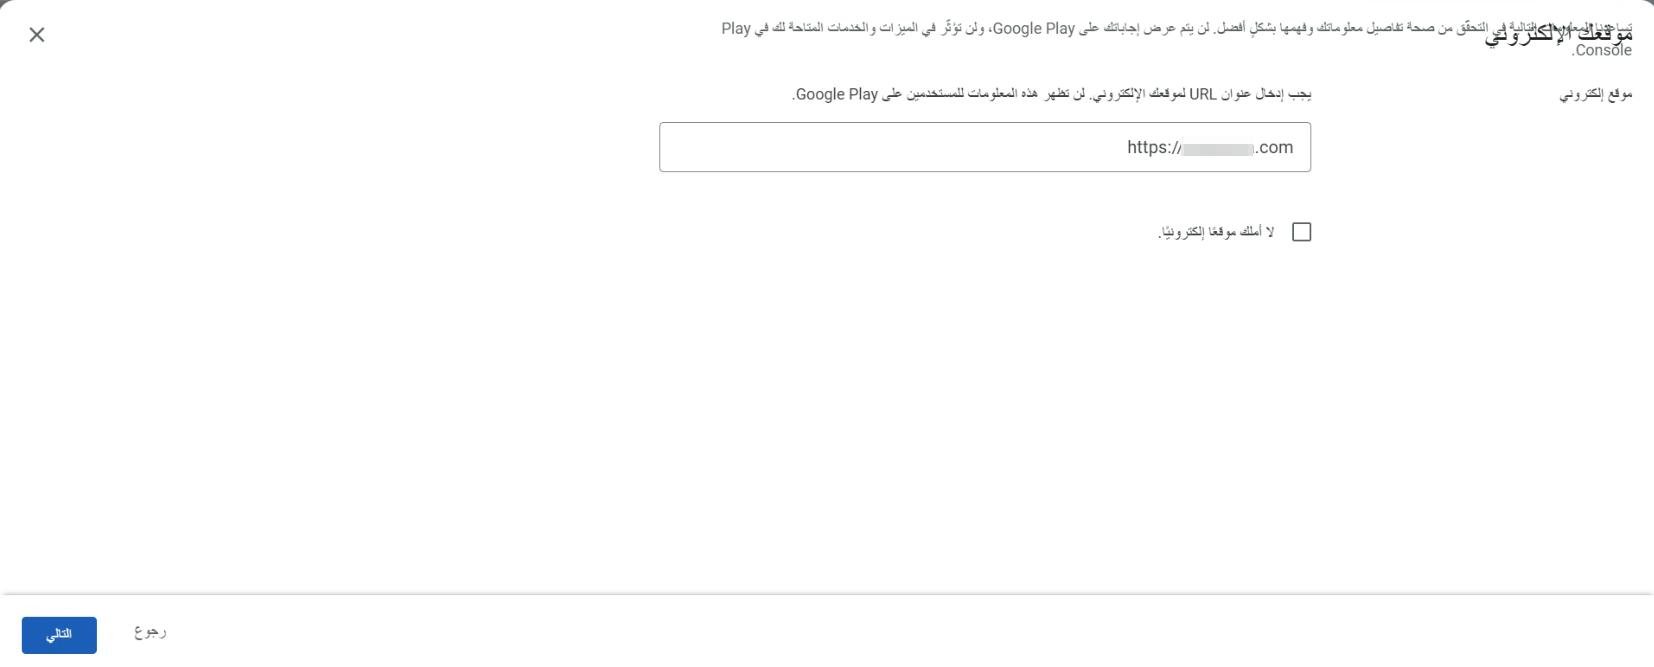
10. Enter your website details. Open the site, copy the URL from the address bar, and paste it here, then click (Next).
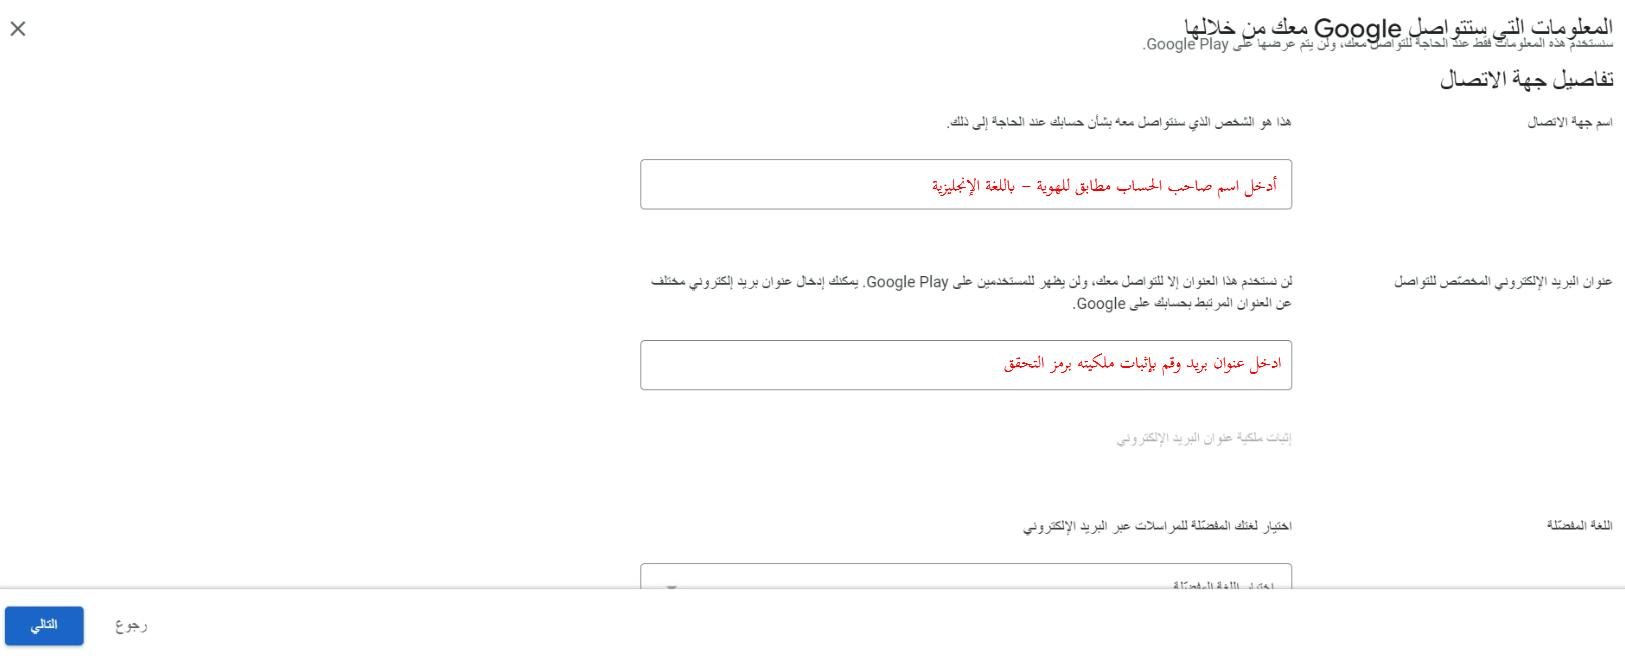
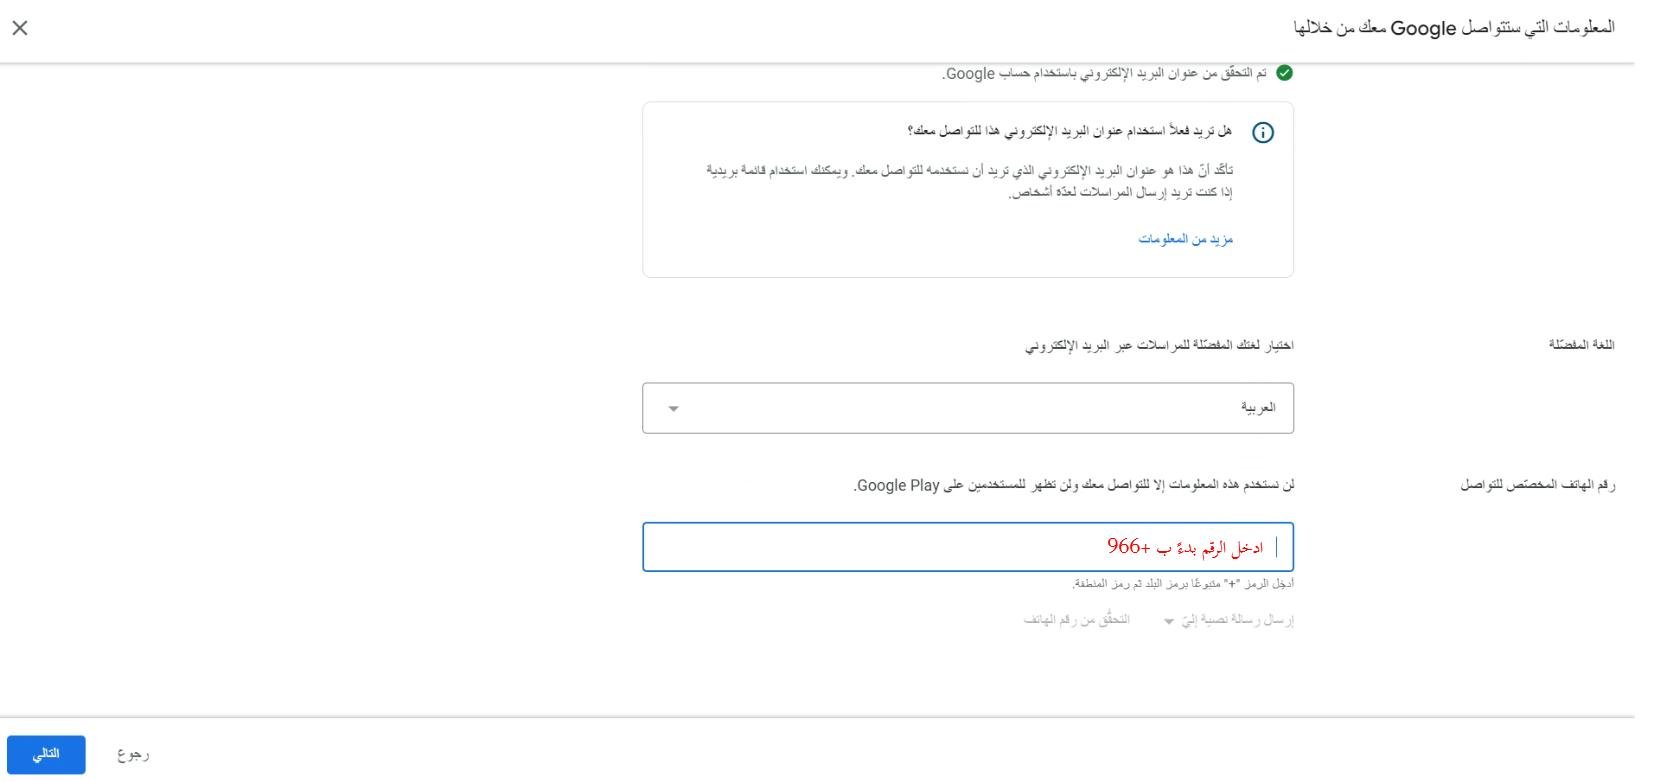
11. Enter the details Google will use to contact you: the account owner's name, your email address, and the language.
Then enter the contact number. This information is not displayed publicly to users on the store. Click (Next).
12. Enter the email address you use for support. This address appears publicly to users on the Google store. Click (Next).
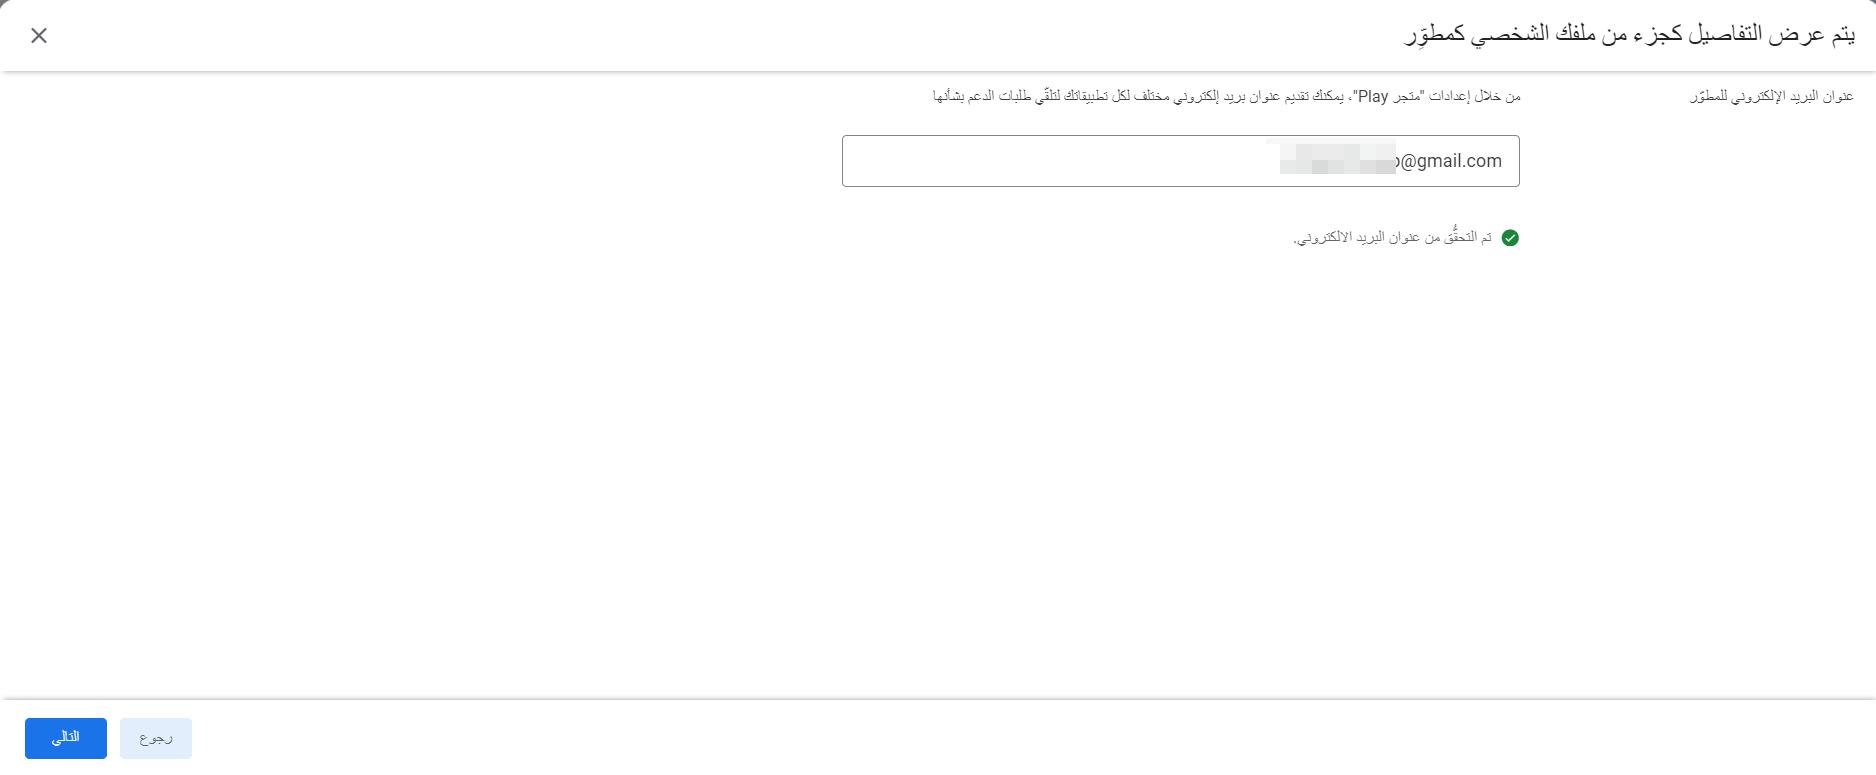
13. The next page appears so you can confirm the details you entered. Turn on the declaration, then click (Save).
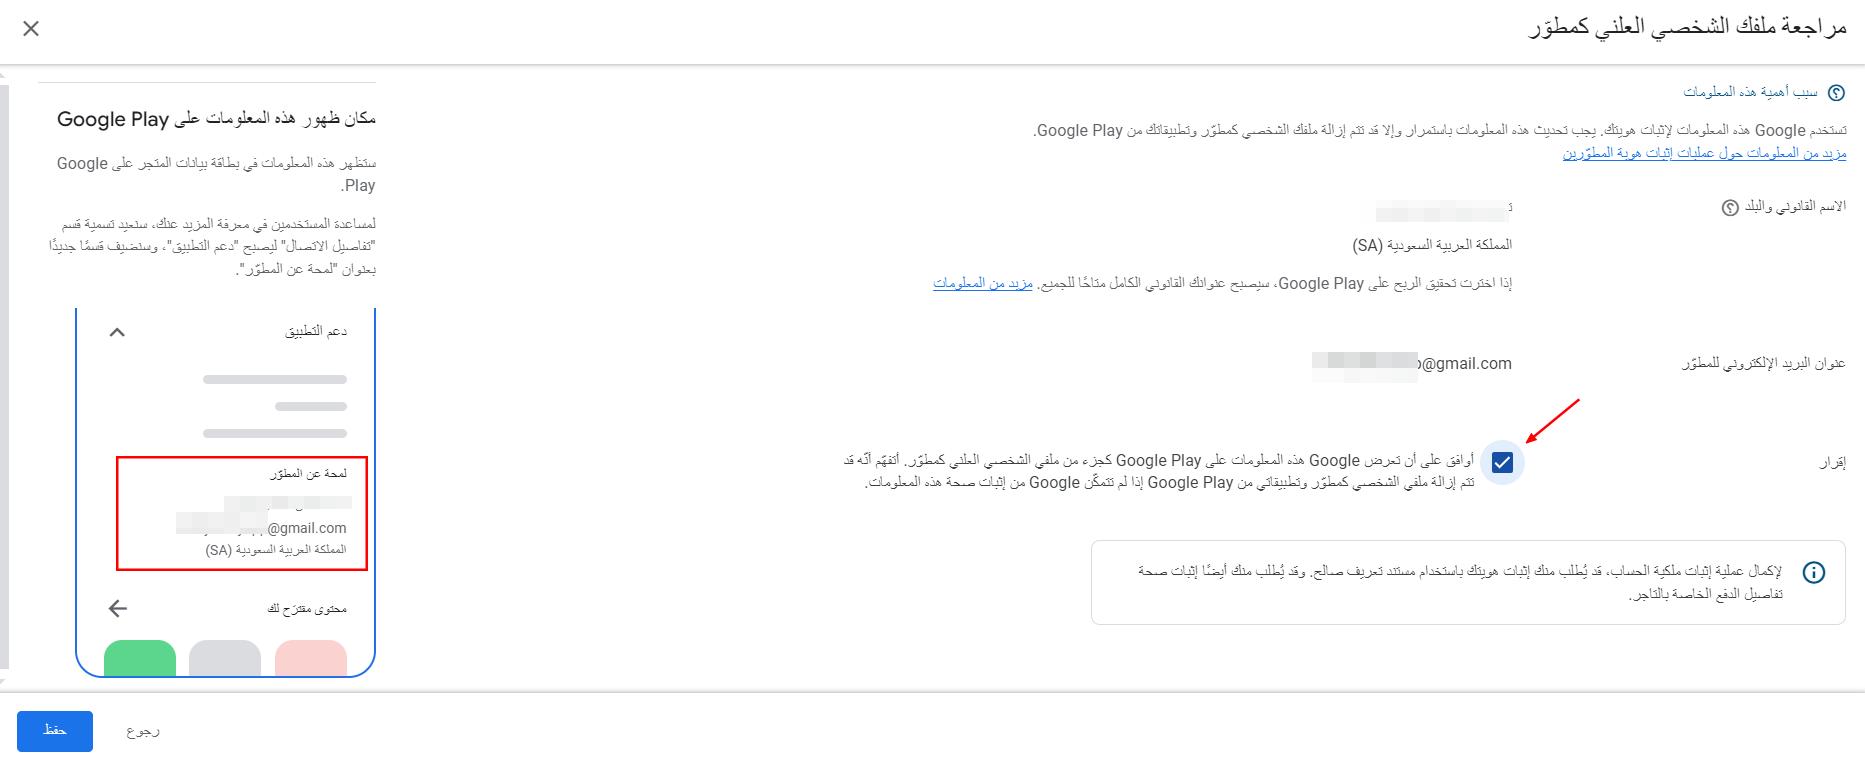
The details you entered, the developer's legal name and the contact email address, are shown publicly to users.
14. A message appears saying the information you submitted is being processed by Google.

15. You receive an email once Google has finished processing, telling you to upload the required proof of identity. Sign back in to the account and choose (Get started).
16. Turn on the declaration, then click (Start identity verification).
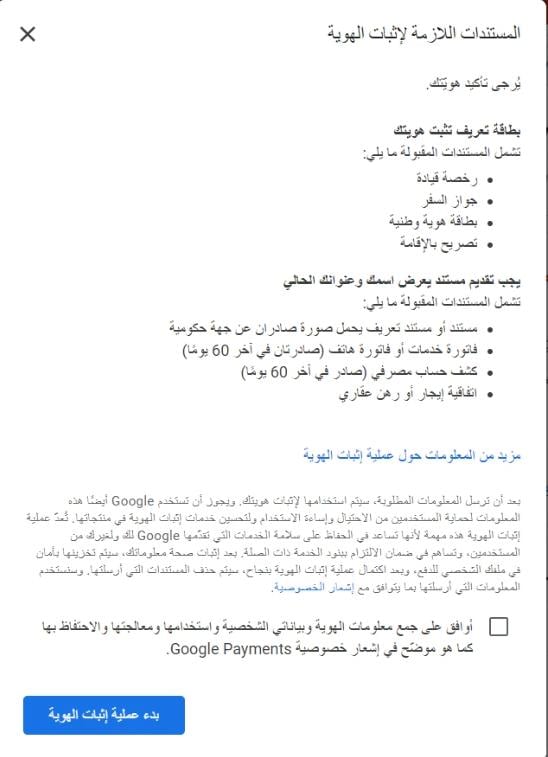
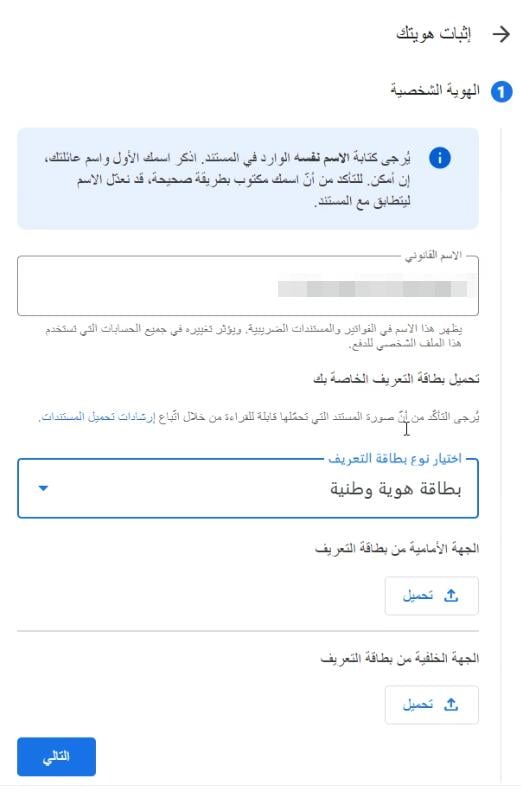
17. Complete the details shown, with the legal name exactly matching the ID in English. The name appears automatically and you can select it if you already completed the payments profile setup in steps 7 and 8. Choose the ID type, upload the file exactly as you prepared it before starting, then click (Next).
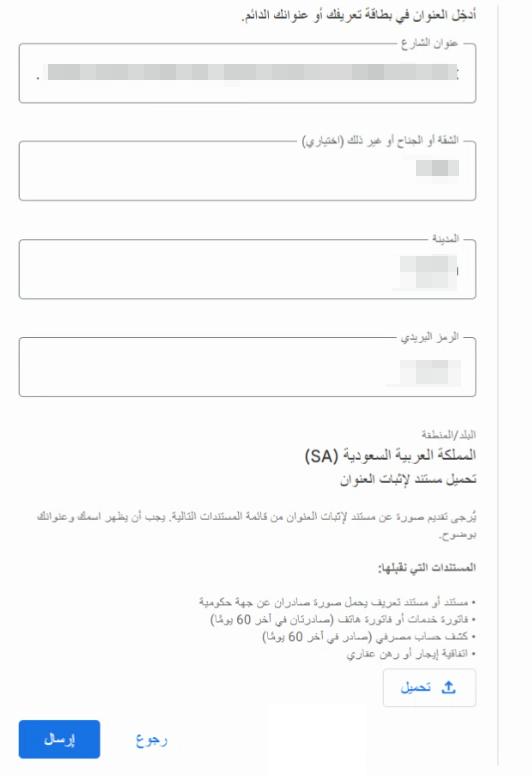
18. Complete the National Address details exactly as they appear on the document issued by SPL, in English. The address appears automatically if it was set up earlier in the payments profile in steps 7 and 8, and you can select it directly. Then upload the required file and click (Submit).
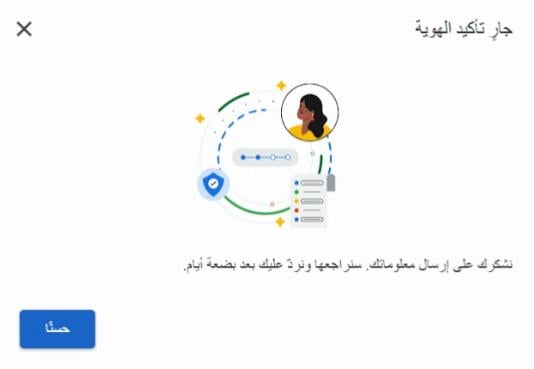
After you submit, the account and the verification process show as being processed by Google. Watch your email for any status updates.
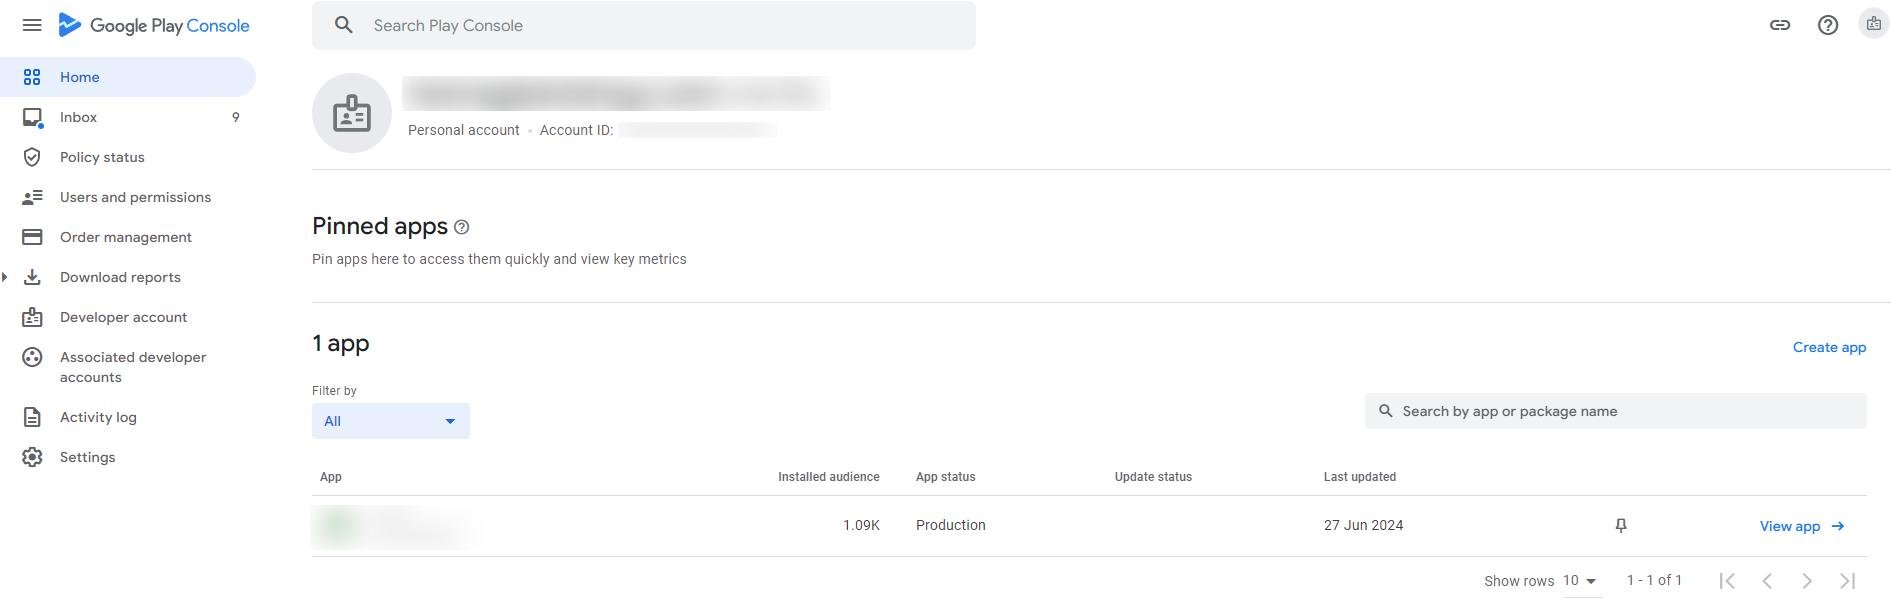
Or open the account to check the status again. The account appears with no alert once it has been accepted, and you receive an email confirming that identity verification is complete.
📝 Important notes
- If account verification is not completed before the deadline set by Google, Salla is not responsible for the state of the account or of the app hosted on it.
- If you get any error or rejection messages during verification, review the steps above carefully to confirm you followed them correctly. You can also contact technical support through chat to check.
For more details, see Developer account verification on Play Console for organizations.
❓ Frequently asked questions
Can someone else verify the account for me?
No. Only the account owner can verify the developer account, and you have to sign in with the owner's email, the one already used to launch the app.
What happens if I miss Google's deadline?
Your profile and apps can be removed from Google Play. Salla is not responsible for the state of the account or the app on it if verification is not completed in time.
Which of my details become public?
The developer's legal name and the contact email address are shown publicly to users on Google Play. Your contact phone number is not displayed publicly.
Does creating a new payments profile affect my existing account?
No. The new payments profile you create is linked to the Google Play Console only, and does not affect your account or your previous profile.
My documents were rejected. What should I do?
Go back through the steps above and check each document against the requirements, especially that the ID is in color, unexpired, shows all four corners, and carries the same name in Arabic and English as the National Address. You can contact technical support through chat to check.
🚀 Completing developer account verification keeps you compliant with Google's requirements and lets you keep managing your app and publishing updates without interruption. Review your details and documents before you submit so the verification goes through smoothly.