Apple allows developers to create an Apple Developer account directly from a mobile device, making the process faster and more convenient. You can complete enrollment either through a desktop browser or entirely via the Apple Developer mobile app, which also enables Apple Pay for seamless payment.
This guide walks you through the complete step-by-step process to successfully enroll in the Apple Developer Program using your mobile phone.
How to enroll in the Apple Developer Program via the mobile app
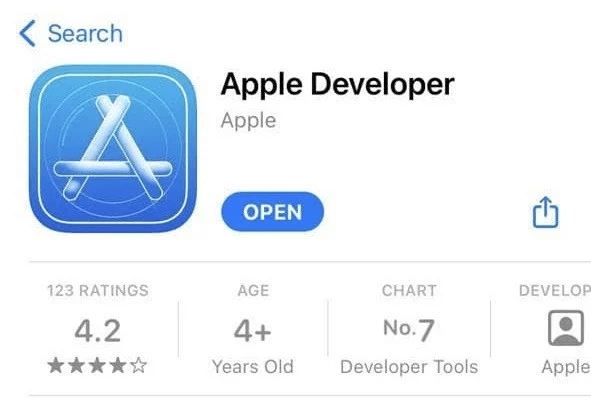
1️⃣ Install the Apple Developer app
From the Apple App Store, download and install the Apple Developer app.
2️⃣ Open the Account tab
Launch the app and tap Account from the bottom navigation bar.

3️⃣ Sign in with your Apple ID
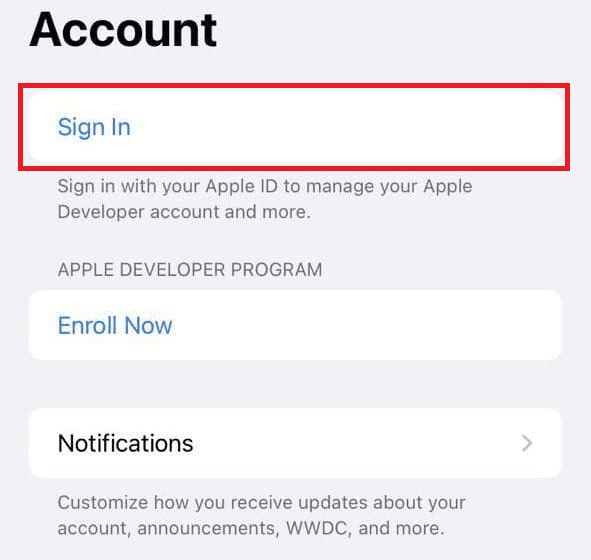
Tap Sign In, then choose whether to:
- Sign in with the current Apple ID
- Or use a different Apple ID
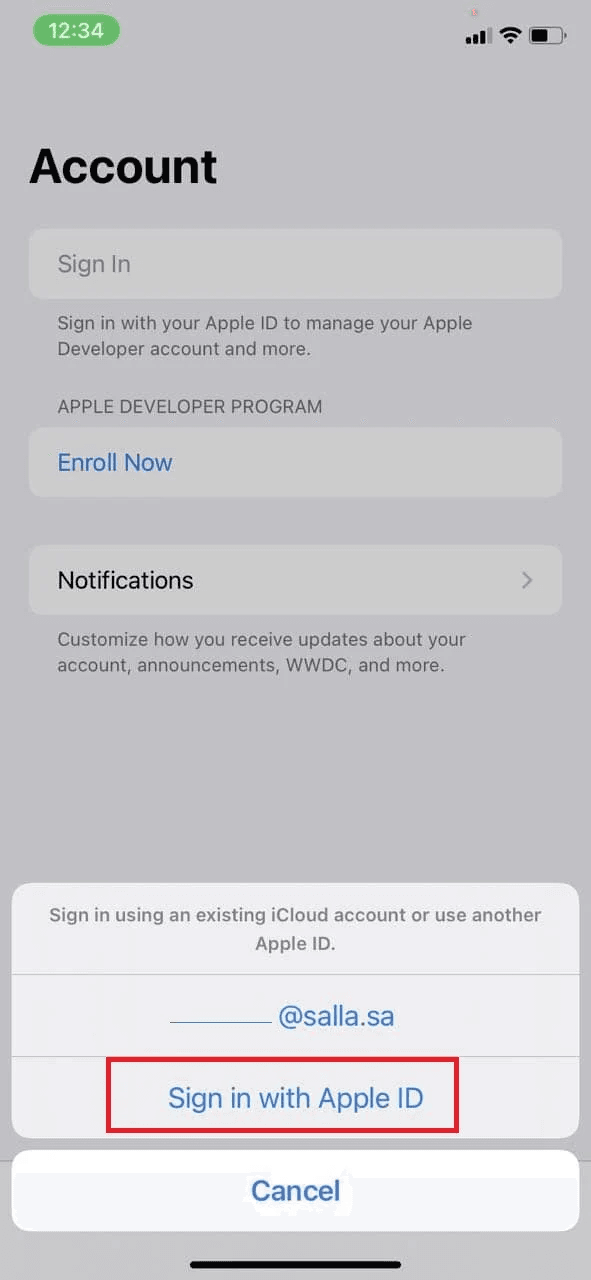
Enter your email address and password.
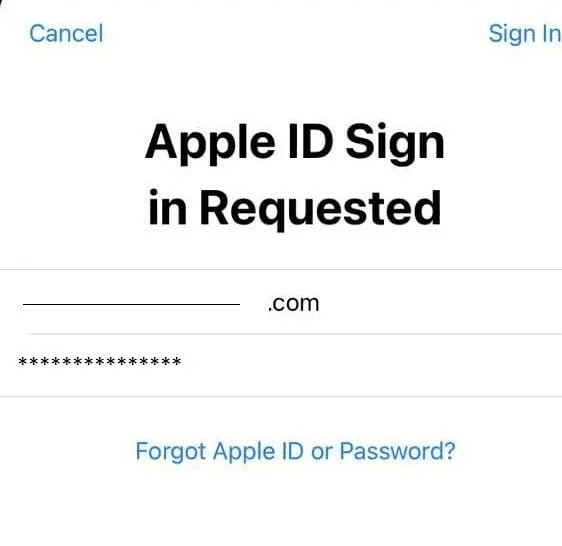
When prompted, tap Sign In on the Apple ID Sign-in Requested screen.
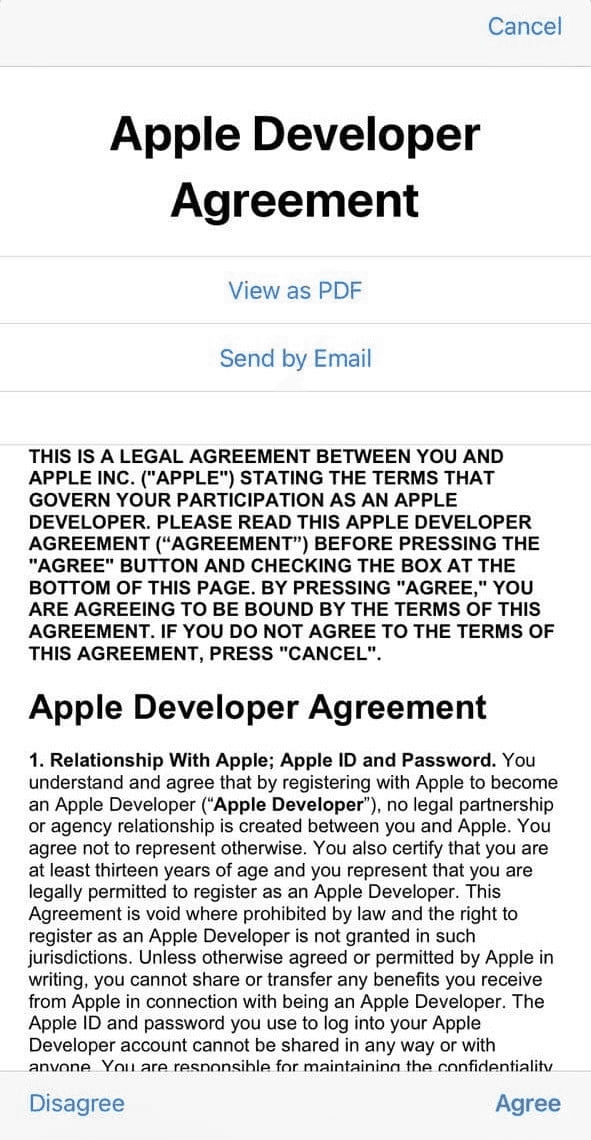
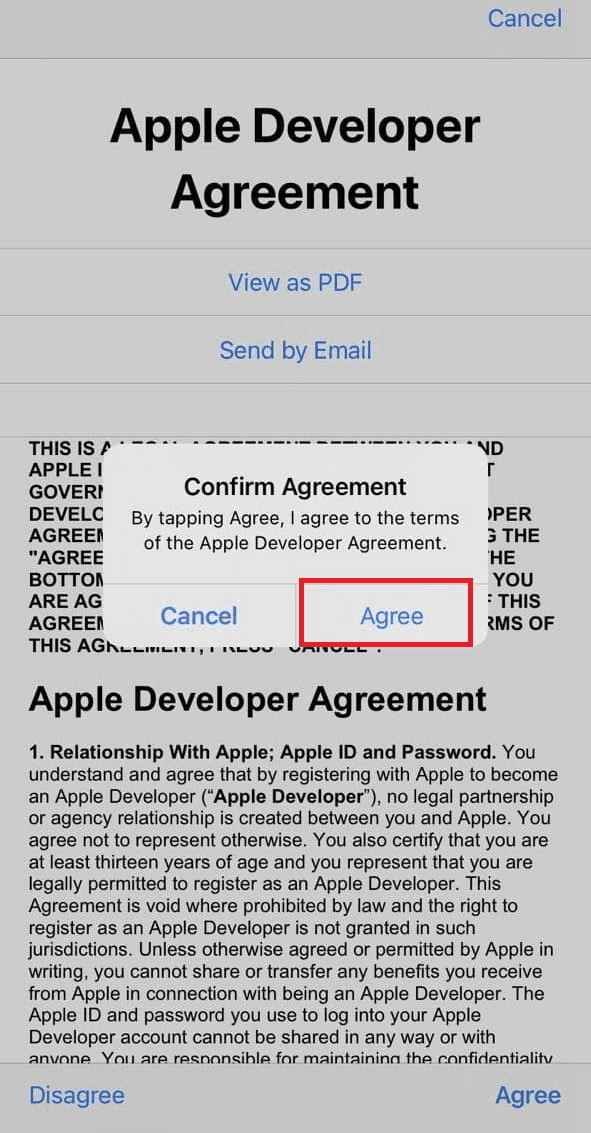
4️⃣ Accept the Terms & Conditions
After reviewing the Terms of Use, tap Agree.
From the confirmation prompt, tap Agree again to proceed.
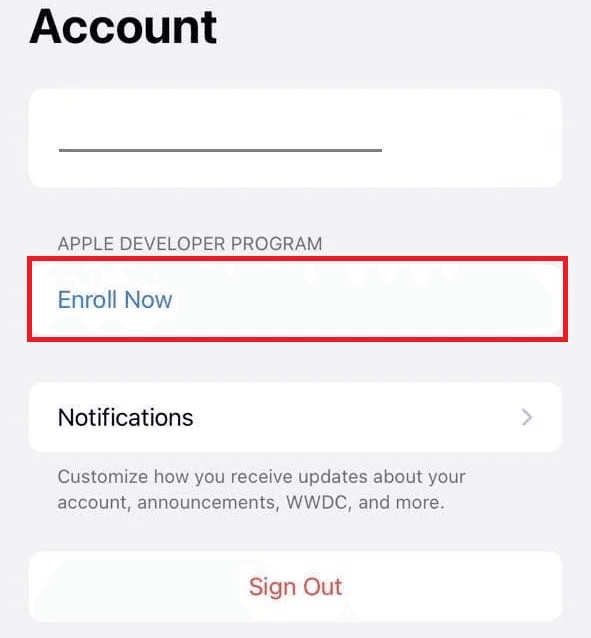
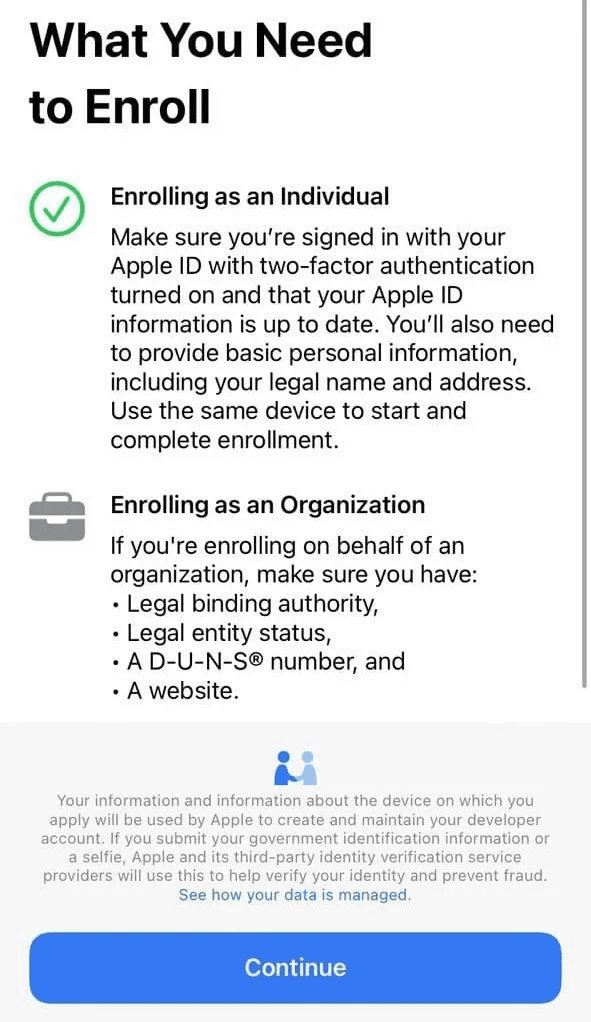
5️⃣ Start enrollment
Tap Enroll Now to begin creating your Apple Developer account.
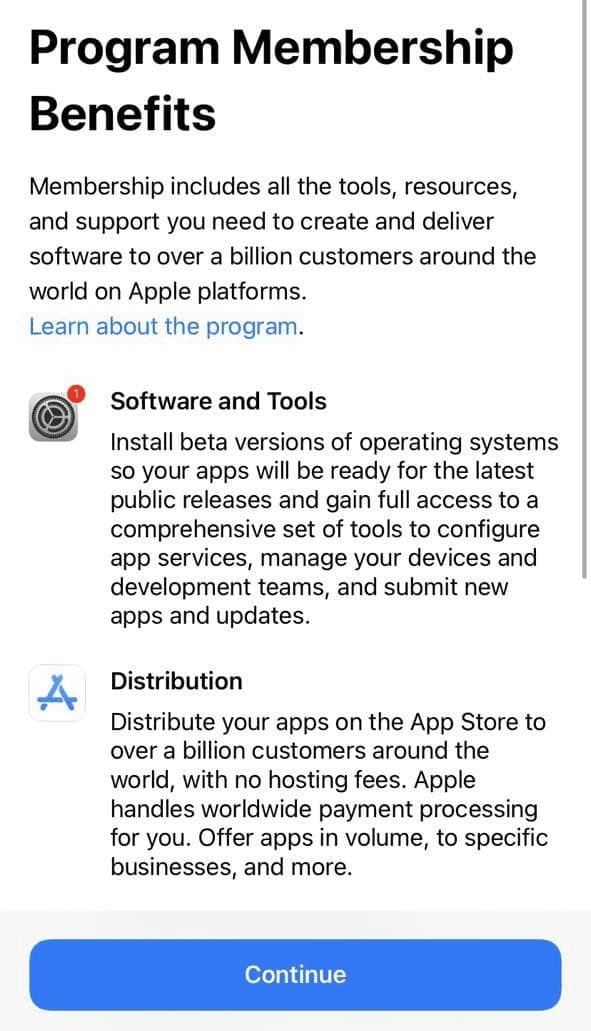
6️⃣ Review developer benefits
After reviewing the benefits of using the Apple Developer app, tap Continue.
One of the key advantages is easy payment via Apple Pay.
You’ll also see a notice explaining that your device information will be used for account maintenance, which means:
- The account must be created from your own device
- Do not switch devices during enrollment
Tap Continue to proceed.
7️⃣ Enter personal information
Enter your personal details exactly as they appear on the commercial registration for company accounts.
Tap Next.
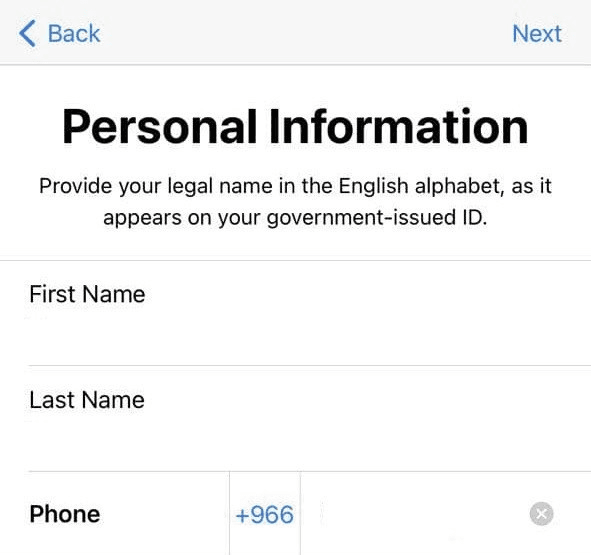
🔔 Important:
- Enter your first and last name exactly as shown on your ID
- Enter a phone number you can remember, as it will be used later for Apple verification
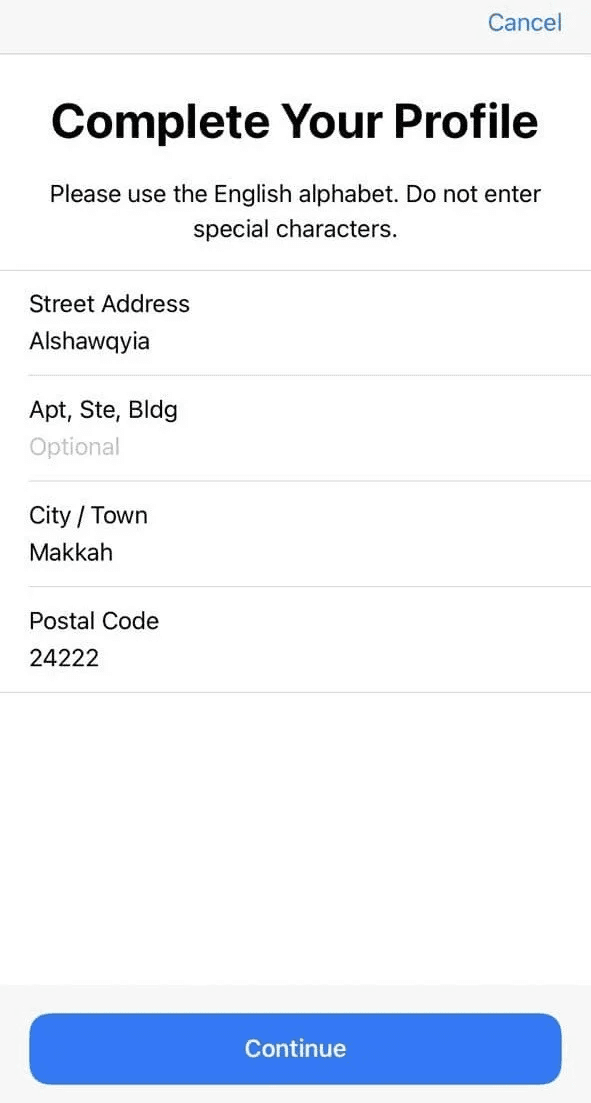
8️⃣ Enter address details
Provide your address information:
- Street name
- Building or floor number
- City
- Postal code
Tap Continue.
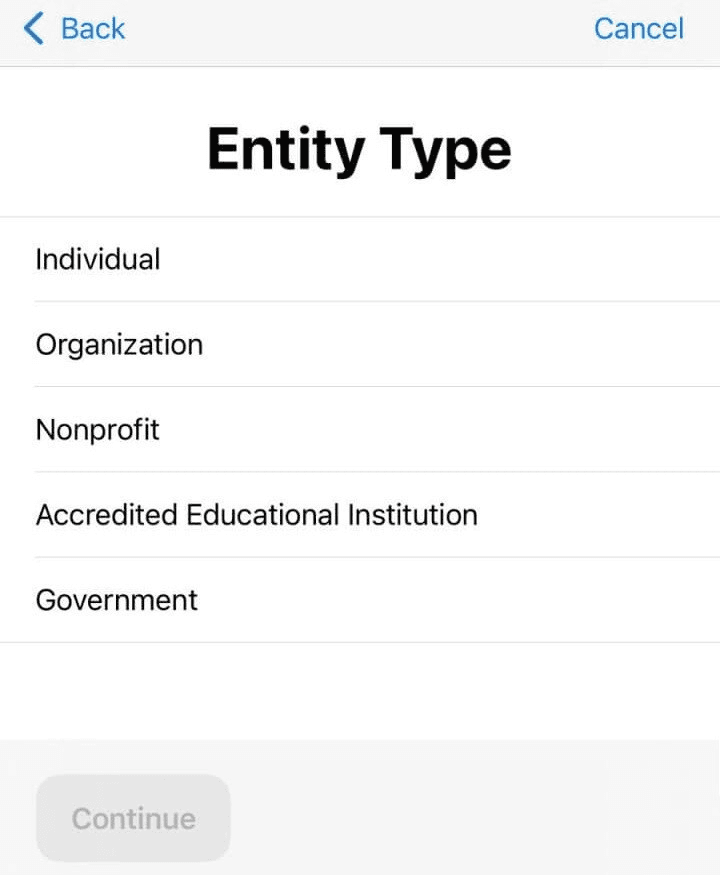
9️⃣ Select membership type
Choose Organization as the membership type (required for Salla App Maker), then tap Continue.
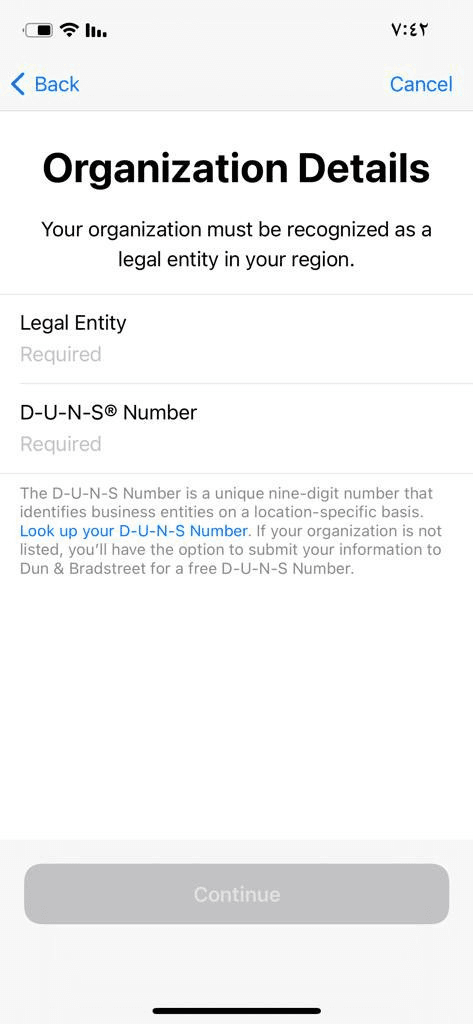
🔟 Enter company details (D-U-N-S required)
Enter:
- The legal company name exactly as registered with Dun & Bradstreet
- The D-U-N-S Number
Tap Continue.
📌 If you encounter an error, contact Apple Support:
- Request Apple Support via email
- Request Apple Support via phone
1️⃣1️⃣ Complete company information
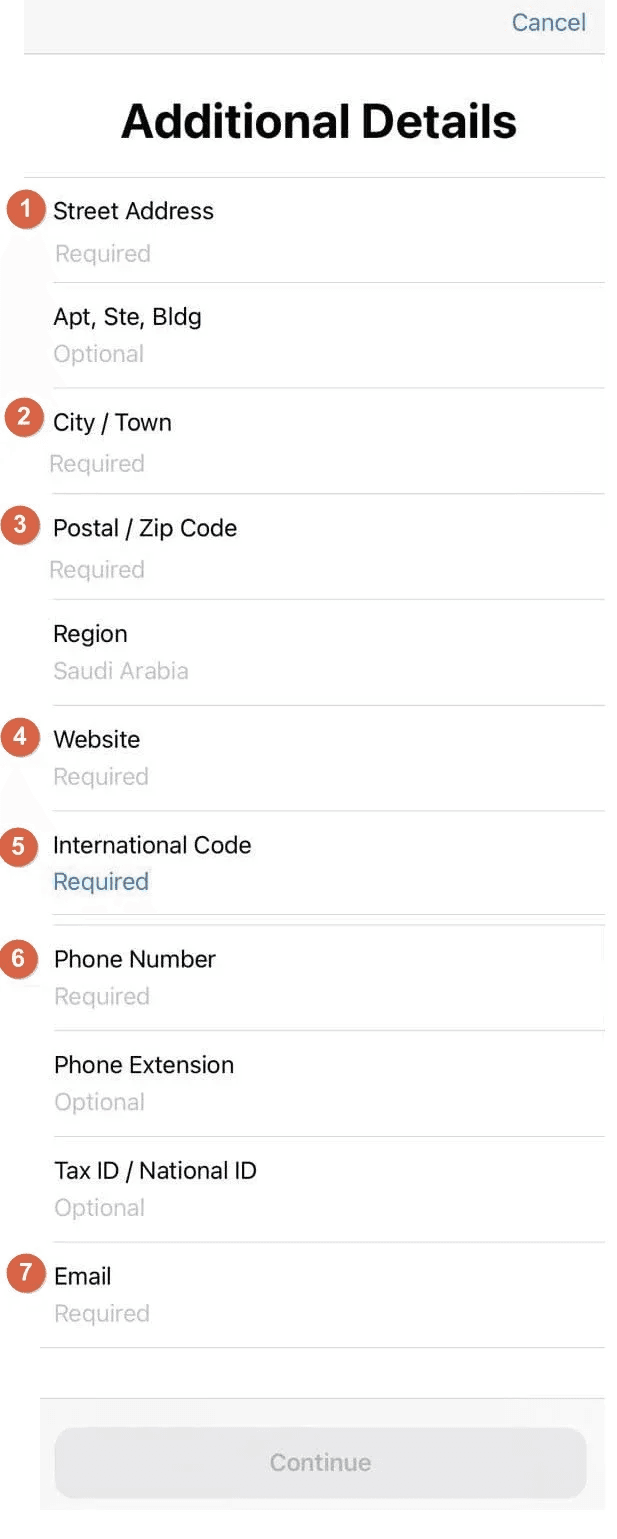
Fill in all company details exactly as registered with D&B:
- Street Address
- Enter the company street and district
- Do not use special characters (commas, dashes, etc.)
- City
- Postal Code
- Website
- Enter the full company website URL (including http)
- International Code
- Use +966 for KSA +971 for UAE
- Phone Number
- Business Email
- Must match the company domain (e.g. email@domain.com)
- Enable Signing Authority to confirm authorization
- First Name
- Re-enter exactly as per ID (owner or manager on CR)
- Last Name
- Re-enter exactly as per ID
- Job Title
- Enter CEO or OWNER
- Work Email
- Re-enter the business email
- International Code
- Re-enter +966 for KSA or +971 for UAE
- Phone Number
- Re-enter the same phone number
1️⃣2️⃣ Enrollment under review
After tapping Continue, your membership will be marked as Under Review, and an Enrollment ID will be generated.
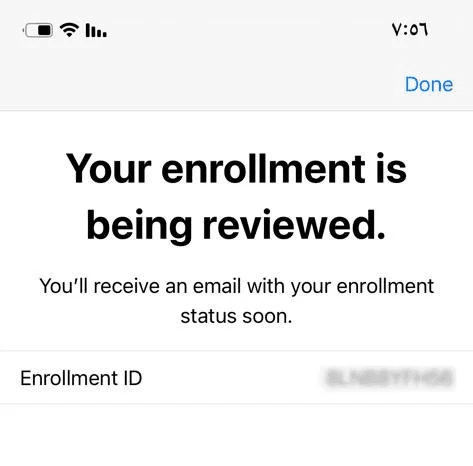
A confirmation email will be sent to your Apple ID email address.
1️⃣3️⃣ Apple verification process
Apple typically takes several days to review the application.
During this time:
- Apple may request additional documents (e.g., translated commercial registration)
- Apple may schedule a verification phone call
During the call, you may be asked:
- What is your first and last name?
→ Answer exactly as entered in step 7
- What is your Enrollment ID?
→ Provide the ID from step 12
- What is your work email?
→ Use the business email entered earlier
- What is your company phone number?
→ Provide the registered number
- What is your position in the company?
→ Yes (Owner)
- Do you have legal authority to sign Apple agreements?
→ Yes
- Will you publish apps on the App Store or outside it?
→ On the App Store
🔔 If you don’t understand a question, feel free to ask:
- “Sorry, could you repeat the question?”
- “Sorry, I couldn’t hear you well.”
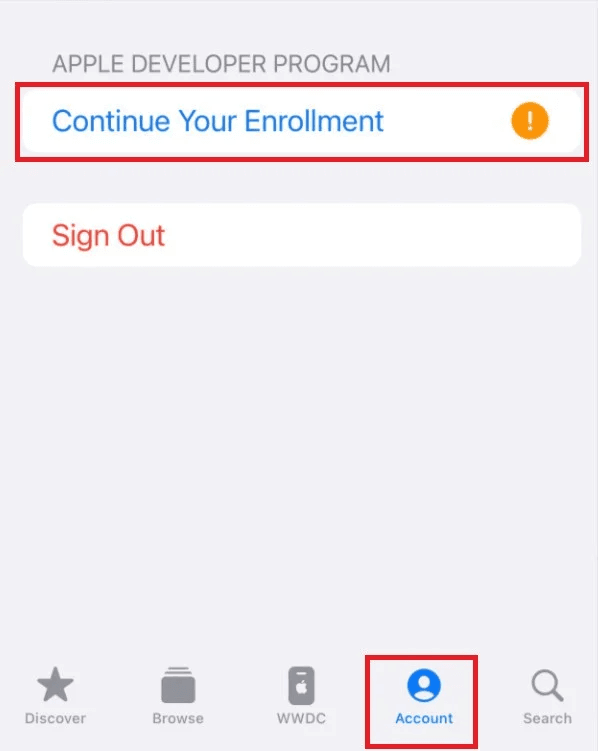
1️⃣4️⃣ Accept the agreement & complete payment
Once approved, Apple will send you an agreement.
Open the Apple Developer app again:
- Go to Account
- Tap Continue your enrollment
- Review the agreement and tap Agree
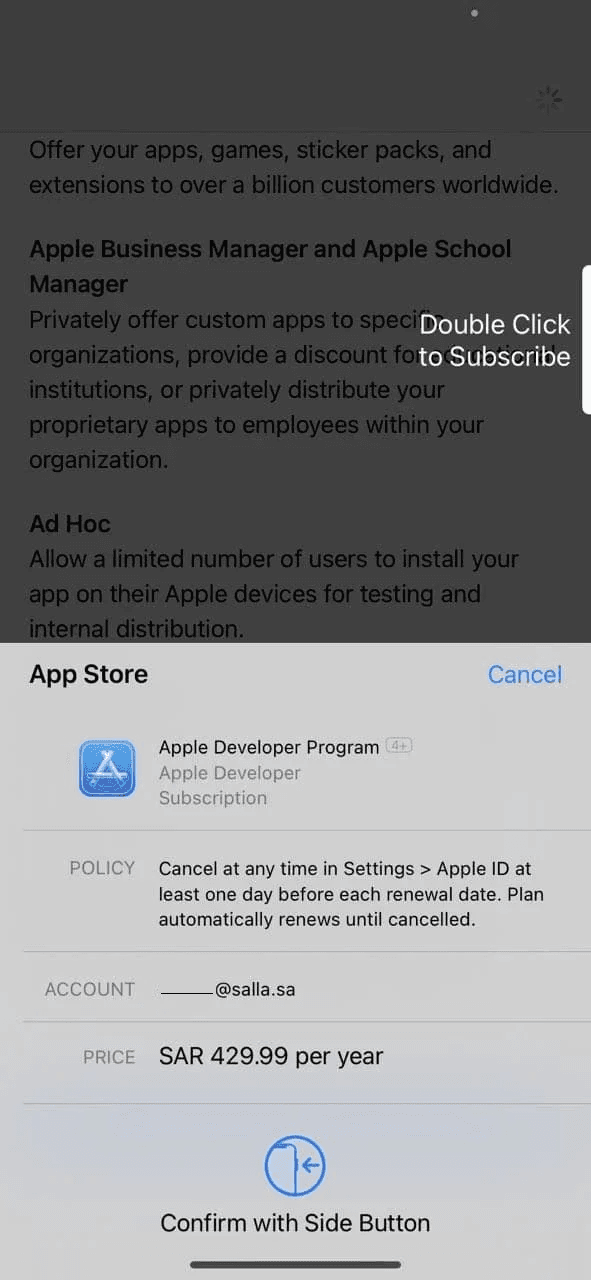
1️⃣5️⃣ Pay the annual subscription fee
You’ll see the annual subscription fee screen.
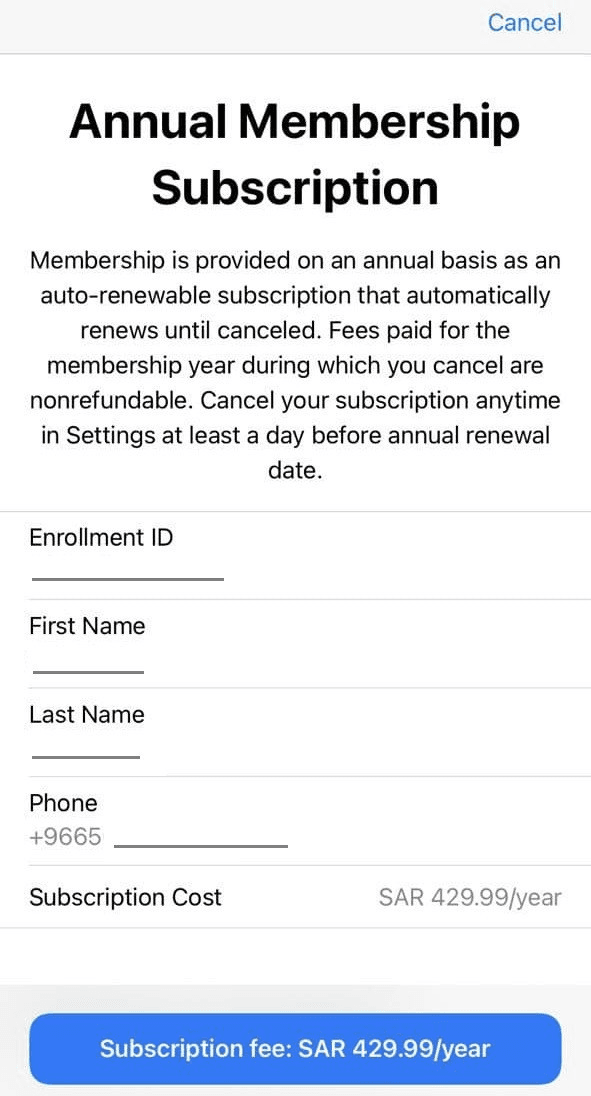
Tap Subscription Fee, then:
- Double-click the side button on your phone to confirm payment via Apple Pay
🔔 Important notes before payment
- Verify the Apple ID linked to Apple Pay in your device settings
- The subscription will be tied to that Apple ID for all future renewals
- If you don’t want to use the current Apple ID, change it before paying
- Losing access to the Apple ID used for payment will cause renewal issues and require Apple Support
Frequently asked questions
Are there mandatory rules when enrolling via the app?
Yes. When enrolling in the Apple Developer Program:
- You must use the same device throughout the entire process
- Switching devices will automatically cancel your enrollment
- All steps must be completed inside the app, not via browser
- Payment must be completed via the app using Apple Pay
- Paying through a browser will cancel the app enrollment
Always confirm the Apple ID used for payment to ensure smooth annual renewals.
How long does it take to activate a company developer account?
Typically 1–2 weeks, depending on:
- Your responsiveness to Apple’s requests
- Apple’s internal verification process
If activation is delayed, contact Apple Support:
- Request Apple Support via email
- Request Apple Support via phone
What if payment fails in the app?
Visit: 👉 https://getsupport.apple.com/products

Then follow:
- Billing & Subscriptions
- Subscriptions & Purchases
- Unable to Purchase
- Review available support options
- Contact Apple Support by phone (Arabic supported for billing)
Helpful resources:
- Apple Pay setup
- Apple billing & purchase support