The Salla Point POS app gives you quick access to create, manage, and track orders easily from your mobile device. This helps speed up order processing and ensures a more efficient and professional sales experience.
📌 Article overview
- Steps to create an order without adding products to the cart
- Steps to create an order with products added to the cart
- Adding products to the cart
- Setting shipping details for the order
- Completing payment for the order
- Managing the order cart
Steps to create an order without adding products to the cart
- Create a new order by entering payment details without adding products to the cart using Quick purchase.
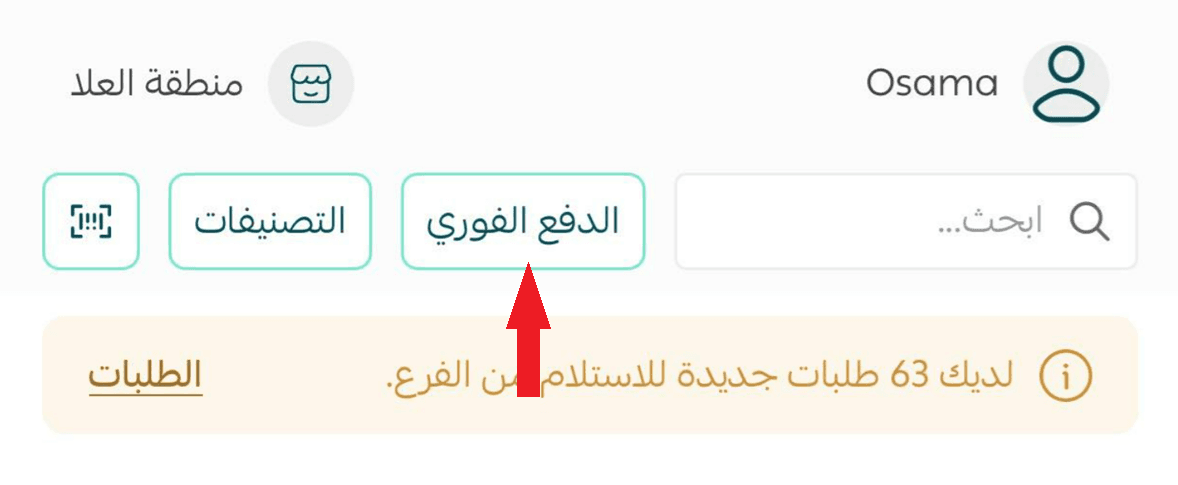
Enter the product name and specify the order amount.
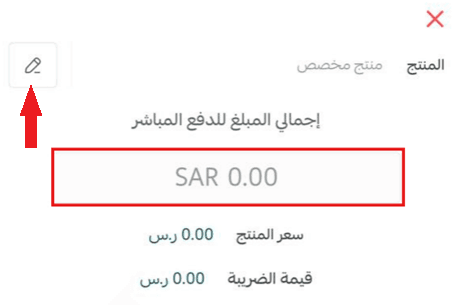
- Select the appropriate payment method, then click Confirm payment to create the order.

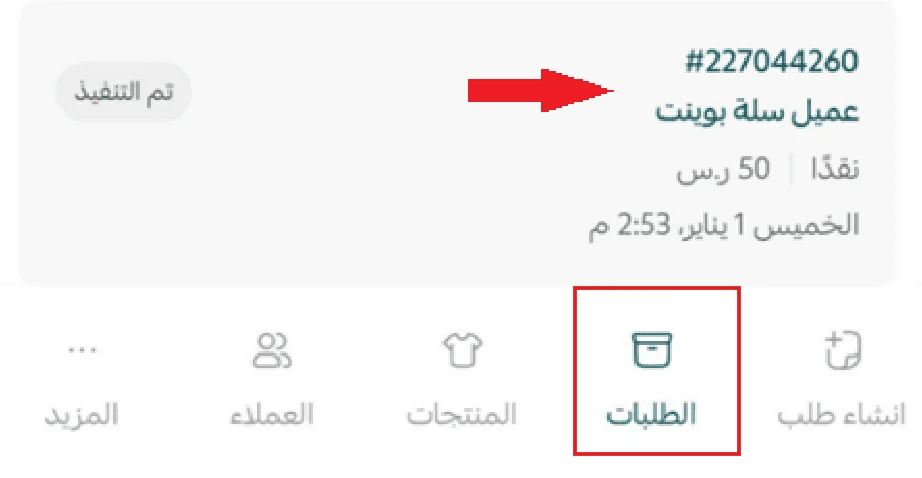
- The order will be created successfully and will appear under the Orders tab.
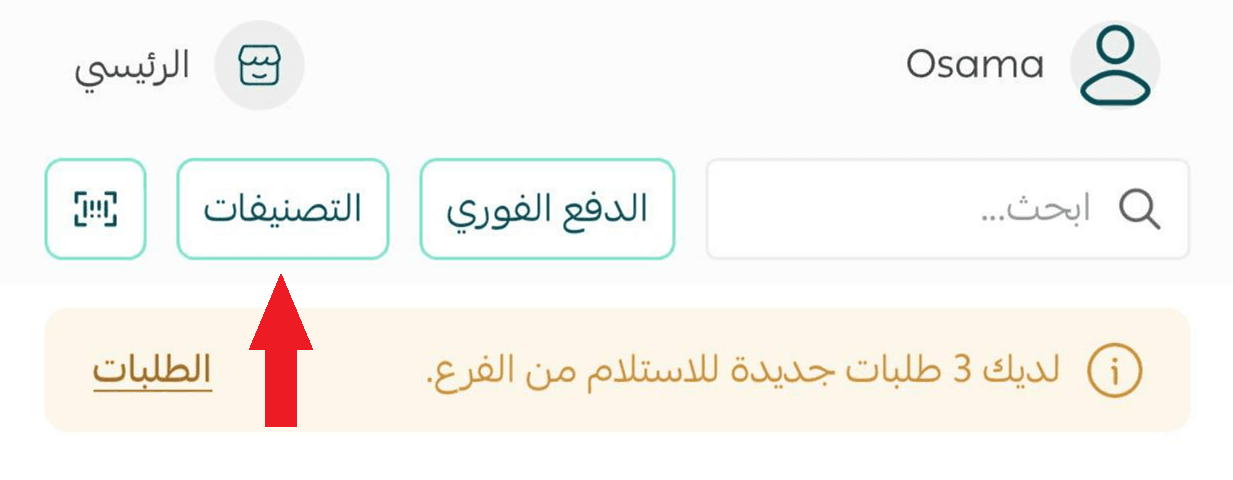
Steps to create an order with products added to the cart
From the Create order tab in the bottom navigation bar, you can create new orders for your customers.

🔔 Important note: If you see an error when adding a product to the cart

❌ Disable the permission View assigned orders only for the employee from the dashboard
✅ Enable the permission Add order for the employee from the dashboard
For more details, see Salla Point employee permissions.
1. Adding products to the Cart
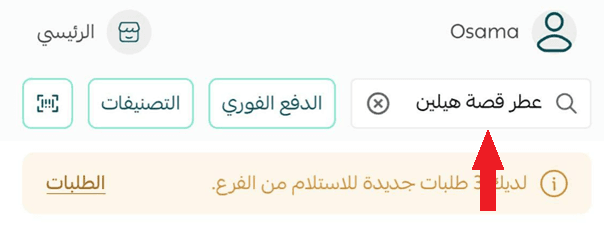
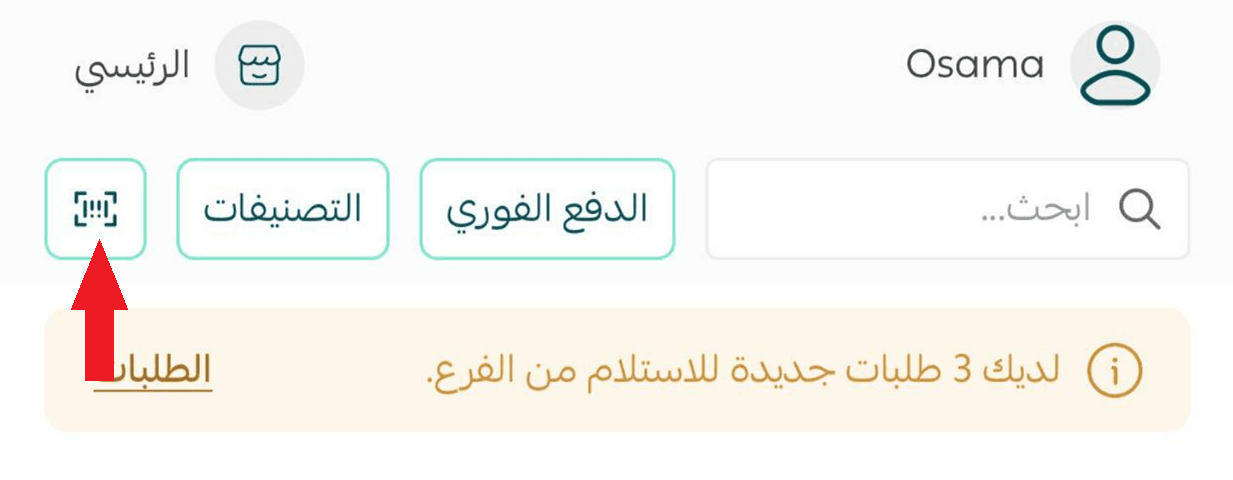
Search for the product you want to add to the cart. You can find products in several ways:
- By typing the product name in the search bar
- By browsing through Categories
- By scanning the barcode using the SKU (stock code)
📝 Note: To use barcode scanning, make sure the SKU is added to the product details.
For more details, see how to add or edit SKU codes.
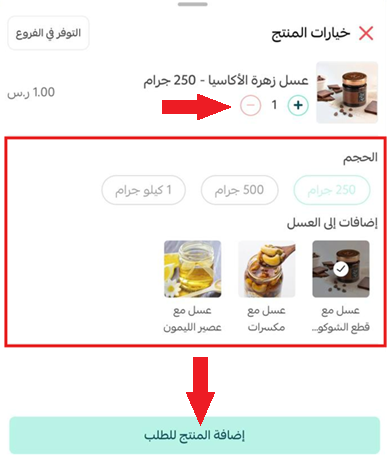
- Adjust the product quantity, select product options, then click Add to order.
If the product has an active promotion, it will appear directly on the product details page.
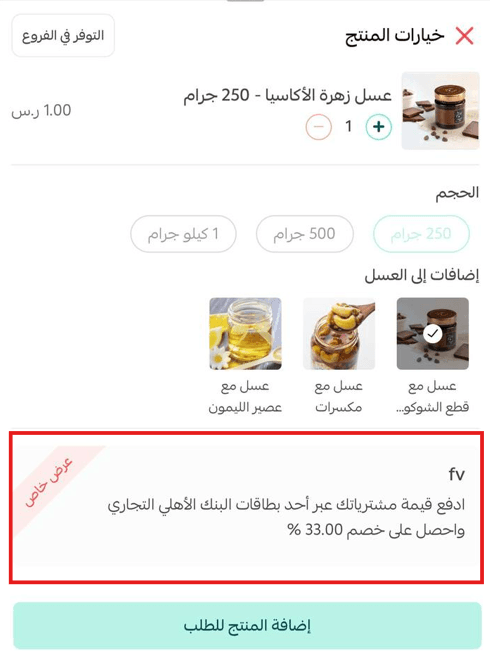
For more details, see the managing promotions and creating special offers article.
You can also check product availability across branches by clicking Availability in branches on the product details page.

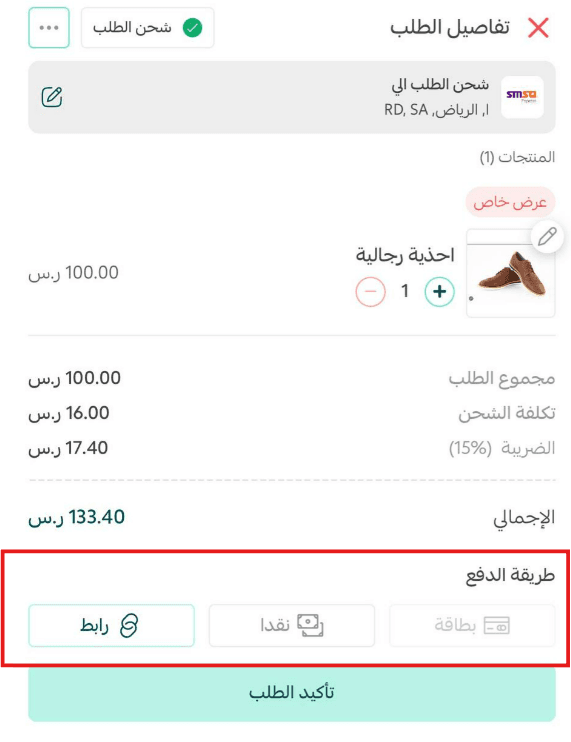
2. Setting shipping details for the order
- Set the order’s shipping details through Order shipping.

- Choose how the customer will receive the product:
- Pickup from branch: The customer collects the product from the current branch
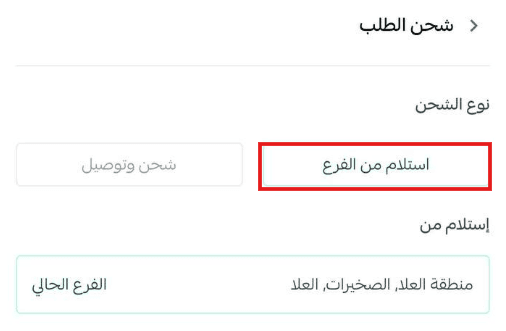
- Shipping & delivery: The product is shipped to the customer’s location

Enter the customer’s location details, select the shipping type and shipping company, then click Confirm.
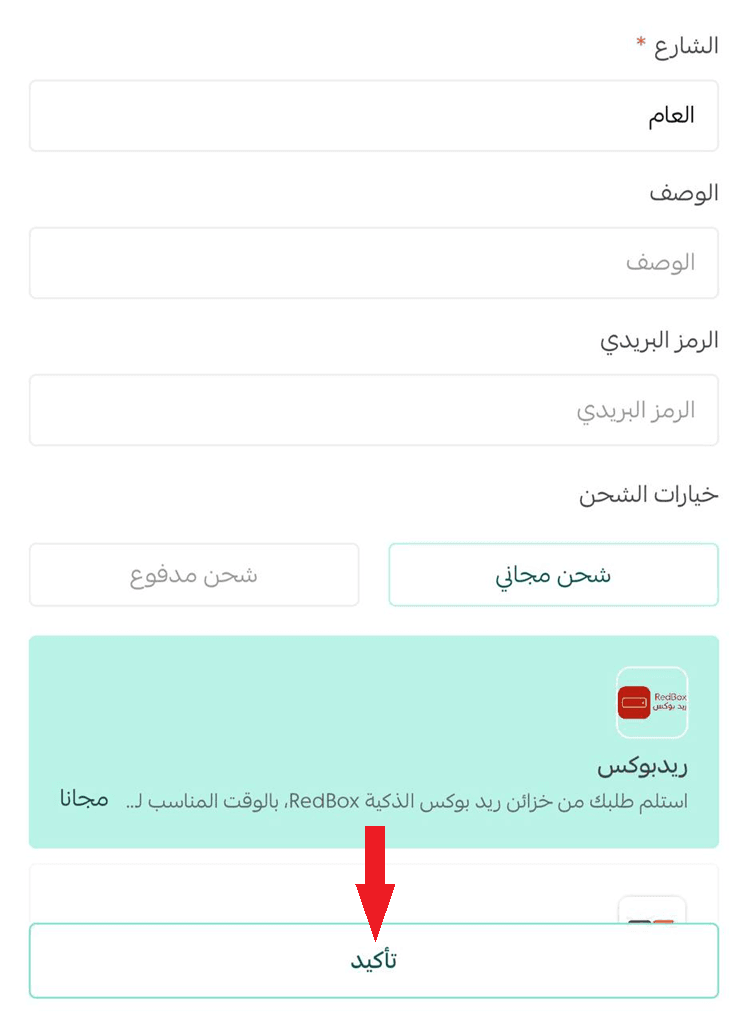
- The shipping details will appear on the order details page.
You can edit the shipping details at any time using the edit button.
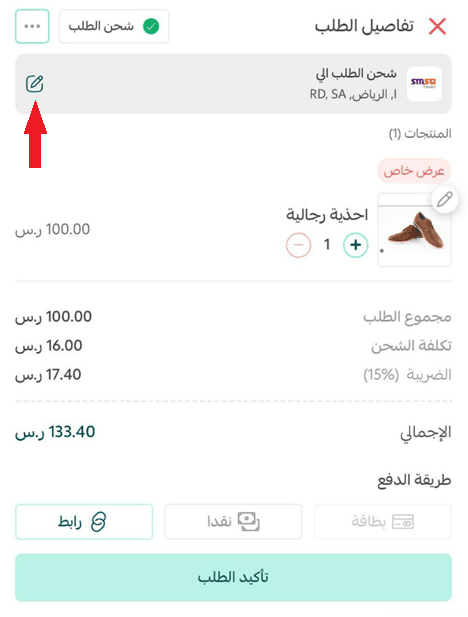
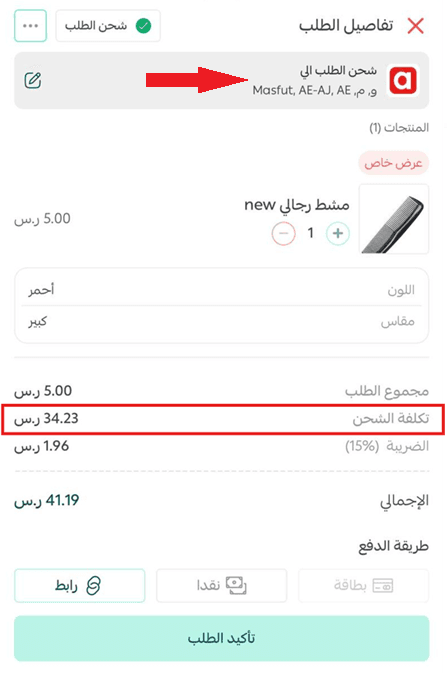
3. Completing payment for the order
- Select the appropriate payment method to complete the order.
For more details, see the available payment methods article.
- Click Confirm order to create the order for the customer.

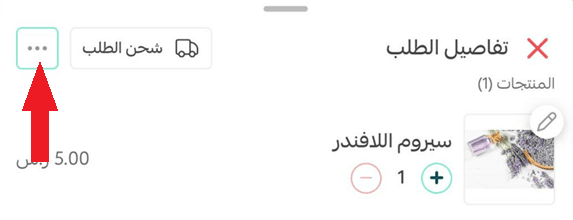
4. Managing the order cart
You can perform several actions on the order cart before completing it:
- Update product quantities or remove items using the edit option

- Access additional actions through the More (...) button
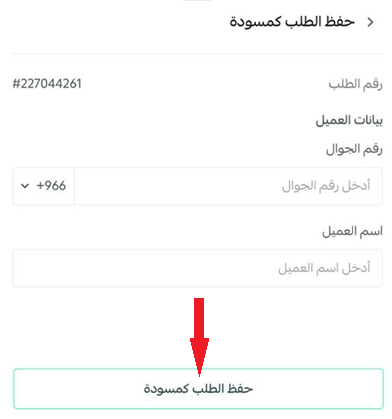
1. Save the order as a draft
Save the order temporarily as a draft and confirm it later.

Enter customer details, then click Save as draft to store it under the orders page.
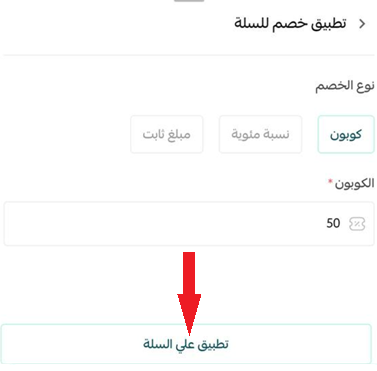
2. Apply a discount to the cart
Apply either a percentage or a fixed discount to the entire order.

Enter the discount details, then click Apply to cart.
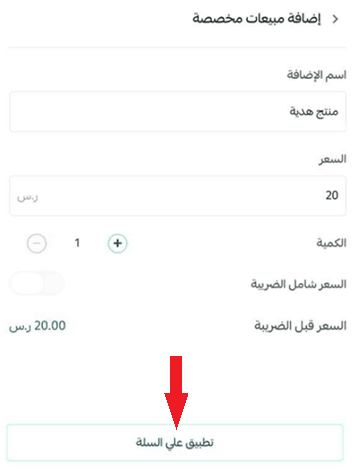
3. Add a custom sale
Add a product that is not previously listed, with a custom name and price.

Enter the product details, then click Apply to cart.
4. Add order note
Add a note that will appear later in the order details for reference.

Enter the note, then click Save note.
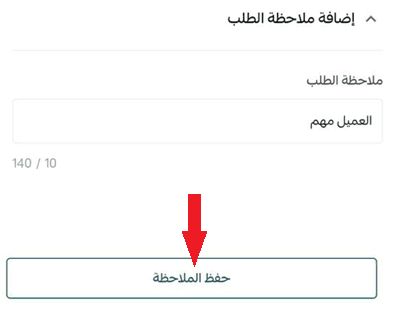
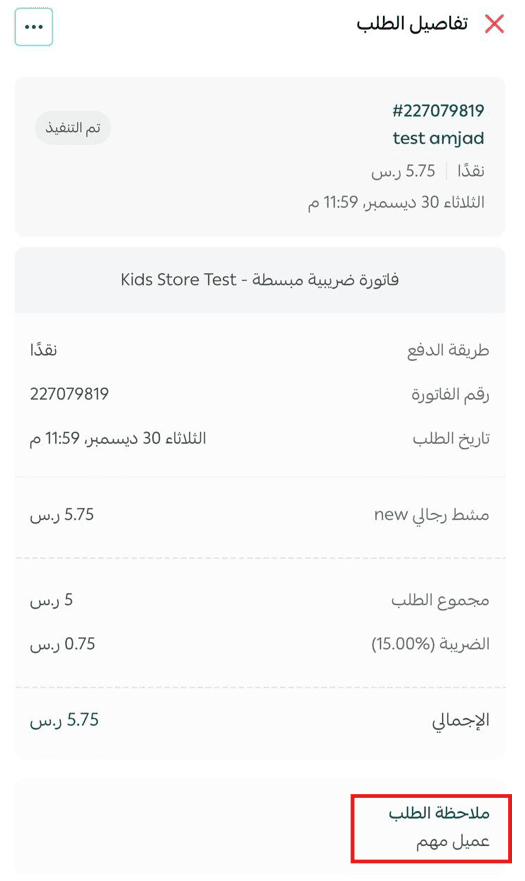
🎉 The note will appear in the order details page.
5. Delete order details
Delete all order details completely.

Click Confirm deletion to remove the order completely.