Flexible and well configured order settings are essential for delivering a smooth shopping experience while maintaining strong operational efficiency.
In this guide, you will learn how to customize and control key order settings. You will also explore advanced features such as reordering, pre order confirmation, and order completion page customization, all designed to improve customer satisfaction and streamline operations.
📌 Article overview
- Key order settings you can customize include:
- Enable or pause order acceptance
- Order receiving hours
- Allow customers to add notes to orders
- Allow customers to cancel orders before fulfillment
- Set Fulfilled status at order creation
- Automatically restock inventory based on order status
- Disable bank transfer payment deadline
- Display shipping progress indicator
- Enable reorder
- Pre order confirmation
- Customize order completion page
- Customize shipping label fee deduction method
- Order status notifications
- Send digital product content
- Customize report calculation statuses
Order Settings Page
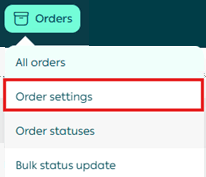
1. Open Orders
From the main menu, click Orders.

2. Open Order Settings
From the Orders menu, click Order Settings.
The Order Settings page will appear with all available configuration options.
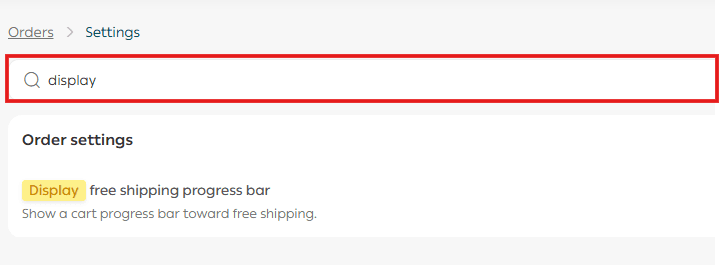
3. Search for a setting
You can quickly find a specific setting by typing keywords into the search field.
Key Order Settings Explained
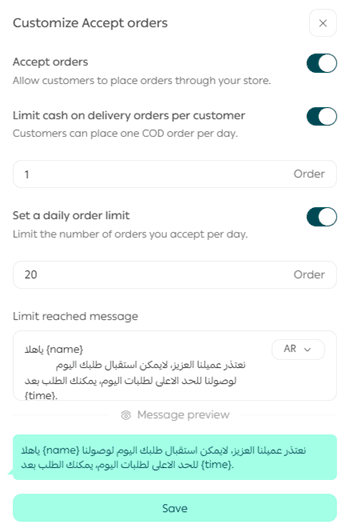
Enable Order Acceptance
You can temporarily stop accepting new orders for reasons such as high order volume or store restructuring.
Steps
- From the Order Settings page, click Customize next to Order Acceptance.

2. Enter the maximum number of orders you can receive per day.
3. Write the message customers will see once the daily limit is reached.
4. Preview the message, then click Save.
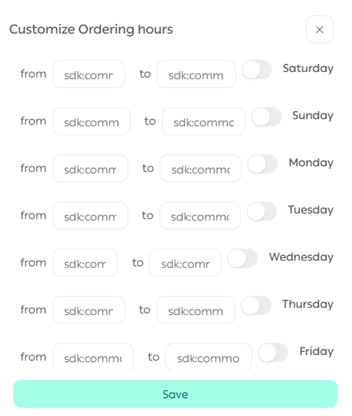
Order Receiving Hours
Customize when your store accepts orders. This is useful for seasonal products, limited availability, or production based businesses.
Steps
- From Order Settings, click Customize next to Order Receiving Hours.

- Select the days and times orders are accepted, then click Save.
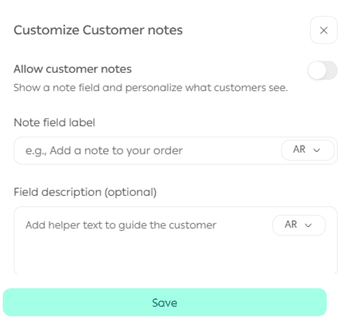
Allow Customers to Add Notes to Orders
Steps
- From Order Settings, click Customize next to Allow Order Notes.

2. Enter the note title and the descriptive text shown to customers.
3. Click Save.
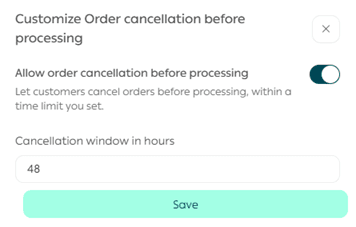
Allow Customers to Cancel Orders Before Fulfillment
Steps
- From Order Settings, click Customize next to Allow Order Cancellation Before Fulfillment.

2. Set the maximum time allowed for cancellation before fulfillment begins.
3. Click Save.
Customer cancellation steps
- Click the account icon at the top of the store, then select Orders List.
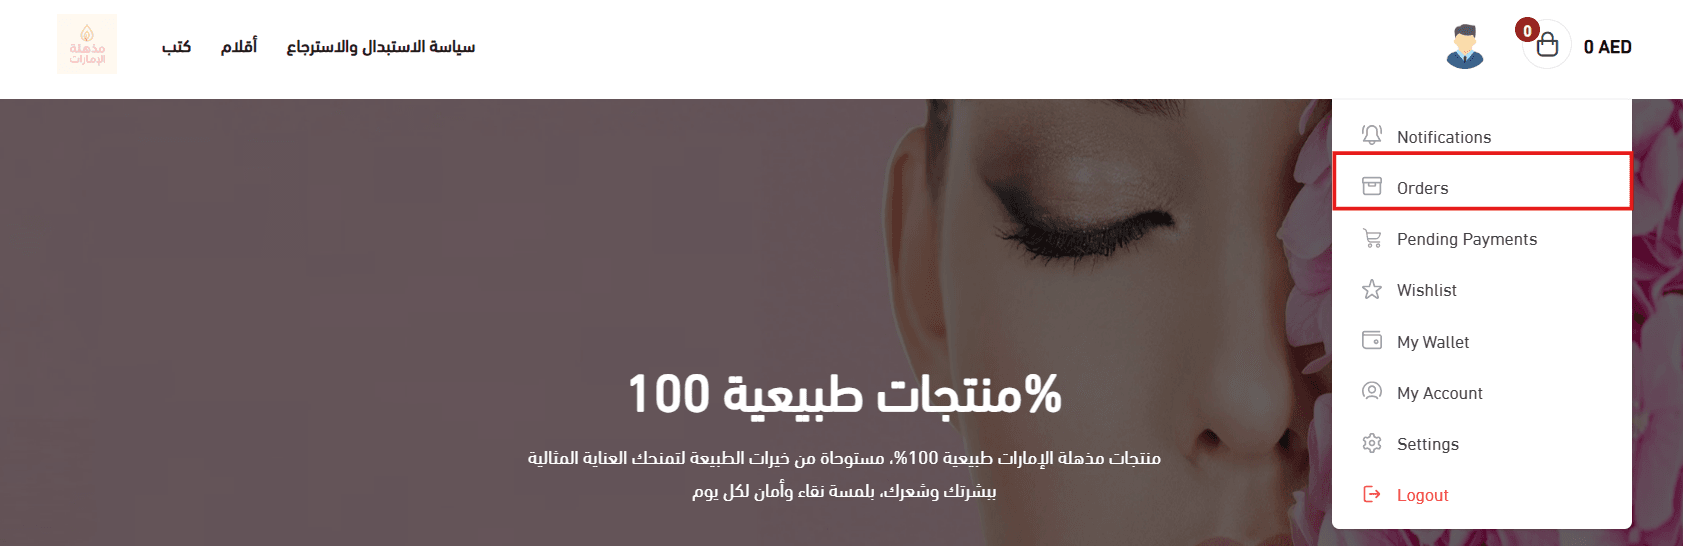
2. From the bottom of the order details page, click Cancel Order.

Set Fulfilled Status at Order Creation
This setting controls when an order is automatically marked as Fulfilled to avoid customer confusion, especially for Cash on Delivery or made to order products.
Steps
- From Order Settings, click Customize next to Set Fulfilled Status at Order Creation.

2. Select the scenarios where the Fulfilled status should be applied.
3. Click Save.
Option 1: Fulfilled for electronic payments
Enable this option and select any product types you want to exclude.
📝 Note: This option helps ensure fast delivery of digital products and digital cards.
Option 2: Fulfilled for Cash on Delivery
Enable this option and select excluded product types if needed.
💡 Example: If an order contains at least one product not eligible for automatic fulfillment, the order status will remain In Progress.
Option 3: Fulfilled for Buy Now Pay Later (BNPL)
Enable this option and select excluded product types if required.
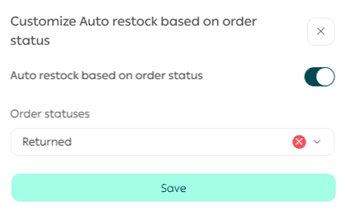
Automatically Restock Inventory Based on Order Status
Steps
- From Order Settings, click Customize next to Automatic Inventory Restock.

2. Enable the setting and click Save.
Disable Bank Transfer Payment Deadline
When enabled, customers must complete the bank transfer immediately and upload the payment receipt during checkout.

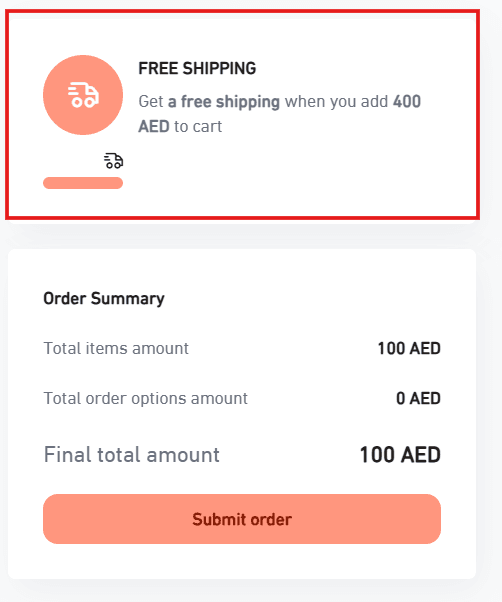
Display Shipping Indicator
Displays a progress bar indicating free shipping availability to customers.

Enable Reorder
Reorder allows customers to quickly repeat a previous purchase with one click.

The Reorder button appears at the bottom of the order page. Customers can review all items in the cart and make adjustments before checkout.

🎯 This feature saves time and encourages repeat purchases.
Pre Order Confirmation
Steps
- From Order Settings, click Customize next to Pre Order Confirmation.

2. Choose when the confirmation appears:
- Always
- Only for Cash on Delivery
Hidden
3. Enter the confirmation text, then click Save.
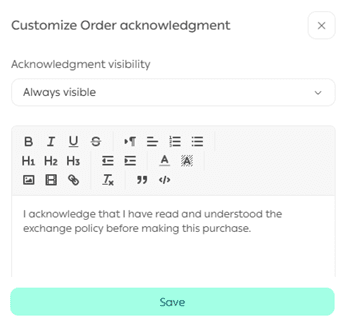
For more details, refer to the Pre Order Confirmation Setup guide.
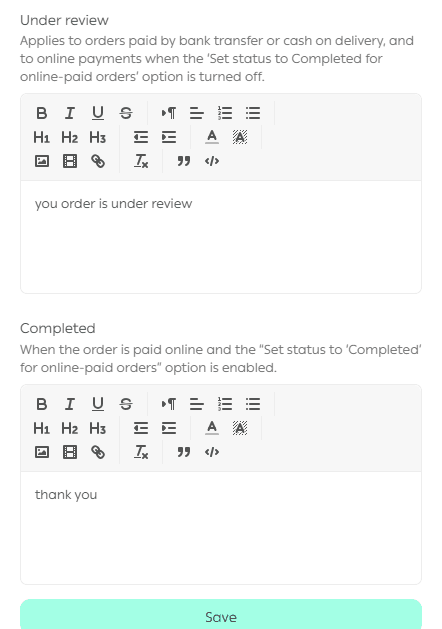
Customize Order Completion Page
Steps
- From Order Settings, click Customize next to Order Completion Page.

2. Enter the main title and the explanatory messages for each order status.
3. Click Save.
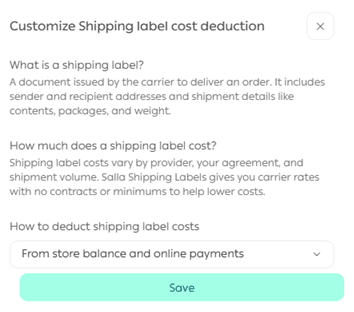
Customize Shipping Label Fee Deduction Method
Steps
- From Order Settings, click Customize next to Shipping Label Fee Deduction.

2. Choose one of the following options:
- Wallet and electronic payments
- Wallet only
3. Click Save.
Order Status Notifications
Choose where customers receive order status notifications.

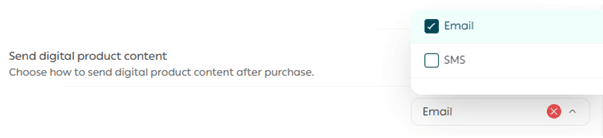
Send Digital Product Content
Customize where digital product links are delivered to the customer.
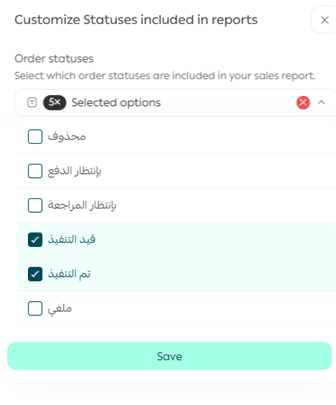
Customize Report Calculation Statuses
Control which order statuses are included in store analytics and reports.

Steps
- Select the statuses to be included in sales calculations.
- Click Save.
Reporting impact
Selected statuses affect all system reports, including:
- Dashboard
- Order reports
- Coupons
- Products
- Sales
- Brands
💡 Example: In Net Sales reports, only orders with selected sales statuses will be counted.
In Orders reports, only orders with selected statuses will appear, giving a clearer view of actual sales performance.
Final Takeaway
Customizing order settings gives you precise control over how your store operates and how customers experience each step of their journey.
With the right configuration, you reduce friction, improve clarity, and build a more reliable and scalable operation.