Having excess stock in one branch while another branch runs out quietly drains your profits. Inventory Transfer helps you move products on demand with speed and precision, turning stagnant stock into active sales and reducing hidden losses.
With this feature, you can rebalance inventory across branches efficiently and keep products available where customers need them most.
📌 Article overview
- Activation requirements
- Inventory Transfer page
- Creating a new inventory transfer request
- Accepting transferred products at the destination branch
✅ Activation requirements
To use the Inventory Transfer feature, the following conditions must be met:
- You must be the store owner, general manager, or branch manager
- The Multiple Markets feature must be enabled
Inventory Transfer page
Accessing the Inventory Transfer page
- From the main dashboard menu, click Products, then select Inventory Transfer.
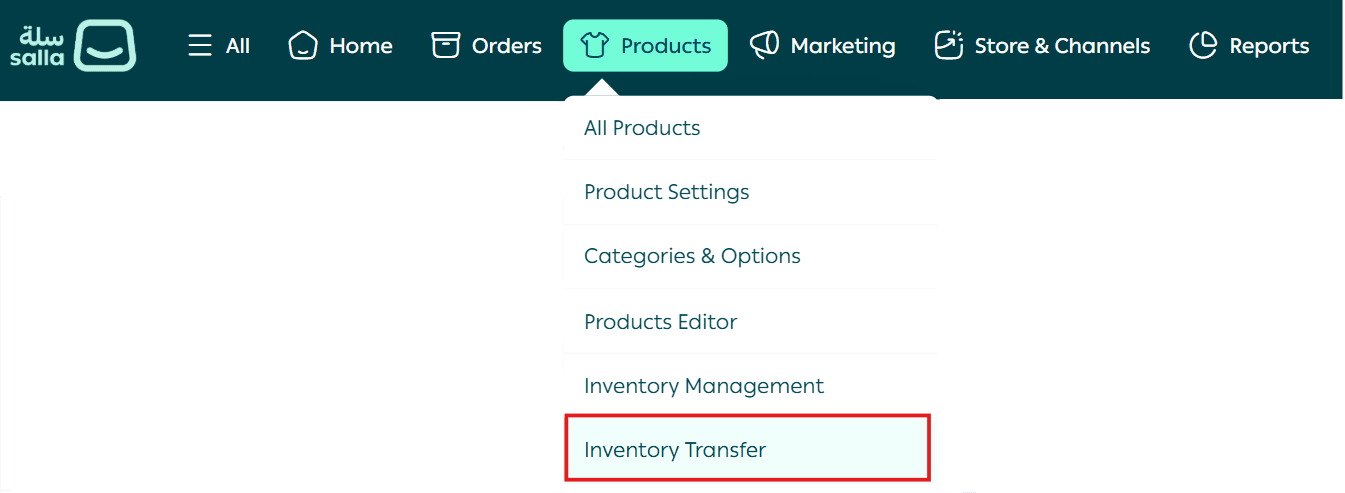
2. You will be directed to the Inventory Transfer page.
What the Inventory Transfer page includes
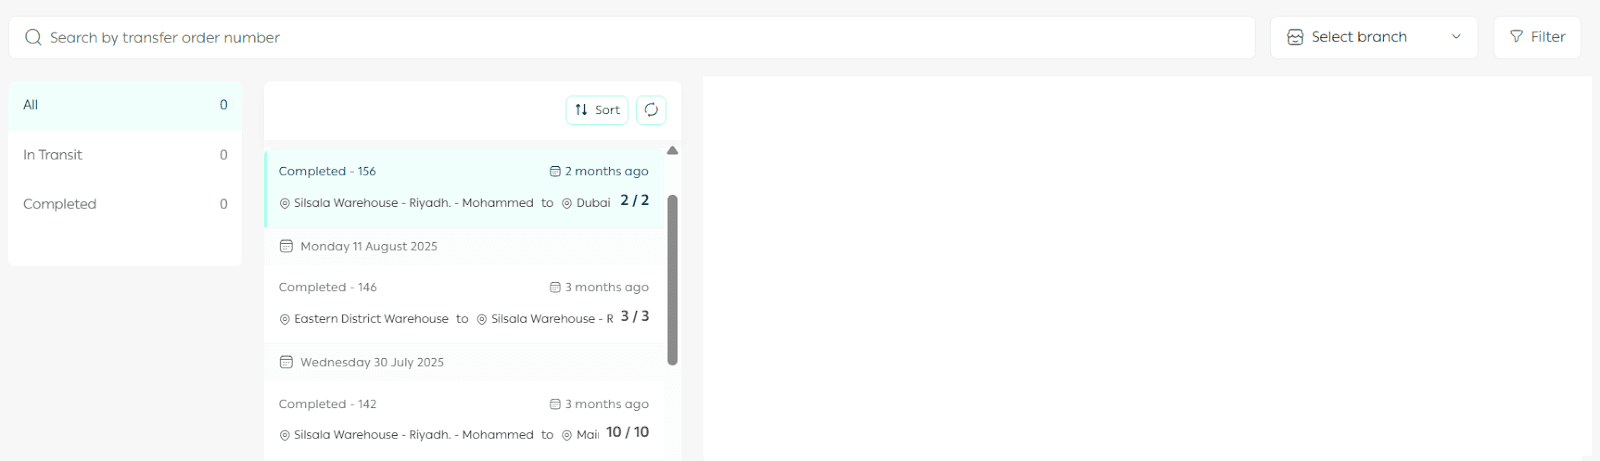
Search bar and filters

- Use the search bar to find a specific transfer request or track a shipment

- From the branch selector, choose the sending branch to filter requests by location

- Use the filter button to apply filters such as request date, warehouse or branch, or transfer status

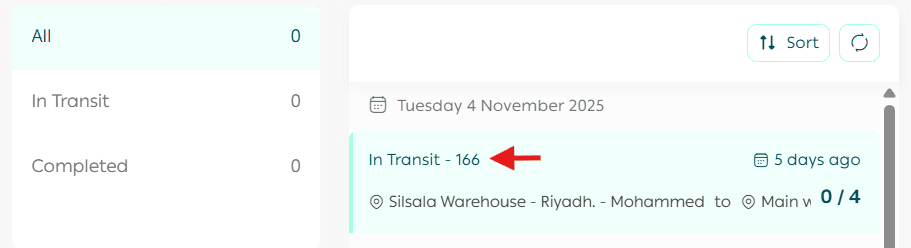
Requests list by status
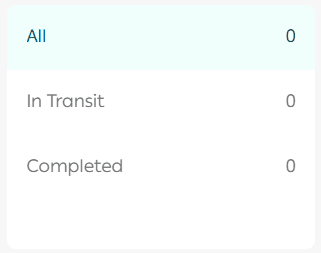
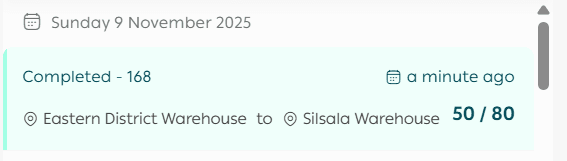
You can track all transfer requests from the main list or review them by status, such as:
- In transit
- Completed
Request details
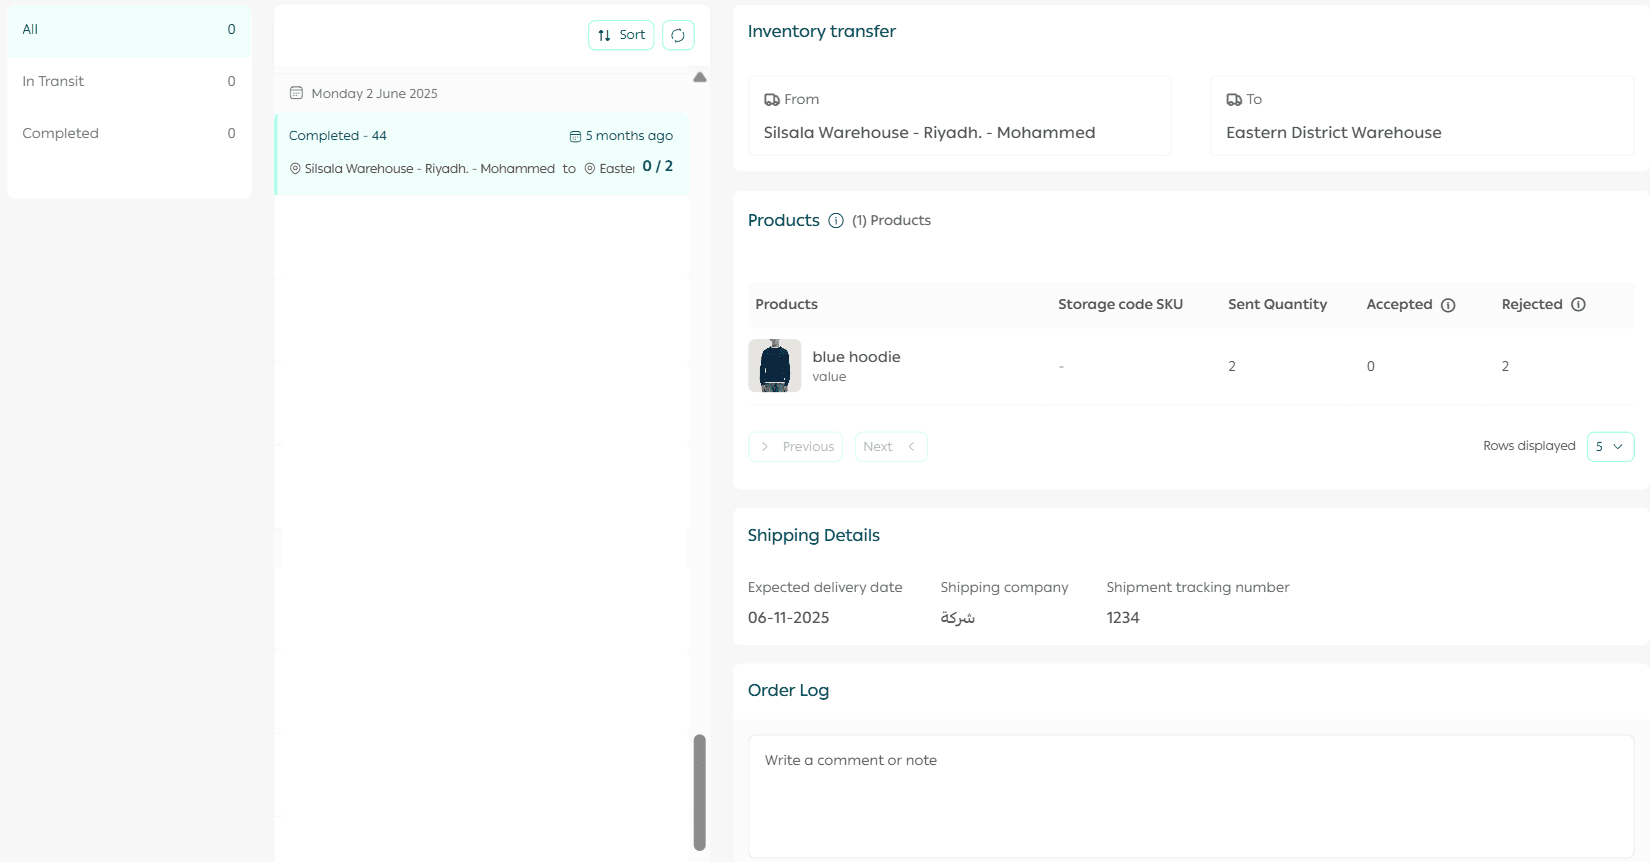
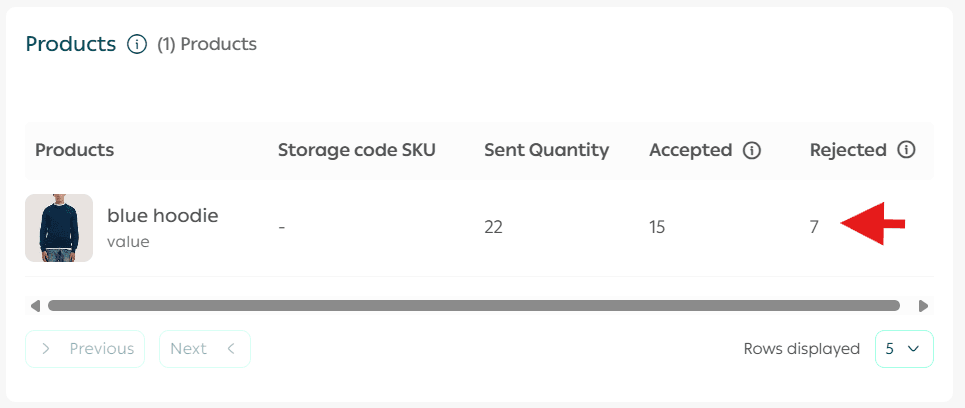
Each request displays detailed information, including:
- Execution date
- Request status
- Transferred products
- Shipping details
- Request history
For completed transfers, quantities are shown in the format sent quantity slash accepted quantity.
Example: 5 sent and 0 accepted appears as 0/5.
Creating a new inventory transfer request
- From the Inventory Transfer page, click Create new transfer.

2. Fill in the inventory transfer request details.
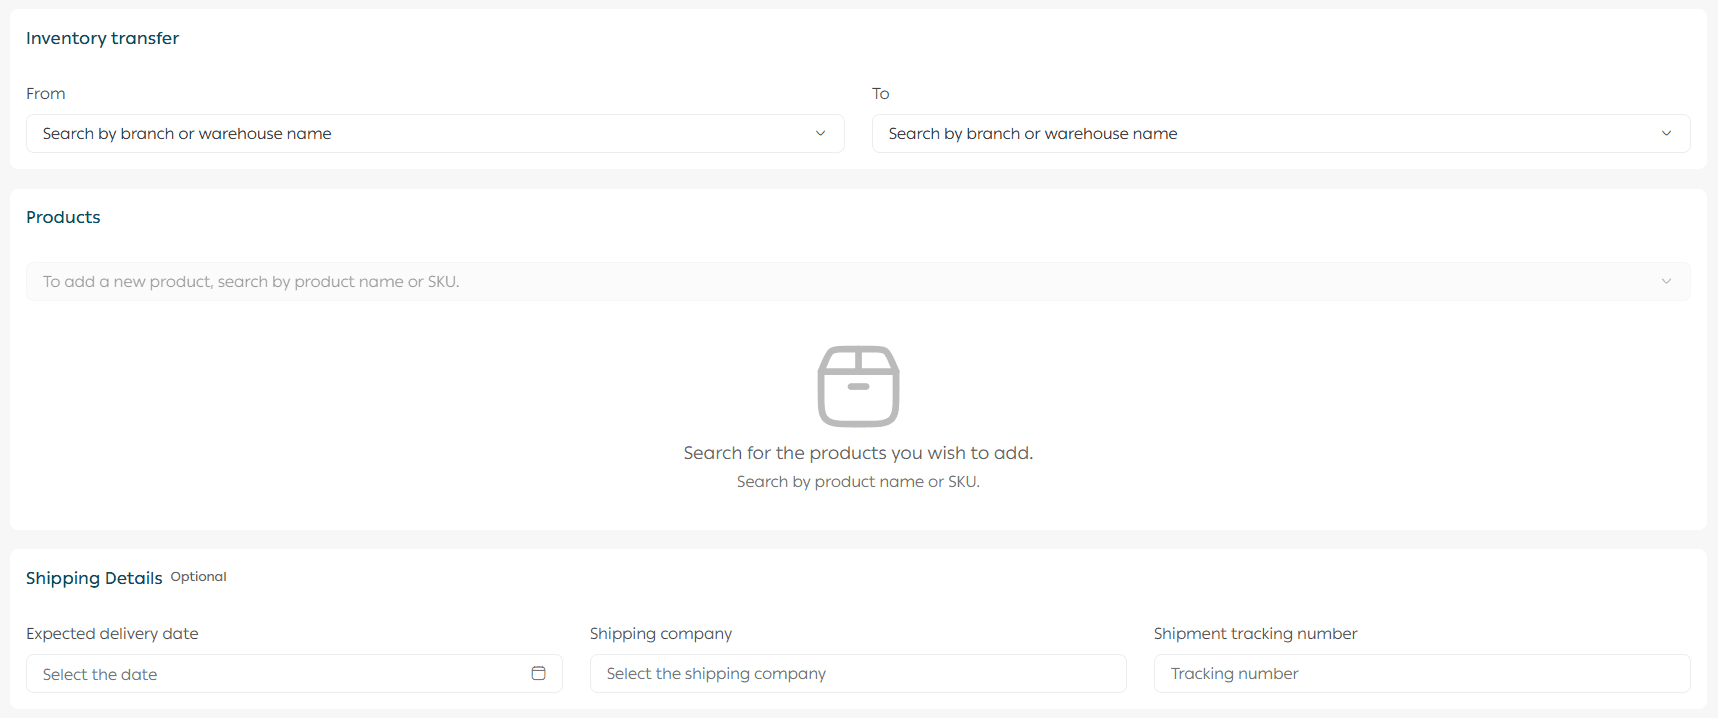
Adding products to the transfer
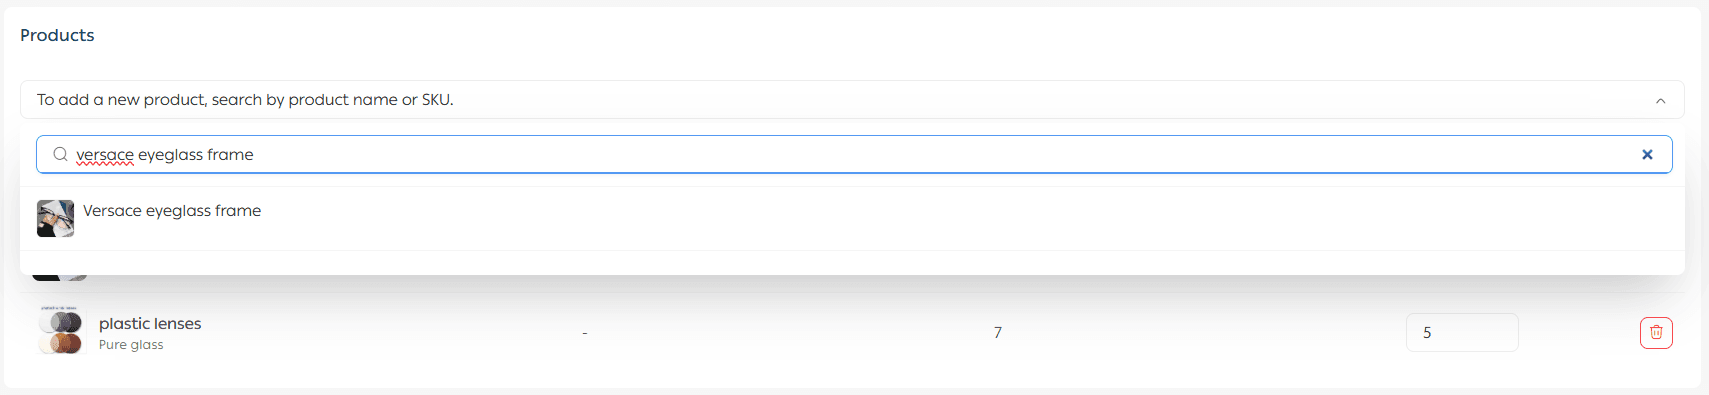
3. Add products using the search bar.
Please note that products can only be transferred between branches if all of the following conditions are met:
- The product type must be one of the following: ready product, made to order service, or food product
- The product must be linked to the sending branch. This is enabled from the product page under Advanced information by activating Show product in branch
- Available quantities must be added for the product
- The product must require shipping
4. Specify the quantity you want to send to the branch or warehouse.

5. Add shipping information if needed. This step is optional.

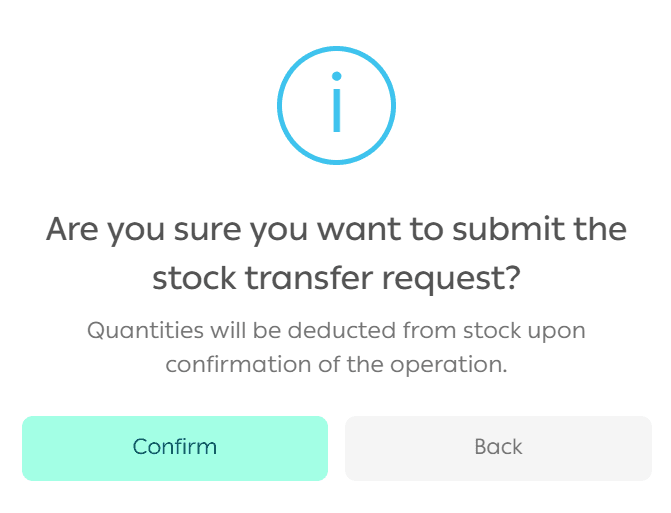
6. Click Transfer inventory. A confirmation message will appear. Click Confirm.
The inventory transfer request will be sent successfully and marked as In transit.
Accepting transferred products at the destination branch
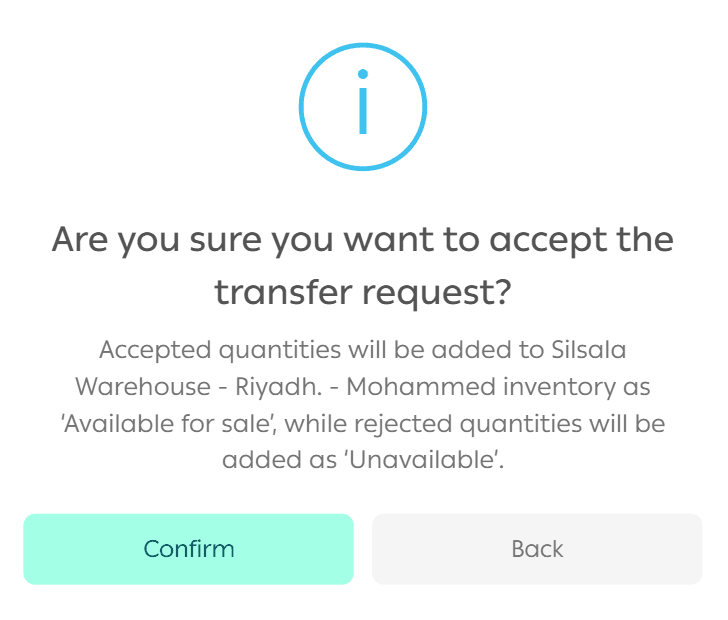
From the request details page:
- To accept all products, click Accept all
- To reject all products, click Reject all

Partial acceptance or rejection
To accept a specific quantity of each product, use Accept allowed quantity. The system will automatically calculate the rejected quantity.
Note: This option is optional and is only used if you want to partially accept or reject products.
If you want to fully accept or reject the request, simply use Accept all or Reject all without specifying quantities.
To complete the transfer, click Confirm.
To cancel the process, click Cancel.

A confirmation message will appear. Click Confirm to finalize the inventory transfer.
Inventory transfer completed
Congratulations. The inventory transfer has been completed successfully.
Note: Once the receiving branch or warehouse accepts the inventory, the quantities are added directly to the available stock and become ready for display and sale in the store.
Frequently asked questions
Which plans support Inventory Transfer?
Currently, this feature is available only on the Special plan.