Adding food and beverage products to your online store requires extra accuracy, both for your business and your customers. In this guide, you will learn how to manage food product details such as calories, order options, quantities, and customization settings. This ensures your food and beverage items are presented clearly, attractively, and in a way that supports customers’ dietary needs.
📌 Article overview
Adding and managing food products:
- Basic product information
- Advanced settings
- Quantities
- Order form and options
- Custom fields
Add and Manage a Food Product
1. Go to Products
From the main menu, click Products.

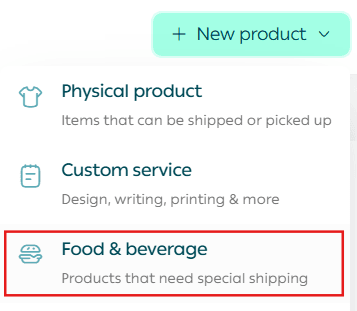
2. Create a New Food & Beverage Product
From + Create New Product, click Add, then select Food & Beverage Product.
1. Basic Product Information
Enter the basic product details, then click Save.
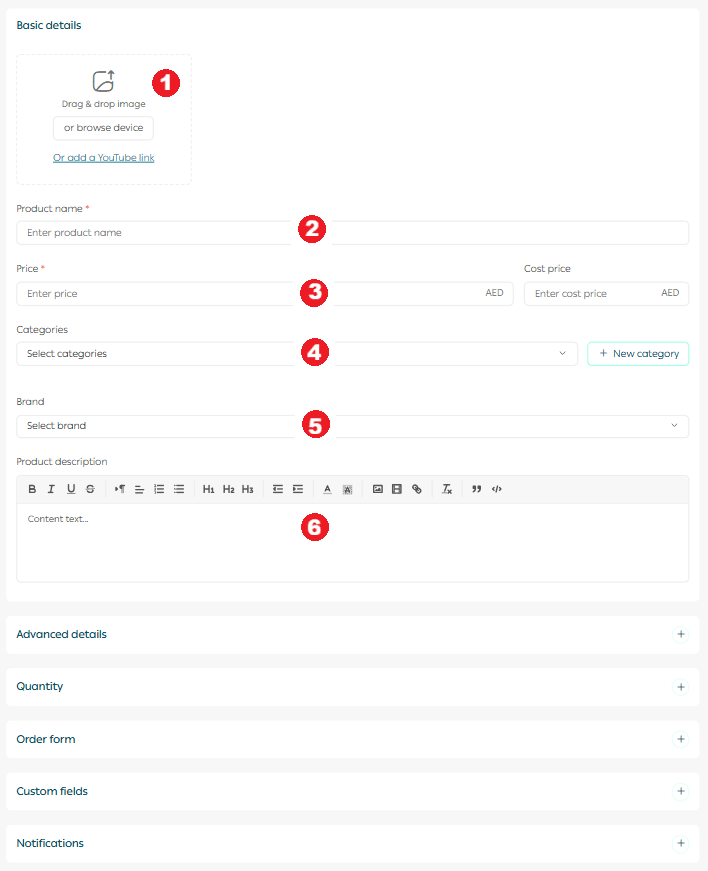
Required fields
- Product images
Upload one or more images that clearly represent the food or beverage.
For more details, see Upload Product Images and Videos.
2. Product name
The name that will appear to customers in your store.
3. Product price
Set the selling price and cost price to track net profit accurately.
4. Product category
Helps organize products, improve reporting, and control product display.
5. Brand
Select the brand associated with the product.
6. Mahally and Souq Eljomla
Choose the appropriate categories if applicable.
7. Product description
Add a detailed description explaining ingredients, preparation, or serving details. You can format text, add images, videos, and links to enhance clarity.
Important note: Mahally and Souq Eljomla are currently available only for stores in Saudi Arabia.
2. Advanced Settings
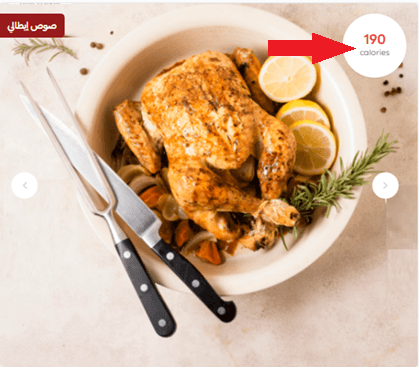
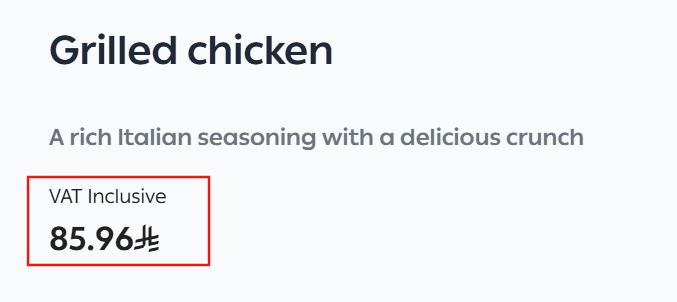
1. Calories information
From the Advanced Information section, enter the calorie value for the food product.

The calorie count will appear clearly on the product page to help customers make informed decisions.
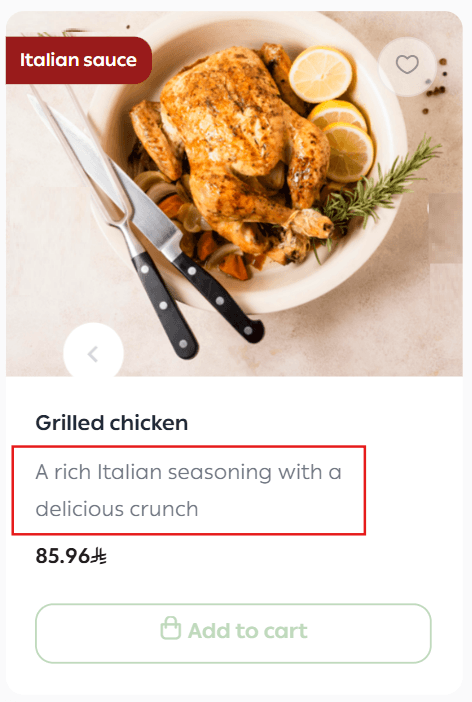
2. Product subtitle

Appears as a highlighted detail under the product name.
3. Promotional title
Displayed on the product image to attract attention to an offer, feature, or key benefit.

4. Discounted price and schedule
Enter the discounted price and define the start and end dates for the promotion.

5. Sales channels

Control whether the product appears on:
- Store website
- Store mobile app
- Souq Eljomla
You can also control product visibility by branch.
Important note: Souq Eljomla is currently available only for stores in Saudi Arabia.
6. Product requirements

- File upload on order
Allow customers to upload files when ordering, such as a reference image for cake decoration or custom design requests.
- Order notes
Enable customers to add notes to personalize their order.
- Taxable product
Specify whether the product is subject to tax. A tax note will appear next to the price for customers.
7. Product tags
Add multiple tags to help customers discover related products.

Tags appear on the product card, and clicking a tag shows all products with the same tag.
8. Shipping options
Specify whether the product requires shipping.
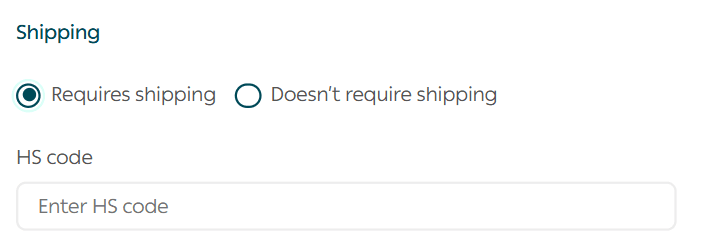
- Requires shipping
The customer will select a shipping company during checkout.
- Does not require shipping
The customer proceeds directly to payment without choosing a shipping provider.
Note: Selecting “Does not require shipping” does not mean the product will not be delivered. It simply means a shipping company selection is not required.
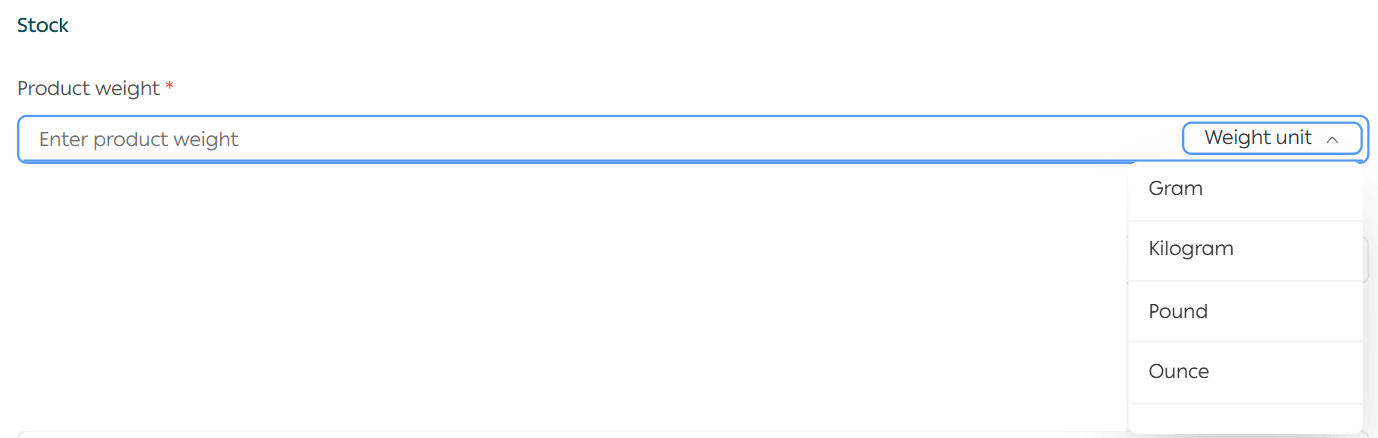
9. Product weight
Enter the product weight using your selected unit.
This is required by shipping companies that calculate delivery fees based on weight.
10. SEO optimization
Optimizing food product pages improves search visibility and attracts more customers. Salla provides built-in SEO tools:
- Product page title
Include the product name, category, and brand.
- Custom product URL
Customize the URL using the product name, category, brand, and SKU.
- Meta description
Write a clear description that includes the product name, category, and brand.
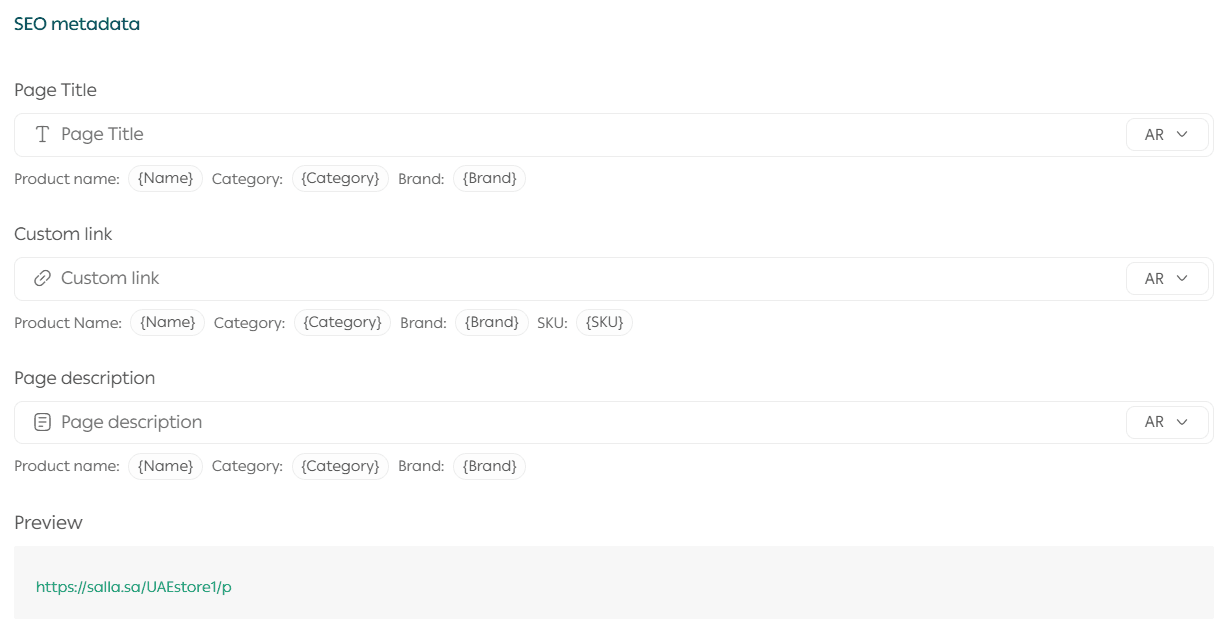
Benefits of adding SKU to the product URL
- Improved search engine indexing accuracy
- Easier differentiation between similar food items
- Faster access for customers searching by SKU
SEO reminder: The clearer and more readable your product URLs are, the stronger your customer experience and search performance will be.
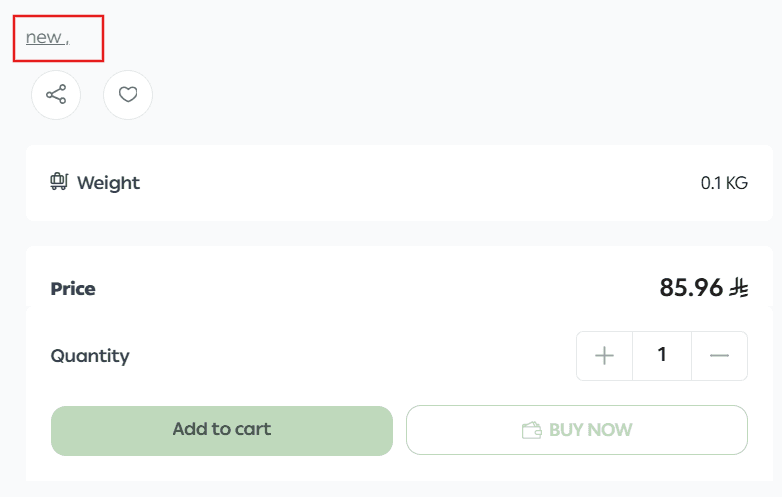
4. Quantities
Add the available quantity for the product.
You can update quantities at any time and assign them to specific branches.
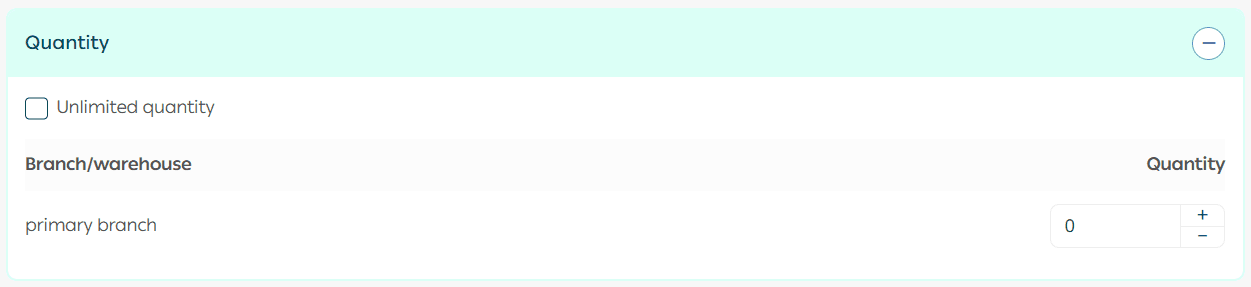
For more details, see Managing Product Options.
5. Order form
The order form allows you to add different types of input fields to a Food & Beverage product order page. This feature enables customers to provide specific details when placing an order, such as customization requests, delivery times, or additional instructions.
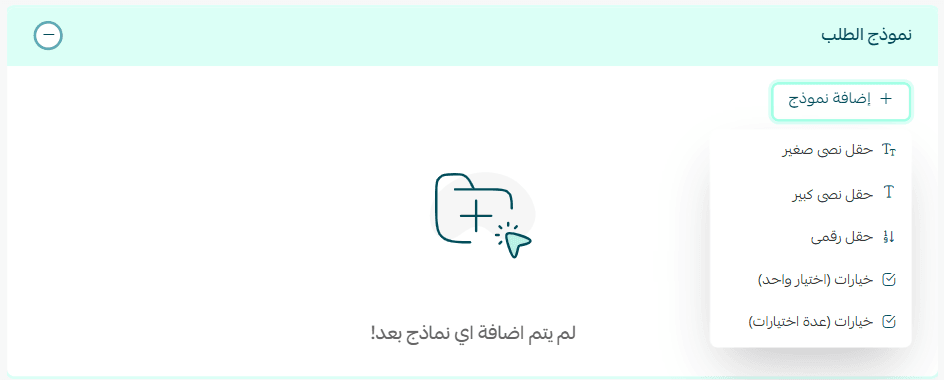
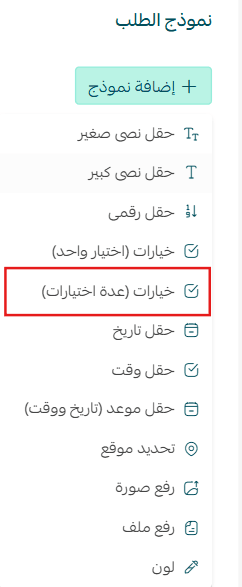
You can add several types of fields to collect the required information from customers.
Text fields (Short/Long)
You can add text fields to allow customers to write notes or provide instructions related to their order.
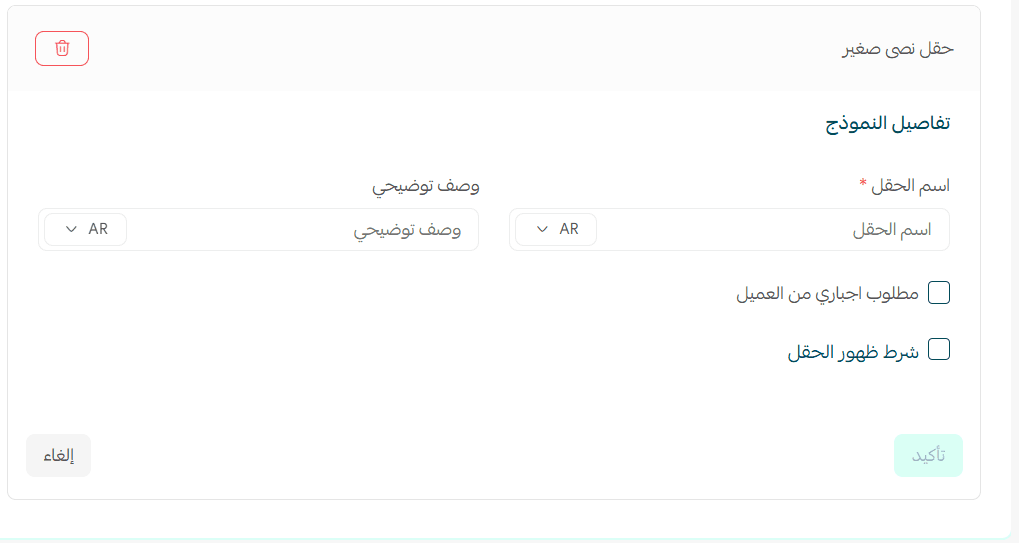
Small Text Field
A short text input field that allows customers to enter brief information.
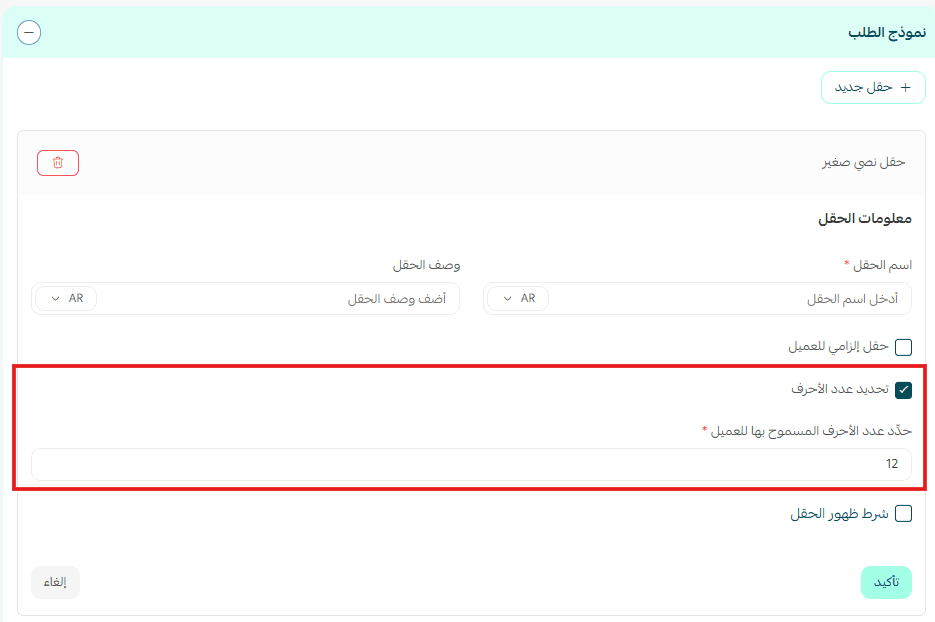
You can also define the maximum number of characters allowed.
Examples of use:
- Writing a short note
- Entering a name to be printed on packaging
- Providing quick instructions
Large Text Field (Paragraph)
A larger text area where customers can write detailed explanations or longer notes.
Examples of use:
- Custom preparation instructions
- Special dietary requests
- Detailed delivery notes
Numeric Field
Add a field that requires the customer to enter a numeric value.
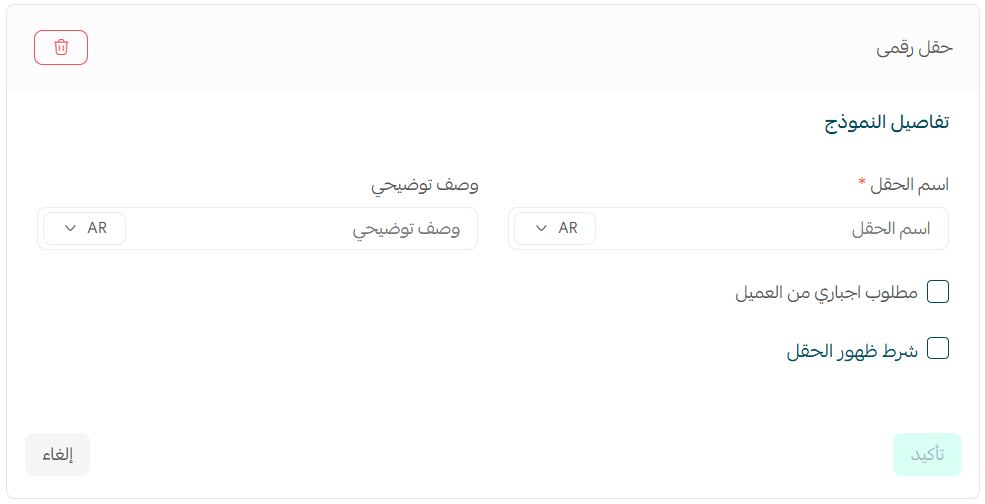
Examples of use:
- Number of guests
- Quantity required for catering
- Table number or event size
Date and Time Field
This field allows customers to select a specific date and time, such as a delivery or pickup time.
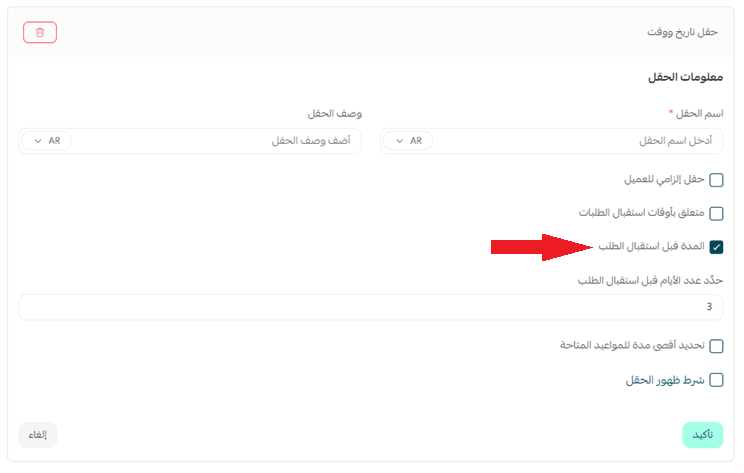
You can also control the minimum number of days required before the order can be received, ensuring sufficient preparation time.
Examples of use:
- Delivery date
- Event time
- Pickup appointment
Options (Single Choice / Multiple Choices)
You can add selectable options to allow customers to choose product variations or add-ons.
Single Choice
Displays a list of options where the customer can select only one option.
Example:
- Choose one sauce type
- Choose one portion size
Multiple Choices
Displays a list of options where customers can select multiple options.
Example:
- Extra toppings
- Additional ingredients
Adding Options
- Go to the Options tab and click Add New Option.
2. Enter the option details. To add more values, click + Add Value.
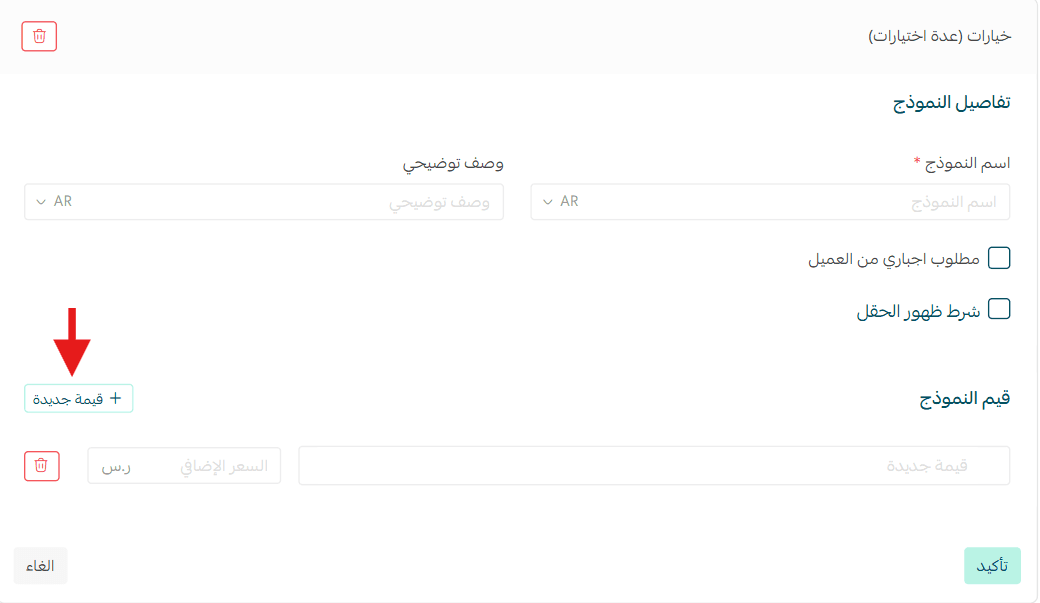
Provide the following information:
Option Name
Example: Types of vegetables
- Option Type
- Single choice
- Multiple choices
Option Values
Example:
- Onion
- Tomato
- Lettuce
3. Click Confirm.
Example: A food product may allow customers to select additional ingredients such as onions, tomatoes, or lettuce.
Editing an option
After successfully adding product options:
- Click the More (+) icon next to the Quantities section.
- Select Edit.
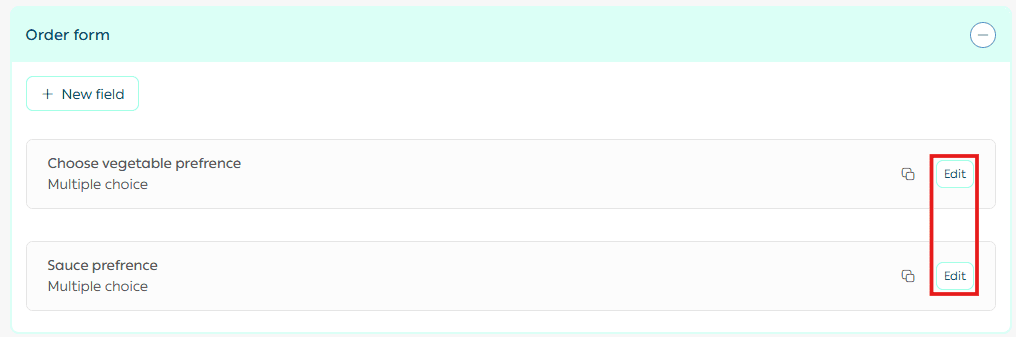
Enter the quantity details for the first option as previously explained, then proceed to edit the remaining options if needed.
Duplicating an option
To duplicate an existing option:
- Click Duplicate.
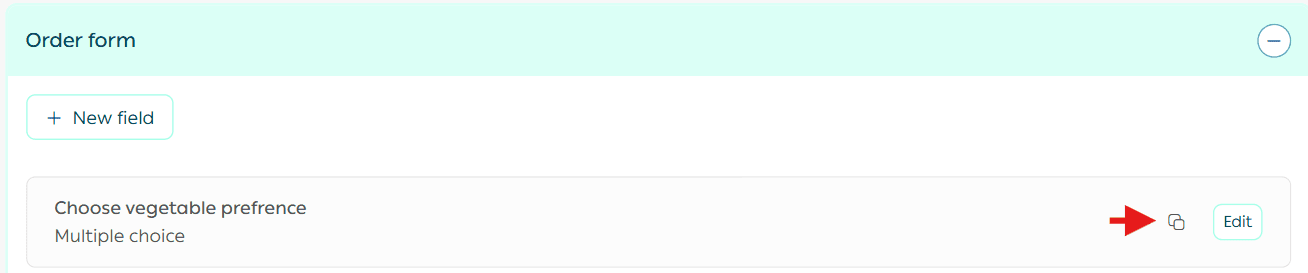
You can then edit the duplicated option and save it.
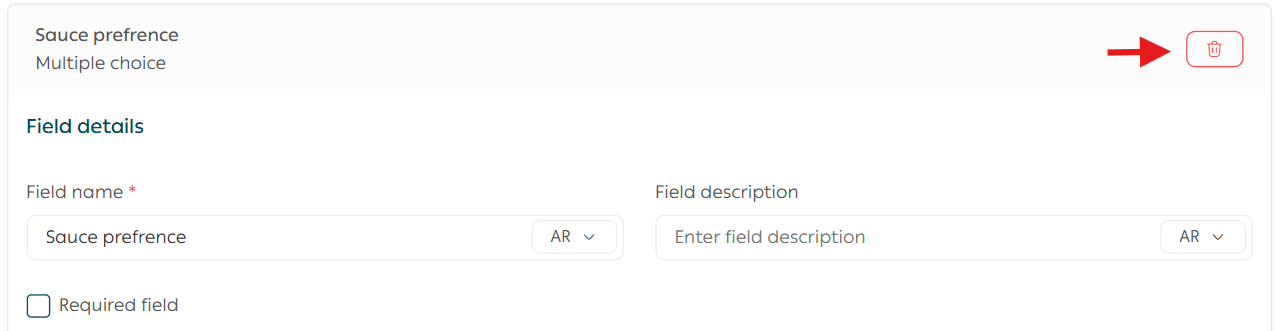
Deleting an option
To remove an option:
- Open the option details.
- Click Delete.
Notes
- Required Field
If enabled, the customer must fill in this field before adding the product to the cart.
- Conditional Field Display
This option allows a field to appear only when a specific value is selected in another field.
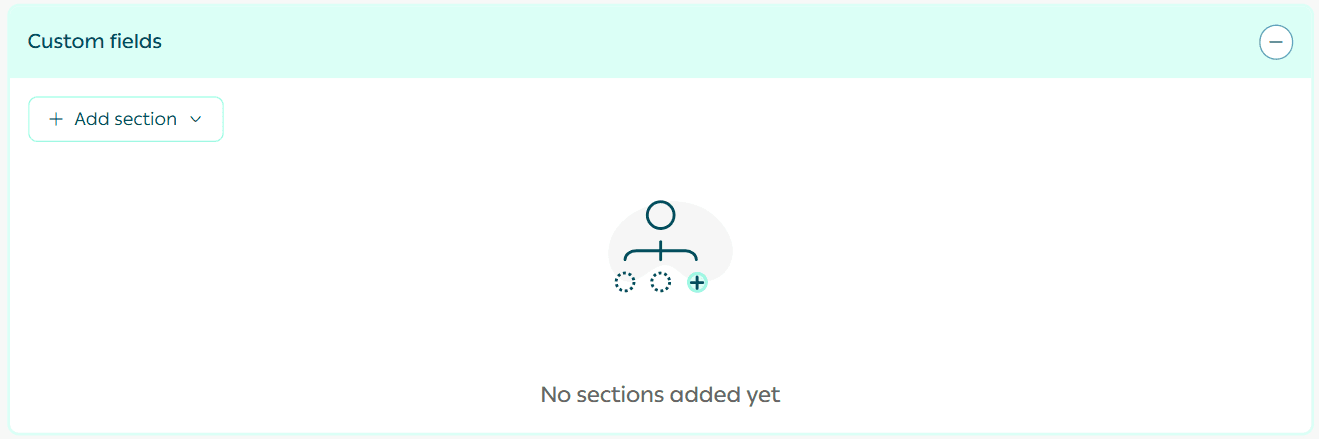
6. Custom Fields
You can add custom fields to store additional product information and choose whether to display this section on the product page in your store.
For more details, see the guide on Product Card FAQs.