A Google Play Developer account is your gateway to publishing and managing apps and games on the Google Play Store. Through Google Play Console, you can upload apps, manage releases, track performance, and access detailed analytics and reports.
This guide explains how to create a company Google Play Developer account, complete payment, and verify business ownership—steps required to use the Salla App Maker.
📌 Article overview
- Requirements for creating a Company Google Play Developer account
- Steps to purchase a Google Play Developer account
- How to verify company ownership with Google
Requirements for a company Google Play Developer Account
Creating a company (organization) account is mandatory when subscribing to the Salla App Maker.
New individual accounts are not accepted.
Key requirements:
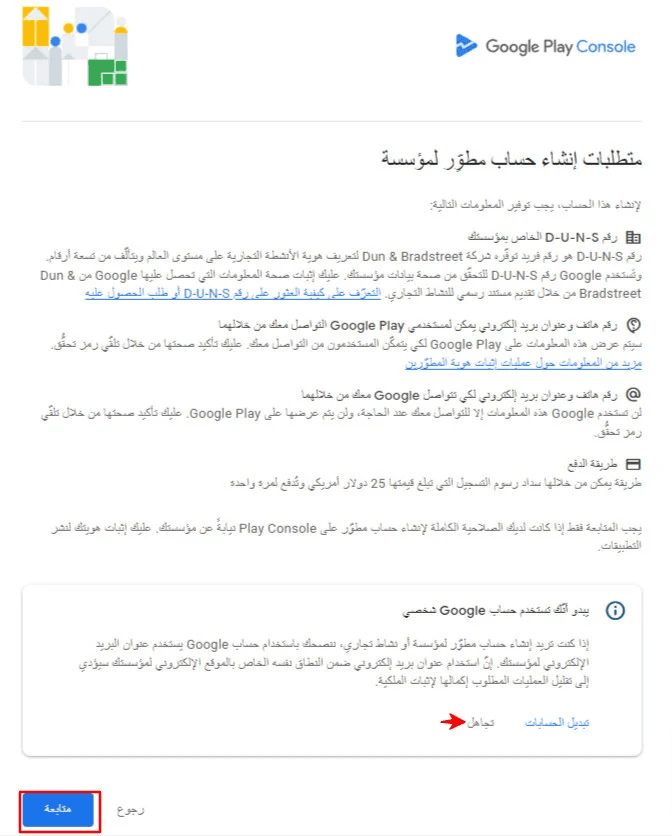
- D-U-N-S Number
Required to verify your business identity
Learn more about the Global D-U-N-S Number
2. Public contact email and phone number
Visible to users on Google Play
3. Google contact email and phone number
Used by Google for official communication
4. Payment method
A one-time registration fee of $25
5. Legal proof of business identity
Required to publish apps under your company name
Steps to purchase a Google Play Developer Account
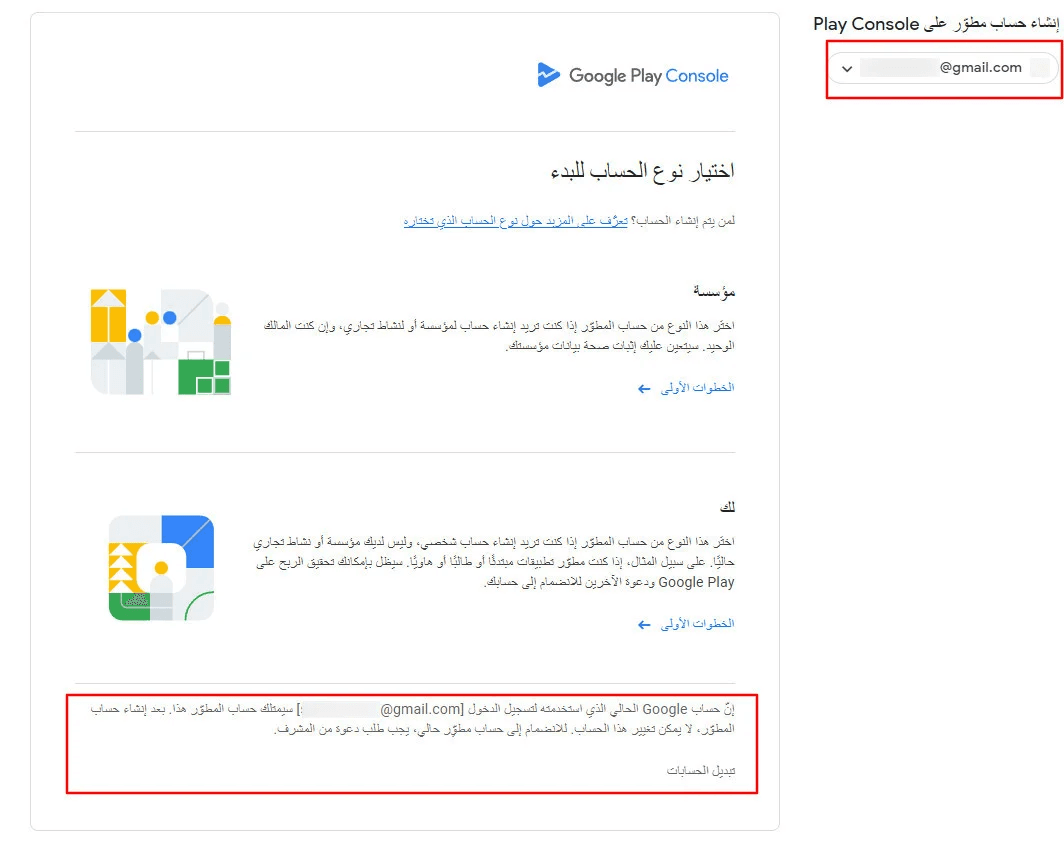
1️⃣ Start registration on Google Play Console
Go to Google Play Console and start registration using:
- A Gmail account, or
- Your business email
🔔 Important: The selected email will become the permanent owner of the developer account and cannot be changed later.
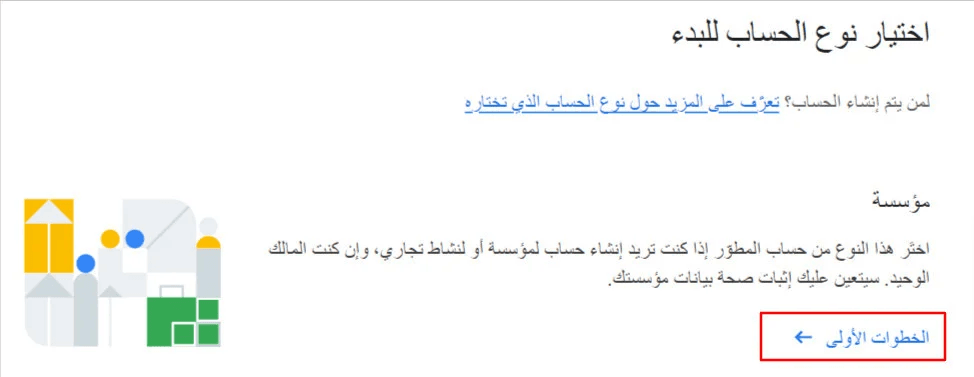
2️⃣ Select account type
Choose Organization (Company) to begin creating a business developer account.
3️⃣ Review company account requirements
A screen will appear explaining the requirements.
Click Continue to proceed.
4️⃣ Choose your developer name
This name appears publicly under your apps on Google Play.
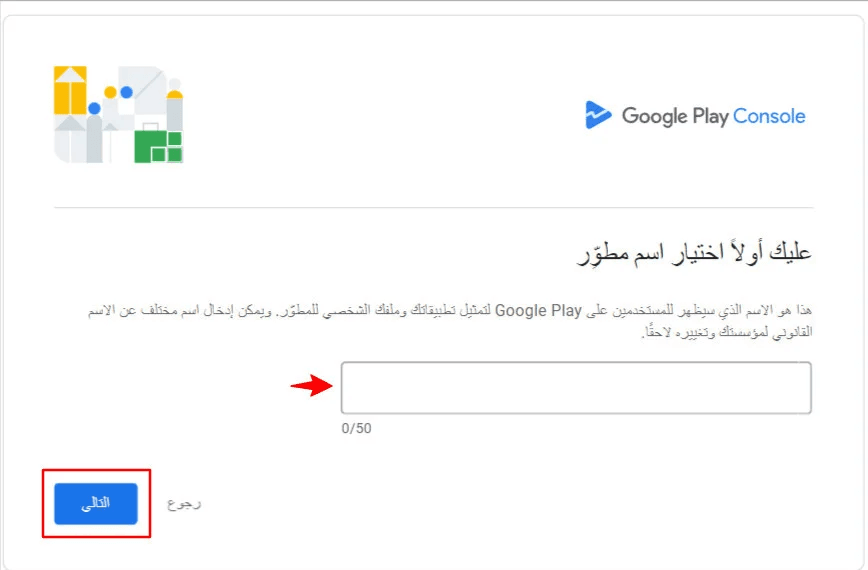
🔔 Key guidelines:
- Can differ from your legal company name
- Must be unique and unused
- Can be in Arabic, English, or both
- Maximum length: 50 characters
- Can be changed later by the account owner
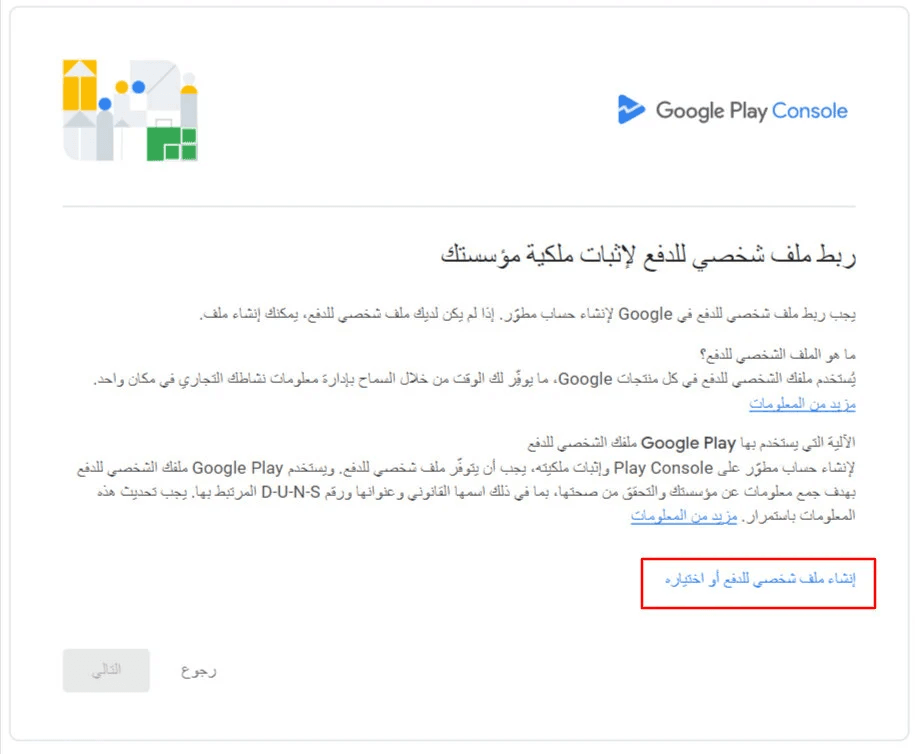
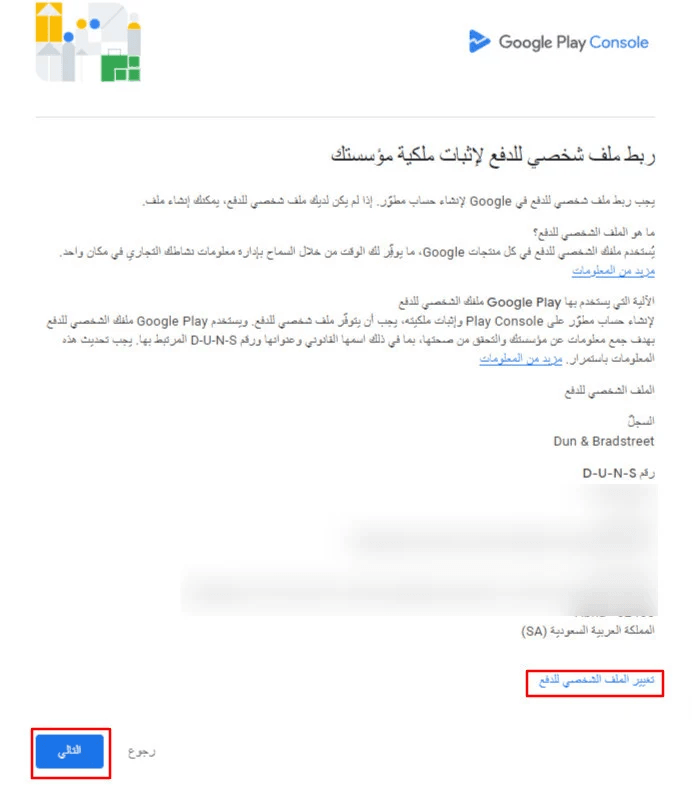
5️⃣ Set up the payment profile
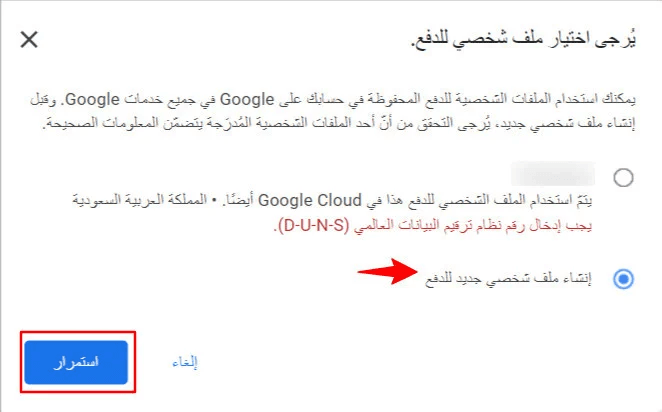
Choose an existing payment profile or click Create a new payment profile (recommended for companies).
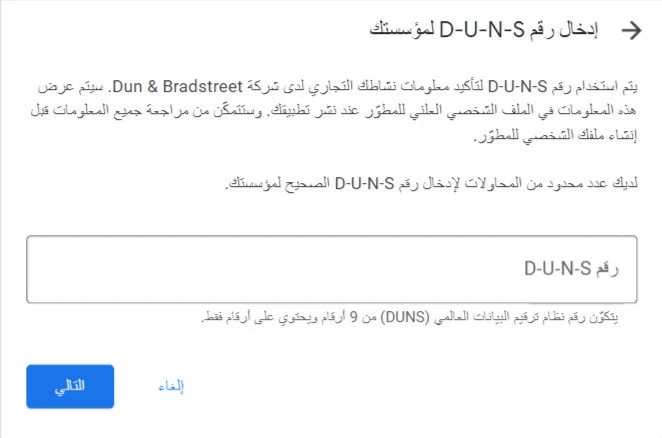
- Enter your D-U-N-S number
- Click Next
- Review company details carefully
- Confirm if the information matches your commercial registration
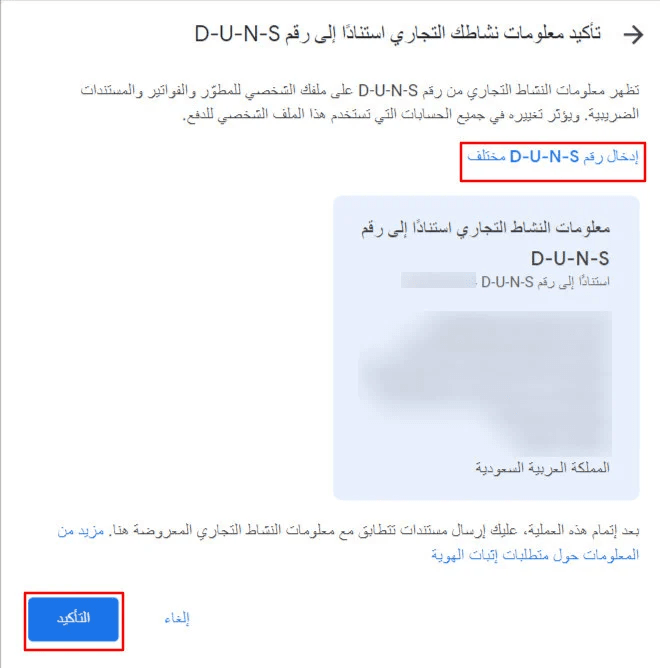
⚠️ After this step, you’ll be required to submit documents that match these details exactly.
Once confirmed:
- Approve payment profile creation
- Click Next to continue
- You may change the payment profile later if needed
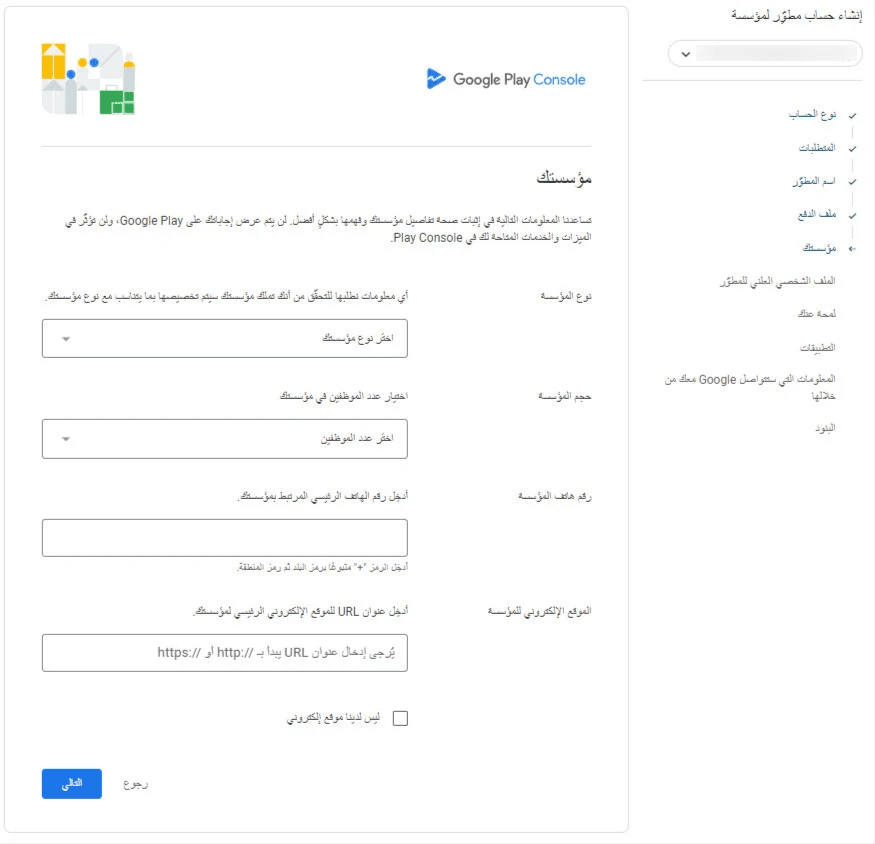
6️⃣ Enter organization details
Provide the following information:
- Organization type (usually Company / Business)
- Number of employees
- Main business phone number (starting with +966 or +971)
- Official company website URL
(You can obtain this from your store domain or domain settings)
7️⃣ Complete public developer profile
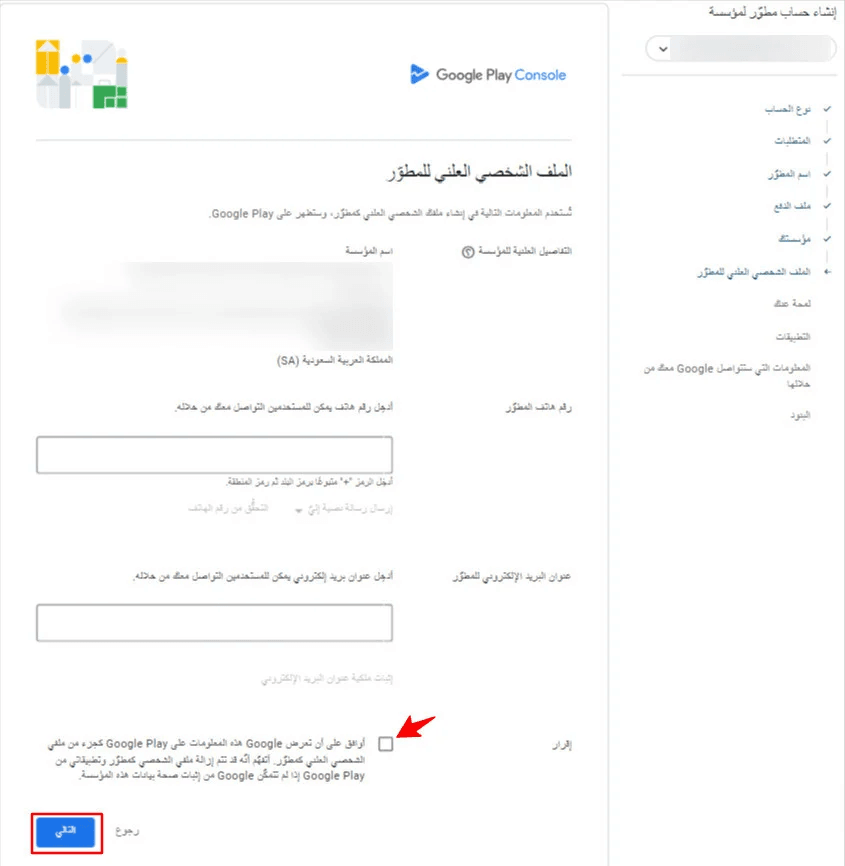
- Public company details are auto-filled based on the D-U-N-S record
- Enter a user-facing phone number (+966 or +971) and verify it via SMS

- Enter a user-facing email address and verify ownership

- Confirm the declaration and click Next
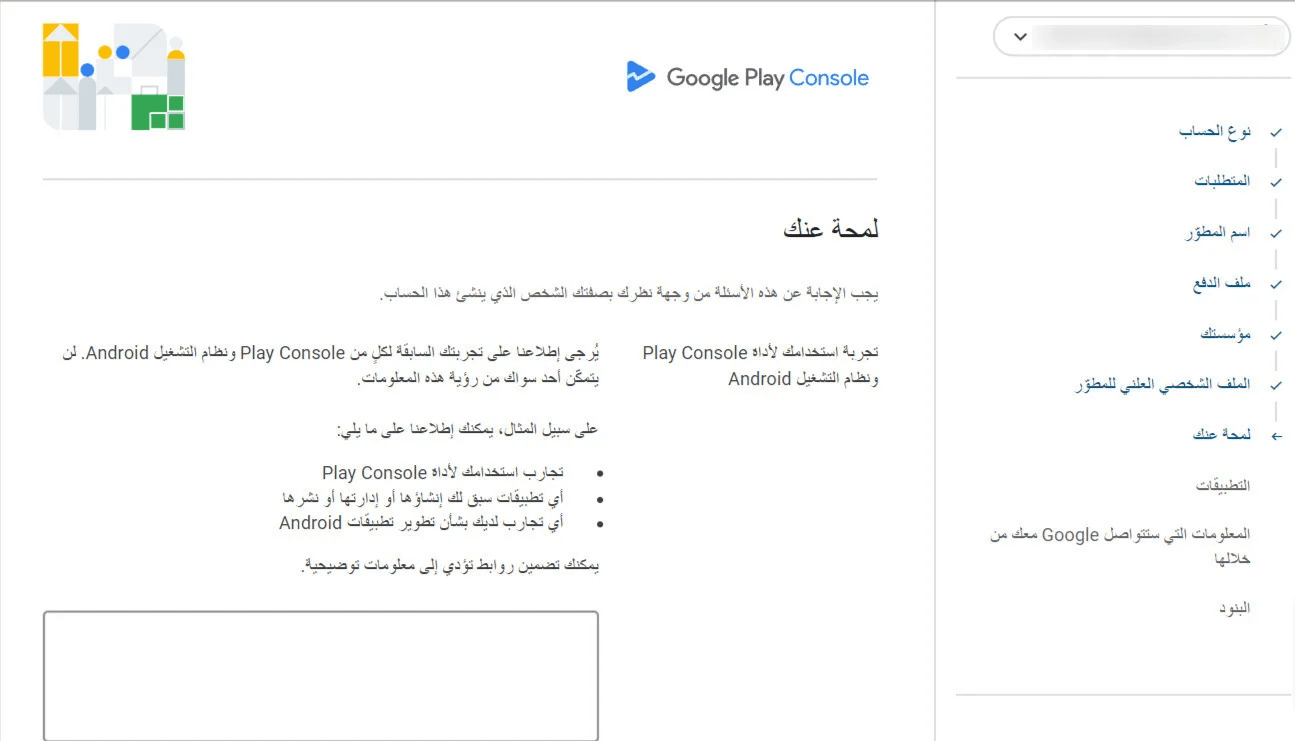
8️⃣ Developer background information
Briefly explain:
- Why you’re joining Google Play
- Any previous app publishing experience (if applicable)
This information helps Google better understand developer needs.
Answer accordingly and click Next.
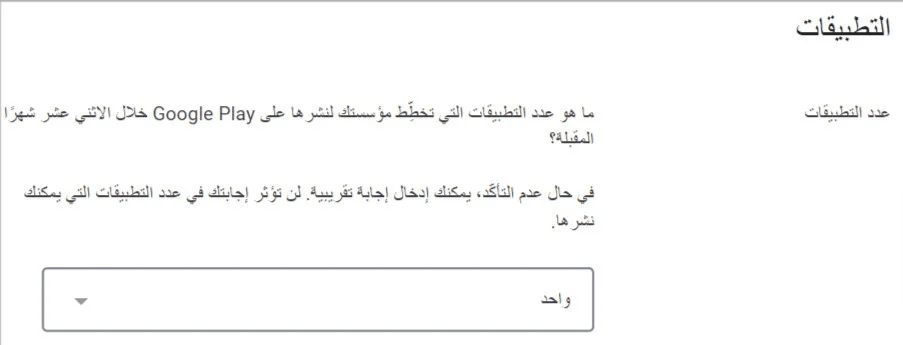
9️⃣ App development plans
- Select the number of apps you plan to publish (approximate is fine)
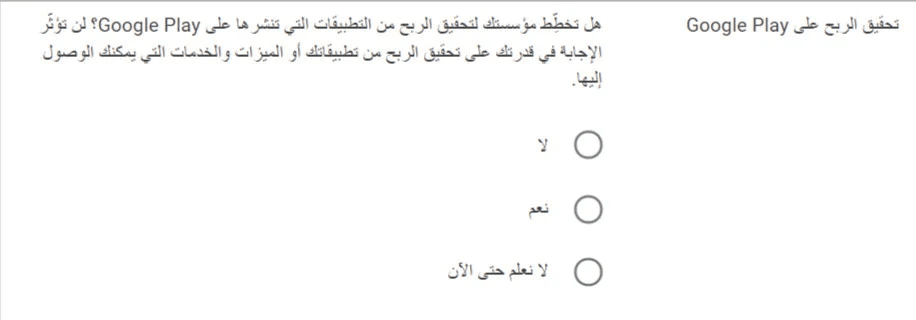
- Answer whether you plan to monetize your apps
(Usually Not sure yet applies)
- Select app categories
For Salla apps, choose None of the above
Click Next.
🔟 Google contact information
Provide internal contact details (not visible to users):
- Primary contact name
- Contact email for Google
- Preferred language
- Contact phone number
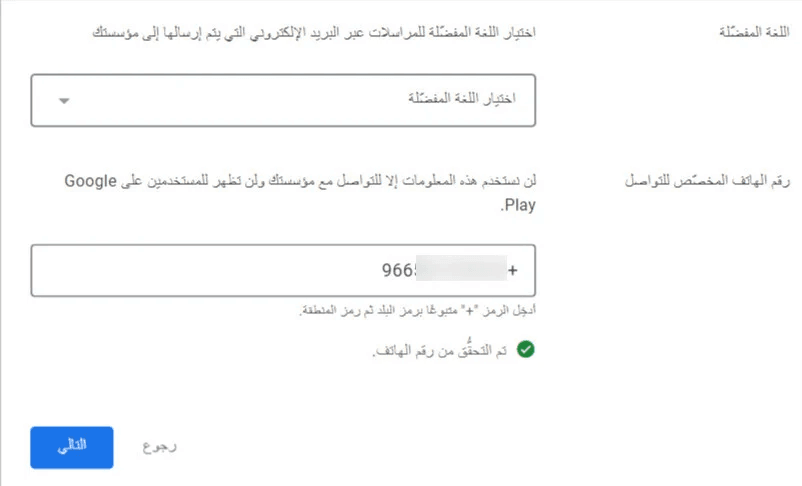
Click Next.
1️⃣1️⃣ Review agreements and policies
Read and accept:
- Developer Distribution Agreement
- Google Play policies
Click Create account and pay.
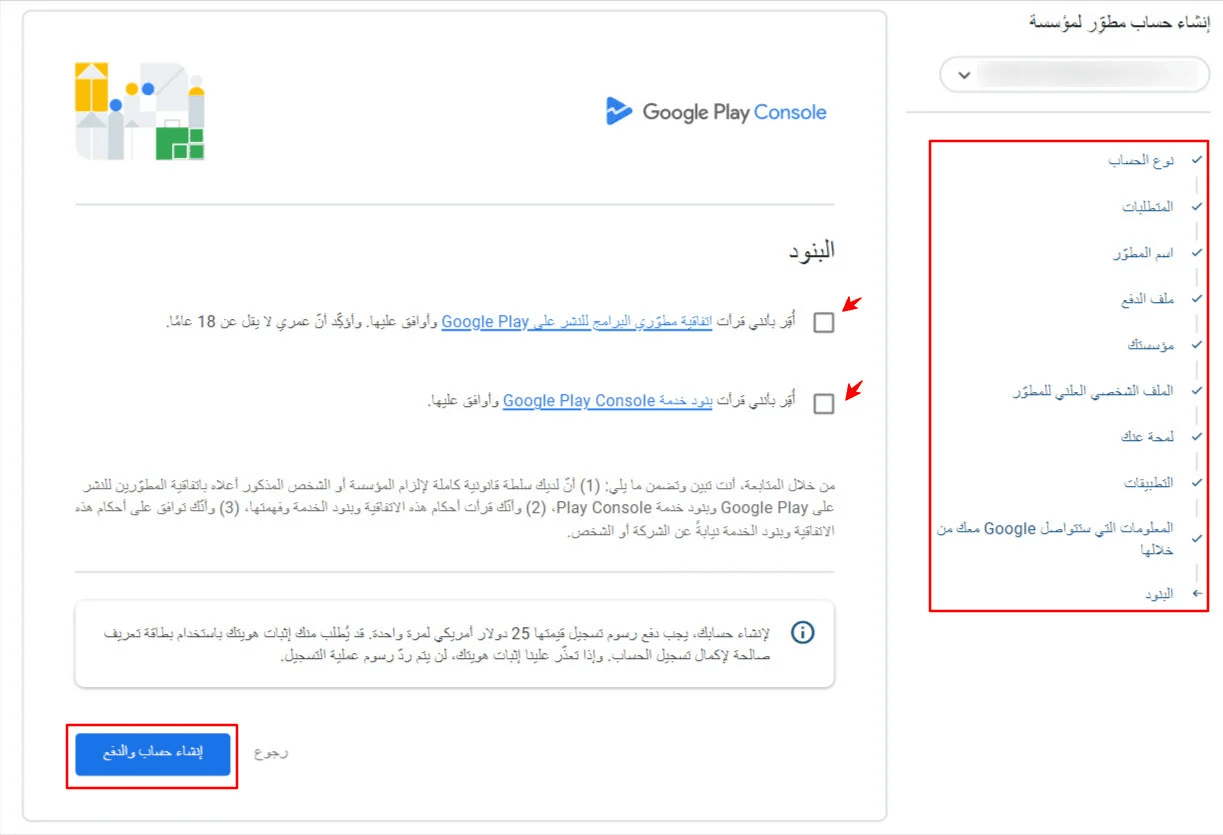
1️⃣2️⃣ Complete payment
- Add a Visa or MasterCard credit card
- Prepaid cards are not accepted
- Ensure at least $25 is available
✅ The $25 fee is paid once only and valid for the lifetime of the account.
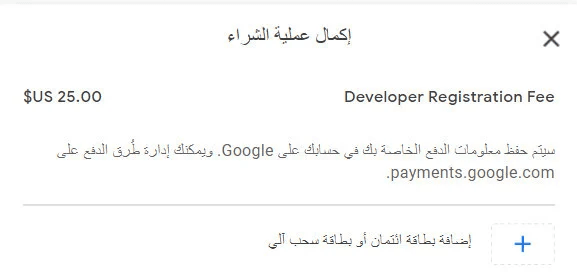
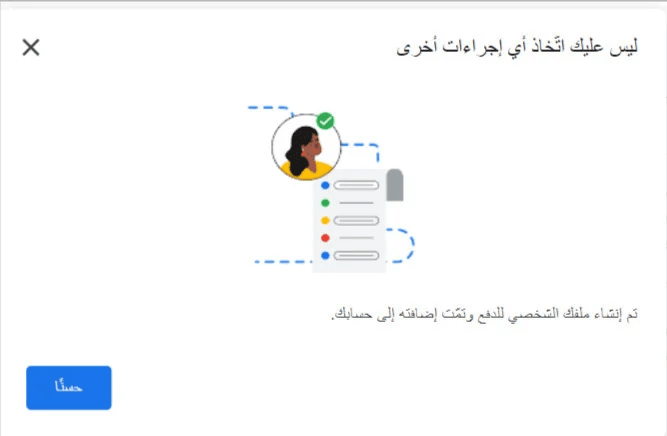
After payment:
- Your account is created successfully
- A receipt is sent to your email
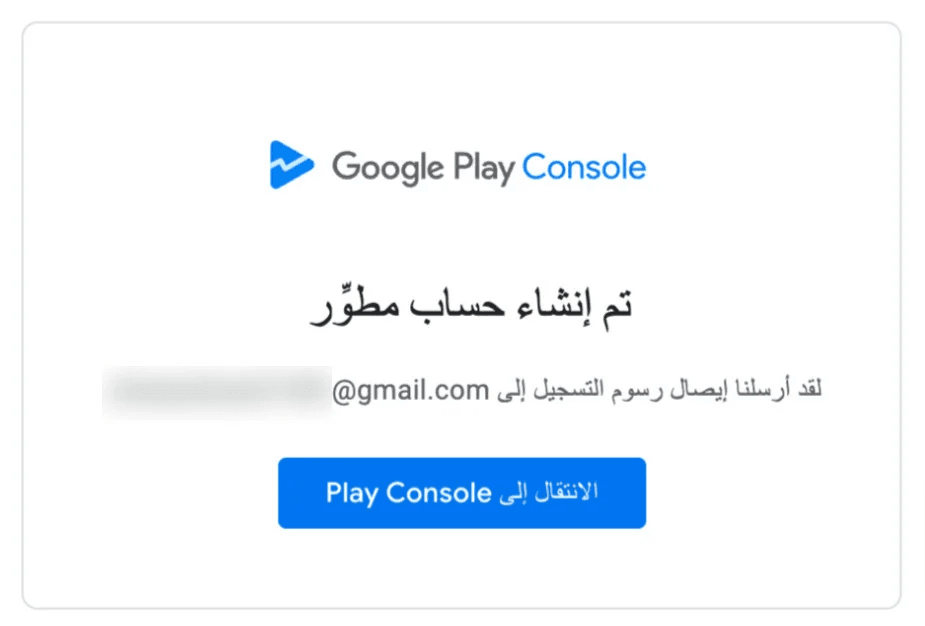
- Click Go to Play Console
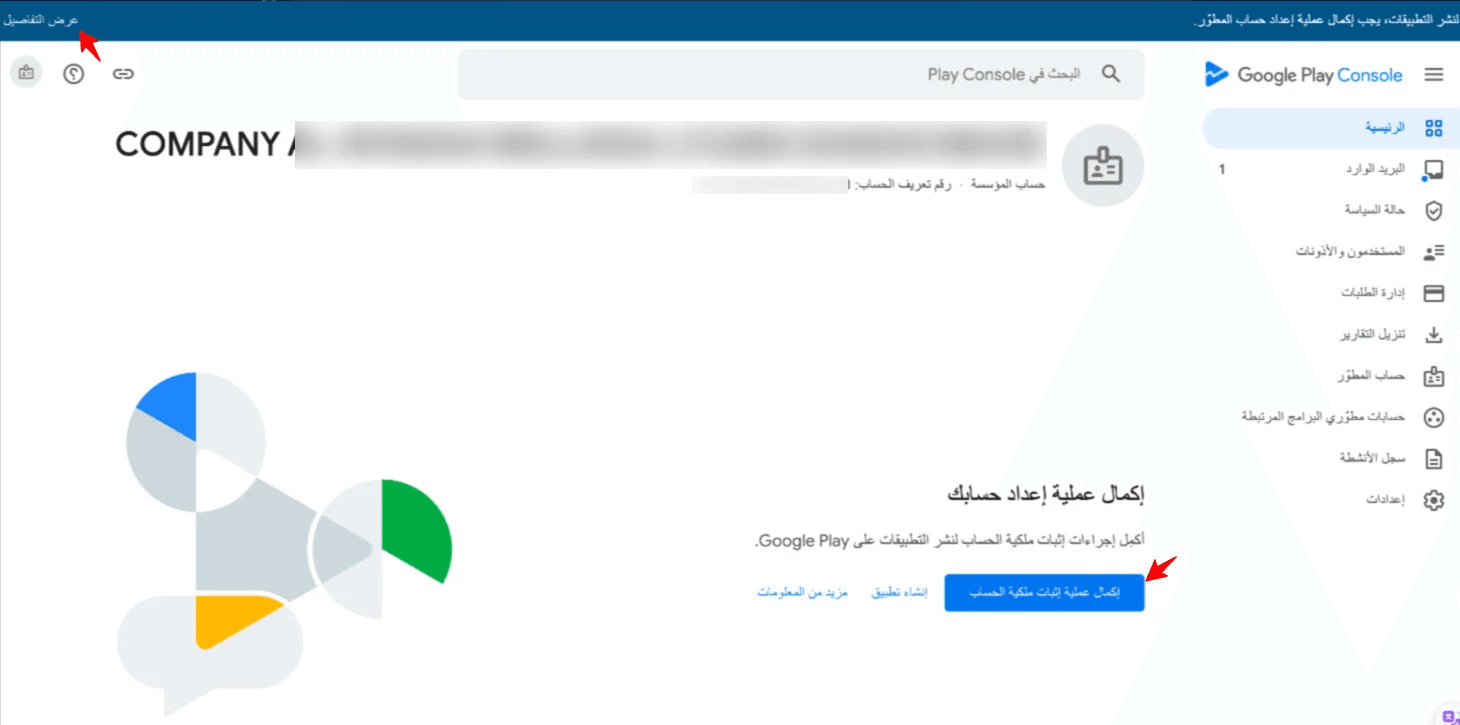
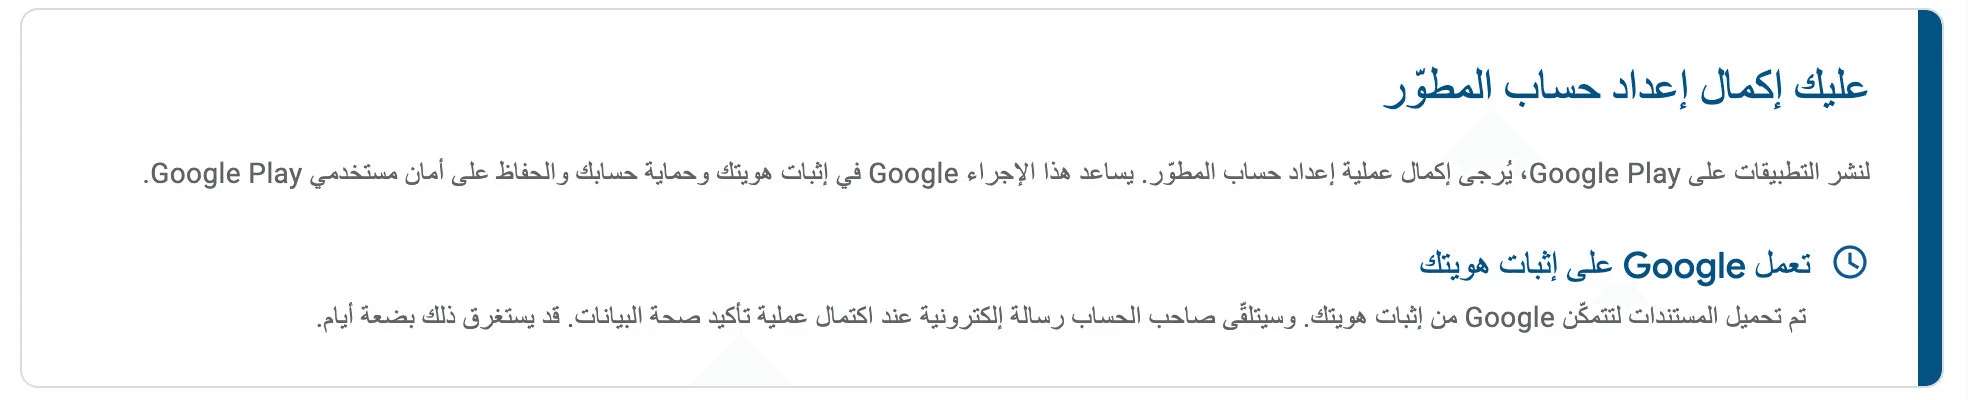
Verifying company ownership (Required)
Before publishing apps, you must complete account verification.
Step 1: Start verification
From the Play Console dashboard:
Click Complete verification
- Or use the banner at the top and select View details


- Or, open Developer account from the main menu
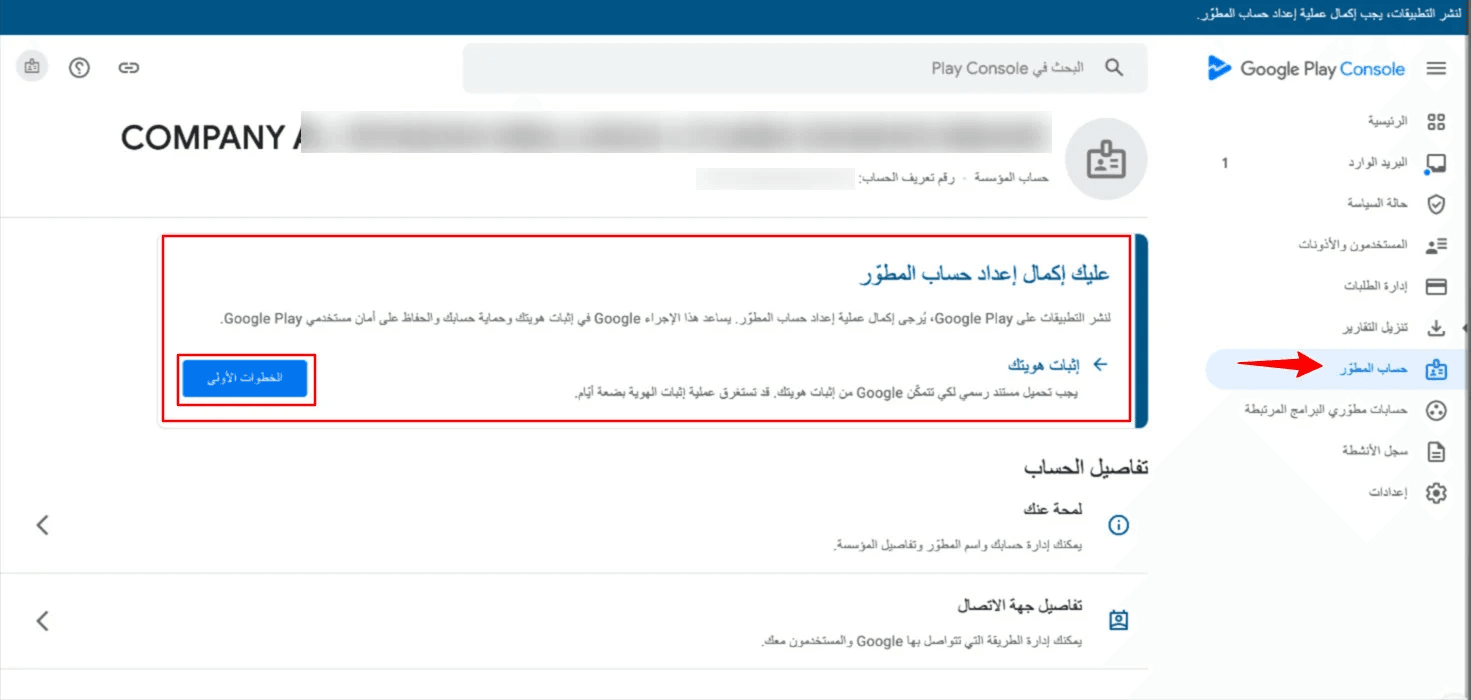
Step 2: Begin verification process
- Review the verification requirements
- Confirm the declaration
- Click Start verification
✅ You only need:
- One document to verify the company (e.g., commercial registration)
- One document to verify identity (e.g., national ID)

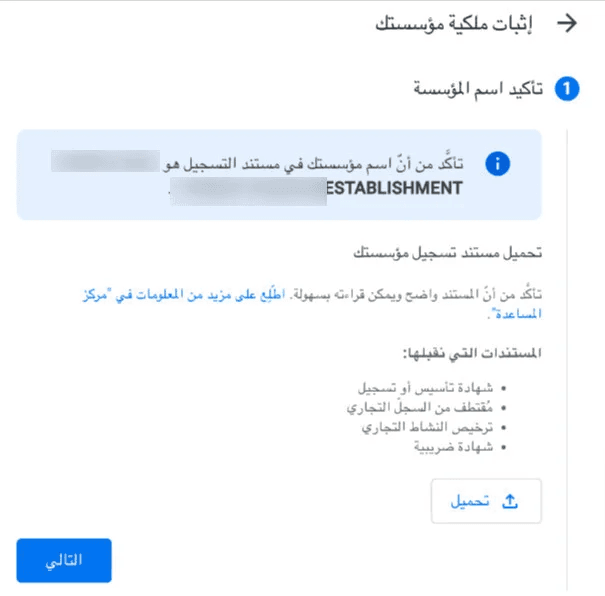
Step 3: Upload company document
- Confirm the organization name (must match D-U-N-S data)
- Upload the company document
(Preferably the same translated commercial registration used for D-U-N-S)
If names don’t match, update them via Dun & Bradstreet before continuing.
Step 4: Upload identity document
Enter your full name exactly as shown on the document
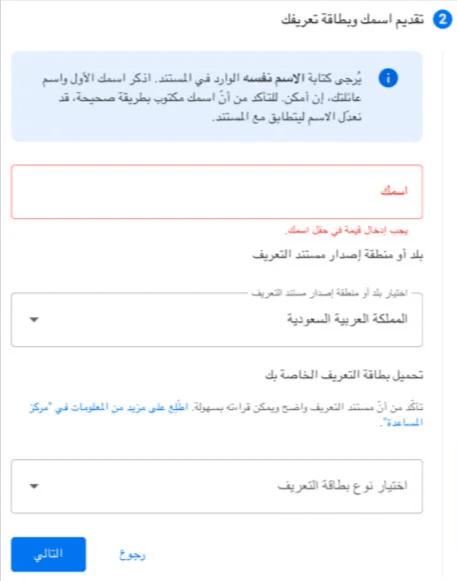
- Select country
- Choose document type:
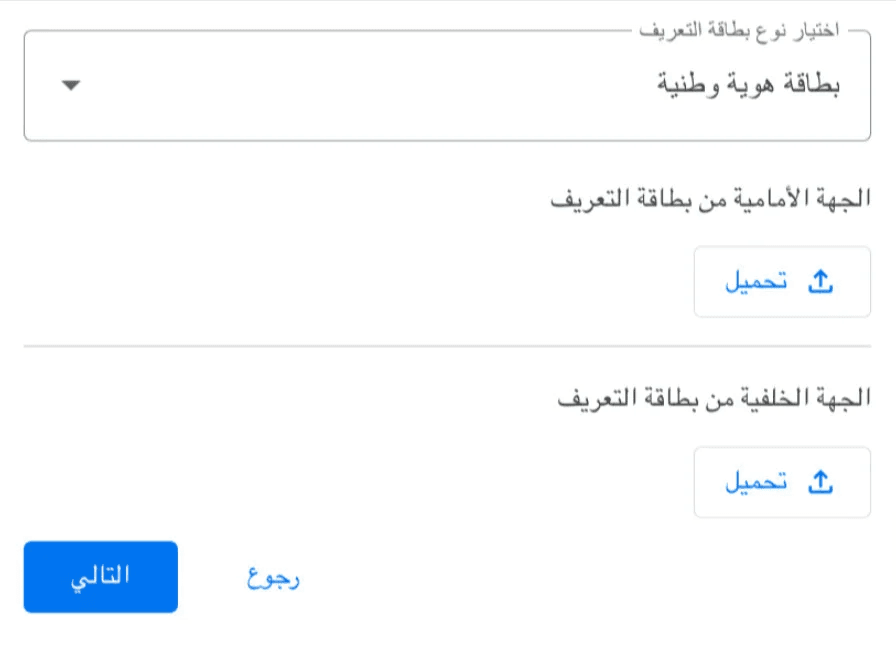
- National ID
- Passport
- Residence permit
- Driver’s license
- Upload front and back (if required)
📌 Tips:
- Name must be in English
- Image must be clear and high quality
- Mobile camera is recommended
Step 5: Confirm address details
- Address fields are usually auto-filled
- Must match the D-U-N-S address
- Submit the form

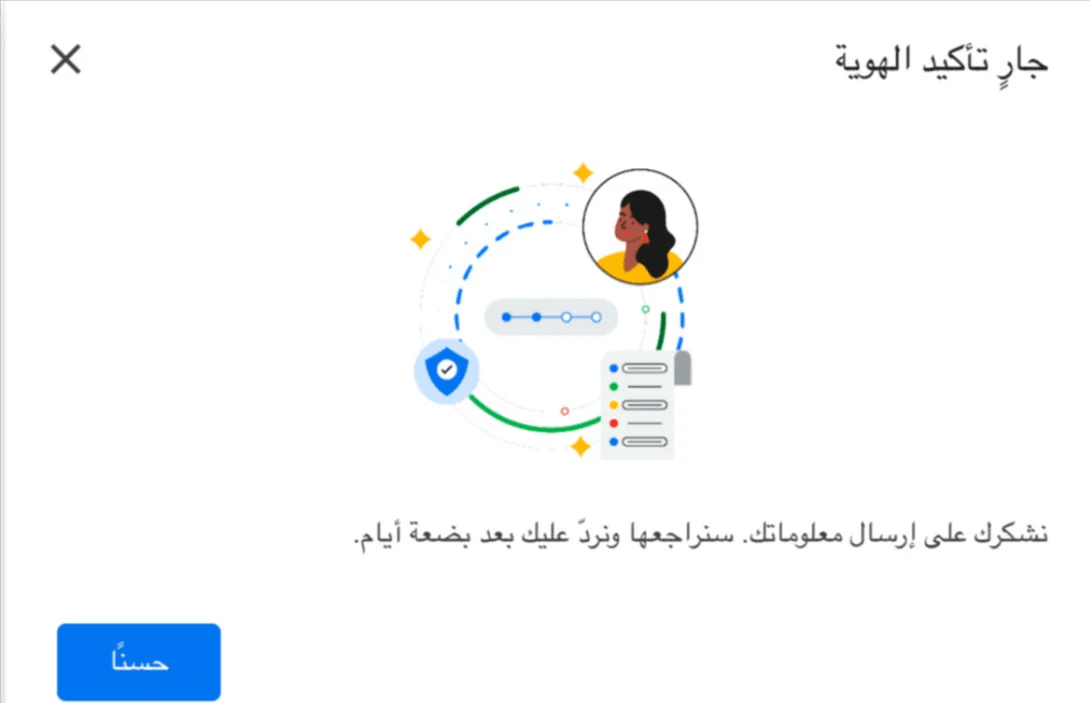
Google will review your submission and contact you by email if needed.
Verification usually takes a few days.
You can track the status directly from your Play Console account.
Once verification is complete
🎉 You can now:
- Publish apps on Google Play
- Fully manage your apps via Google Play Console
- Use Salla’s App Maker without restrictions
Frequently asked questions
Will I pay the developer fee more than once?
No. The $25 fee is a one-time payment. You can publish unlimited apps under the same account as long as they comply with Google policies.
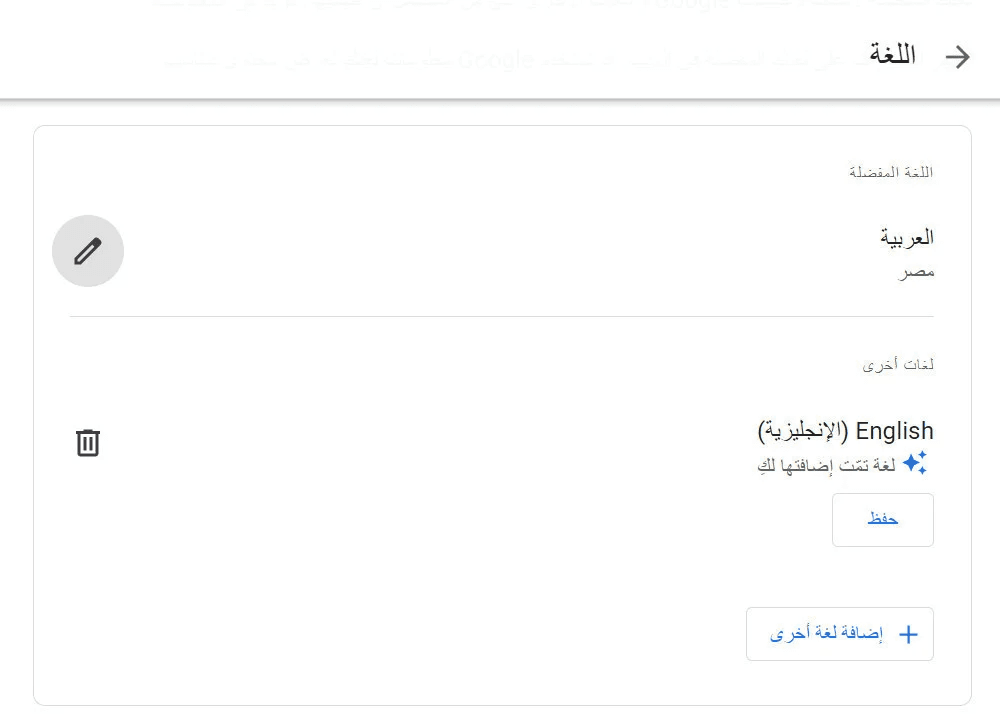
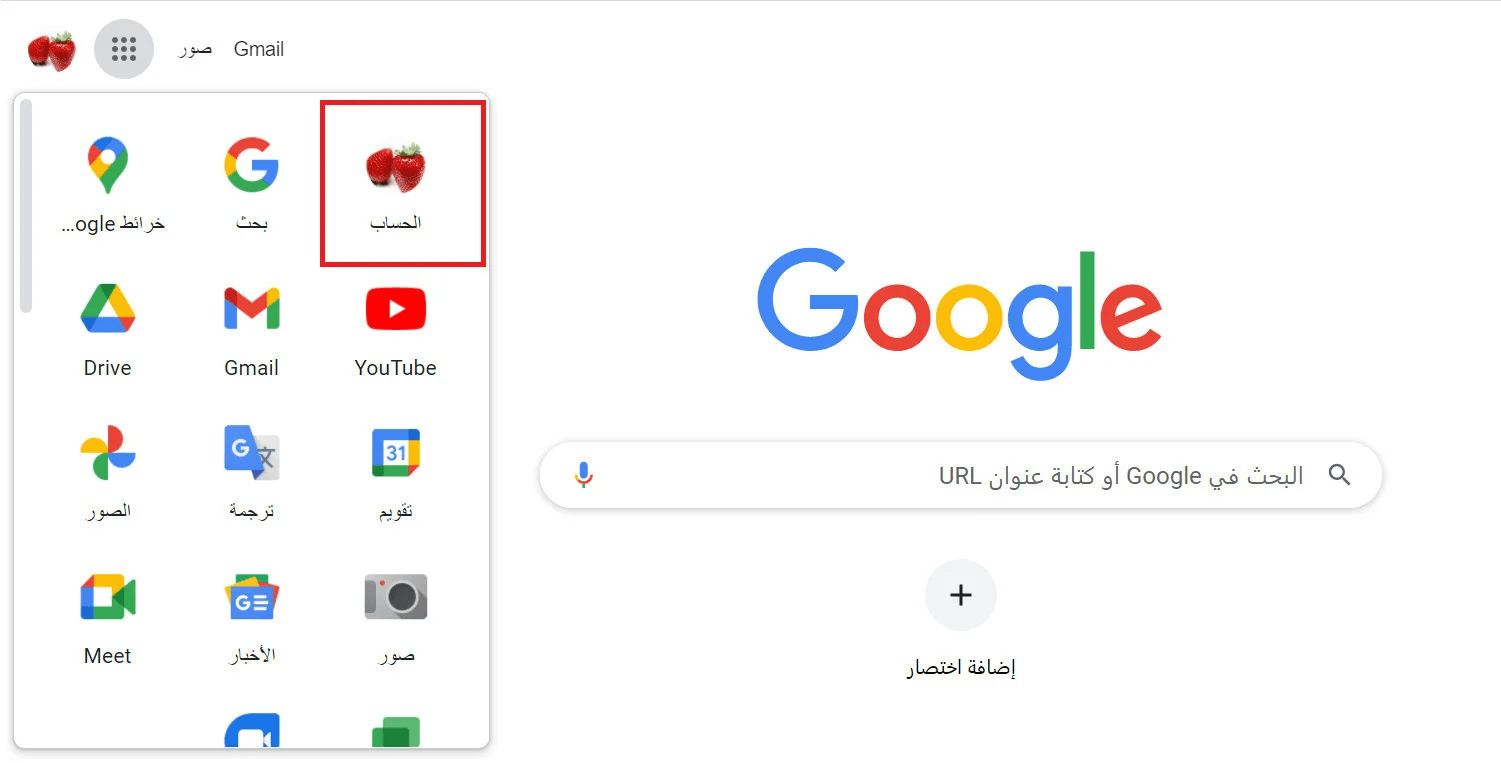
Can I change the Google Play Console language?
Yes. You can change the interface language:
- From Google homepage, open Apps → Account
2. Go to Data & Privacy → Language
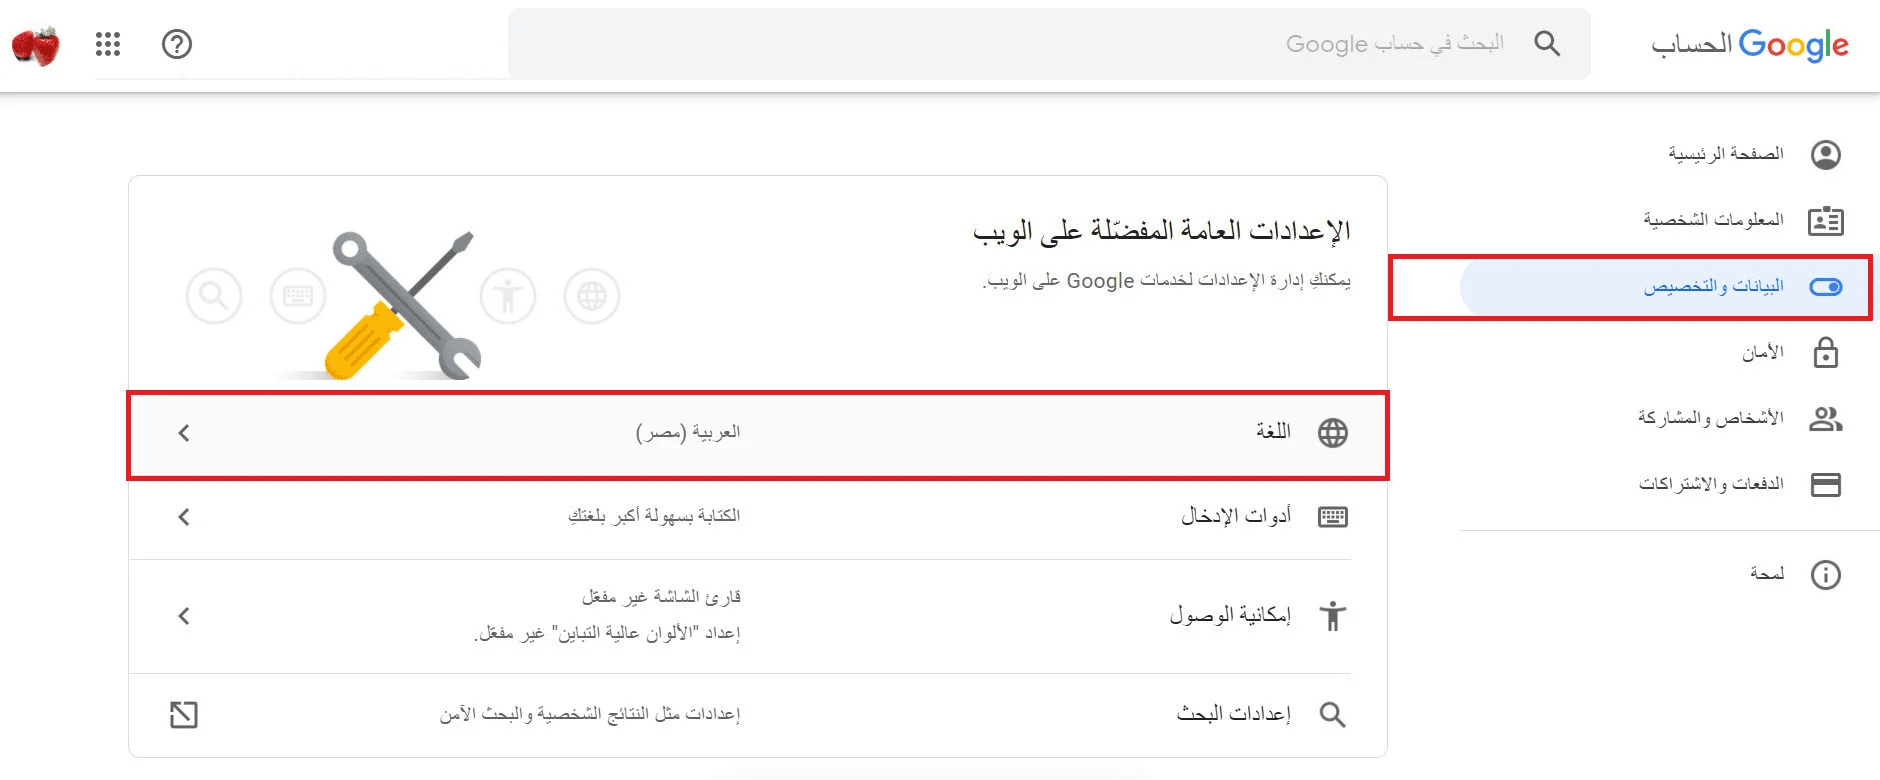
3. Select or add your preferred language