Communication channels are the methods your customers use to contact you, such as email, live chat, or social media. Interactions for each channel are managed through a dedicated inbox. In this article, you’ll learn how to control and configure communication channel settings.
📌 Article overview
- Accessing communication channels
- Communication channel settings
Accessing communication channels
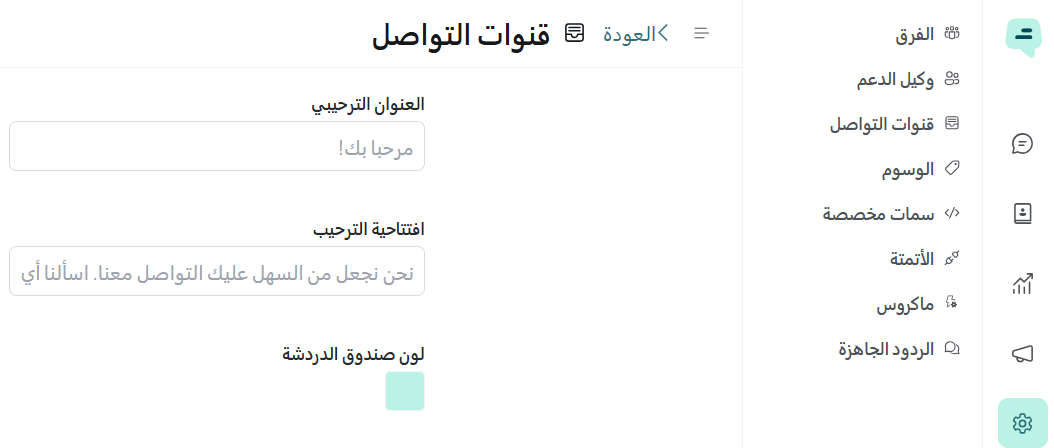
- From the main menu, click All, then from the Settings & tools section select Salla Chat.
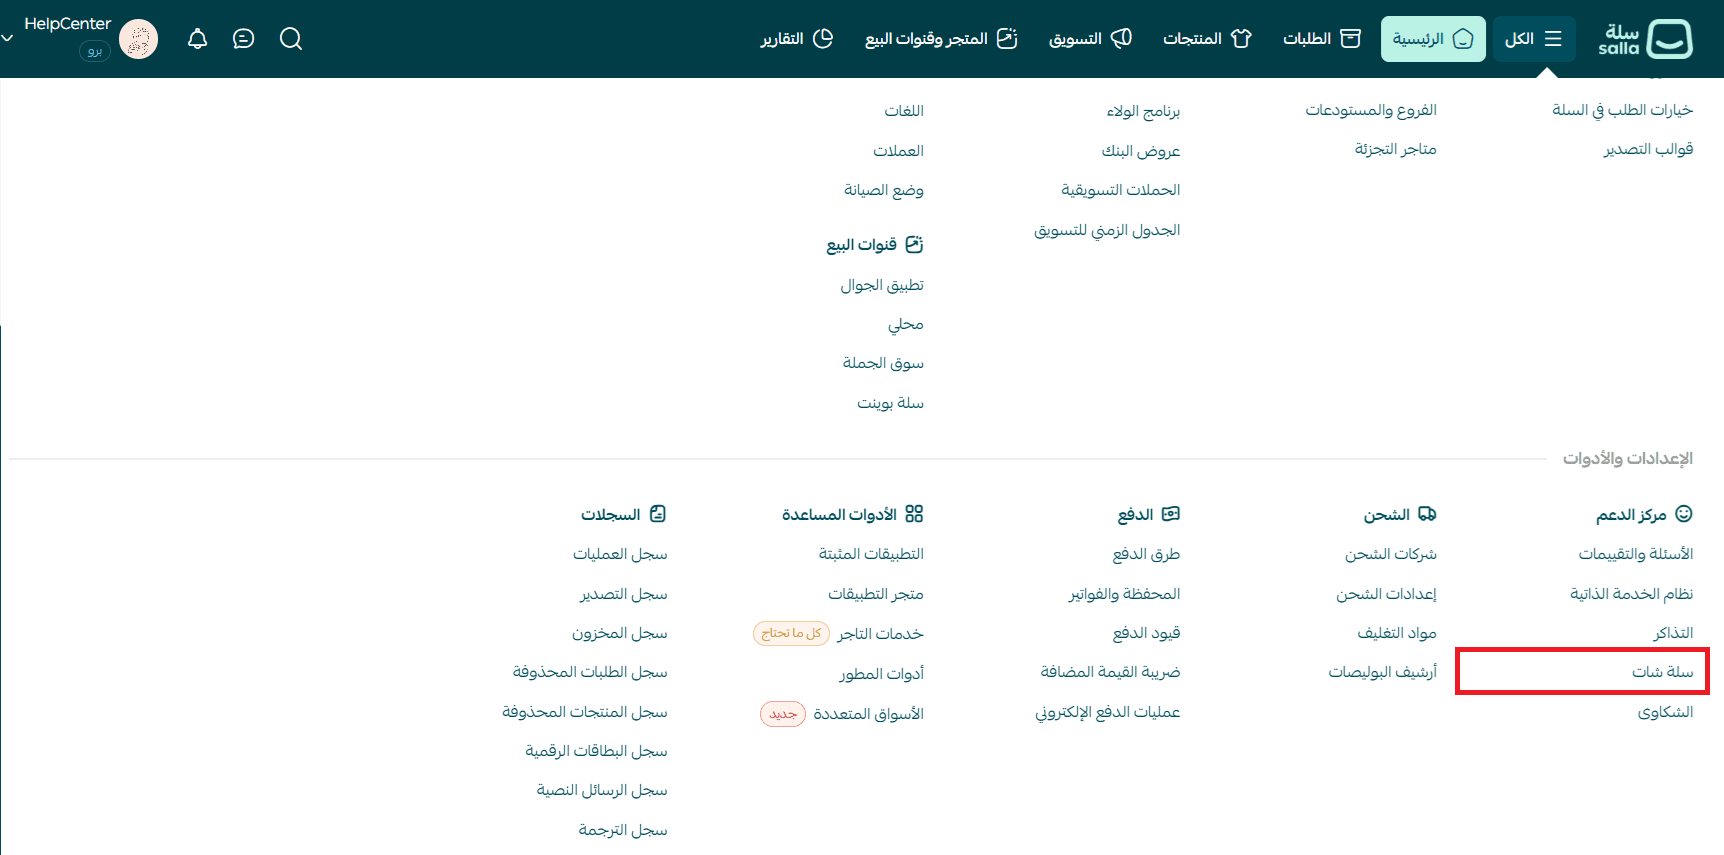
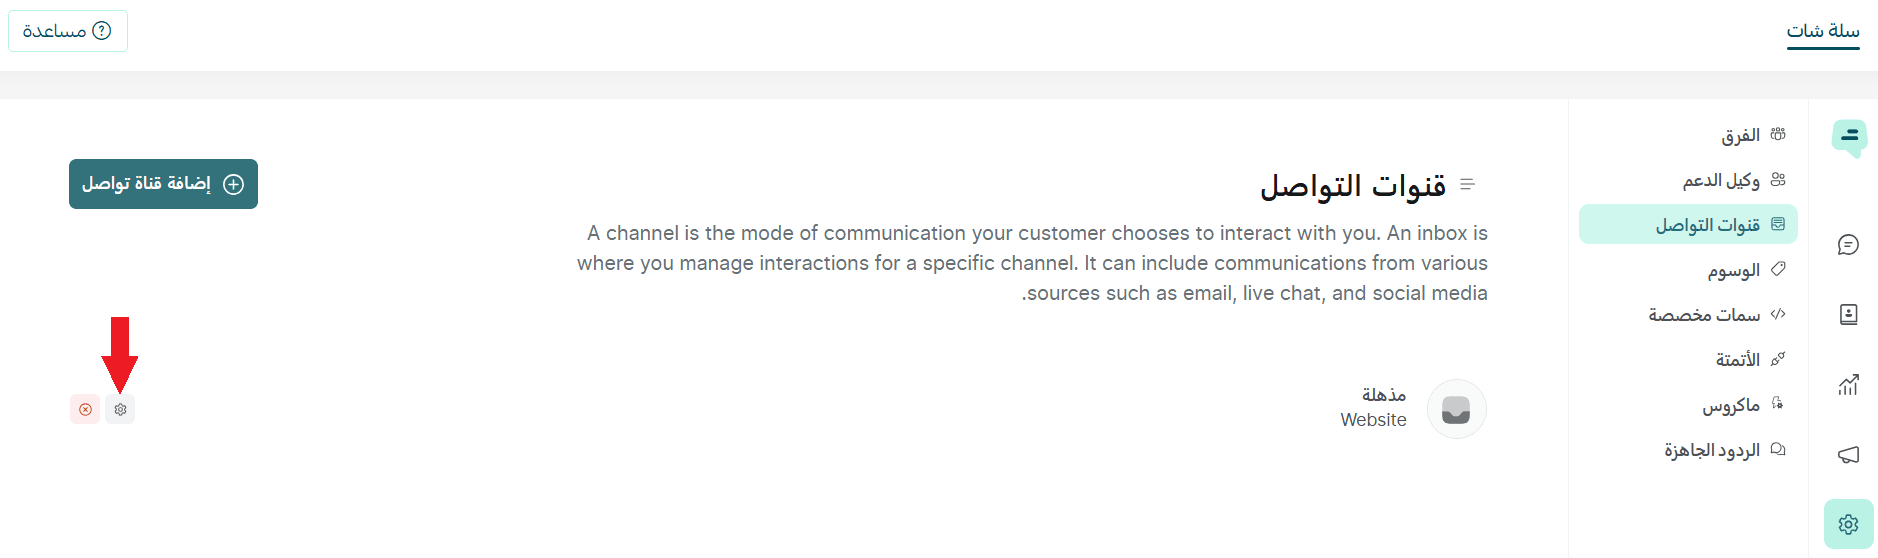
- From the Salla Chat menu, click the Settings icon, then select Communication channels.
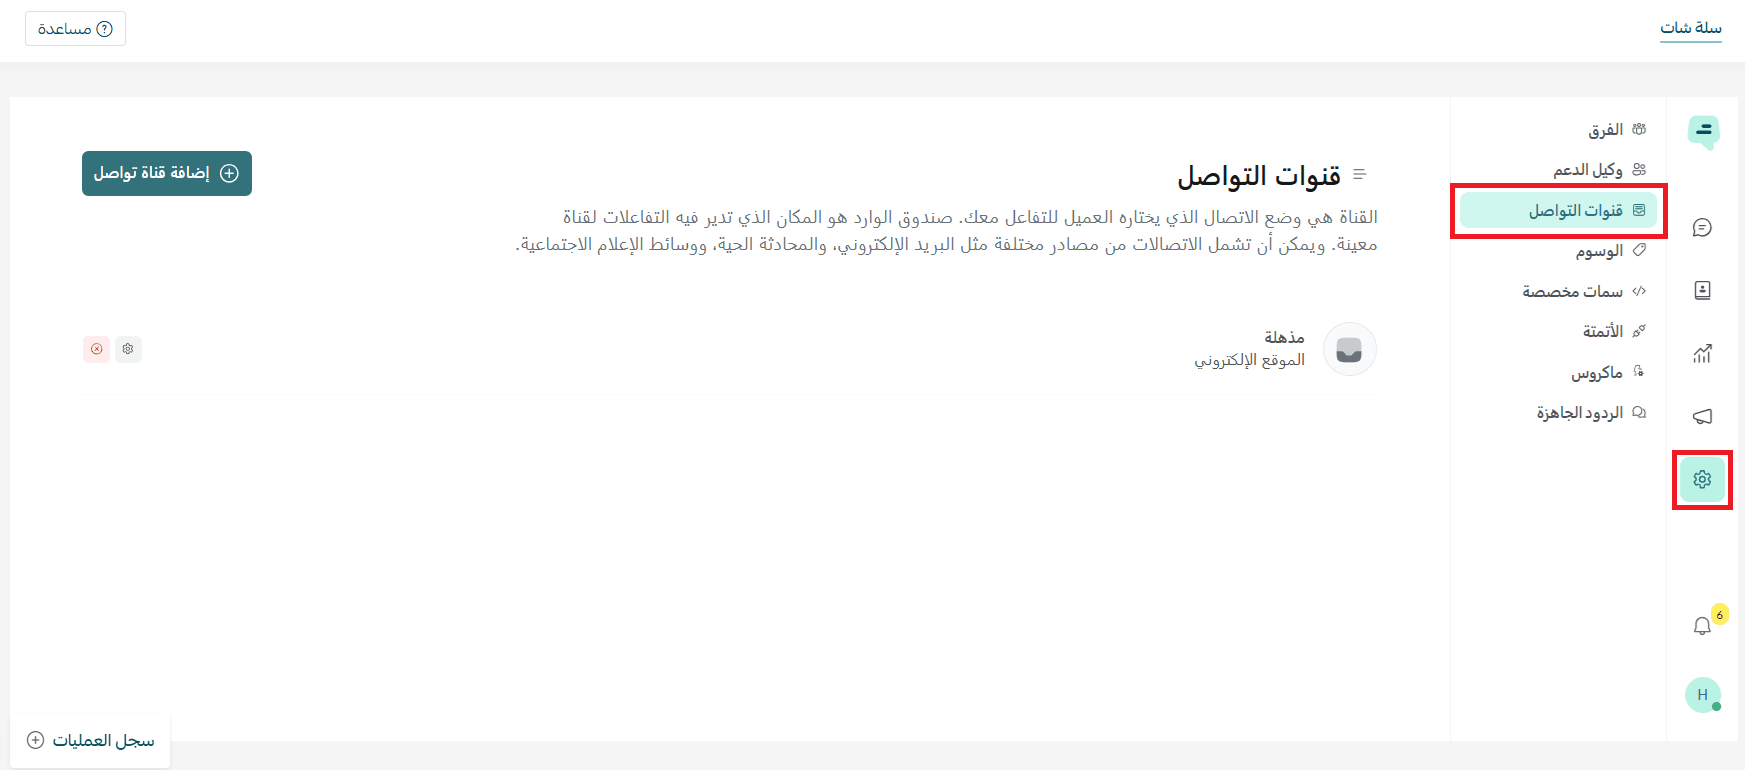
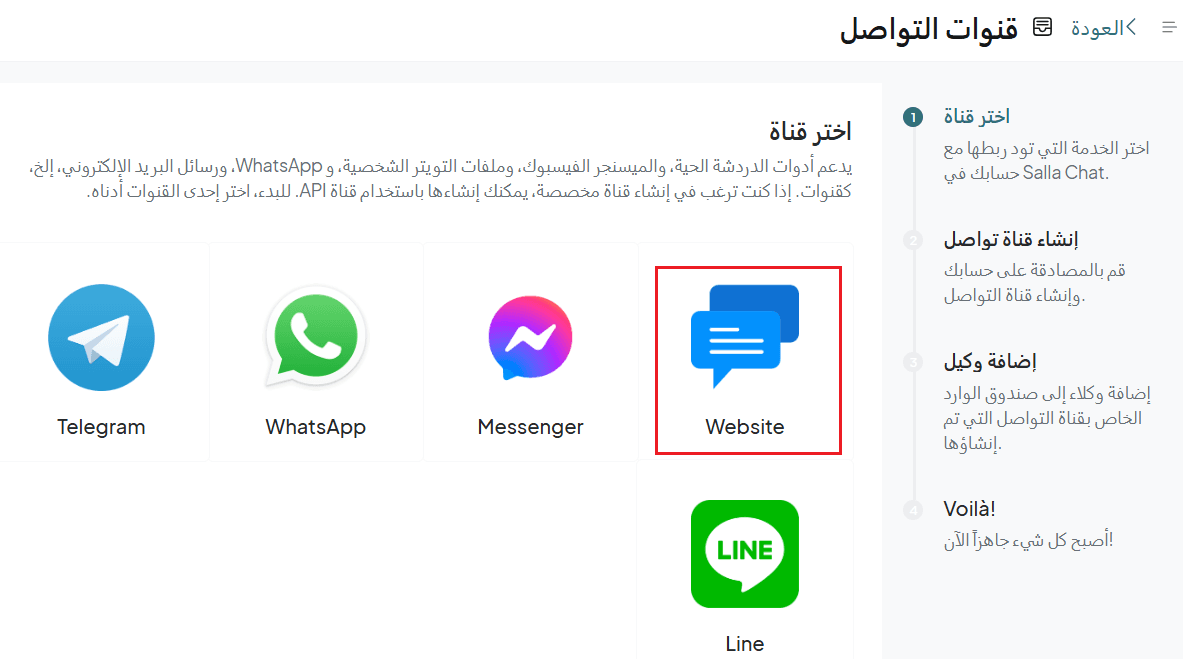
- Click Add channel.

- Choose the desired communication channel.
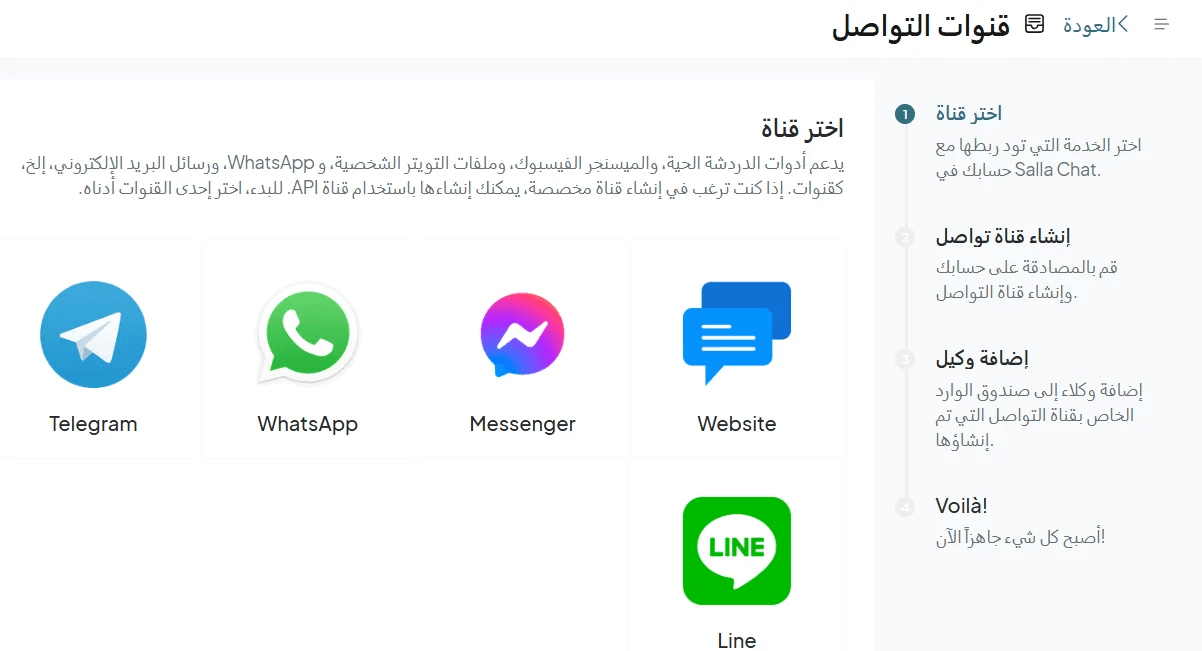
💡 Example: Connecting Salla Chat with your online store
- Select the communication channel
- Add a support agent (customer service employee), then click Add agents

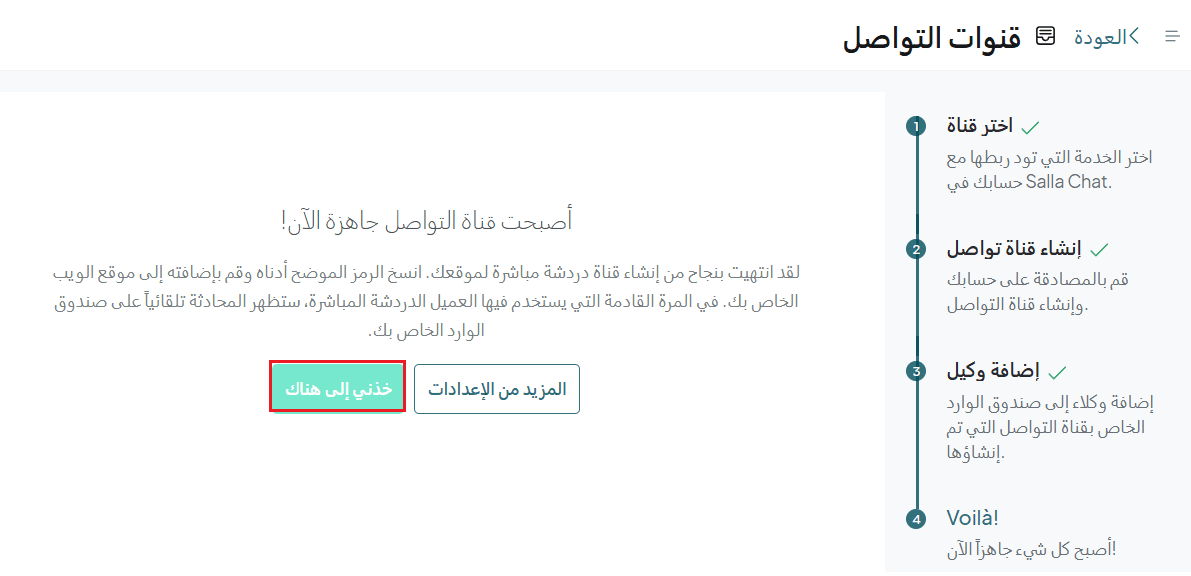
- The communication channel is now ready
Communication channel settings
You can manage channel settings at any time by clicking the Settings icon.
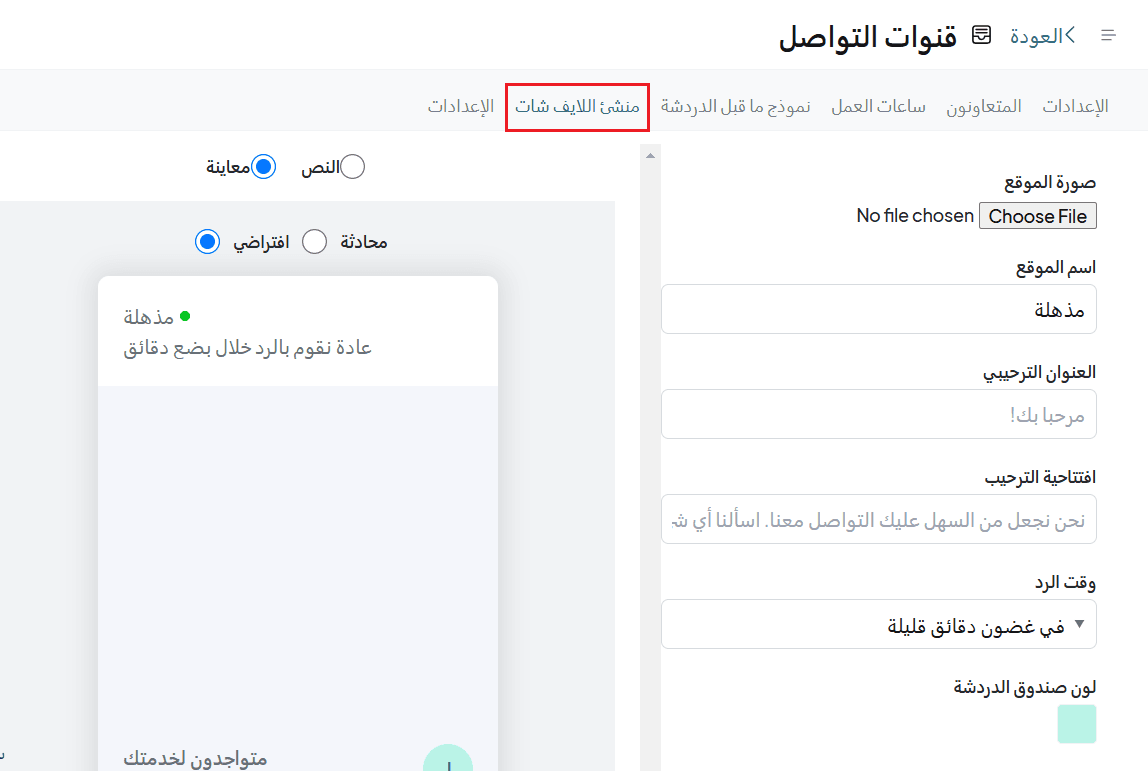
1. General settings
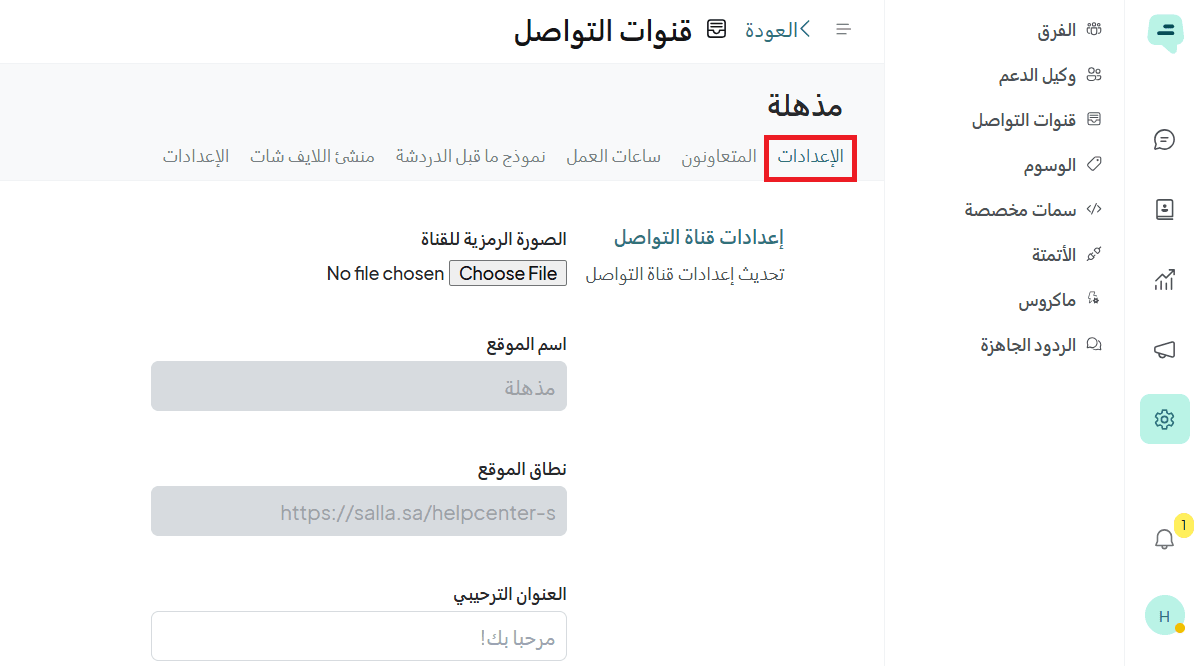
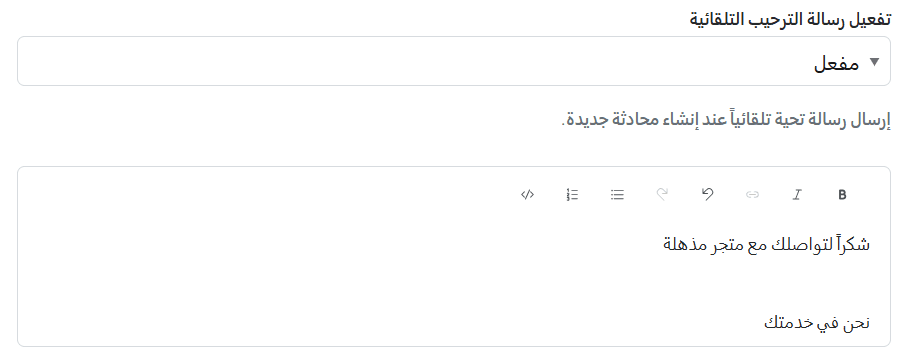
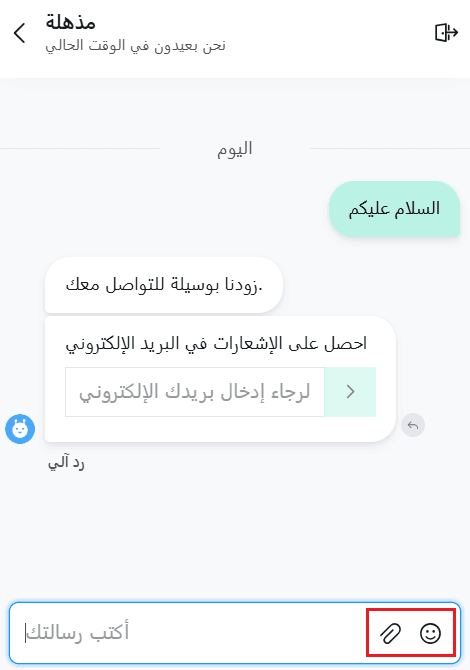
- Welcome title and greeting message
Write the message that will appear when a customer starts a new conversation, and choose the chat widget color.
- Enable automatic welcome message
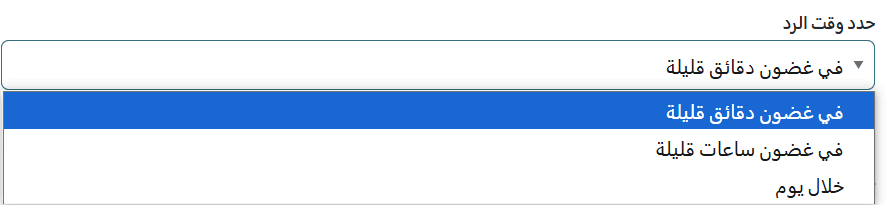
- Response time
A message shown to customers indicating when they can expect a reply.
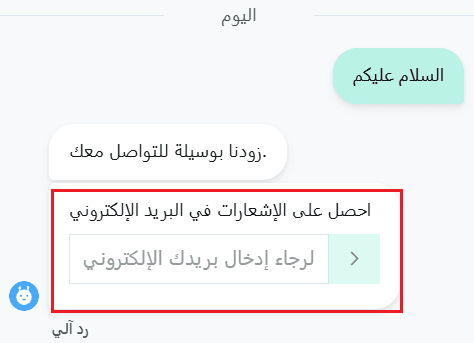
- Enable email capture box
Enable or disable the field that collects the customer’s email at the start of a conversation.
If enabled, the customer will be asked to enter their email before starting the chat.

- Enable customer satisfaction rating
Turn on/off customer feedback after the conversation ends.

- Allow messaging after conversation is resolved:
Enable or disable the ability for customers to send messages after the conversation is closed.

- Continue conversation via email
When enabled, conversations will continue via email if the customer’s email is available.

Widget UI Features
You can enable features that improve the chat experience:
- File upload tool: Allows users to upload files during the chat
- Emoji picker: Adds emoji support for better interaction
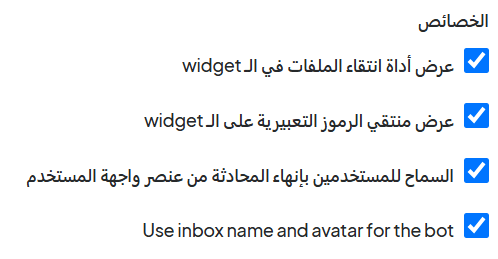
- Allow users to end the conversation: Let customers close the chat themselves
- Use inbox name/email for bot identity: Displays a defined name and image for the bot to create a more personalized experience
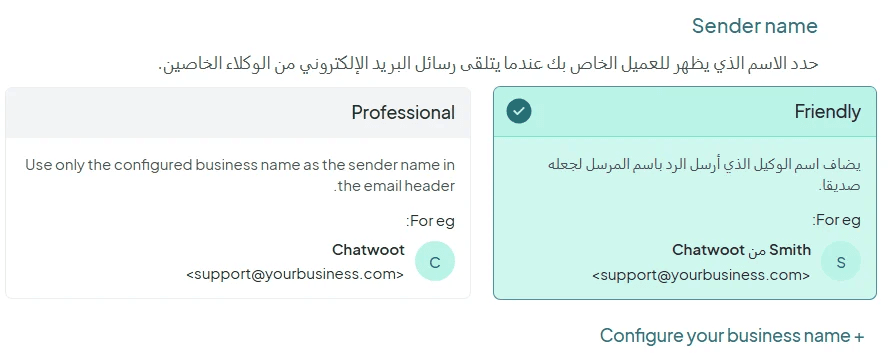
Sender Name Options (for agent emails)
- Option 1 (Friendly):
Example: Chatwoot from (Agent Name)
Email: support@yourbusiness.com - Option 2 (Professional):
Example: Chatwoot
Email: support@yourbusiness.com
2. Collaborators
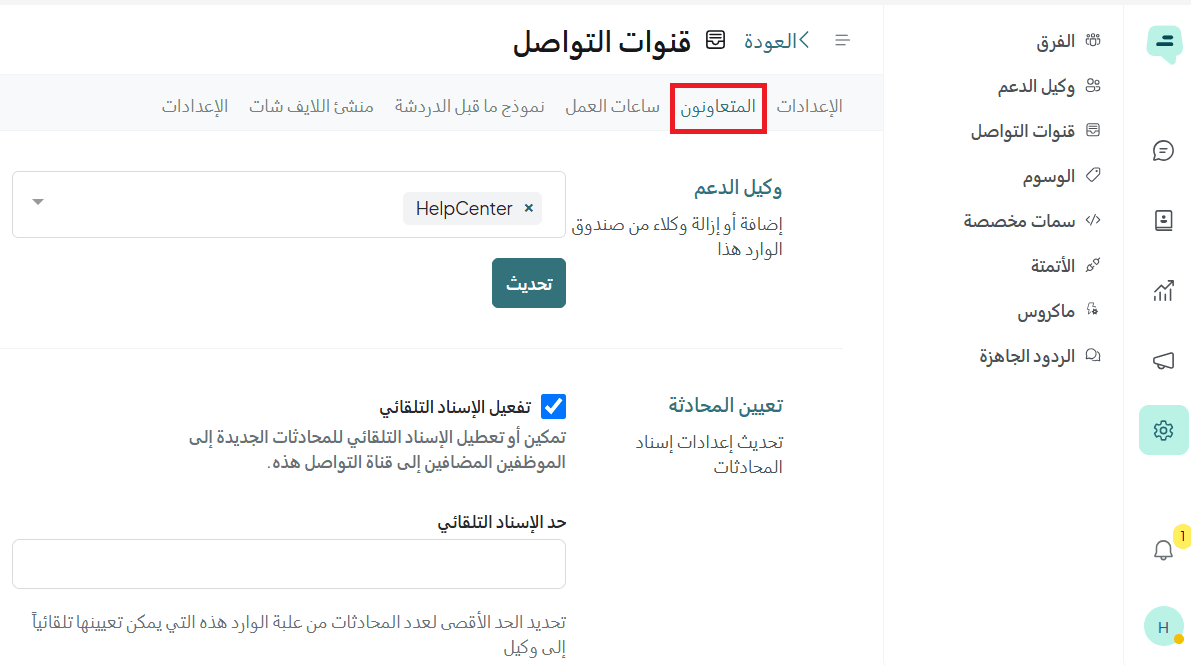
These settings help organize conversation distribution and ensure efficient responses:
- Support agents
Assign agents (customer service staff) to manage conversations for this channel
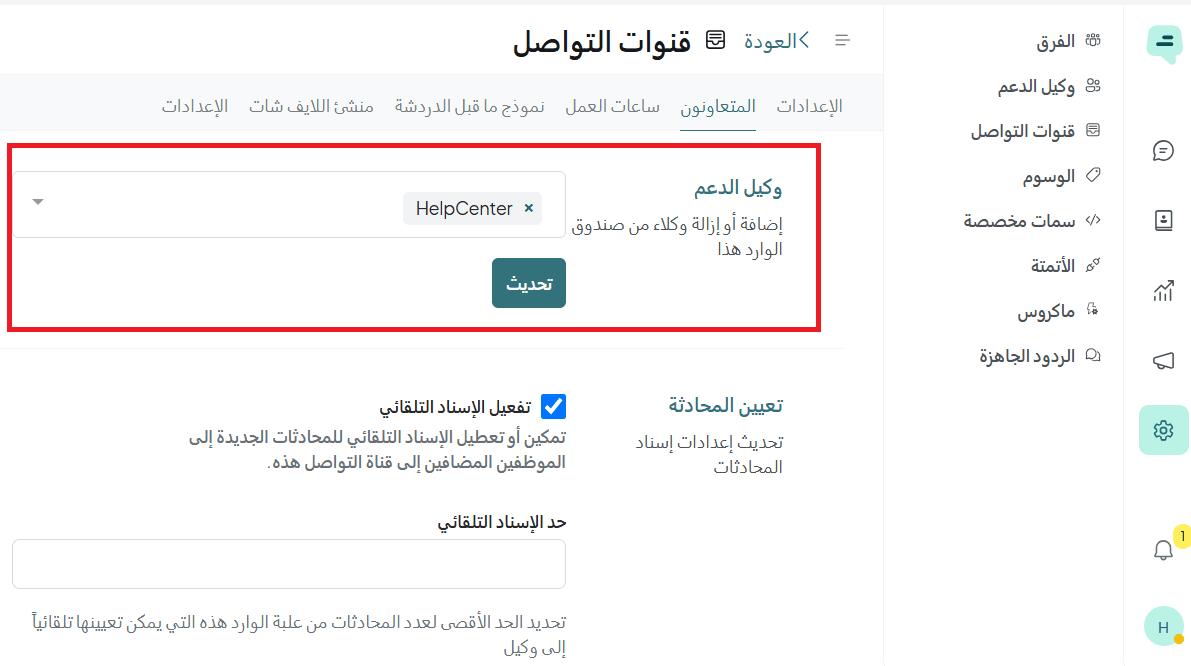
- Enable auto-assignment
Automatically assigns incoming conversations to agents
📝 Note: If disabled, conversations must be assigned manually
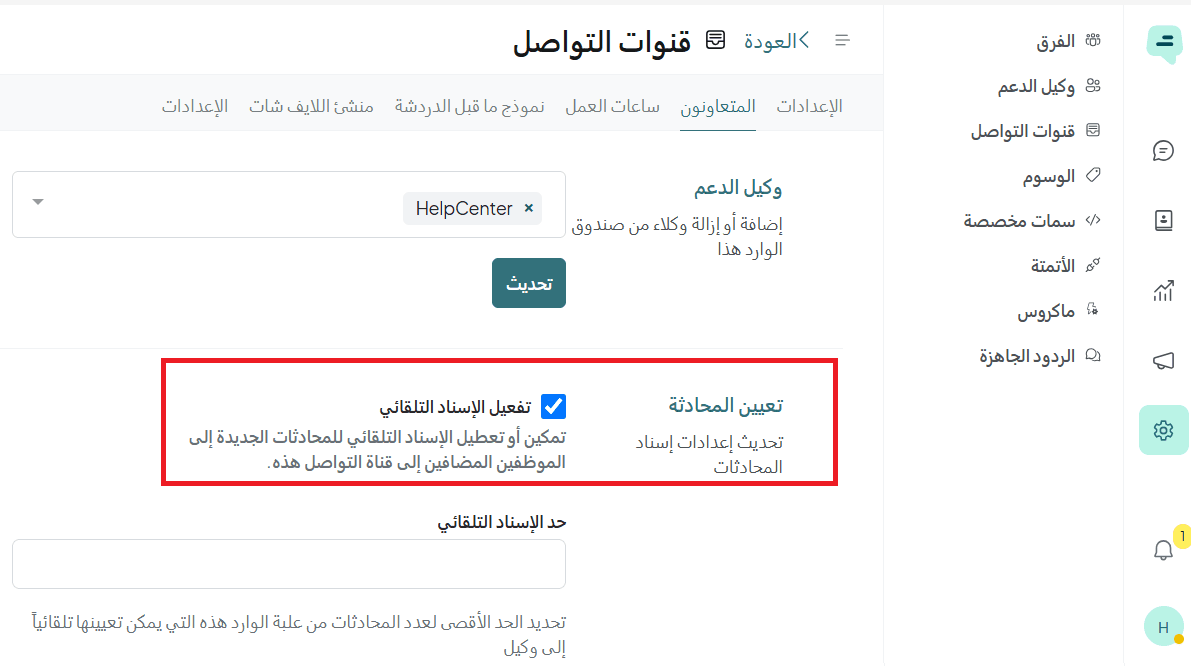
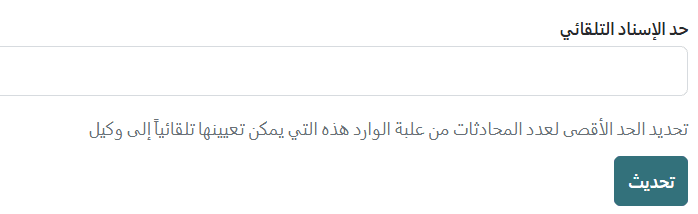
- Auto-assignment limit
Set the maximum number of conversations assigned to each agent to avoid overload
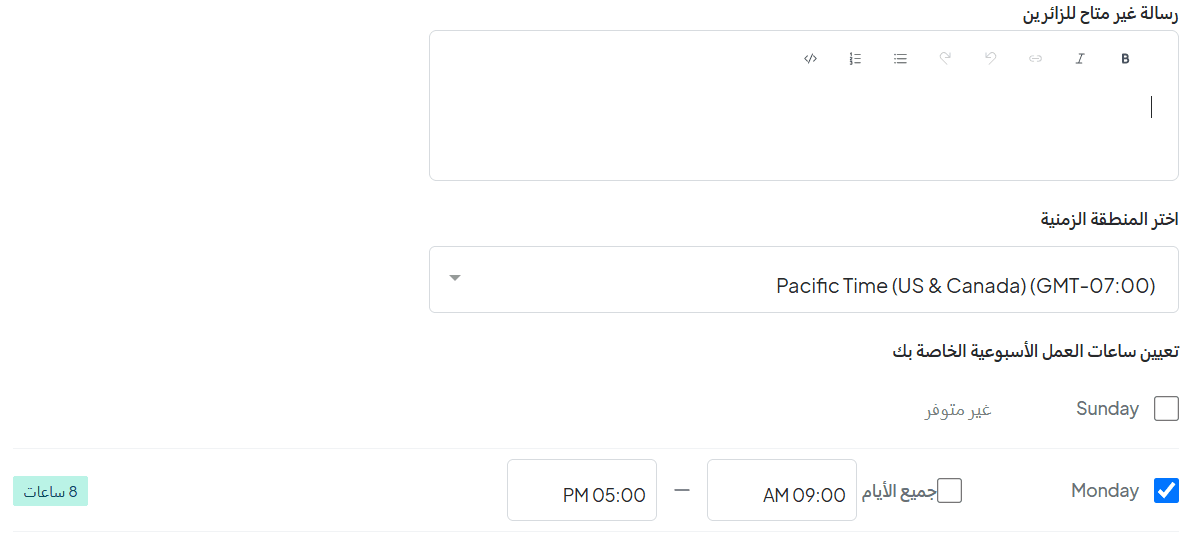
3. Working hours
You can define your business hours, which will appear at the top of the chat.
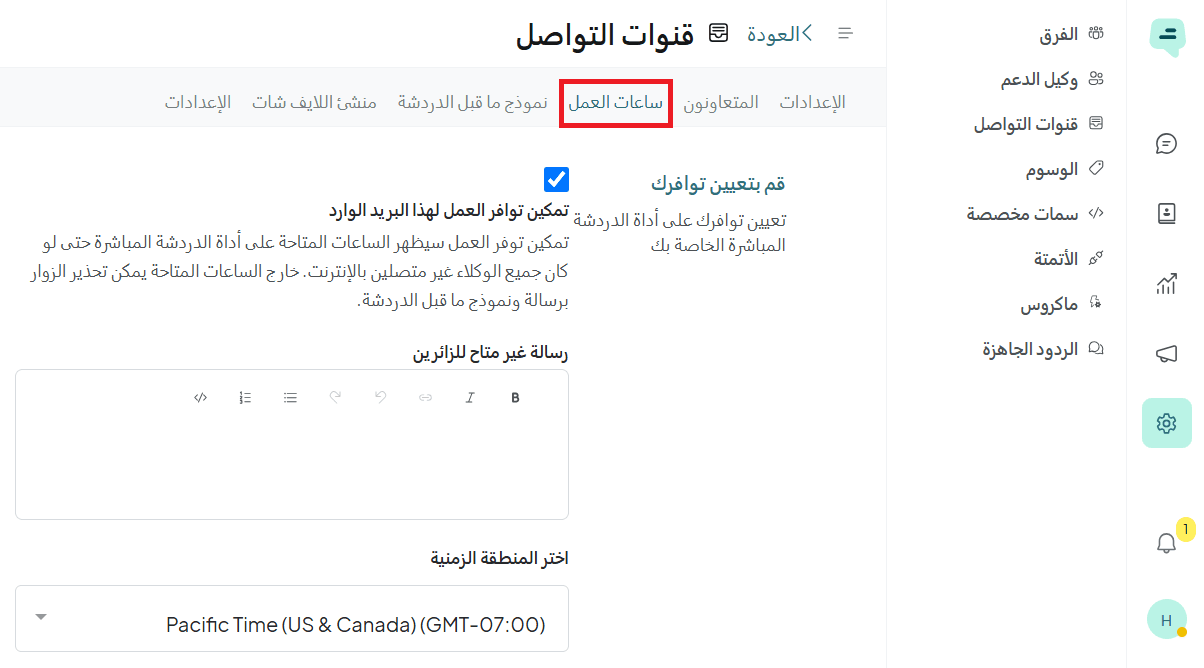
You can also set a message to display when customers contact you outside working hours.
4. Pre-chat form
You can require customers to provide details (such as email, name, or phone number) before starting a chat.

5. Live chat builder
You can preview how your configured chat settings will appear to customers when they use live chat.
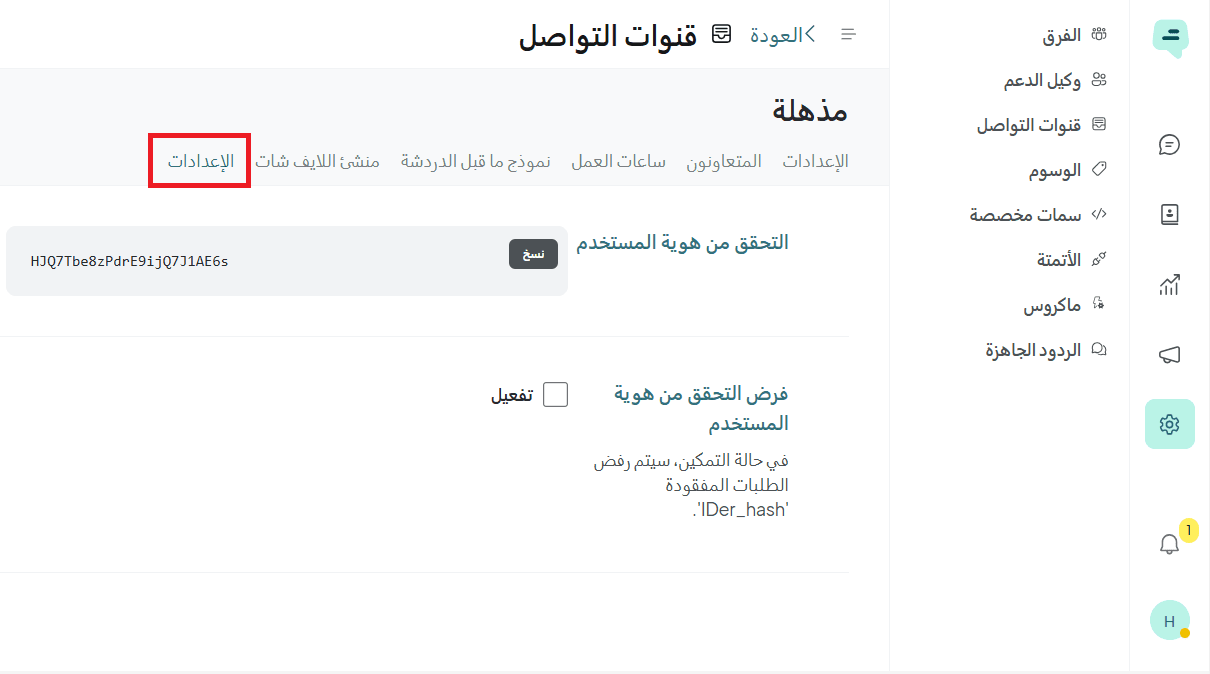
6. Security settings
Includes:
- User identity verification
Displays a unique verification code for each user, which can be copied and used to verify their identity during conversations - Enforce identity verification
When enabled, verification becomes mandatory
📝 Note: If this option is enabled, requests without valid identity information will not be accepted