How long does it take you to change the price on fifty products?
The product management table is where your whole catalog becomes editable in one place. You change a value by clicking the cell it sits in, decide which columns you want in front of you, save the arrangements you use most as named views, and apply a single action to hundreds of products at once. If your store runs on multiple markets, the table shows the pricing columns for each market separately. In this guide, you'll learn how to open the product management table, edit and customize it, run bulk actions, and read the multi-market view.
The product management table brings your whole catalog into one editable grid. You can change a price, quantity, image, category or sales channel by clicking the cell, decide which columns appear, save named views for different jobs, and apply one action to many products at once.
📌 Article overview
- How to open the product management table
- Bulk actions on selected products
- Viewing products across multiple markets
- Frequently asked questions
🚀 How to open the product management table
Here is how to reach the table and start editing your product data directly from it.
1. From the main menu, click (Products), then (Manage products).

A page opens showing all of your products and their data in a single table, so you can manage and update them without leaving it.
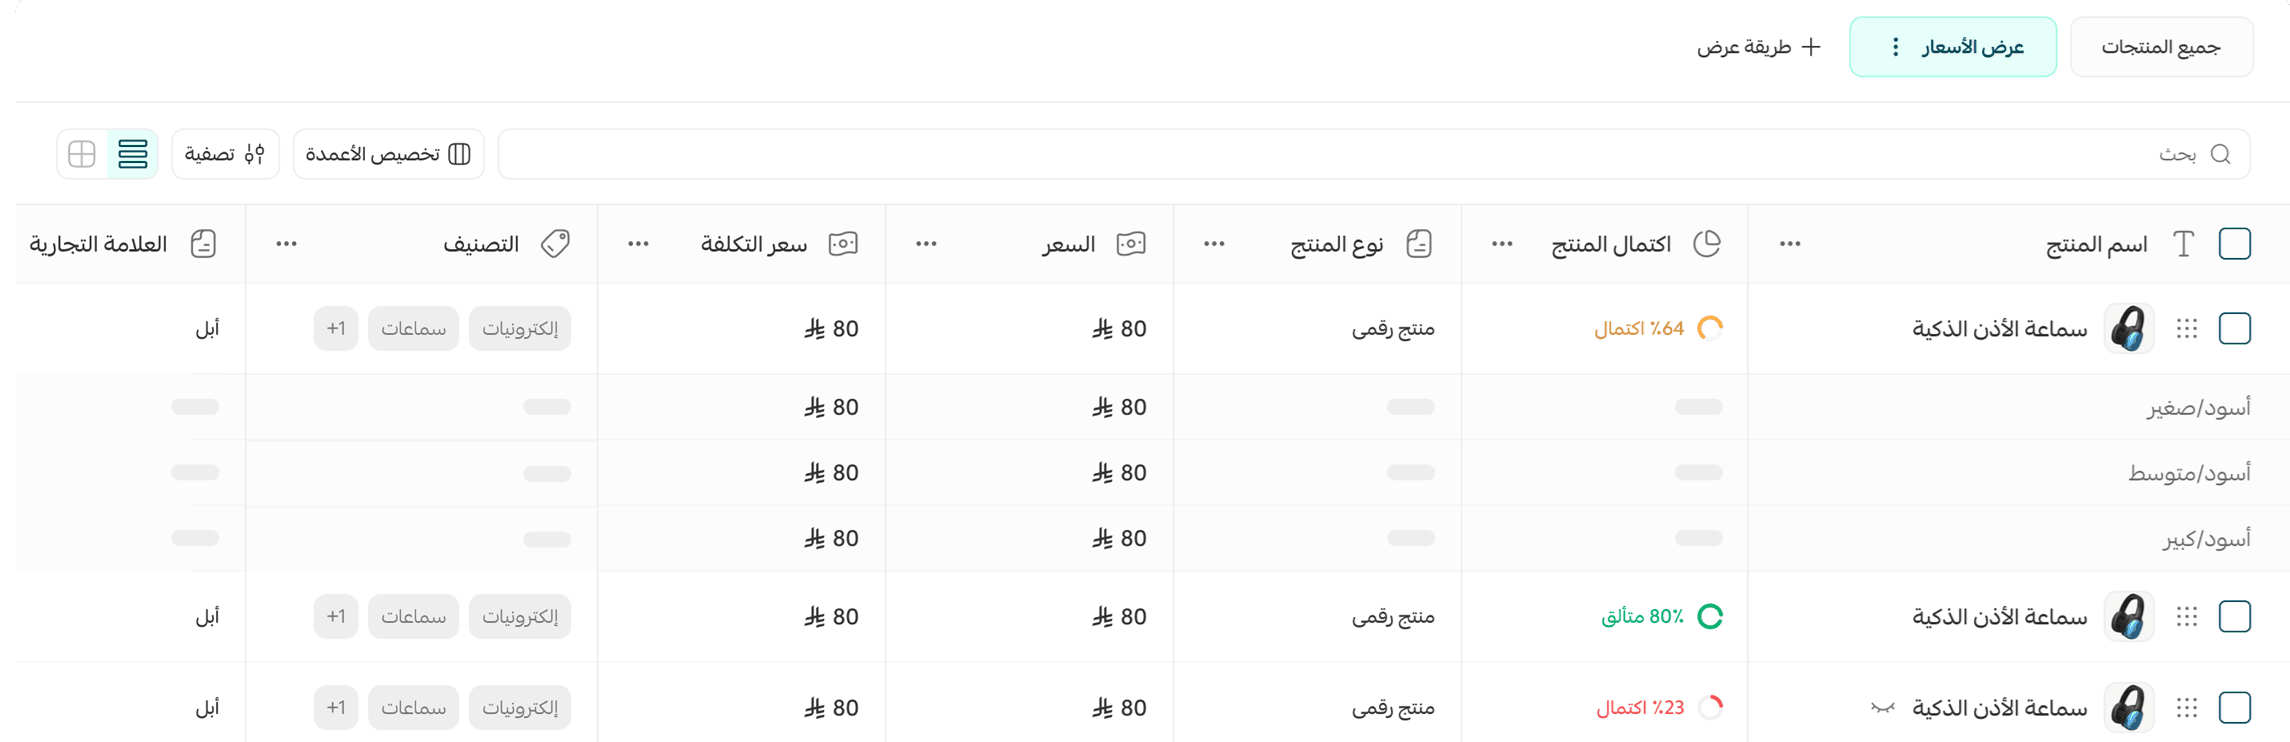
💡 Note: You can edit any product field directly by clicking the cell you want, entering the change, and saving it.
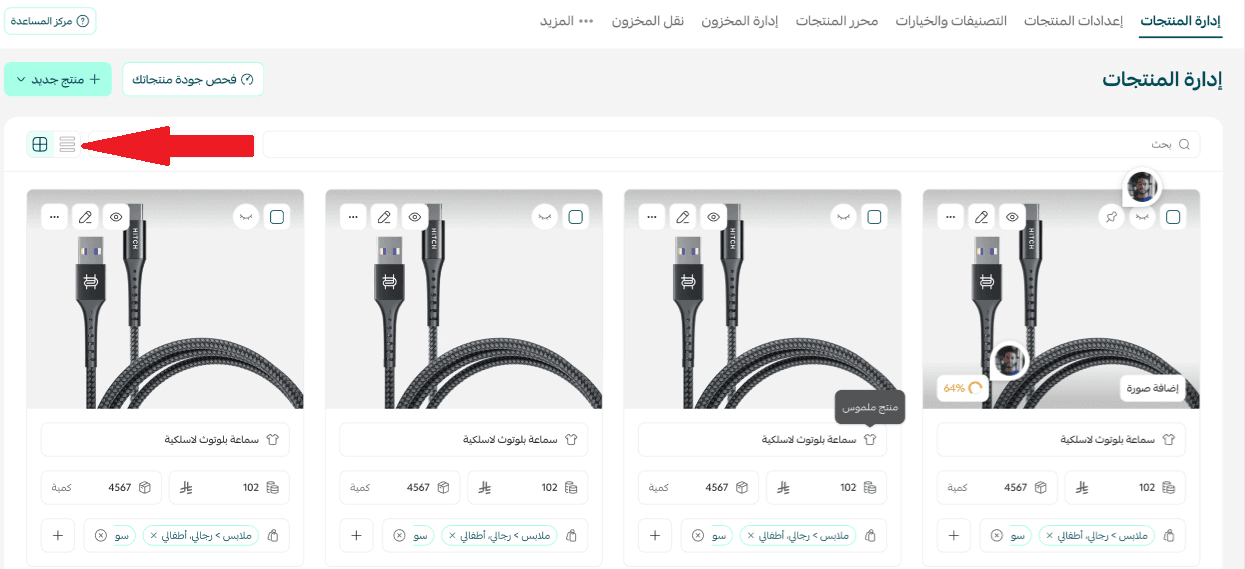
2. Switch between the two display modes from the top of the page: table view, which shows all the data in rows and columns, or grid view, which shows your products as thumbnail cards.
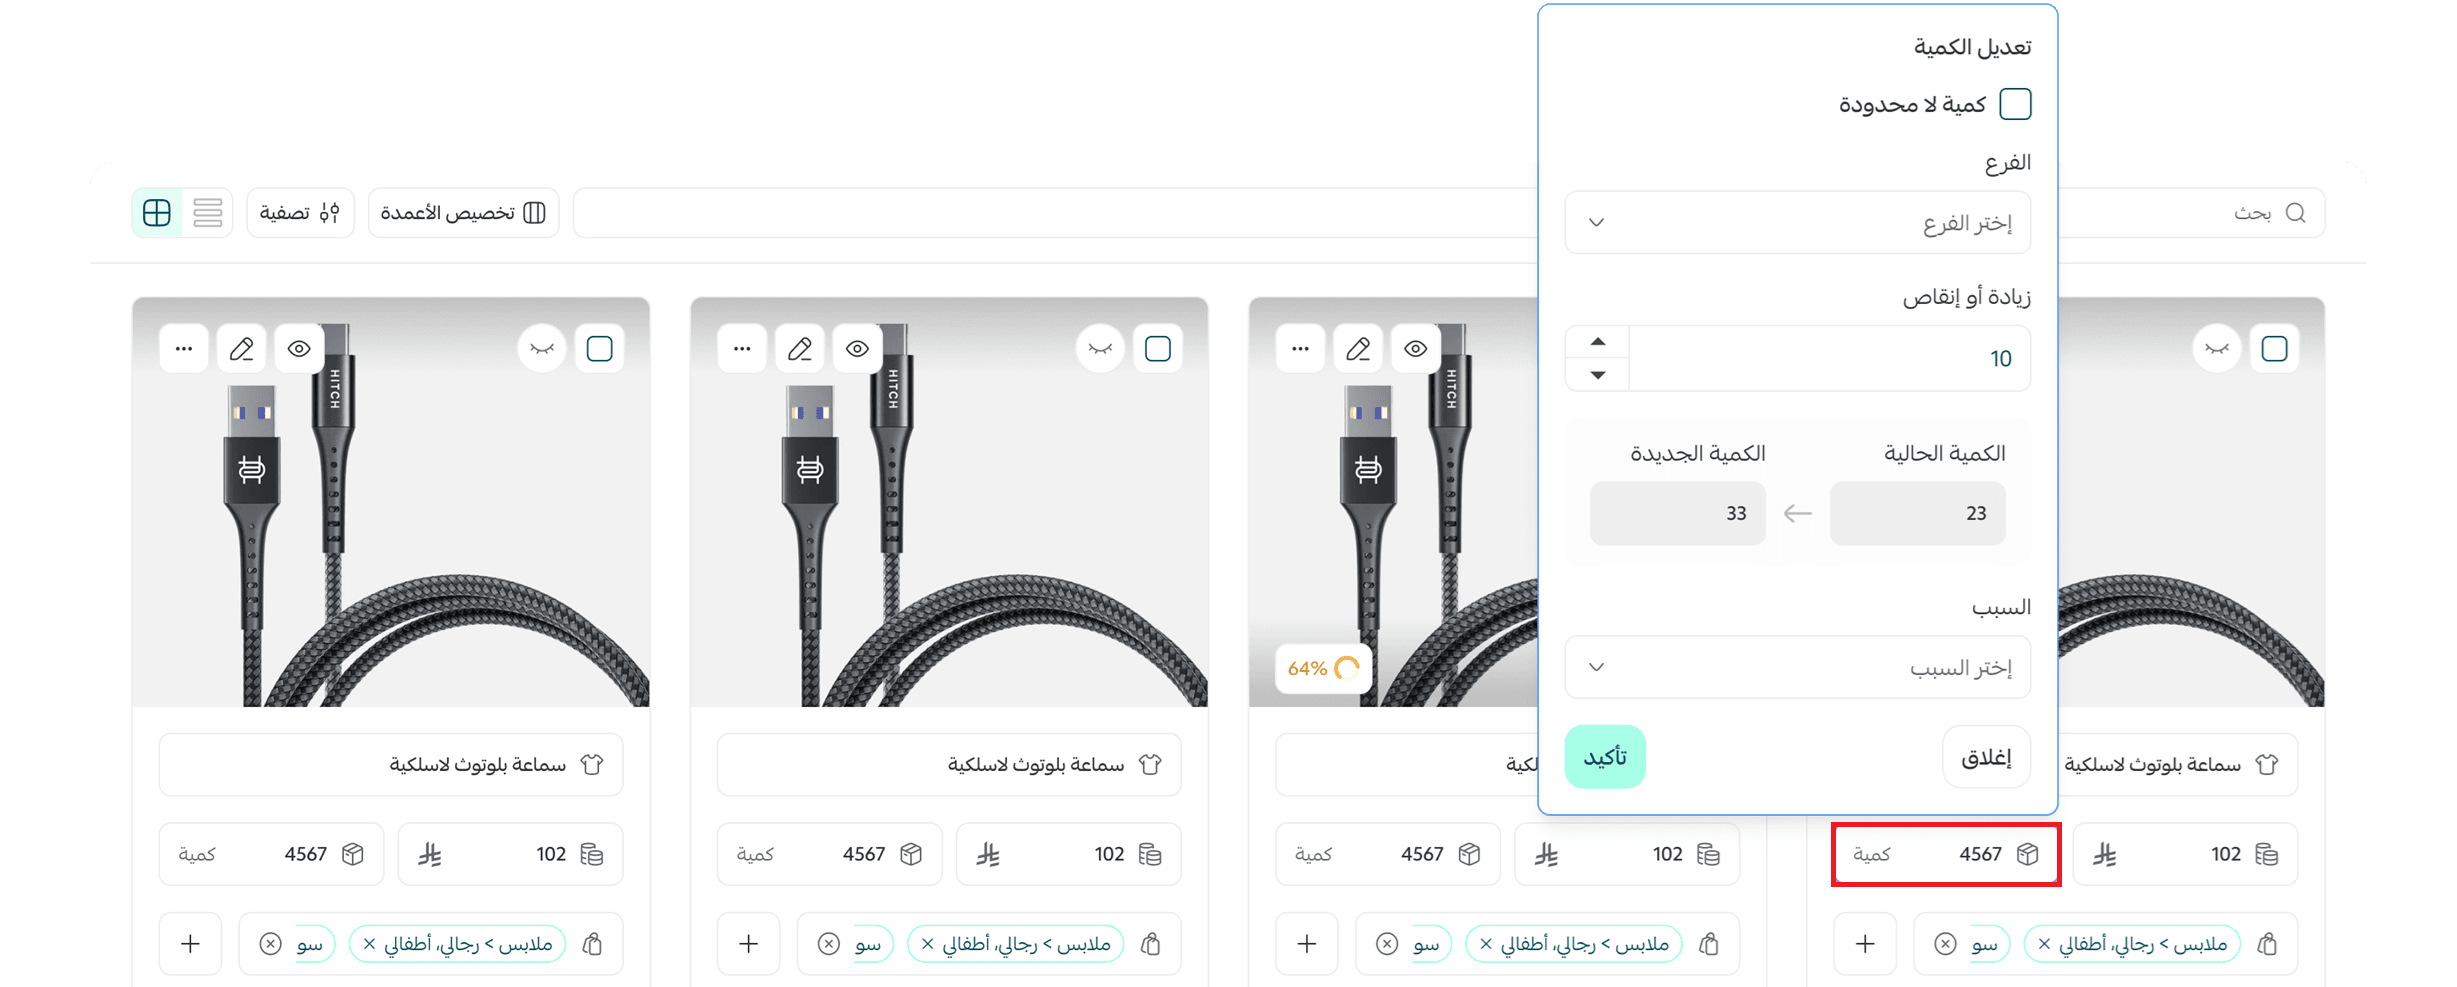
3. To edit a product in place, click any cell you want to change, such as the price, the quantity, the images, the category or the sales channel, and edit the value directly without opening the product page. Then click (Save) to keep your changes.
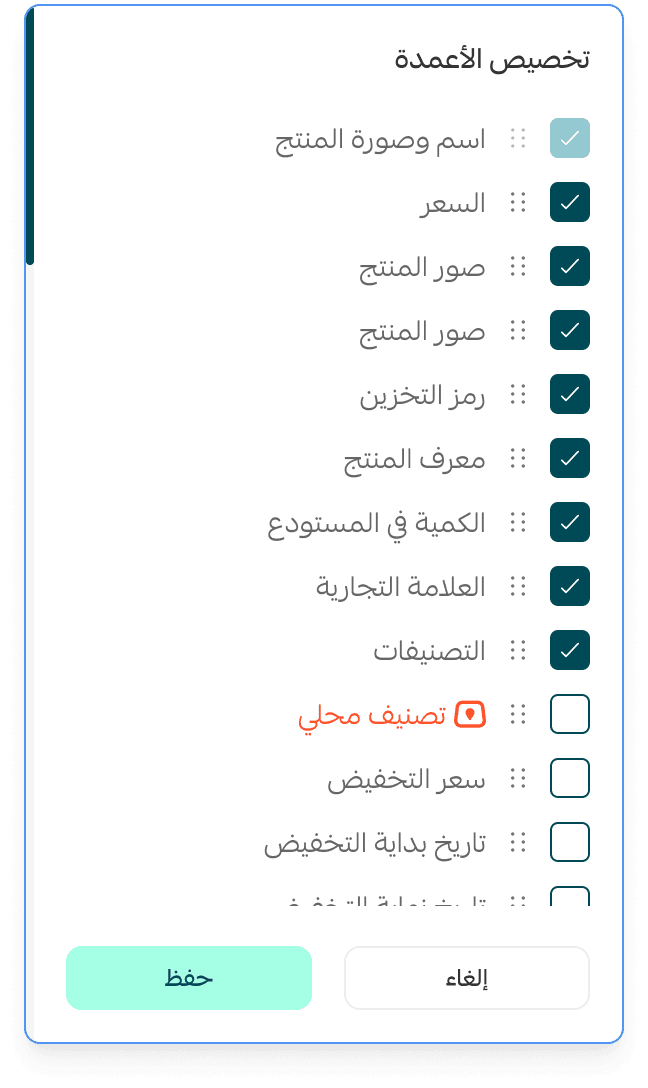
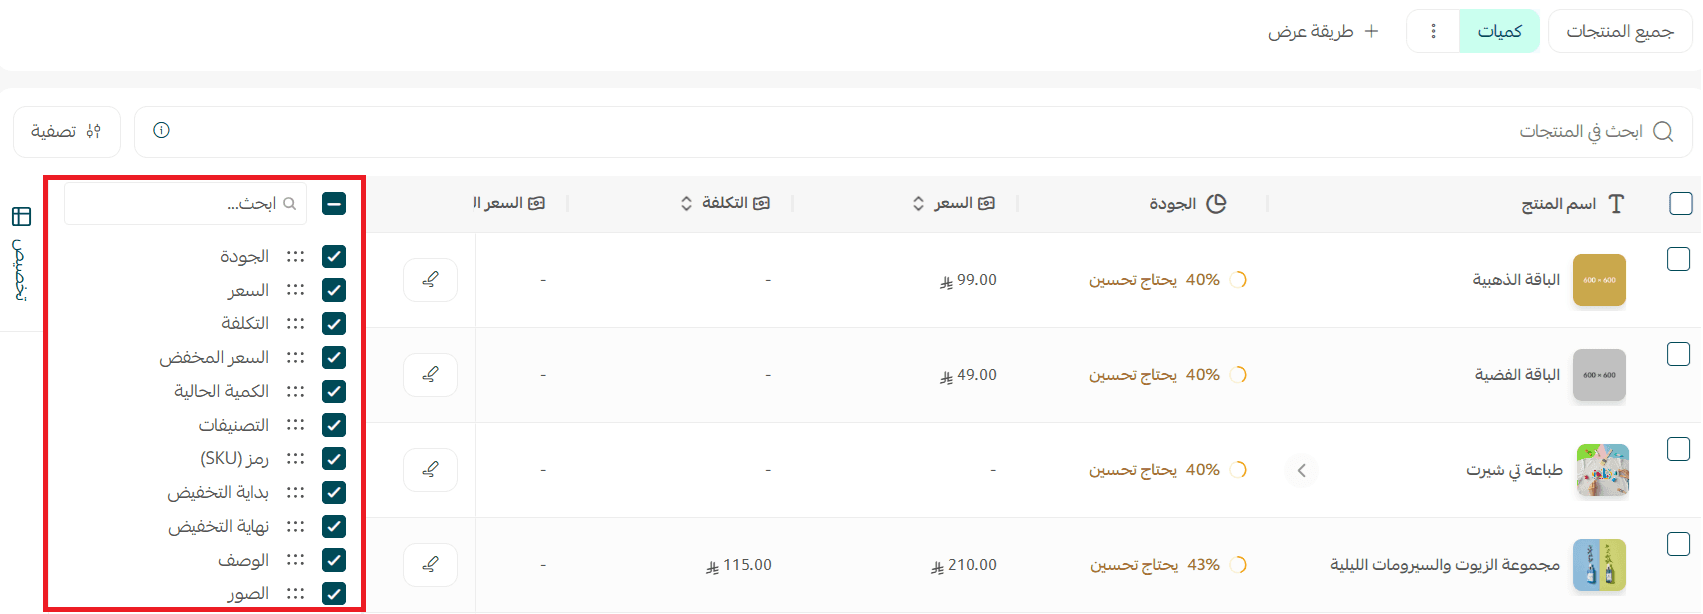
4. To change which columns are visible, click (Customize columns), then select the columns you want to show or hide. You can also drag any column and drop it in a new position to reorder the table around your priorities.
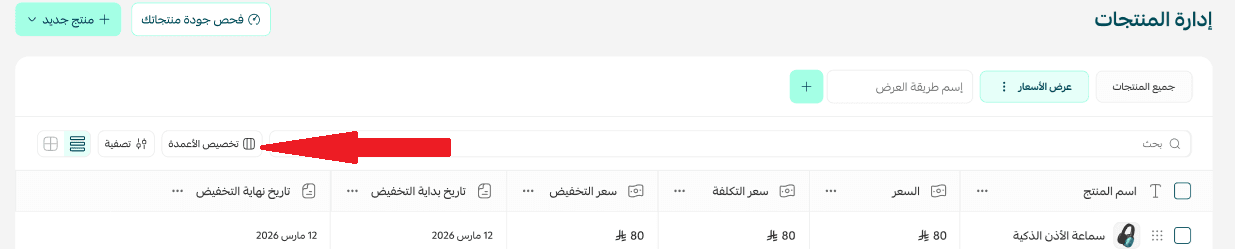
In the (Customize columns) window, choose the columns you want to show or hide, then click (Save) to apply the change.
💡 Note: The product name column and the actions column stay pinned while you scroll the table sideways, so you can always tell which product a row belongs to no matter how many columns are on screen.
5. To build a view that fits a specific job, click (+) next to (View), give it a name that says what it is for, such as "Quantities", and click (Add).

Use (Customize columns) to pick the columns this view should show. The choice is saved to that view only and does not affect any of your other views.
6. Change a view at any time by clicking the (...) icon next to its name. You get three options:
Save again: stores any changes you made to the columns.
Rename: changes the name of the view.
Delete: removes the view permanently.

💡 Example:
Create one view called "Quantities" that shows only the stock and quantity columns, and another called "Prices" for reviewing prices and cost. You then move between them from the tabs above the table instead of rearranging columns every time.
🗂️ Bulk actions on selected products
When you select more than one product using the checkboxes, the number selected appears above the table, for example Selected (1,500). From there you can apply one action to every selected product at once instead of repeating it product by product. Click the (...) icon next to the count to open the bulk actions menu.
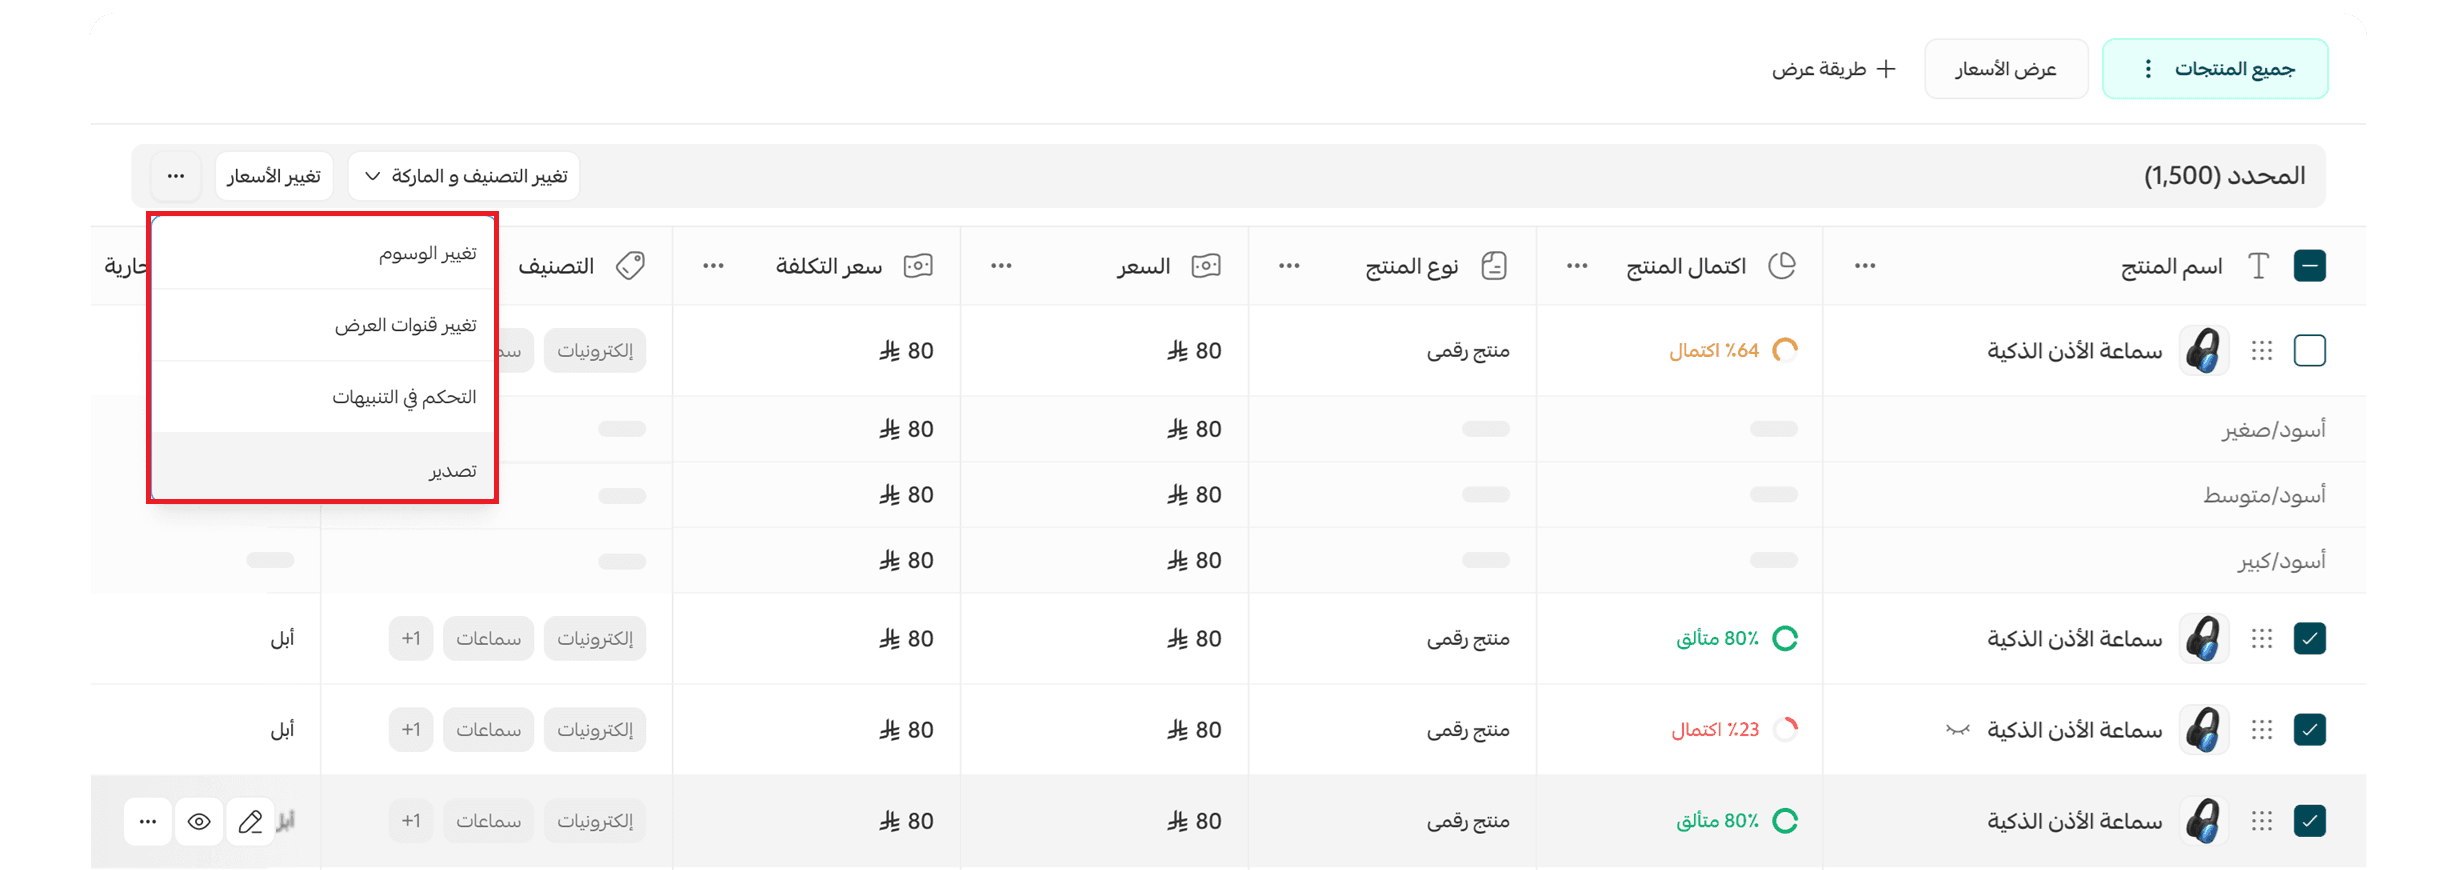
The menu includes:
- Change tags: add or edit the tags on every selected product in one go.
- Change display channels: turn specific sales channels on or off for all the selected products at the same time.
- Control notifications: set the notifications for the selected products, such as stock alerts, without opening each product.
- Export: export the data for the selected products only, rather than your entire catalog.
💡 Note: Bulk actions save the most time on large catalogs, for example updating the tags on a whole product category or switching off one sales channel for all of them at once.
🌍 Viewing products across multiple markets
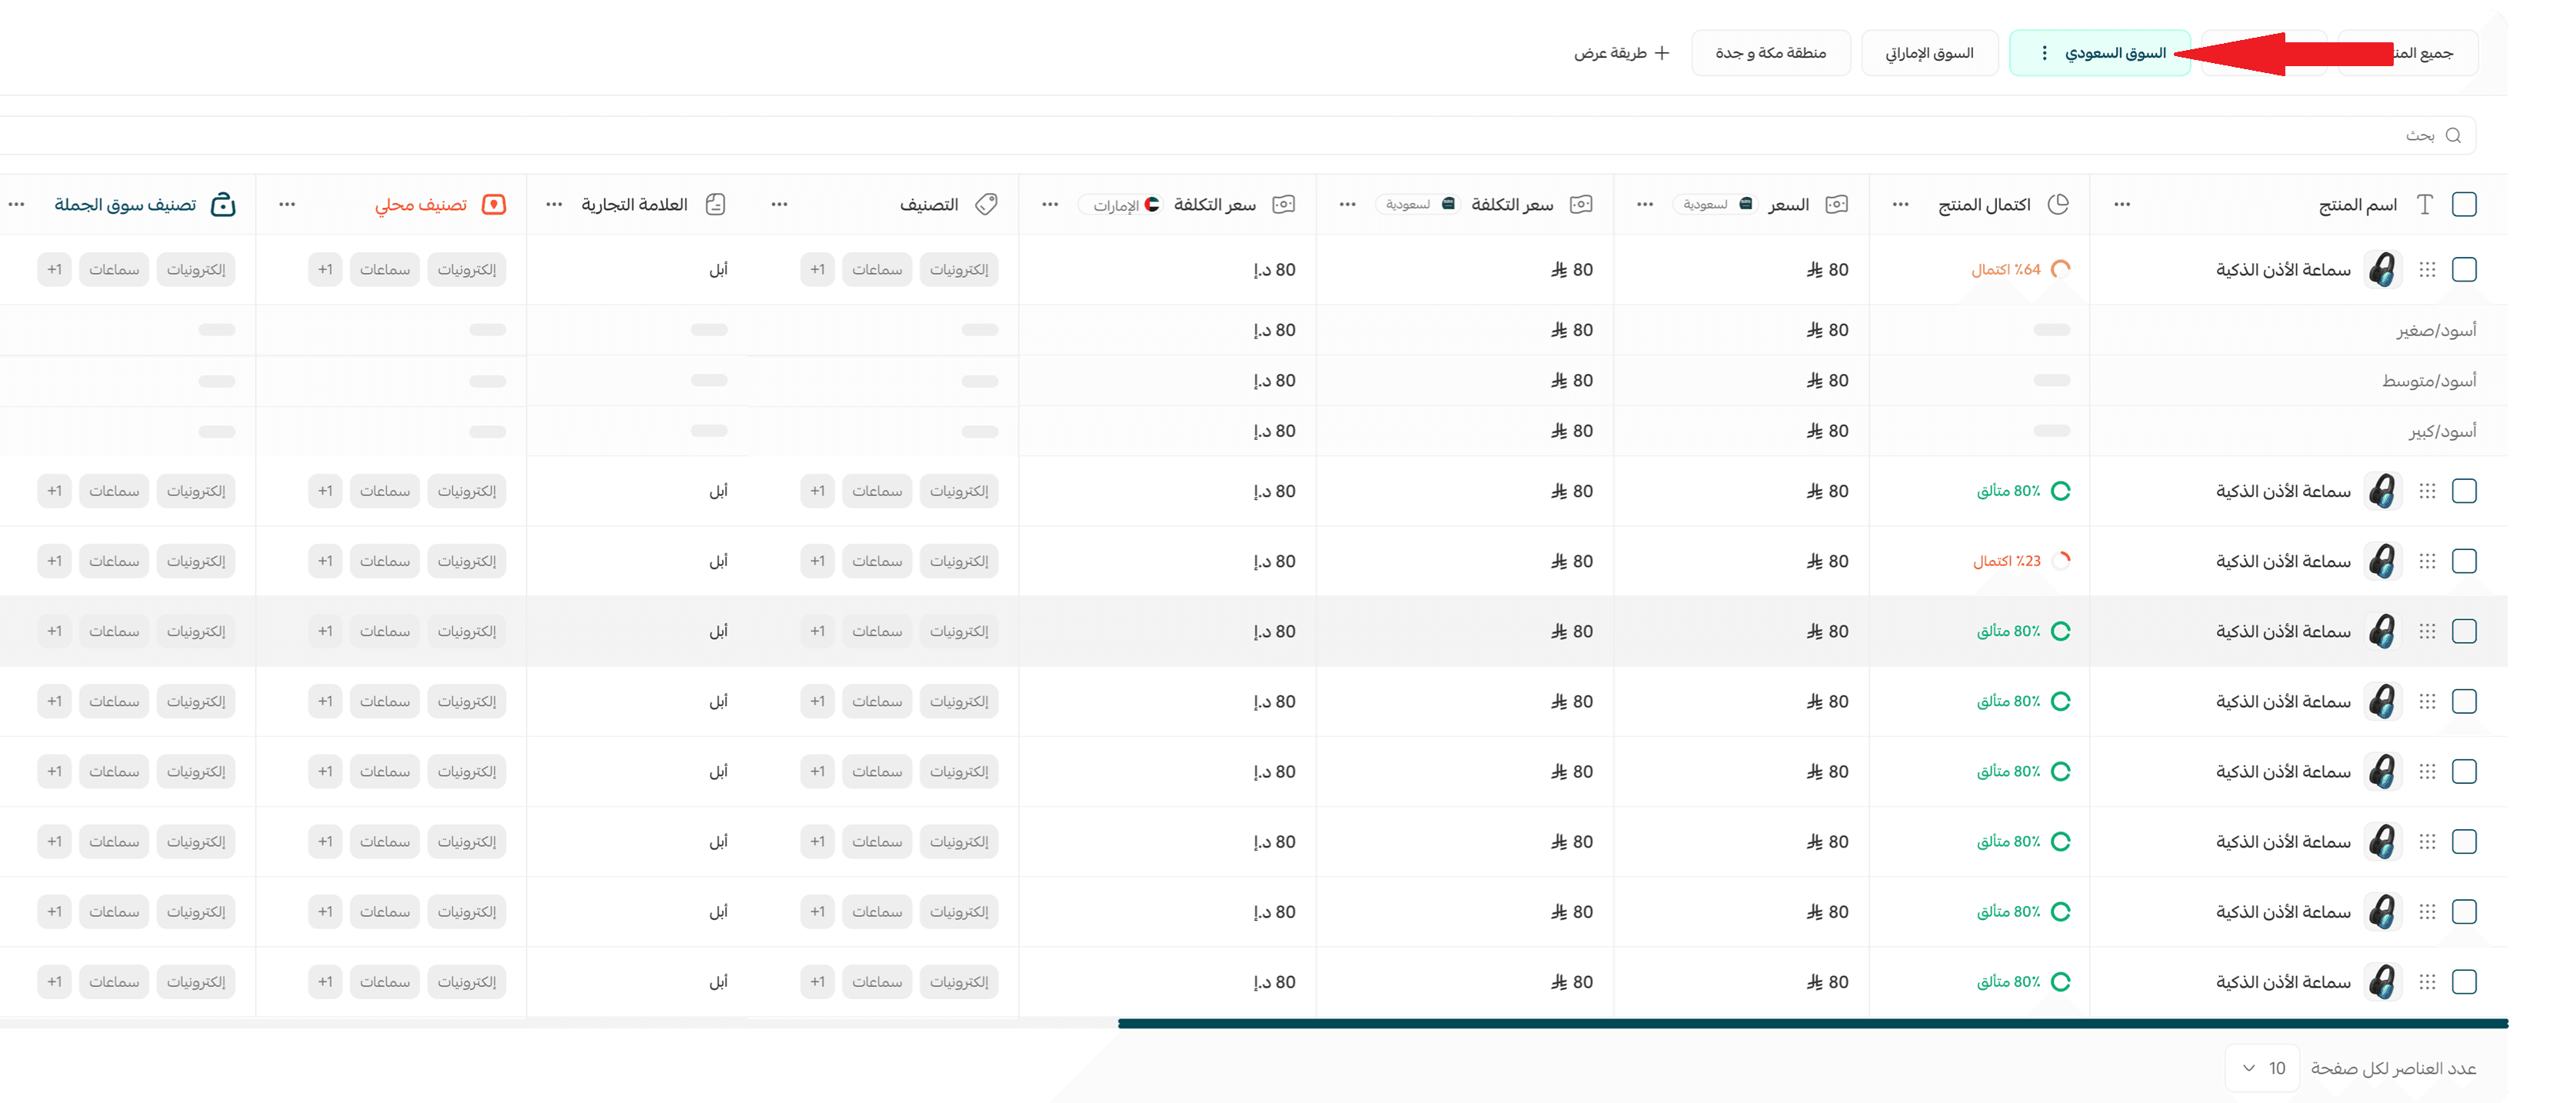
If your store has the multiple markets feature enabled, the table shows a separate set of columns for each market, including the price, the cost price, the sale price and the sale dates, plus a product display in markets column that shows which markets each product appears in. The default columns that cannot be edited in this view are hidden automatically.
❓ Frequently asked questions
❓ Do I need a specific plan to use the new product management table?
No. Salla merchants on every plan get the general improvements to the table, such as inline editing and column customization.
❓ Who can use the product display in markets column and its prices?
That column is available only to merchants who have the multiple markets feature enabled.
❓ Why do some sales channels appear disabled in the channels column?
A channel is shown as disabled automatically when it isn't available for your store, for example if you don't have an app connected to it.
❓ Do I need to save every edit separately?
No. Edit as many cells as you need across the table, then save them all together with a single (Save).
❓ Can I create more than one custom view?
Yes. You can create several views with different columns. Each one appears as its own tab that you can return to at any time.
🔍 More learning resources
To go further with managing your product catalog, see the Help Center articles on managing products and on multiple markets settings for your store.
🎯 The product management table gives you faster, more precise control over your catalog from a single place. Set it up around the way you work, and put the time you save back into growing sales.