Do your customers struggle to find clear information about your store, policies, or brand story?
Informational pages play a key role in building trust and improving clarity across your online store. Pages such as About Us, Terms of Use, and Return and Refund Policies help customers understand who you are and how your store operates. In this guide, you will learn how to create, manage, and use informational pages effectively to deliver a more professional and transparent shopping experience.
📌 Article overview
- What informational pages are
- How to create an informational page
- How to manage informational pages
- Creative ways to use informational pages
- Frequently asked questions
What are informational pages?
Informational pages are pages created to explain key aspects of your store. These include pages like About Us, Terms and Conditions, Privacy Policy, and Return and Refund Policy. They can also be used to explain specific materials, processes, or components involved in your products through detailed and clear descriptions.
How to create an informational page
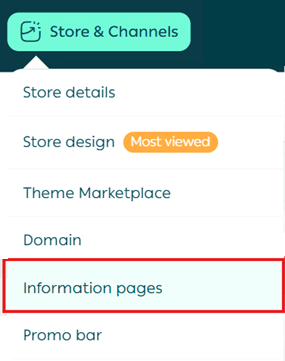
- From the main menu, go to Store & Channels, then select Informational Pages.
2. Click New Page to create a new informational page.

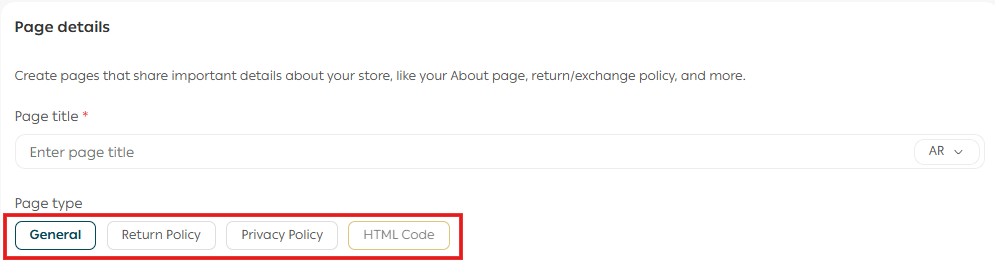
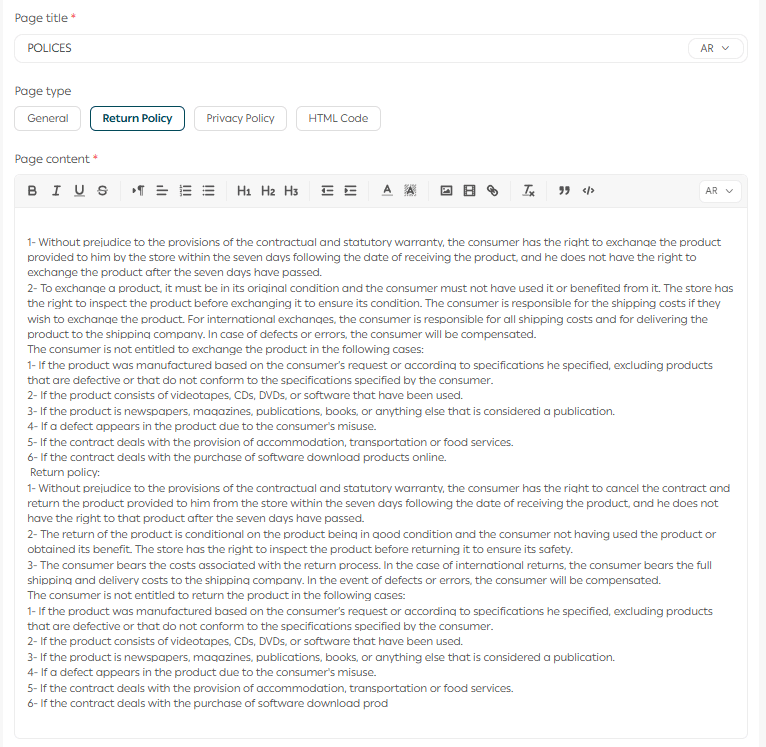
3. Enter the page title and choose the page type:
- General
- Terms and Privacy Policy
- Return and Refund Policy
- HTML Codes
4. Write the page content. You can include text, images, videos, and external links as needed.
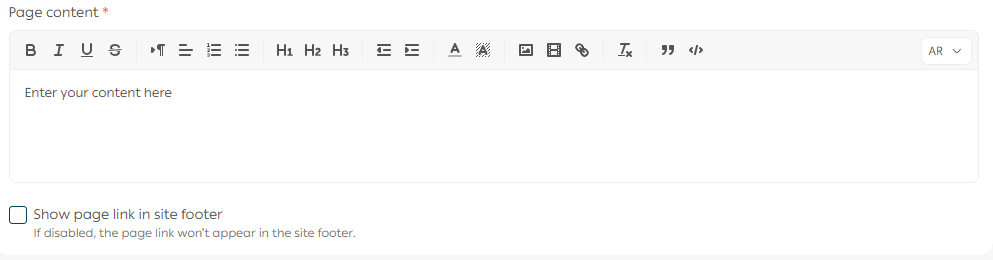
Note: When selecting Terms and Privacy Policy or Return and Refund Policy, a default template will appear in the editor. You can use this template as a starting point and customize it to match your store’s policies.
For advanced formatting, you can also create an informational page using HTML.
5. Click Create page to publish the page and control its visibility.

Managing informational pages
1. Disabling a page
To hide a page from customers without deleting it:
- Change the page status to Draft
This keeps the page saved but invisible to customers.

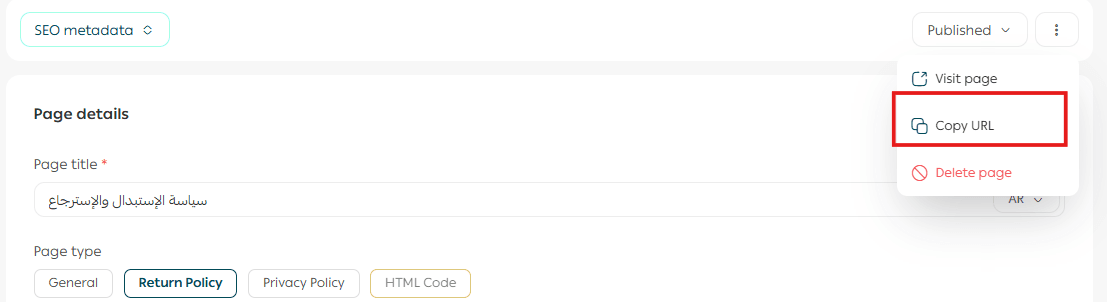
2. Copying a page link
To copy the direct link of an informational page, open the page menu, click the three dots, then select Copy URL.
Creative uses for informational pages
Informational pages do not have to be static or boring. Used creatively, they can strengthen your brand and improve engagement.
1. Product journey page
Create a page that shows how your product is made, from idea to delivery.
- Add behind-the-scenes photos and videos
- Use a timeline or visual flow of the production process
- Explain the materials used and why they were chosen
Benefit: Builds trust and creates an emotional connection with your brand.
2. Your story page
Instead of a basic About Us page, tell your story in a narrative way. Share how the store started, the challenges you faced, and the values that guide your business.
3. Store by the numbers
Create a page that highlights your achievements using real data.
- Number of products sold
- Customer satisfaction rate or total reviews
- Countries your store ships to
- Sustainability impact if applicable
Benefit: Strengthens credibility and encourages purchasing decisions.
4. Product usage guides
If your products require explanation or instructions, create a dedicated guide page.
- Tutorial videos
- PDF manuals
- Step-by-step instructions
Benefit: Improves customer experience and increases long-term loyalty.
5. Common mistakes and how to avoid them
Create a page that educates customers on common mistakes when using your products.
Examples:
- Five common mistakes when choosing the right perfume
- How to care for leather shoes properly
Use visuals or videos to make the content easier to understand.
Benefit: Reduces customer inquiries and increases satisfaction.
Frequently asked questions
How can I display an informational page link in my store?
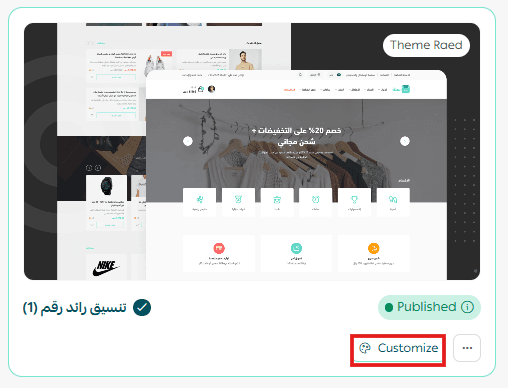
- Go to Store Design and open Theme Customization for your active theme.
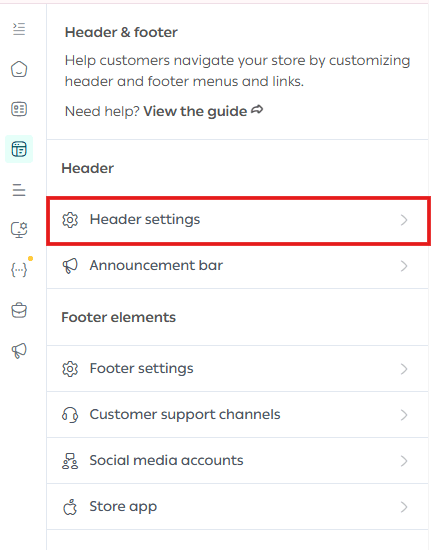
2. Open Menu Management, such as the header menu.
3. Click Add New Menu
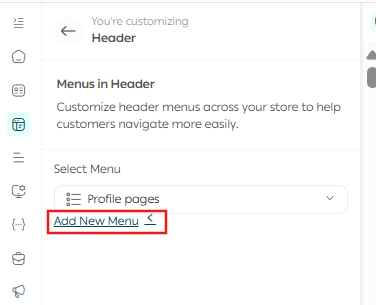
4. Add a new menu item and edit it
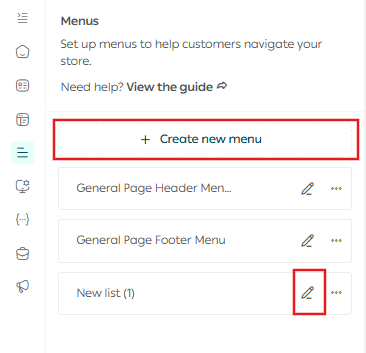
5. Enter the title, select Informational Page as the link type, choose the page, decide whether it opens in a new tab, then click Save Changes.
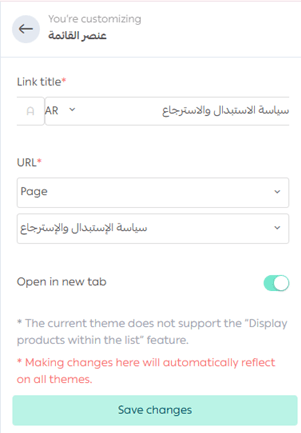
Note: To display categories alongside informational pages in the header, categories must be added using the same method.
The page will now appear in your store navigation.

Why assign a page as a Return and Refund Policy?
Assigning a page as a Return and Refund Policy allows the policy to be accessed via a barcode printed on invoices. Customers can scan the barcode to view the policy instantly. This also helps your store meet key e-commerce invoice compliance requirements.
Additional Support
If you need professional help writing clear, well-structured informational pages that build trust and reflect your brand identity, you can use Merchant Services to work with trusted external service providers and elevate your store content.