In today’s competitive environment, typography has become one of the most powerful tools for visual brand differentiation.
The custom font feature in the Store Customization page allows you to showcase your brand identity in a professional, simple way—without any technical complexity.
📌 Article overview
- Uploading custom fonts in Salla
- Creating the font code on GitHub
- Linking the font to your Salla store
Uploading custom fonts in Salla
Salla provides several options for customizing fonts in your store:
- Salla fonts
- Google Fonts
- Uploading a custom font (designed or purchased from a designer or websites such as):
- Alfont
- Arabfonts
All you need to do is:
- Upload the font file (TTF) to an external server
- Then include a CSS file link so the system can read and load the font correctly
You can use your own server or any file hosting service.
In this article, we’ll explain how to upload fonts using GitHub, which provides a free and simple solution without programming complexity.
Adding the font on GitHub
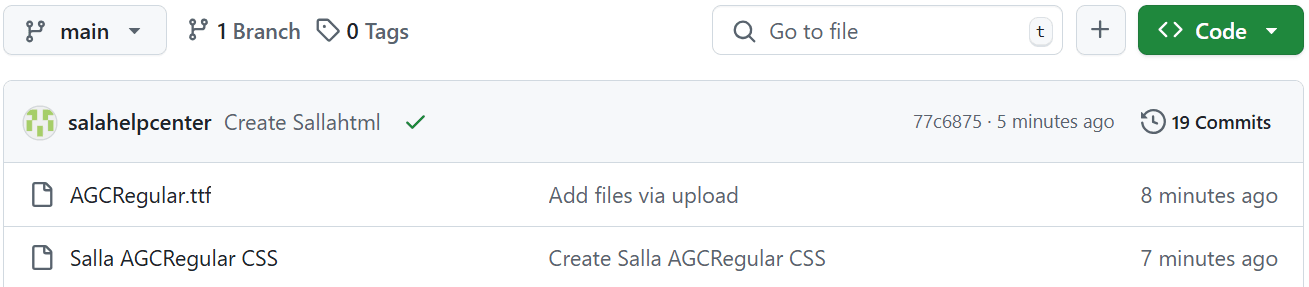
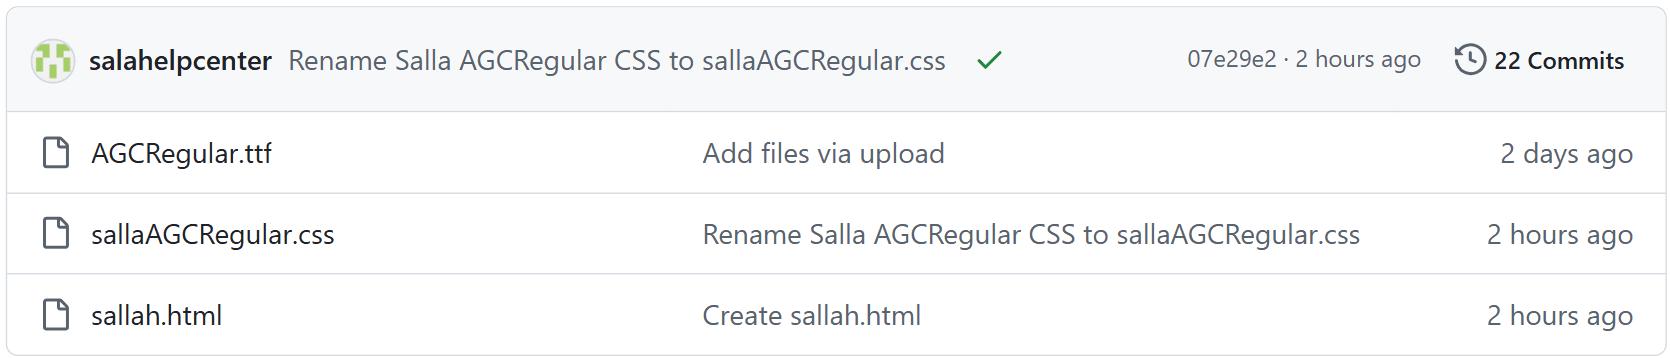
Upload the font file (TTF)
- Log in to GitHub, then from the homepage click (New repository).
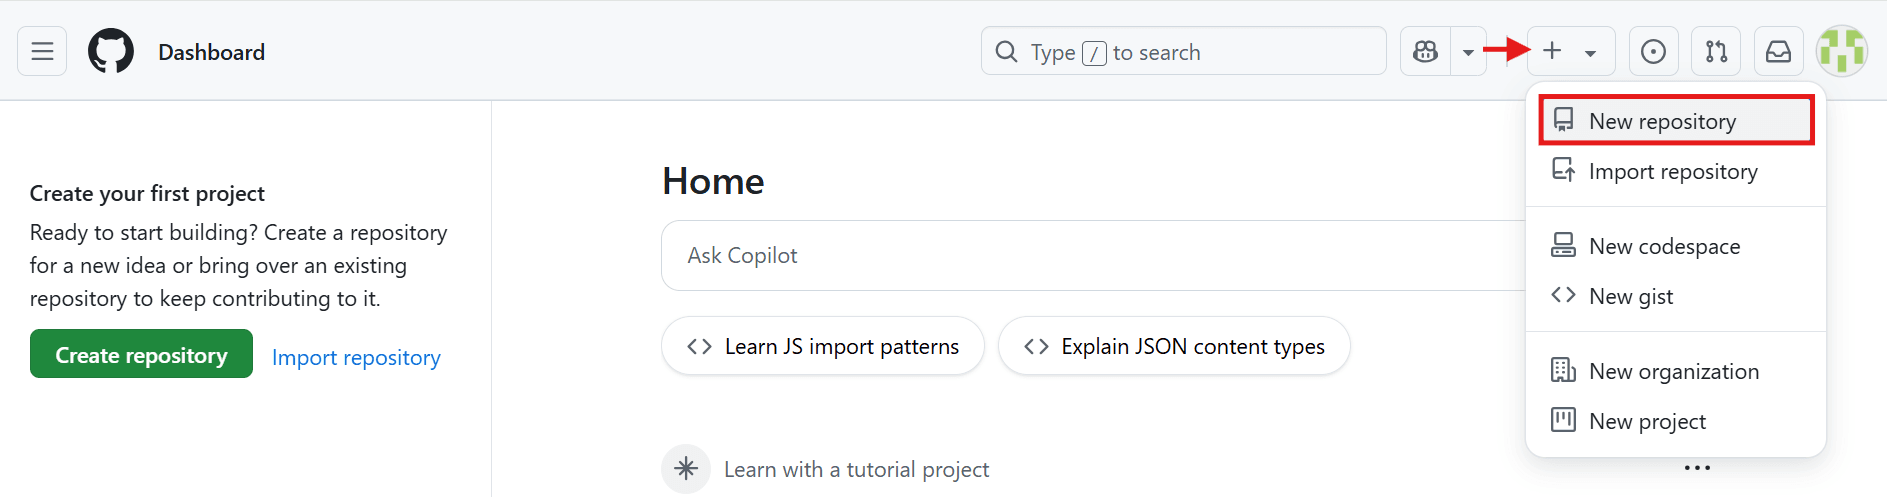
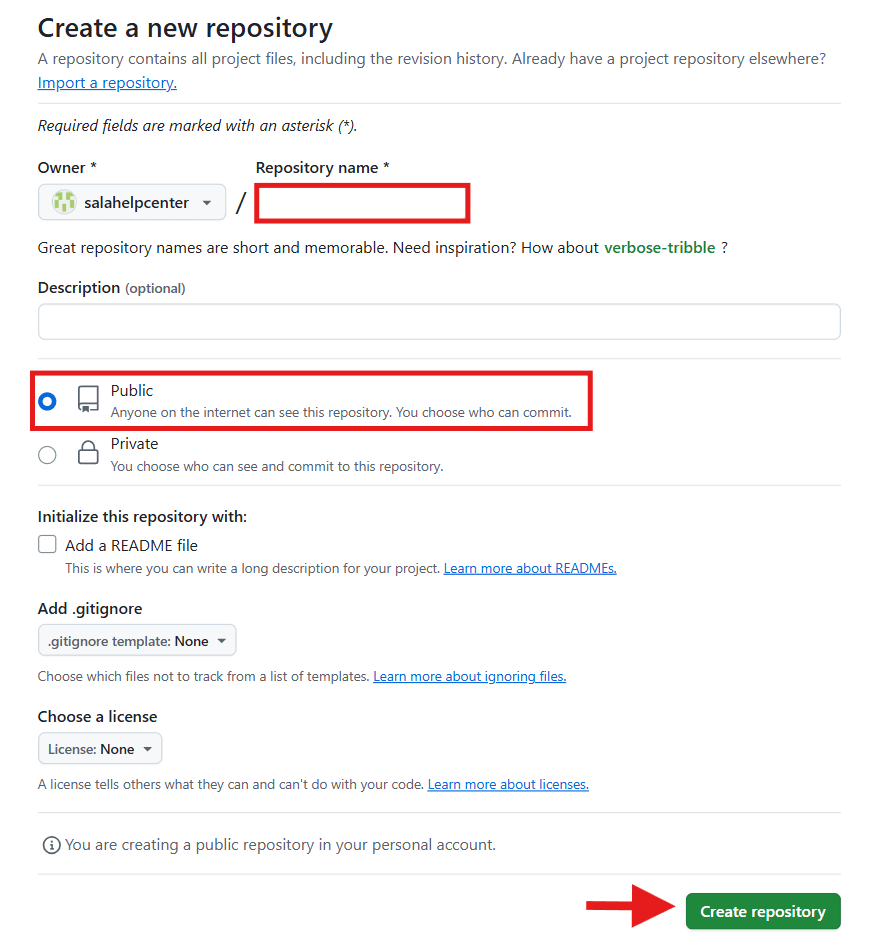
- Enter a name for the repository, make sure it is set to Public, then click (Create repository).
📝 Important note: Do not change any other settings.
- Click (uploading an existing file) to upload your font file.
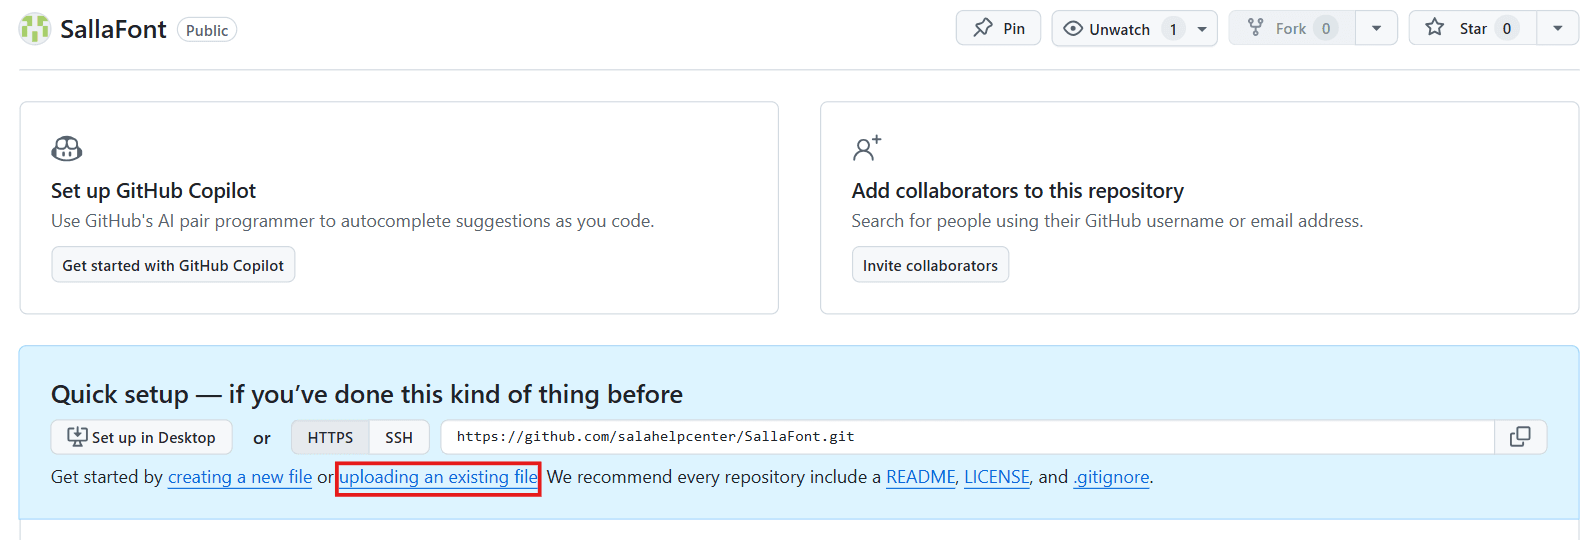
- Upload the font file and make sure the format is .ttf, then click (Commit changes).
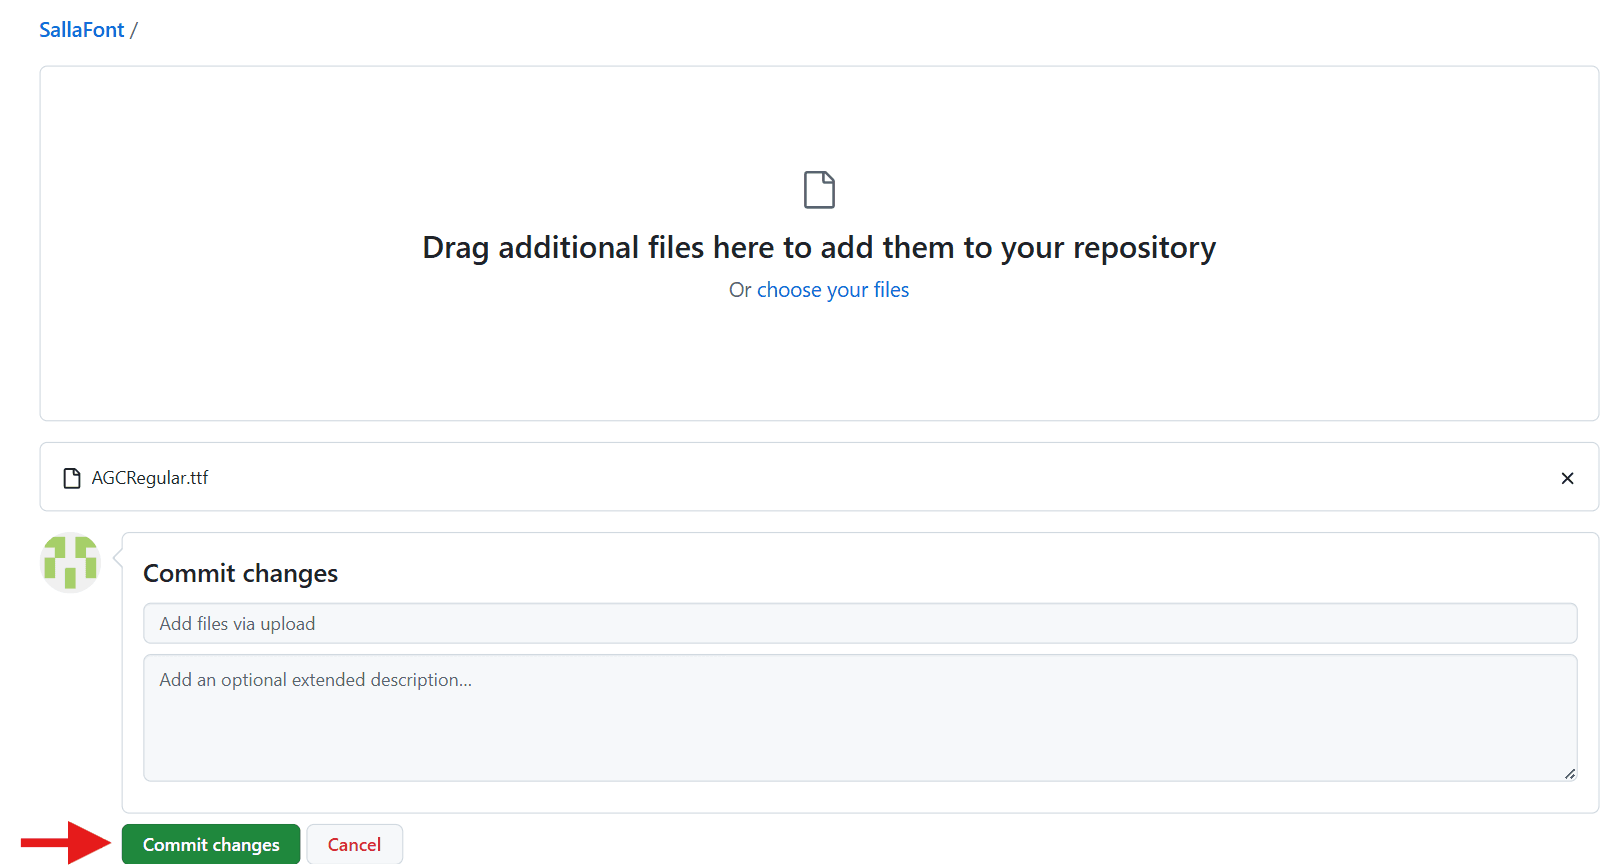
✔️ Your font file has now been uploaded successfully!

Add the CSS file
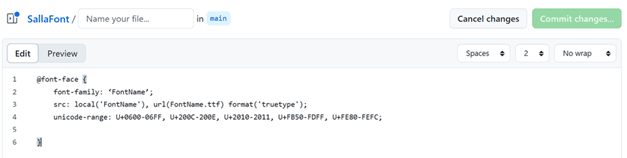
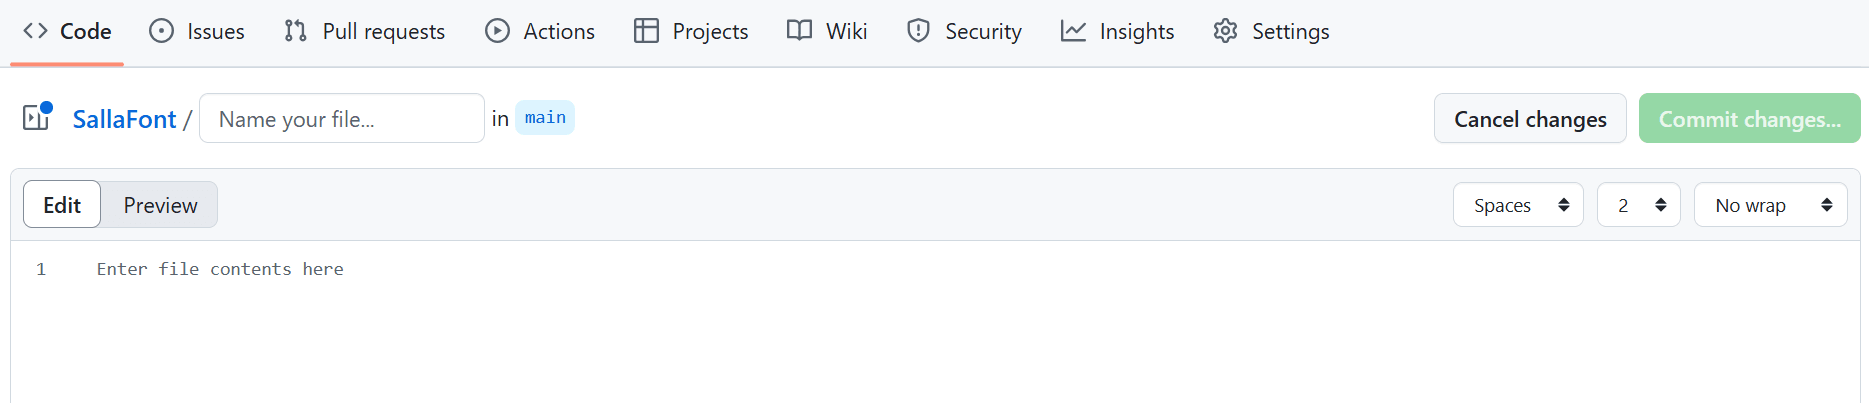
- To link the font to Salla, create a new file by clicking (Create new file).

- Enter a file name that ends with .css, for example: salla.css

📝 Important notes:
- The file name must be in English
- No spaces (use sallafont, not salla font)
- Must start with lowercase letters (use salla, not Salla)
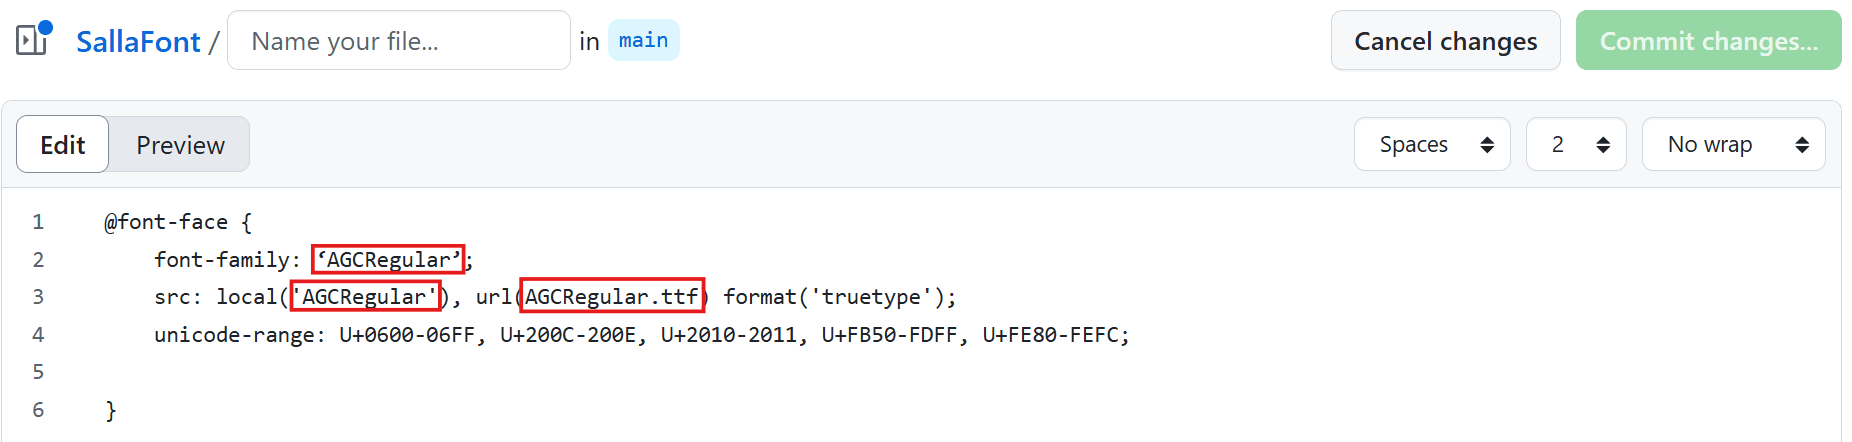
- Paste the following code into the text editor:
@font-face {
font-family: "Alfares";
font-style: normal;
src: url(Alfares.ttf) format("ttf");
font-display: auto;
}
@font-face {
font-family: "Alfares";
font-style: normal;
font-weight: 700;
src: url(Alfares.ttf) format("truetype");
unicode-range: U+0000-00FF, U+0131, U+0152-0153, U+02BB-02BC, U+02C6, U+02DA,
U+02DC, U+2000-206F, U+2074, U+20AC, U+2122, U+2191, U+2193, U+2212, U+2215,
U+FEFF, U+FFFD;
}
body {
font-family: "Alfares", cursive;
text-align: center;
}
h1 {
font-weight: 700;
}
h2 {
font-weight: 400;
}
⚠️ In this code, "Alfares" is the font name used as an example. Replace it with your own font name.
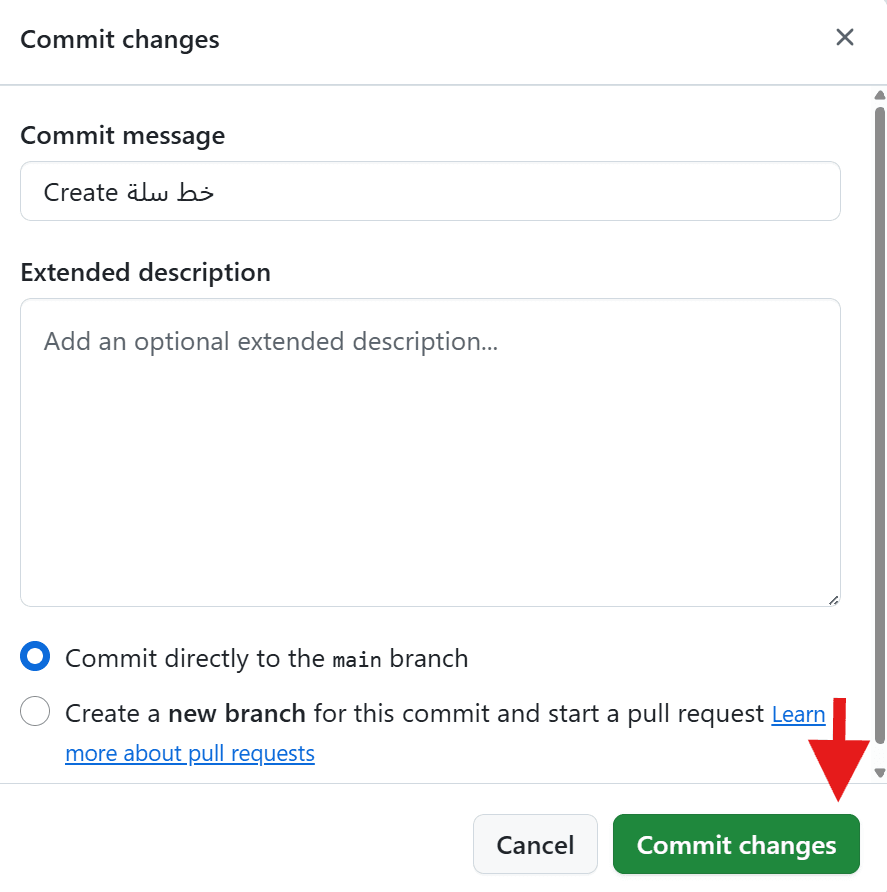
- After pasting the code, replace all highlighted text with your font name, making sure it matches the font file name uploaded earlier. Then click (Commit changes).
- Keep the default settings and click (Commit changes) again.
✔️ The font has been added successfully! Only a few final steps remain to link it to your Salla store.
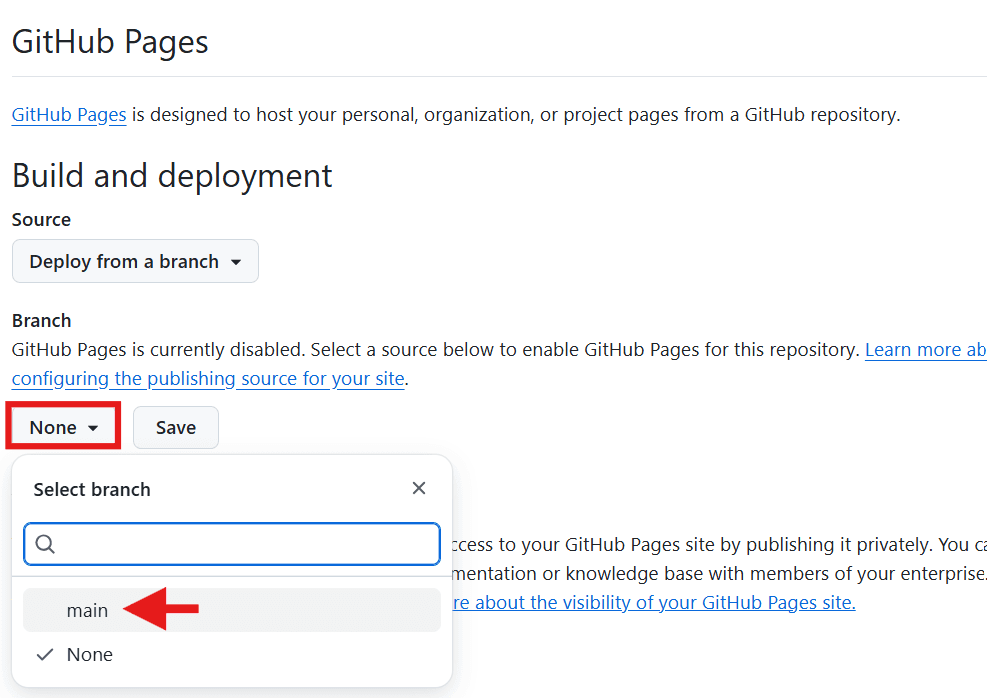
- Go to the Settings tab, then from the sidebar click Pages.
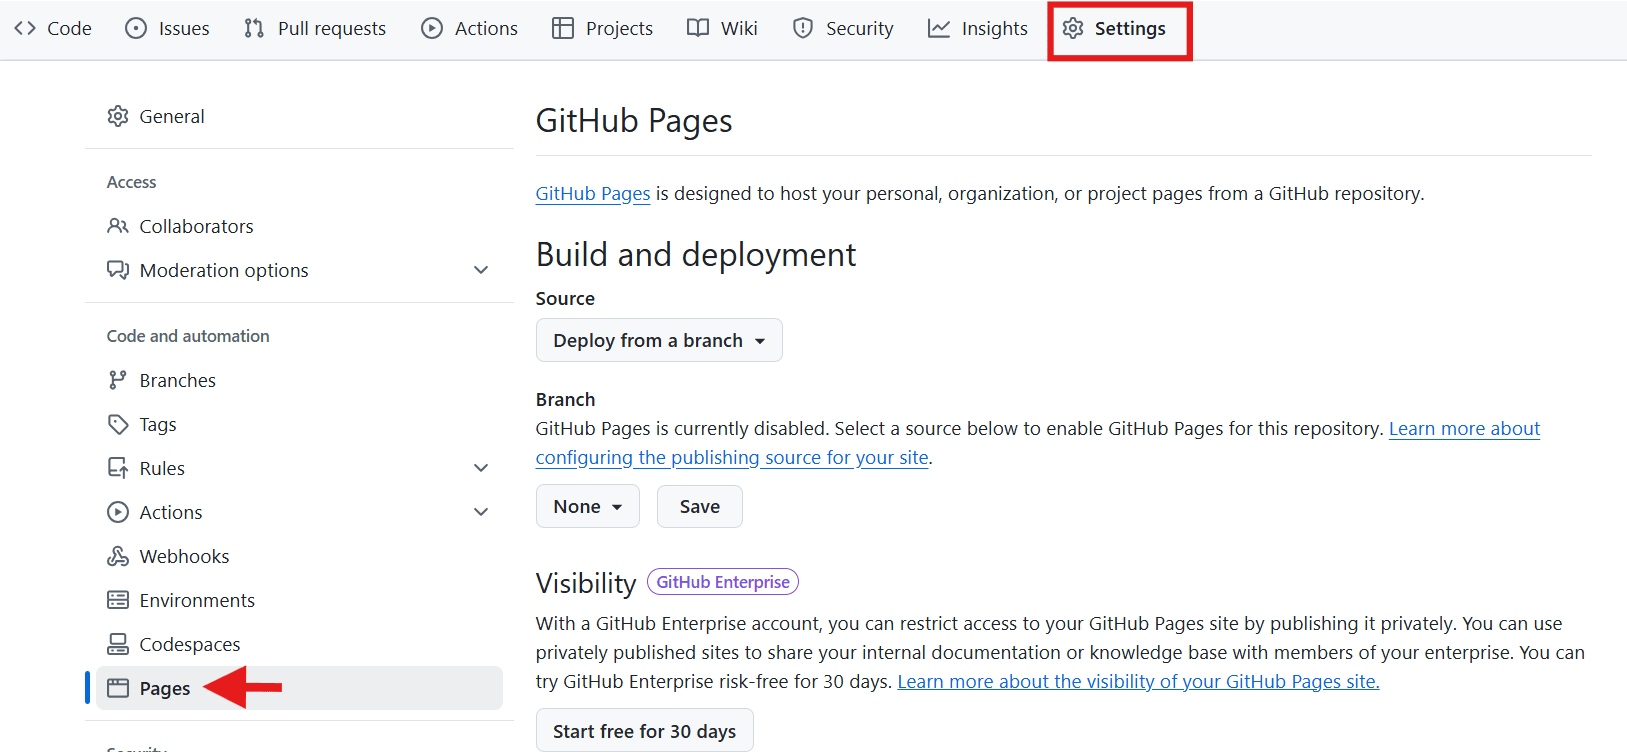
- Under Branch, select main, then click Save.
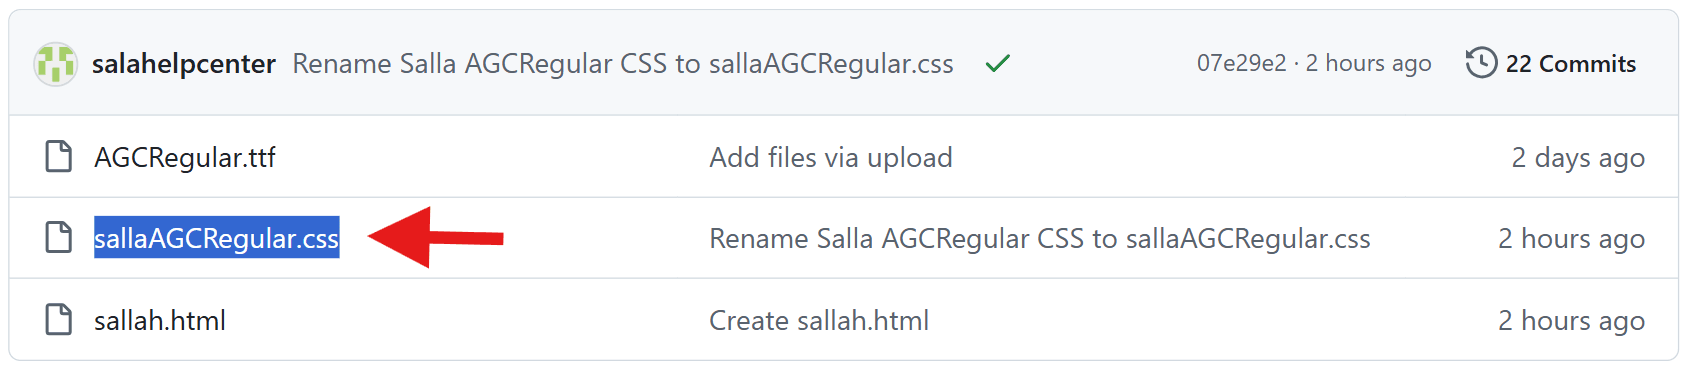
Upload the HTML file
- From the top menu, click Code, then Add file → Create new file.
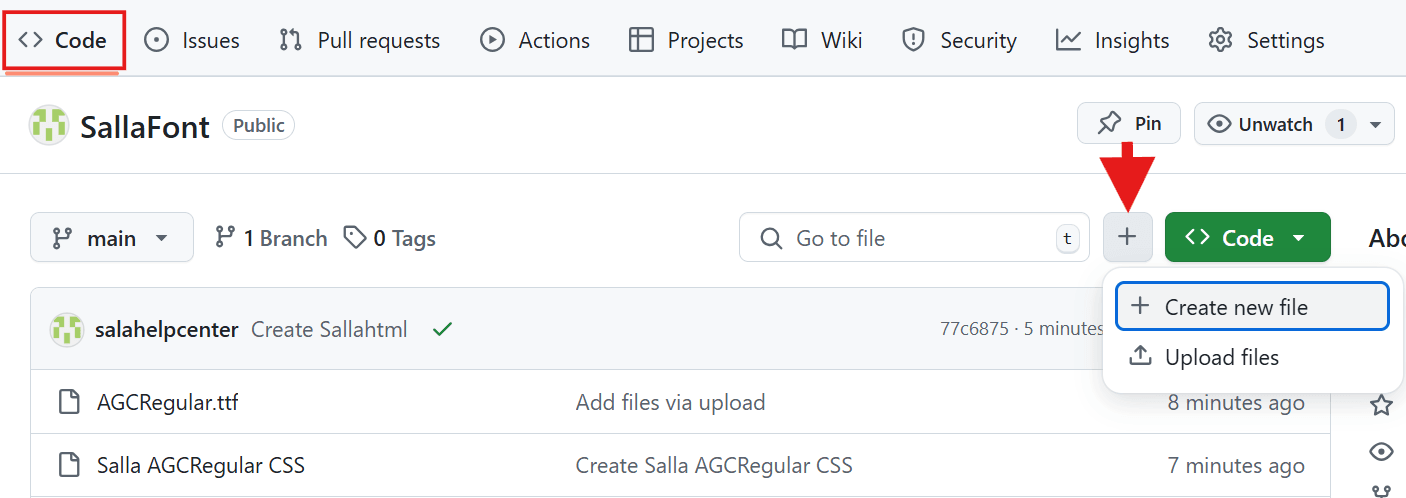
- Without making any changes, enter a file name ending with .html, for example: salla.html
Then click (Commit changes).
✔️ Fonts have now been successfully added!
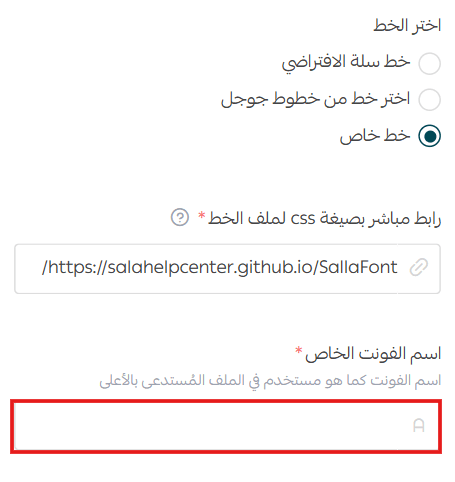
Linking the font to Salla
- Go to the Settings tab → Pages → click Visit site.
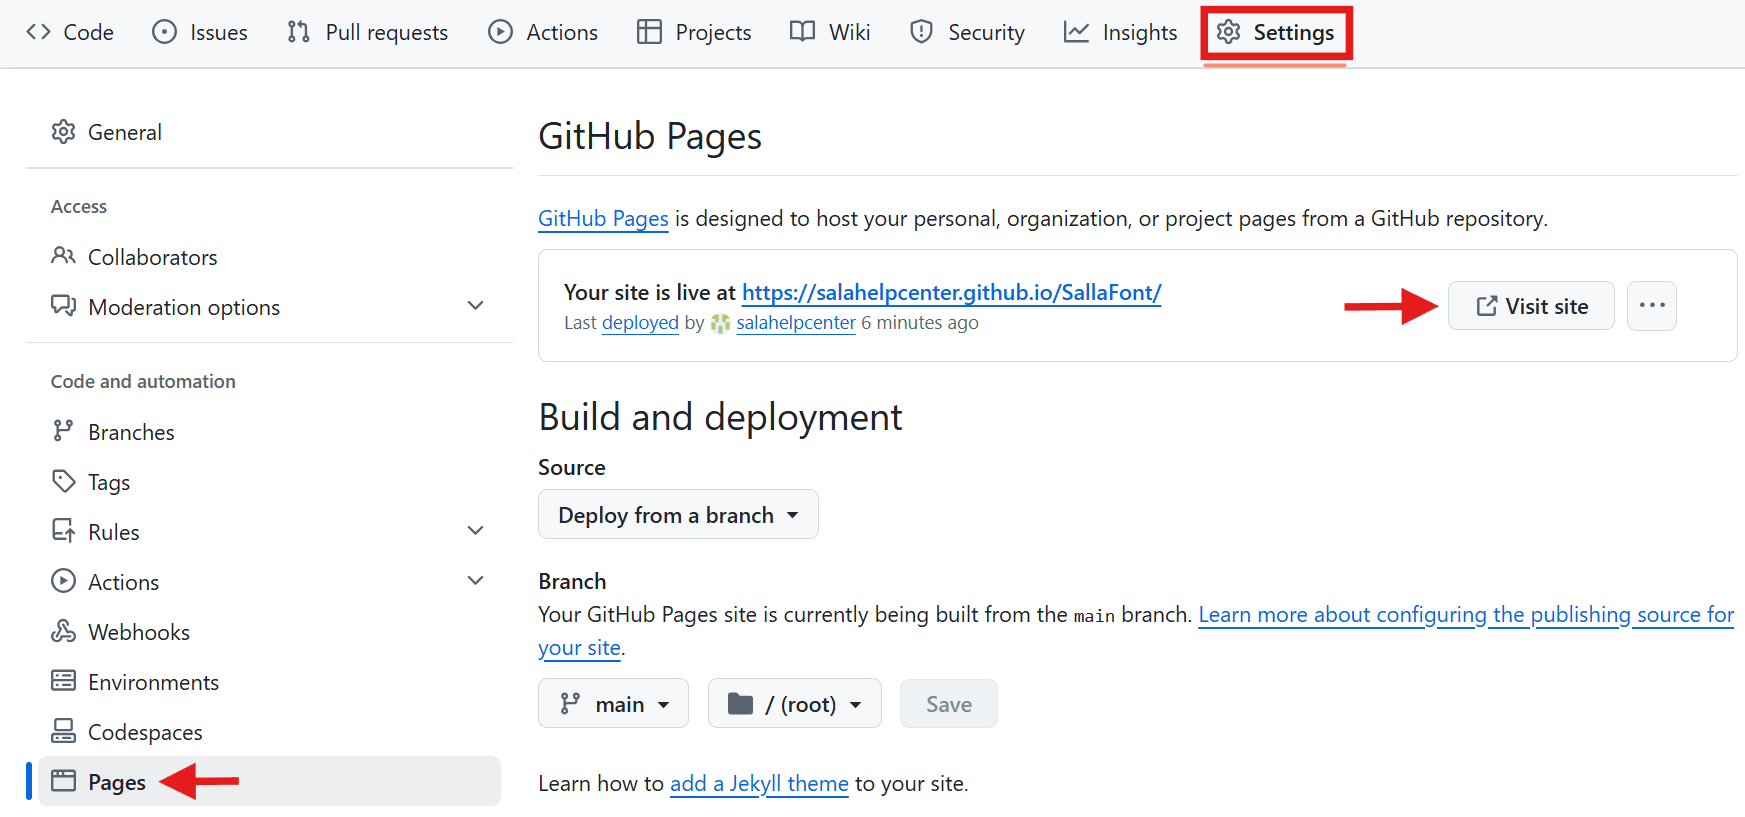
- From the generated link, append the name of your CSS file.
(This refers to the CSS file you created earlier.)
- When the code appears on the page:
- Copy the URL
- Add it to the Theme Customization font link field
Then, in the Custom Font Name (Font Family) field, enter the same font name used in your CSS file, and click Save Changes.
🎉 Congratulations! Your custom font is now successfully applied to your store.