In this article, we’ll guide you step by step through setting up Salla Chat to improve communication with your customers. Follow along to learn how to customize tools and chat settings to deliver an excellent customer experience in your store.
📌 Article overview
- Managing Salla Chat settings
- Salla Chat settings options
To complete the remaining setup steps, go to: Salla Chat settings: Part two
Managing Salla Chat Settings
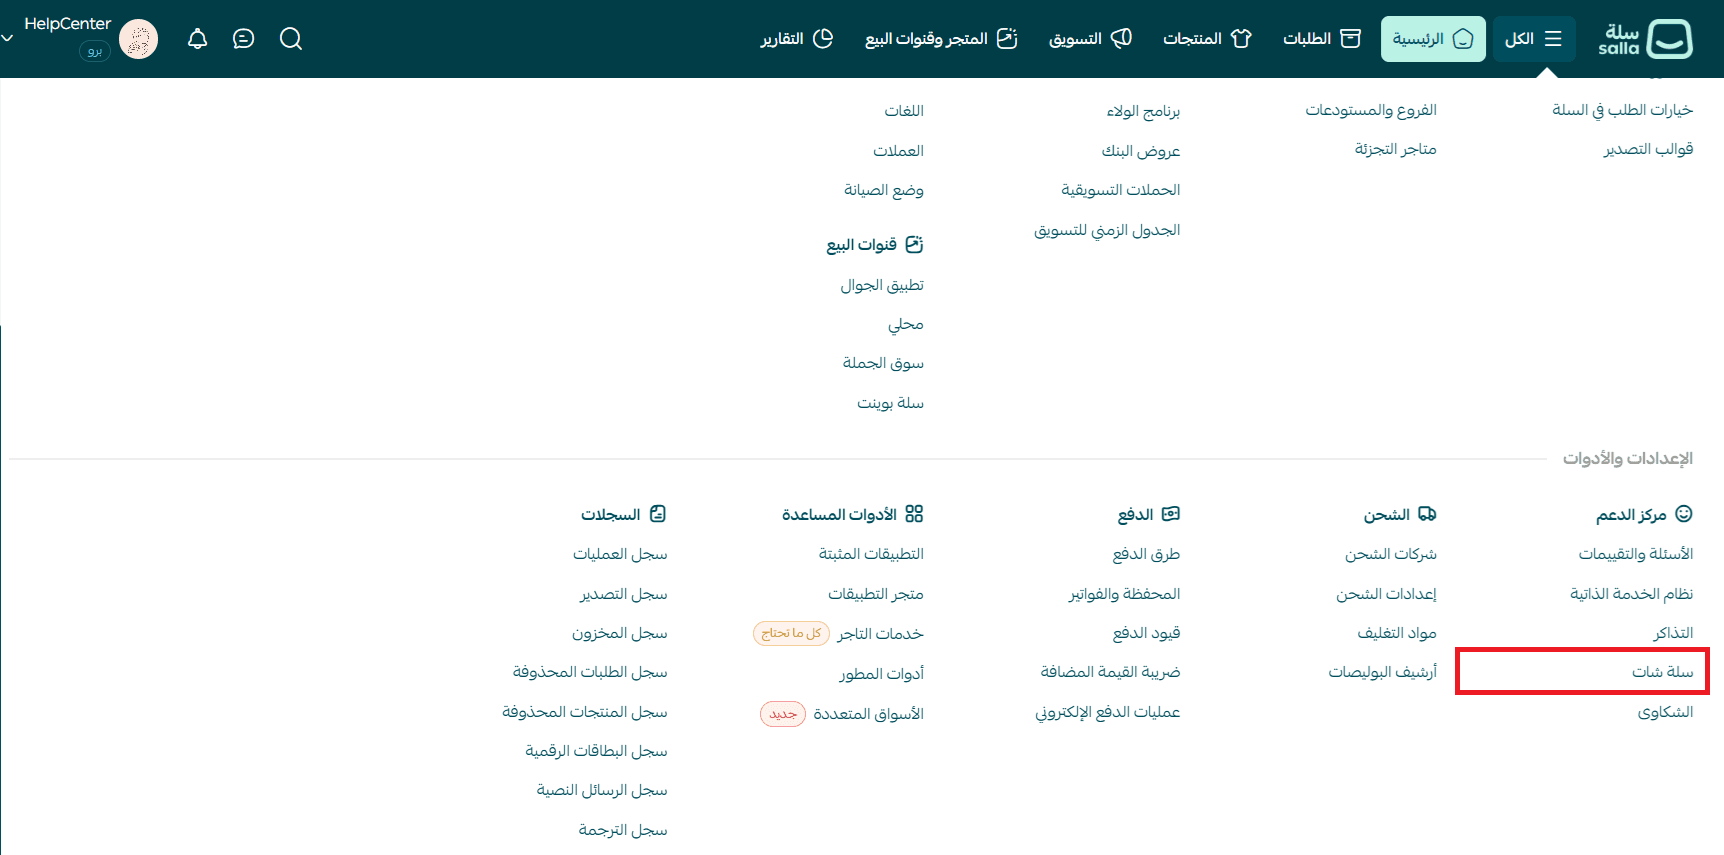
- From the main menu, click All, then from the Settings & tools section, select Salla Chat.
- From the Salla Chat menu, click the settings icon to access the Salla Chat Settings options.

Salla Chat settings options
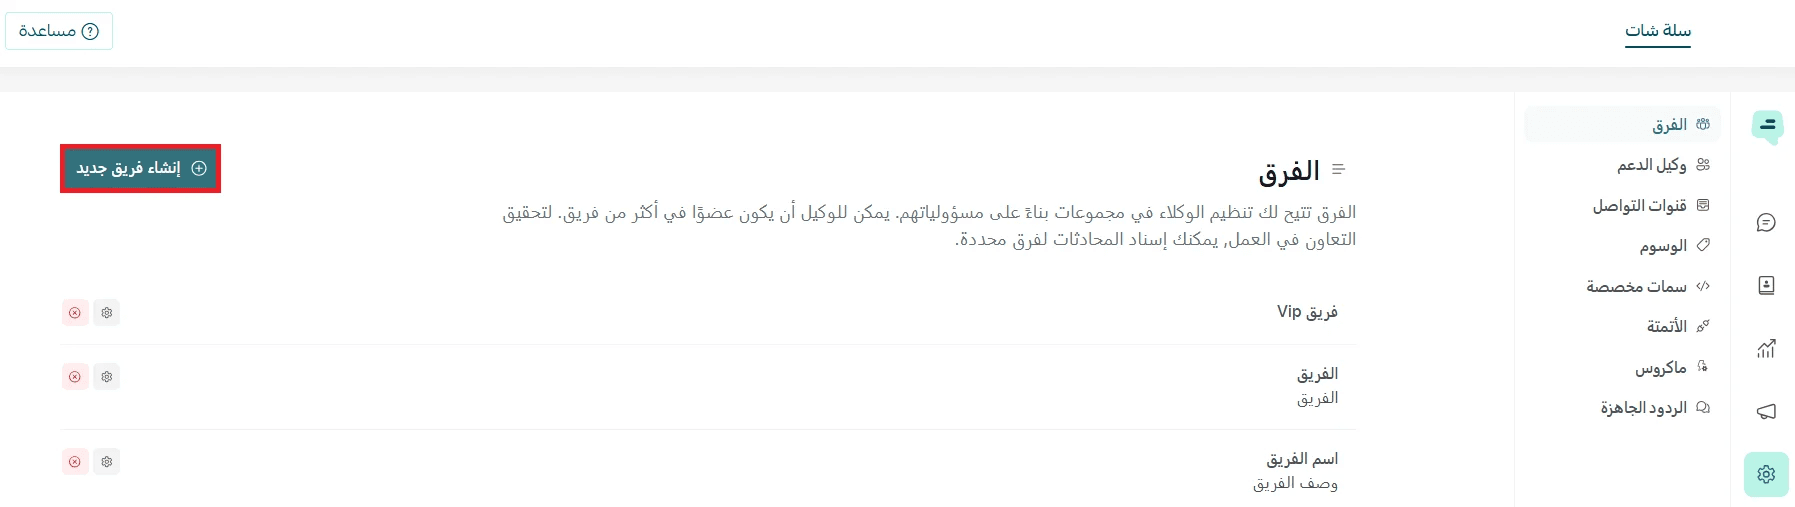
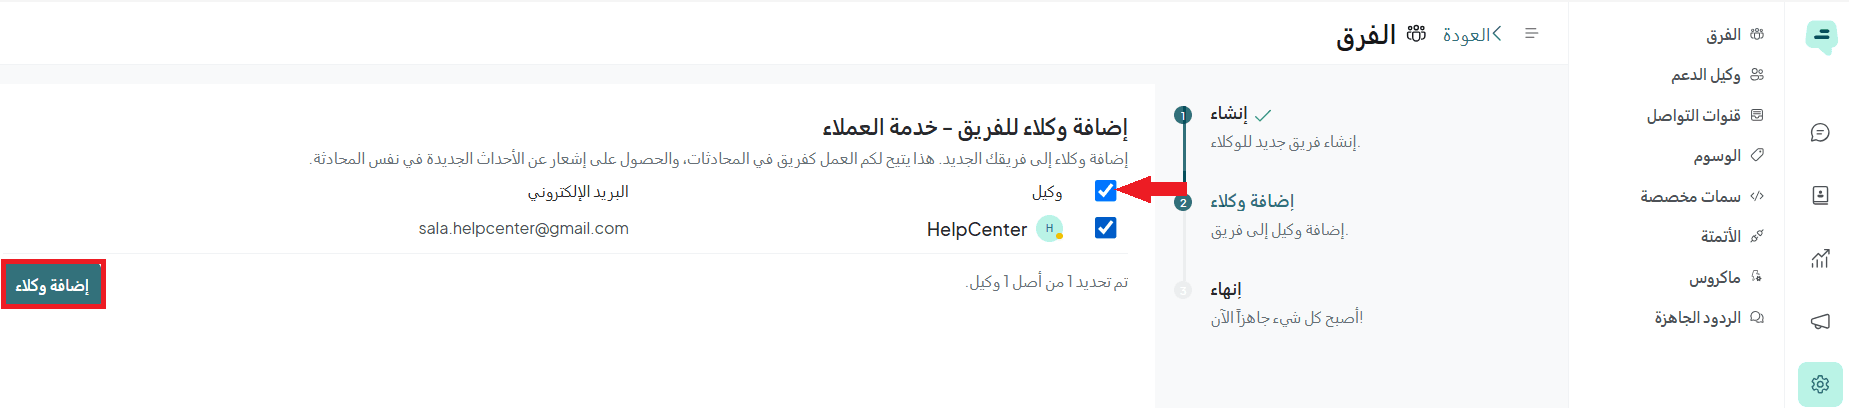
1. Teams
The teams feature helps you organize employees into groups based on their responsibilities. An employee can belong to more than one team, and you can assign conversations to a specific team for collaborative handling.
To create a new team, click Create new team.
Enter the team name and description, for example, a Customer support team dedicated to handling customer inquiries.
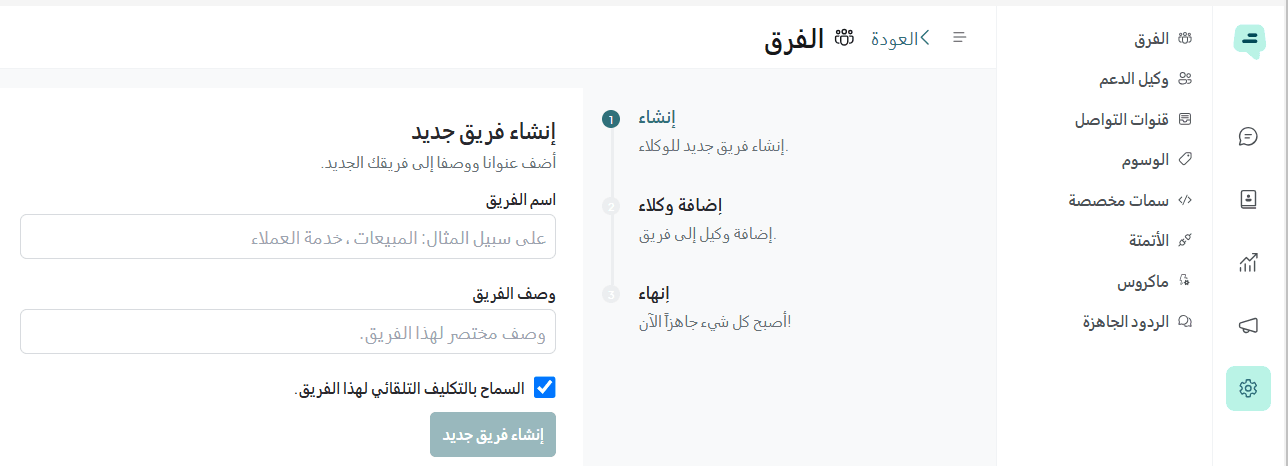
📖 Additional info: You can enable automatic assignment, which distributes conversations evenly among team members.
Add employees by selecting them, then click Add agents.
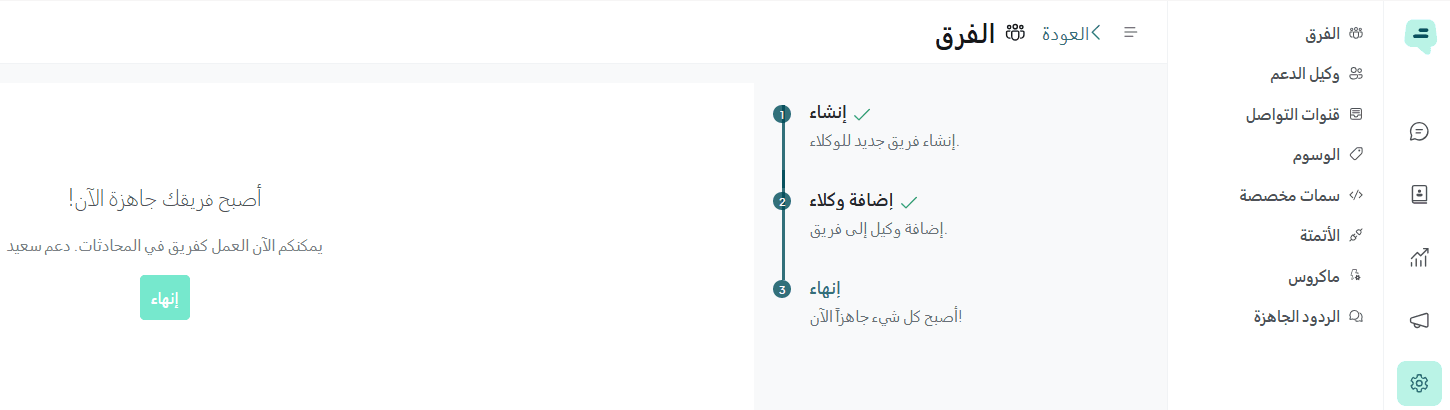
Done! Your team has been created successfully.
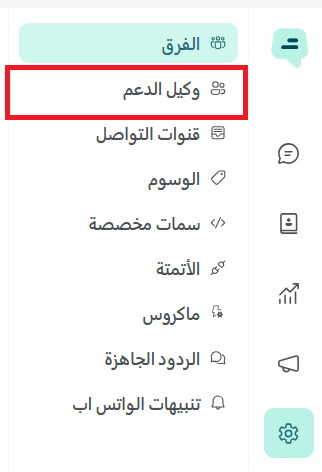
2. Support agent
In this step, you add customer support staff and assign them the appropriate permissions. Support agents can read and reply to incoming messages based on their assigned roles.
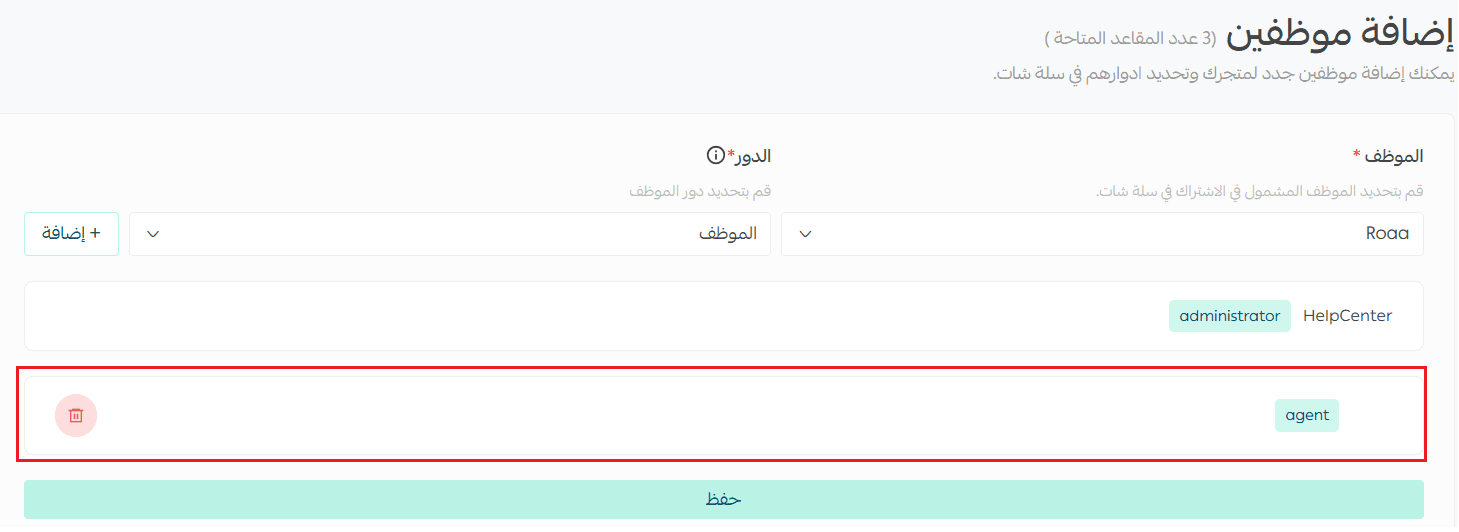
To add an employee, go to Settings → Support agent.
📝 Note:
- The store owner (admin) is automatically added to Salla Chat and does not count towards the number of employees allowed in the plan.
- The store owner can add employees according to the plan limits.
Example: If your plan allows 1 employee, then 2 users will have access: the store owner + 1 employee.
Select the employee, assign a role, then click Add.

After clicking Save, the employee will be added successfully.
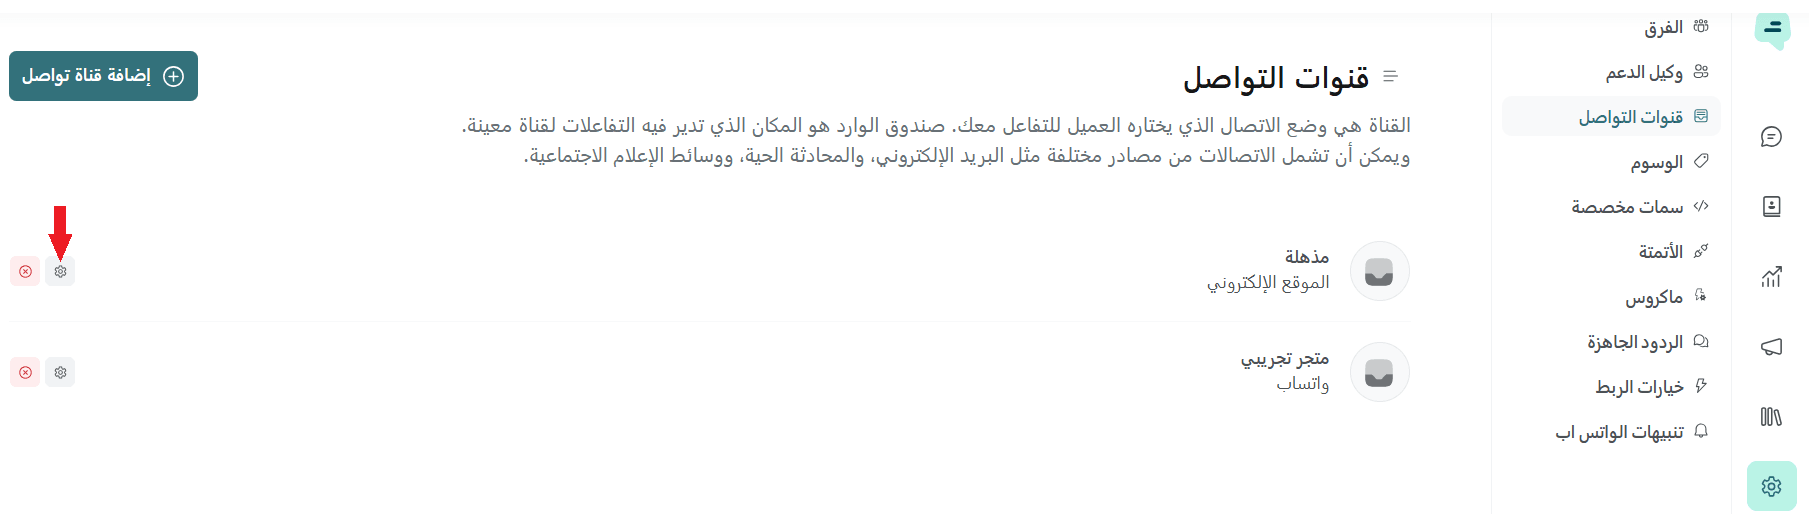
3. Communication channels
A channel is the method your customers use to contact you (e.g., email, live chat, or social media). Each channel has its own inbox for managing interactions.
To add a new channel: Go to Settings → Communication channels → Add channel
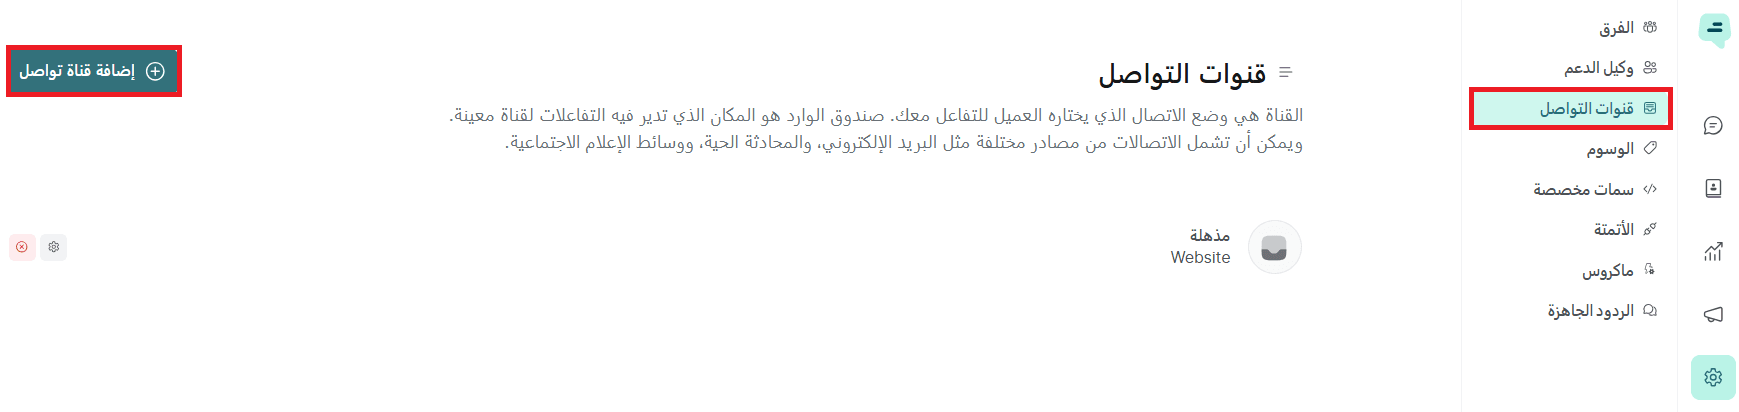
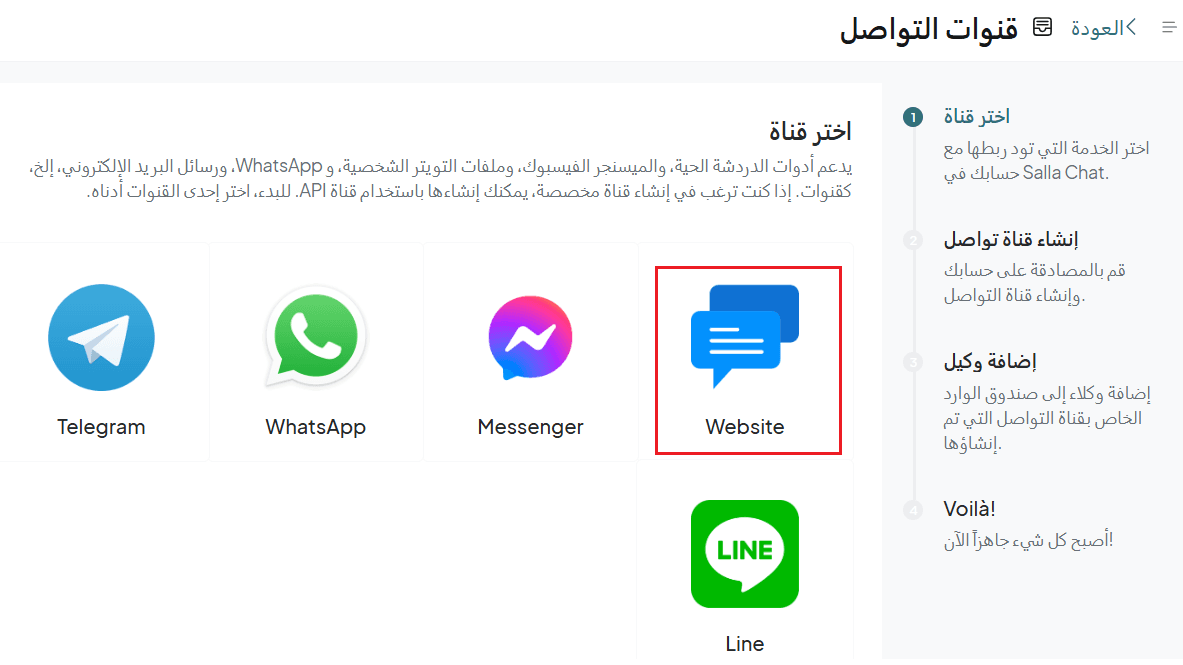
Then select the desired channel.
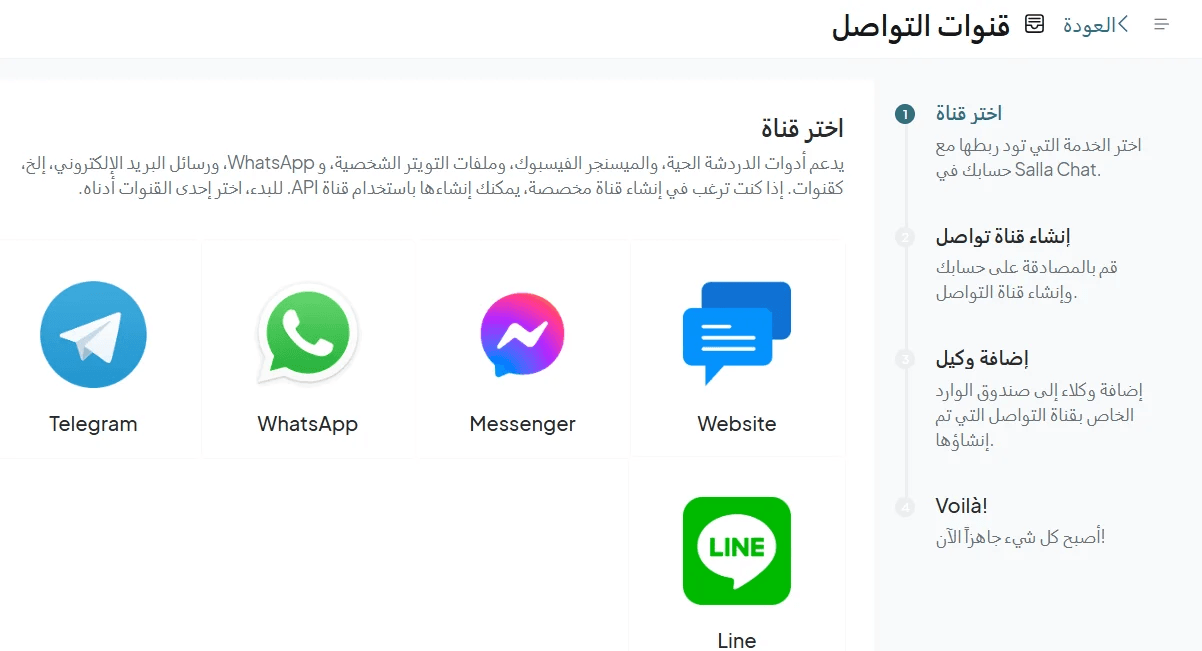
Example: Connecting Salla Chat with your store
- Choose the communication channel
- Add a support agent, then click Add agents
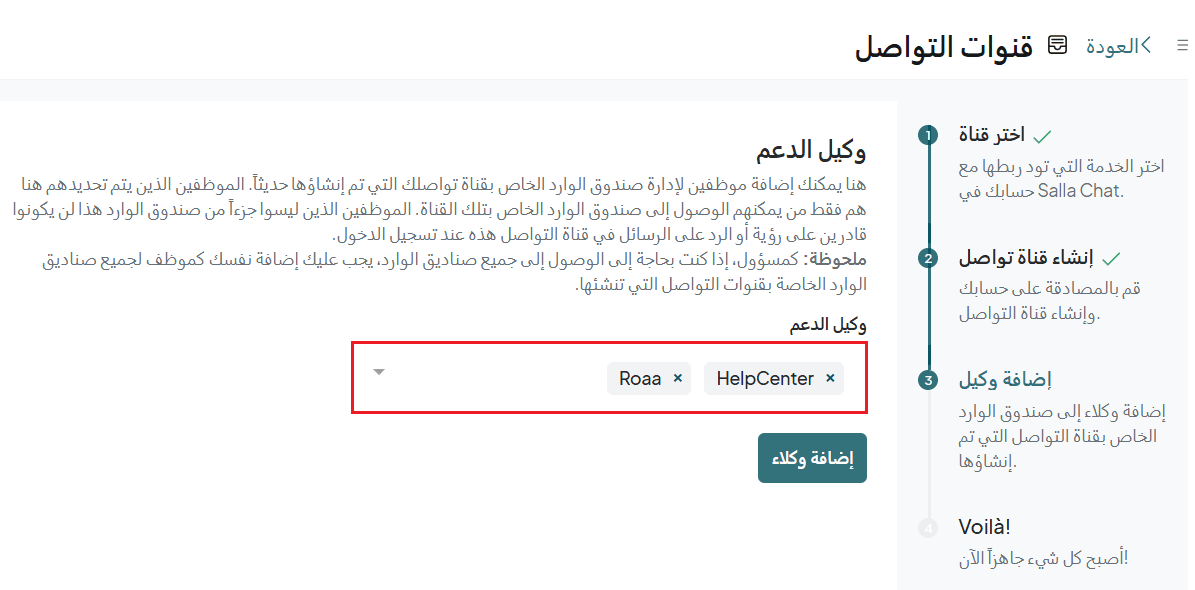
- The channel is now ready
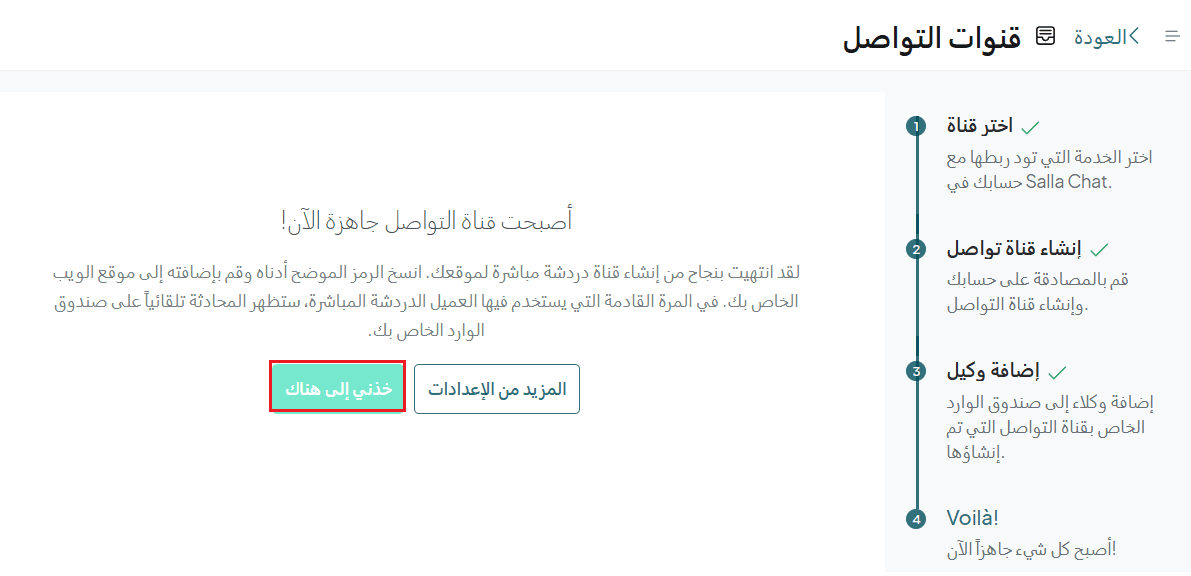
To edit channel settings at any time, click the settings icon to access configuration options.
For more details, see the Communication channel settings article.
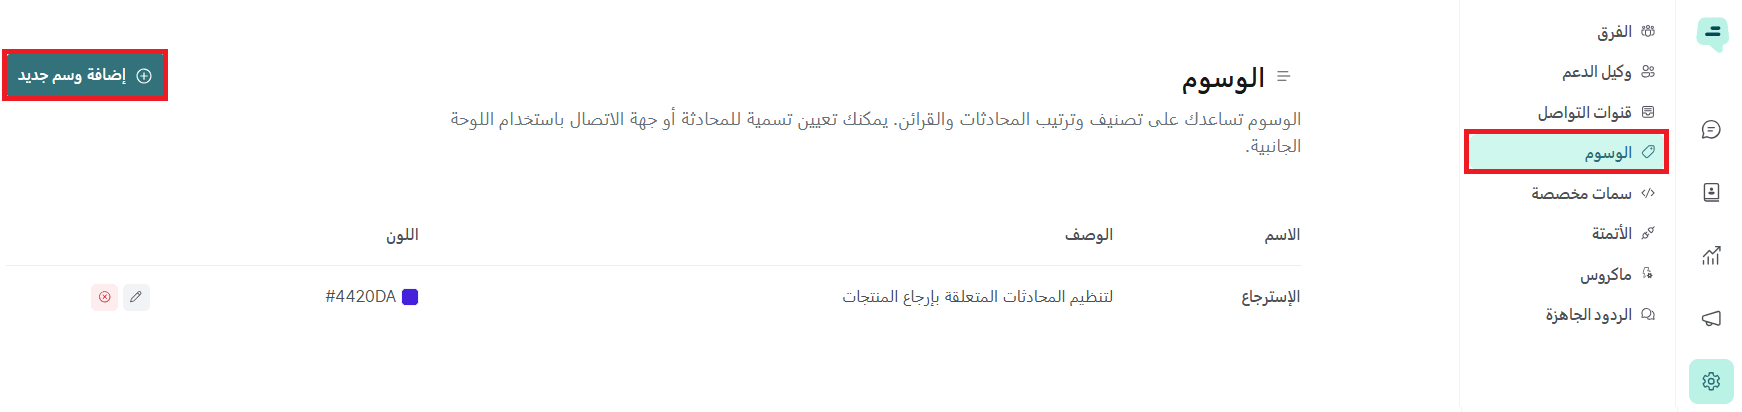
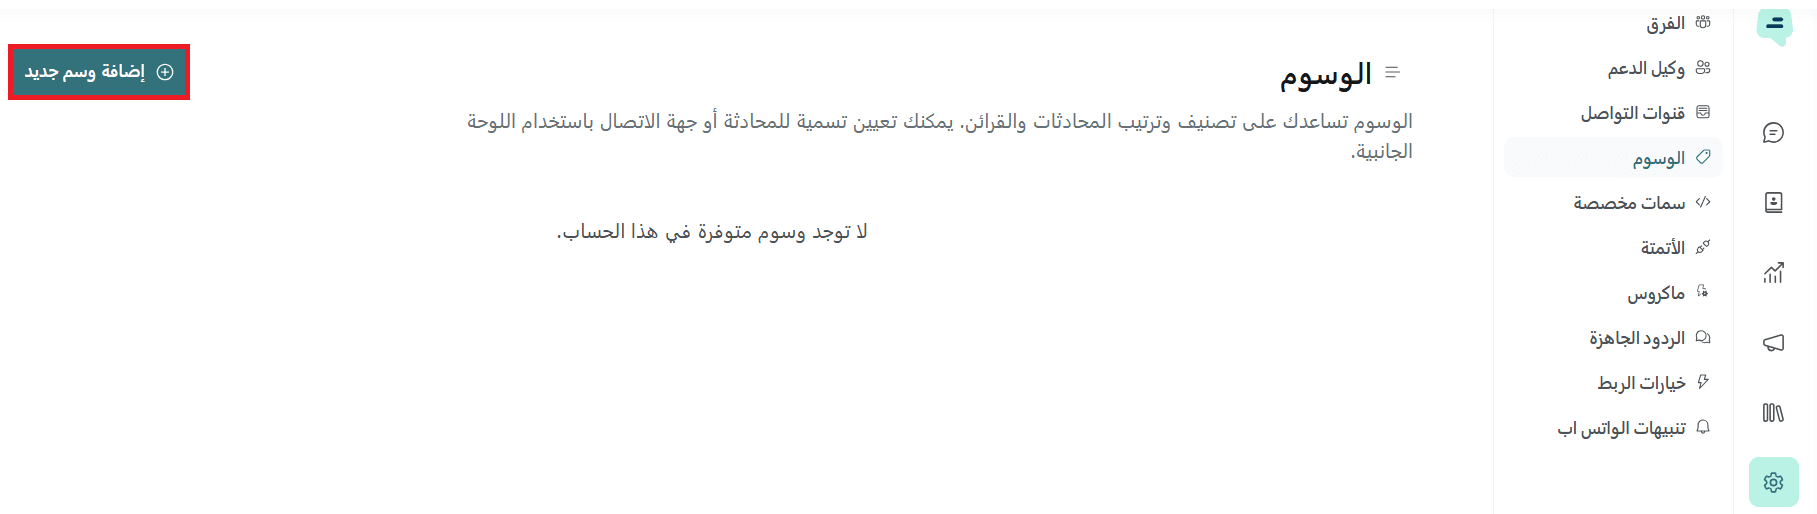
4. Tags
Tags help you categorize conversations and leads, making it easier to prioritize and organize them. You can also use tags to build custom workflows.
You can assign colors to tags for easy identification and use them to filter conversations from the sidebar.
To add a tag: From the sidebar, select Tags → Add new tag
Enter:
- Tag name (e.g., Complaints)
- Description (e.g., Follow-up on complaints)
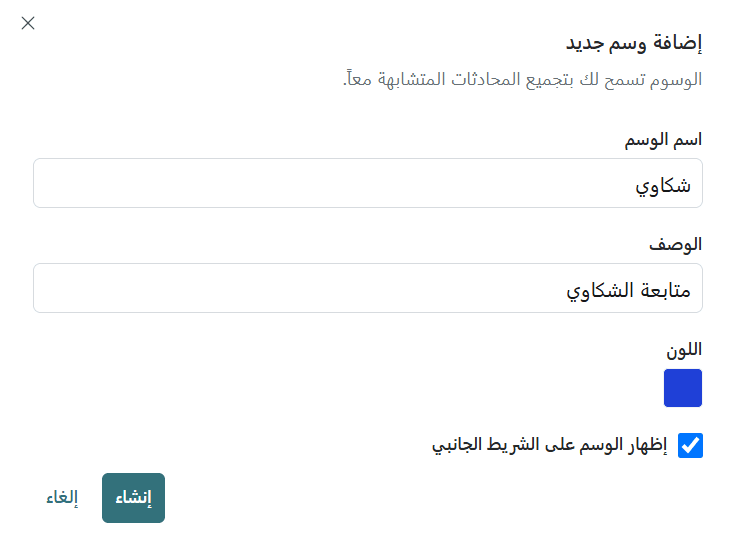
Done! The tag is now available for use.
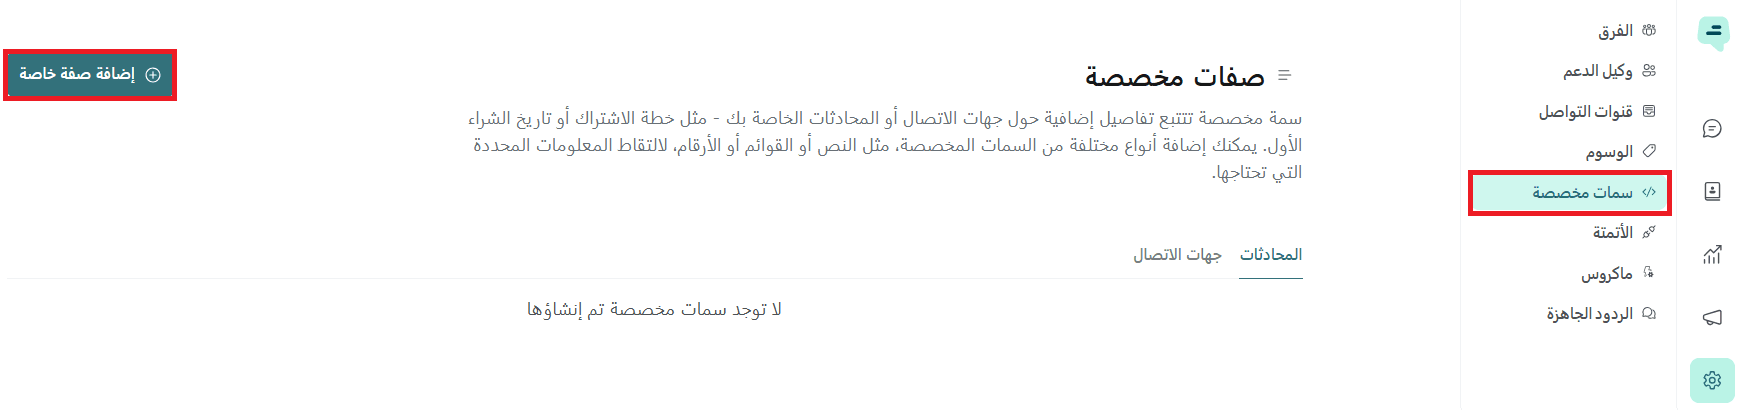
5. Custom attributes
Custom attributes allow you to track additional details about contacts or conversations, such as subscription plans or purchase history.
You can create different types (text, number, date, etc.) to store specific data.
To add a custom attribute: From the sidebar, select Custom attributes → Add attribute
Then define:
- Applies to: Conversations or Contacts
- Display name
- Key
- Description
- Type
Example: Tracking purchase count
- Applies to: Contacts
- Display name: Purchase Count
- Key: purchase_count
- Description: Tracks how many times a customer has purchased
- Type: Number or Text
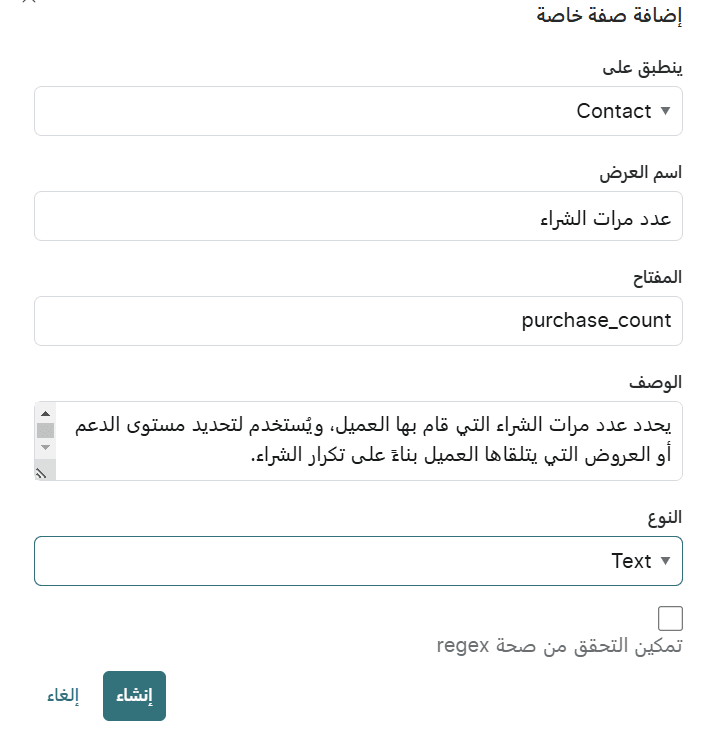
Click Create to save the attribute.
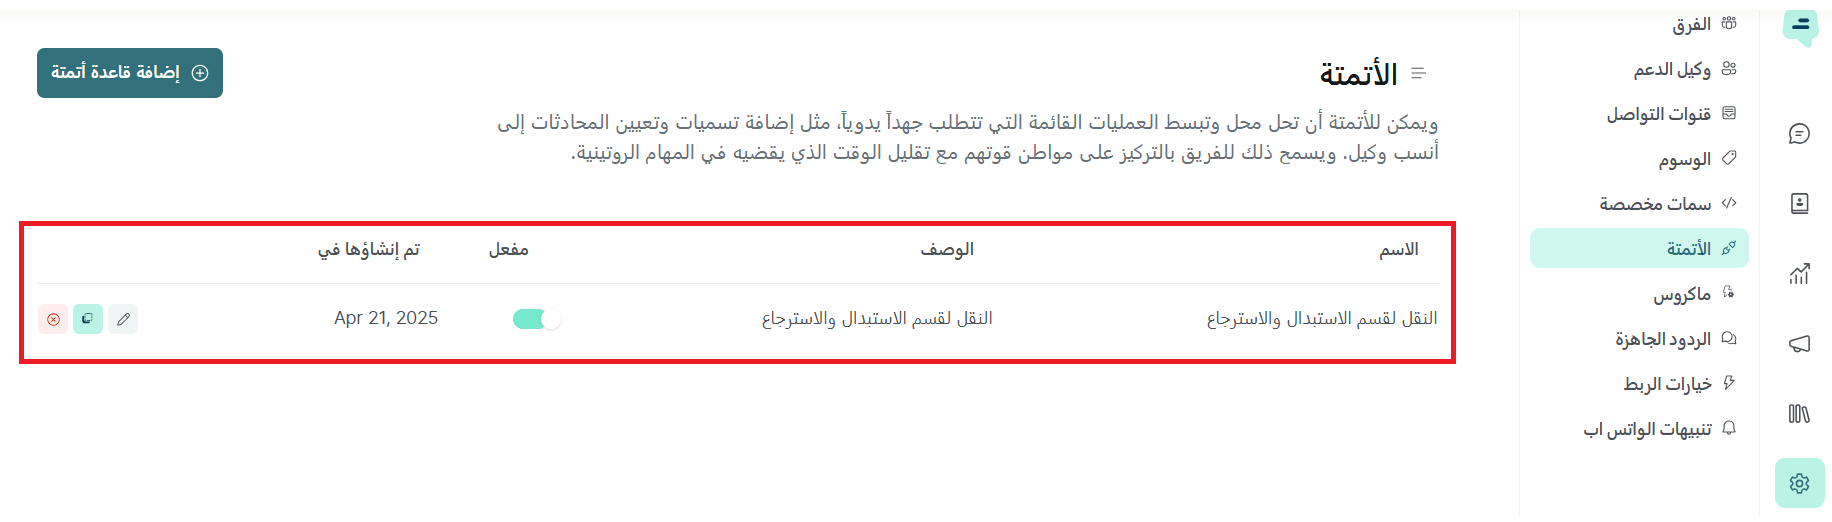
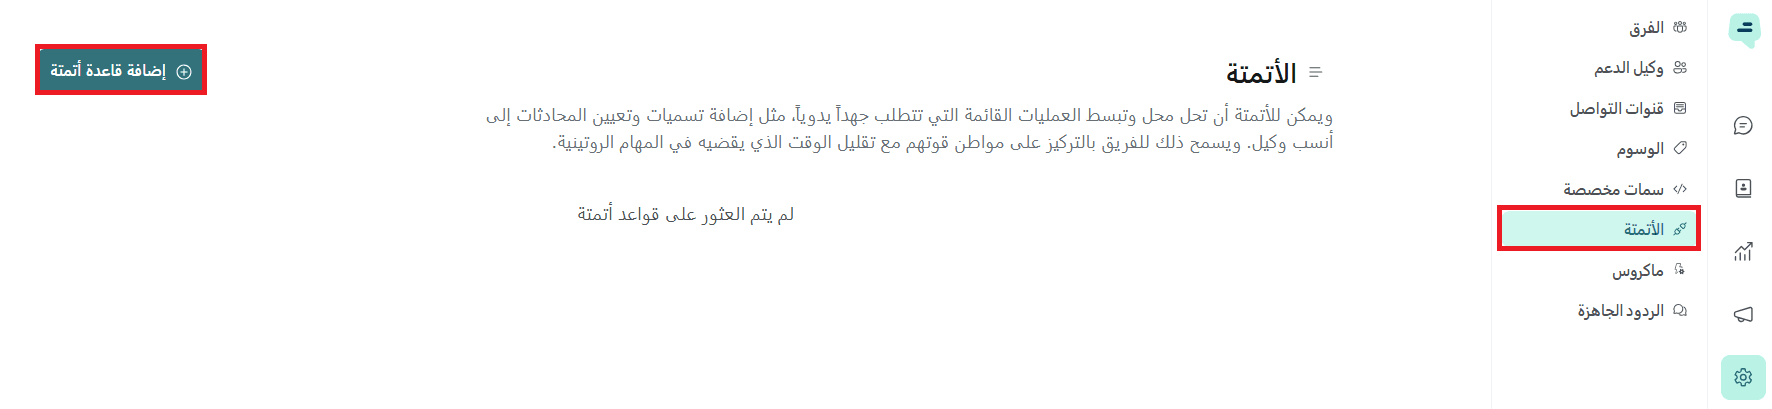
6. Automation
Automation helps streamline workflows and save time by automating repetitive tasks such as tagging conversations or assigning them to the right agent.
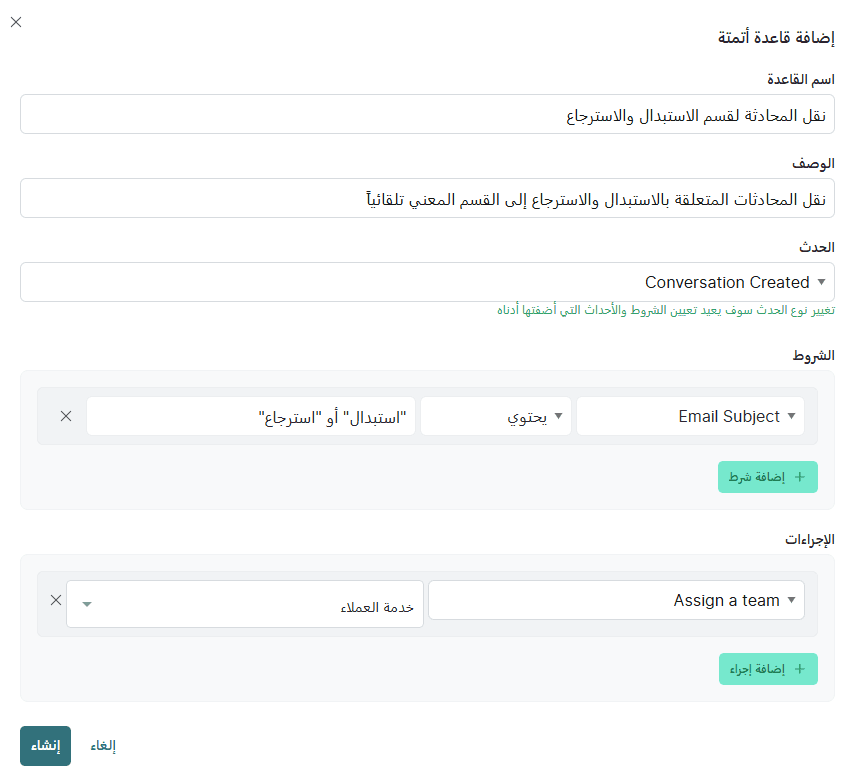
To create automation: From the sidebar, select Automation → Add rule
Fill in the details:
Example: Automatically assign conversations to Customer Support
- Rule name: Assign to Returns & Exchanges Team
- Description: Automatically assign related conversations
- Event: Conversation Created
- Conditions: Keywords like “return” or “exchange”
- Actions: Assign conversation to the support team
📝 Important: Make sure the team is created before assigning it in automation.
Result: When a new conversation includes relevant keywords, it will be automatically assigned to the appropriate team without manual intervention.
🎉 Congratulations! Your automation rule is ready.