Are your X campaigns built on real customer behavior, or on guesswork?
If you run ads on X (formerly Twitter), the quality of your targeting depends entirely on the quality of your data. X Pixel - Catalog tracks what shoppers actually do in your store as it happens, from viewing a product to adding it to the cart to completing a purchase, and feeds that back into your ad account. In this guide, you'll learn how to install the app on your Salla store, how to create each event code in X, and where to paste those codes so tracking goes live.
X Pixel - Catalog connects your Salla store to your X ad account so purchases, add-to-cart actions, checkouts, and content views are tracked automatically. Install the app from the App Store, create each event in the X Events manager, then paste the pixel and event IDs into the app settings and save.
📌 Article overview
- Stage 1: install the X Pixel - Catalog app
- Stage 2: copy your event codes from X into the app settings
- What you get from connecting X Pixel - Catalog
- Frequently asked questions
🚀 How to connect X Pixel - Catalog to your store
Stage 1: install the X Pixel - Catalog app
1. From the main menu, click (All), then under helpful tools, click (App Store).
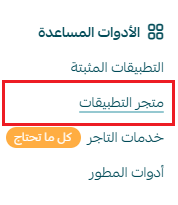
2. Search for the app using the search field.

3. On the X Pixel - Catalog installation page, click (Install).
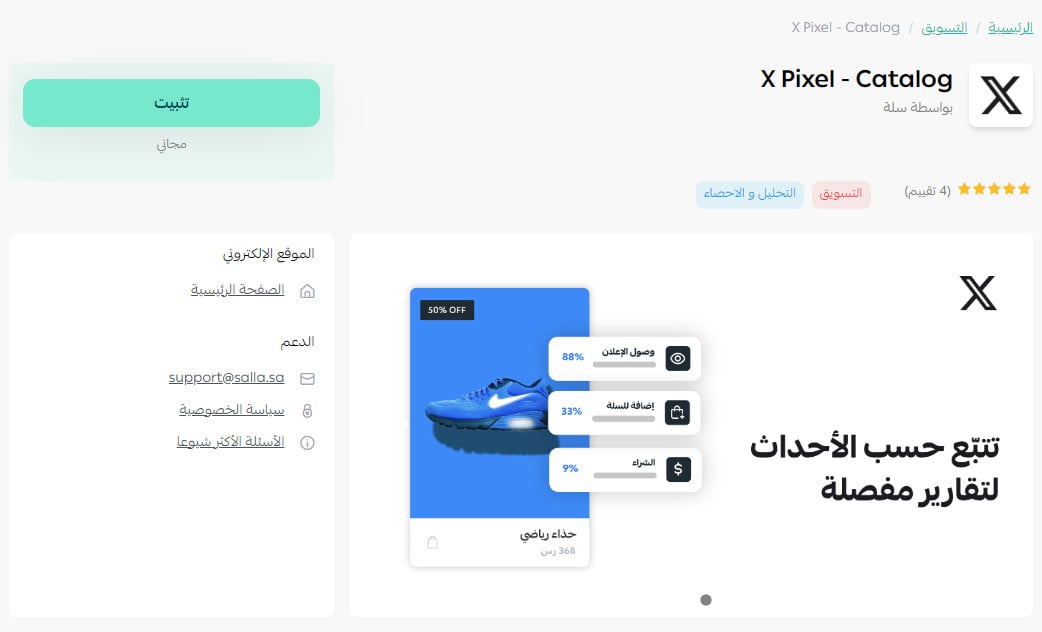
4. X Pixel - Catalog is now installed on your store.
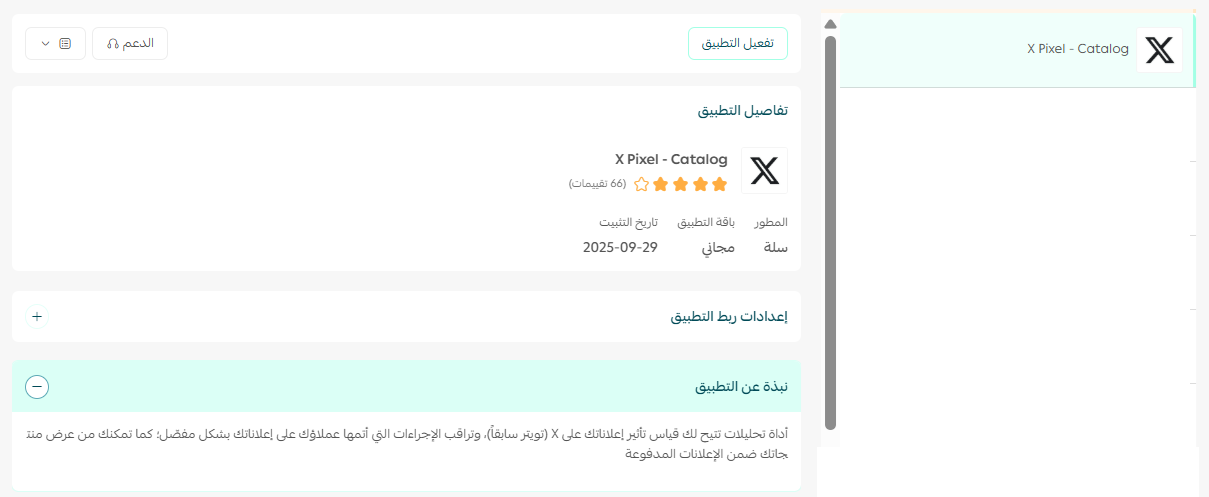
5. Open the app from your installed apps page. Under the app connection settings you'll see several empty fields. The next stage explains where each value comes from.
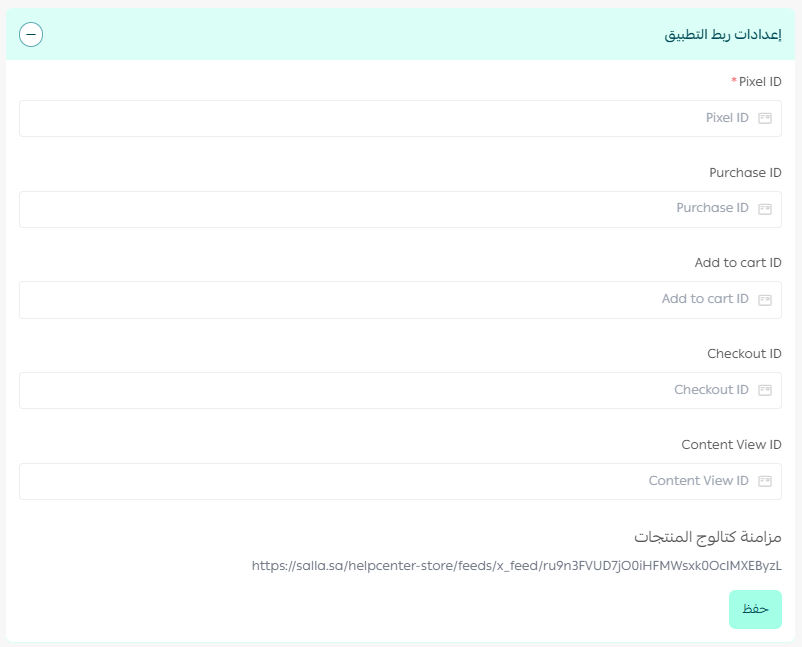
Stage 2: copy your event codes from X into the app settings
1. On the X analytics page, click (Events manager).

2. On the Events manager page, click (Copy) to copy your pixel code.

Paste the pixel code into its field in the app settings.

3. To get your Purchase ID, go back to the X Events manager and click (Add events).
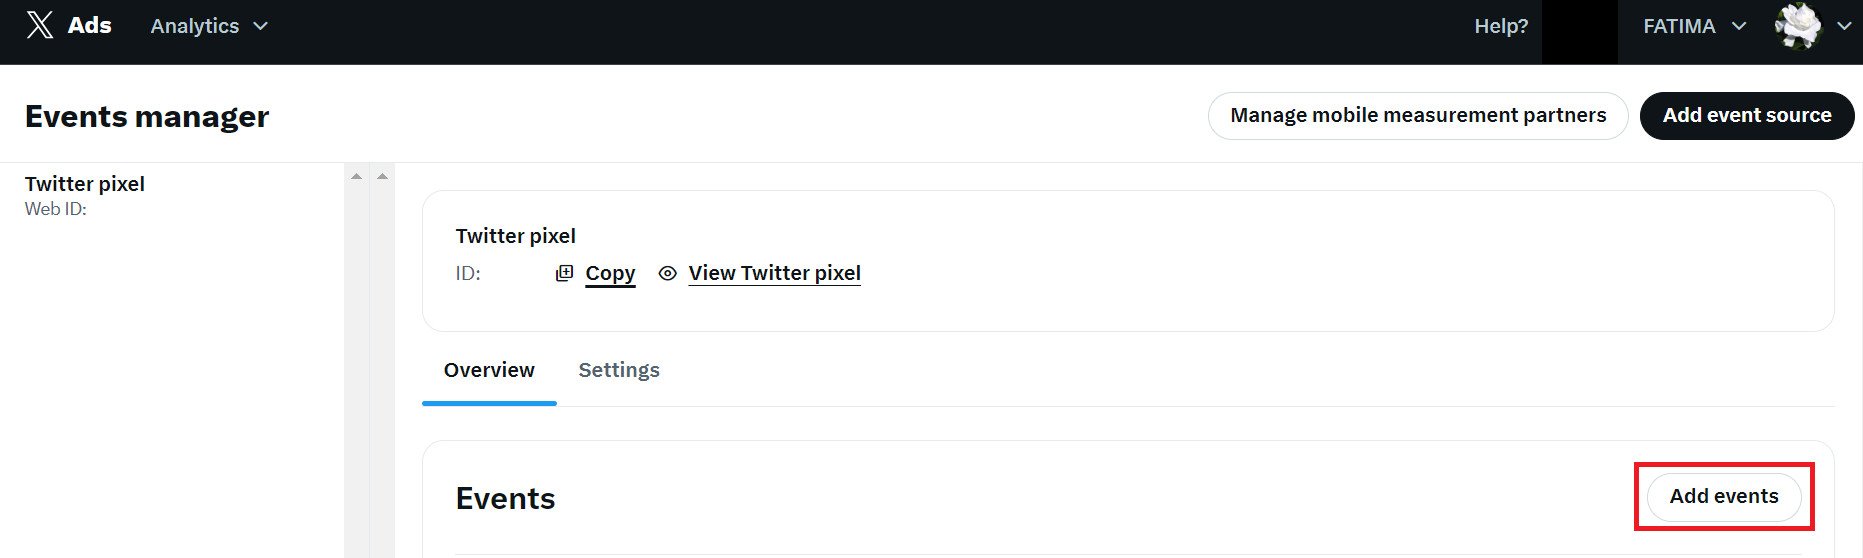
Creating an event takes three steps:
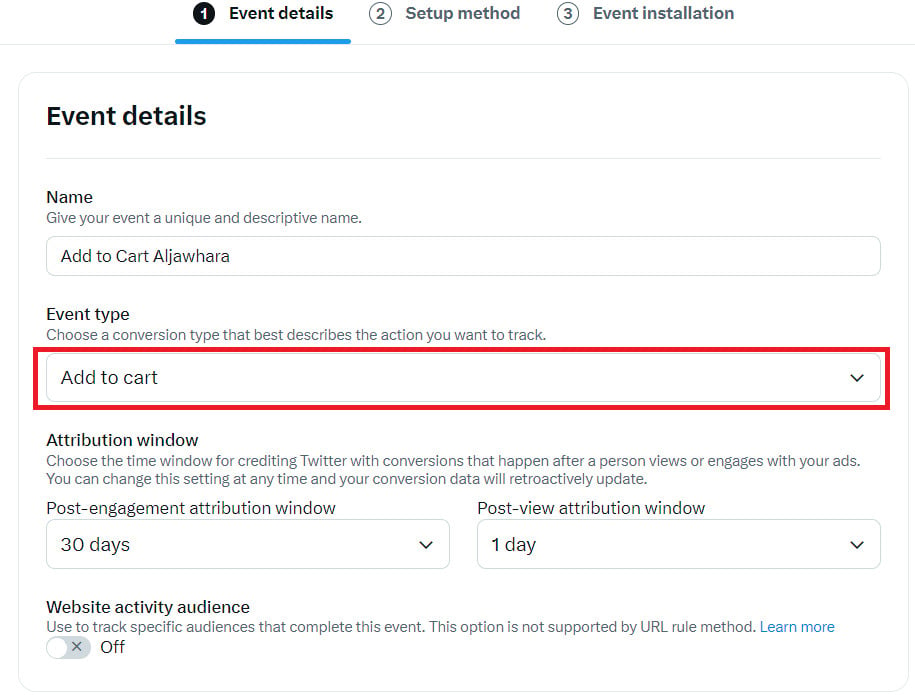
1) Event details
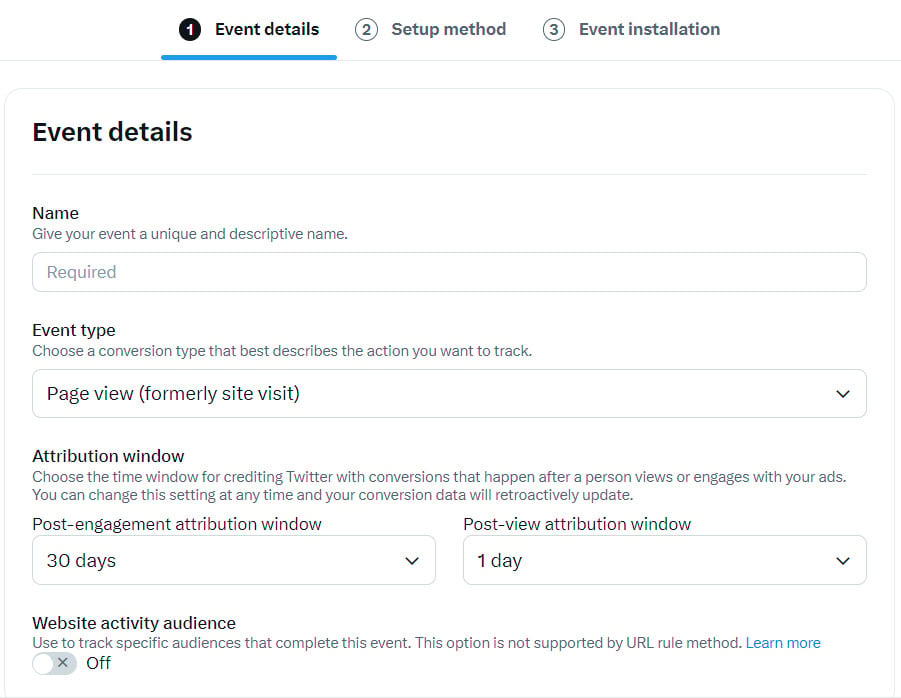
Fill in:
- Event name. A unique name that describes the event.
- Event type. The kind of conversion that matches the action you want to track. For this one, choose Purchase.
- Attribution window. The period X uses to record conversions after someone sees or engages with your ad. You can change it at any time, and your conversion data updates retroactively.
- Website activity audience. Used to track the specific audiences that complete this event. This option isn't supported with the URL rule method.
Then click (Next) at the bottom of the page.
2) Setup method
On the next page, choose the first option (Recommended).
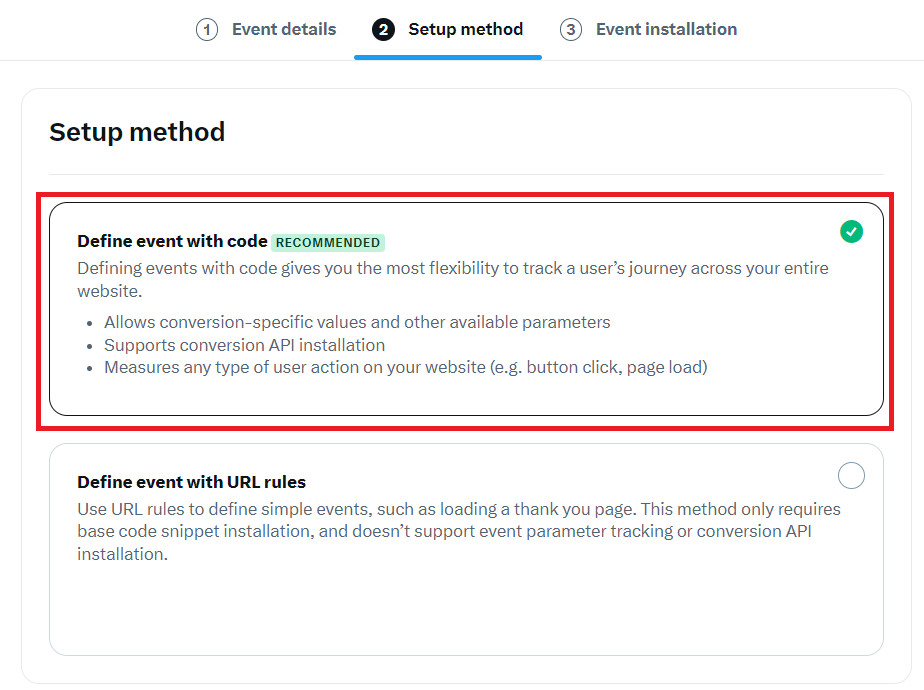
Click (next) to move to the last step.
3) Event installation
Your purchase code is ready. Click (Save) to keep it.
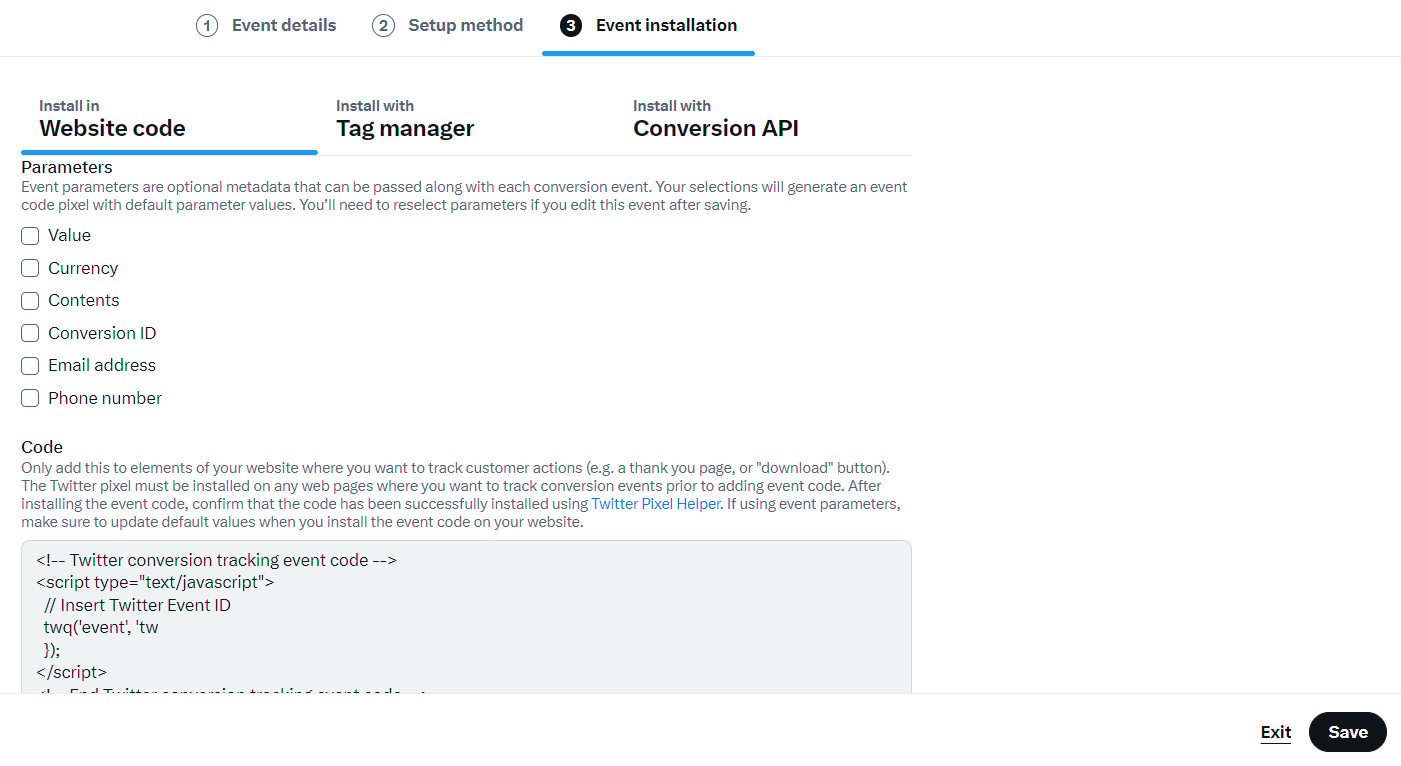
Saving takes you back to the Events manager, where you can copy the purchase event code you just created.
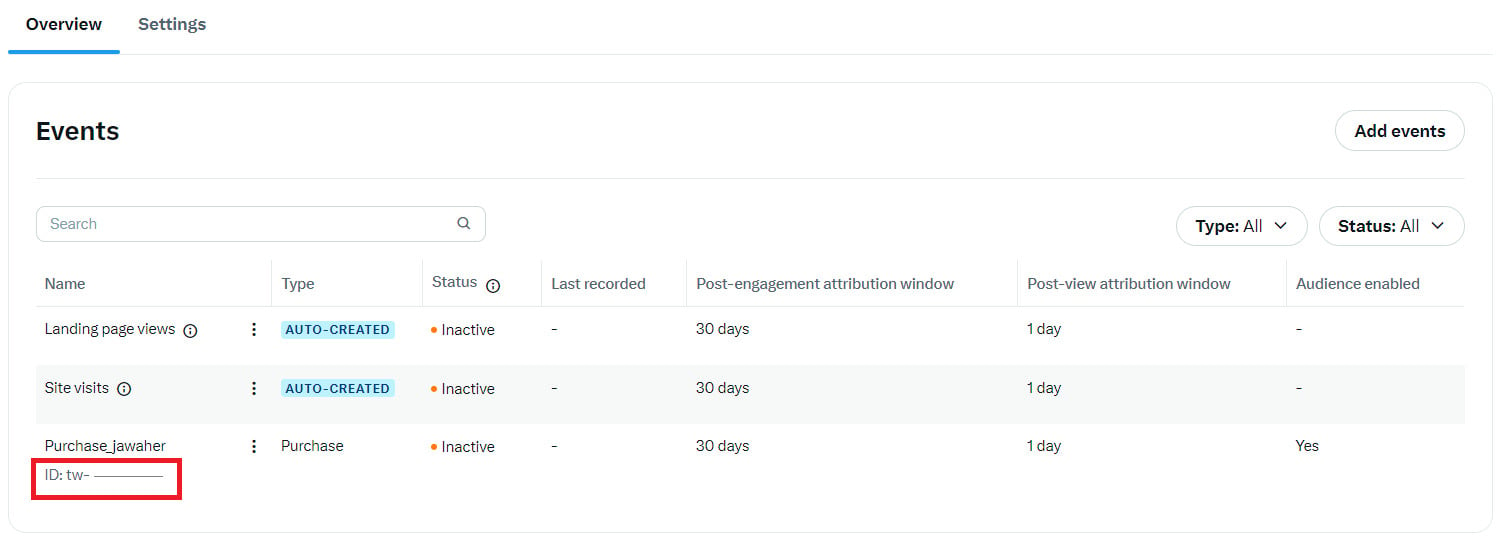
Paste it into its field in the X Pixel settings.
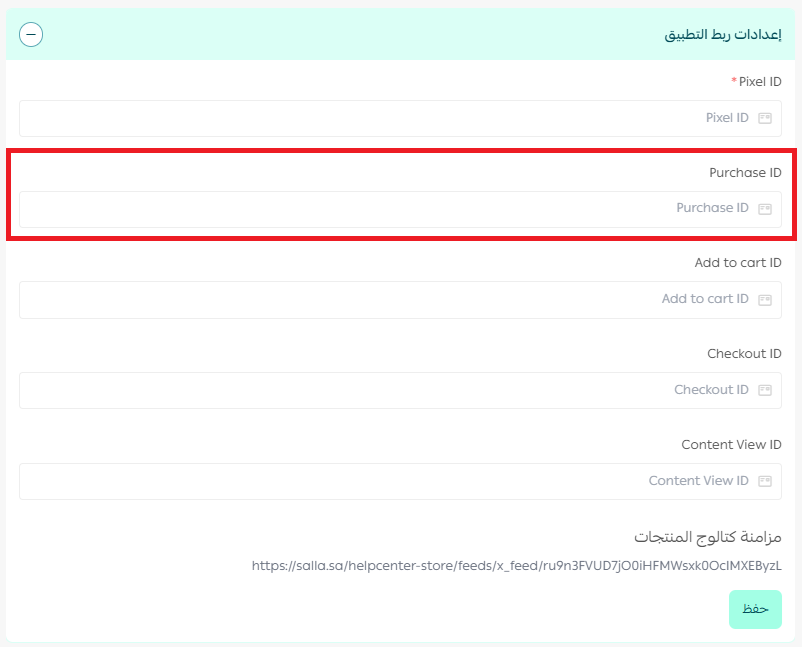
📝 Important note
Use the exact same steps to create and copy the codes for the remaining events, and paste each one into its own field in the X Pixel settings.
4. Create a code for the add to cart event, Add to Cart ID.
Paste it into its field.
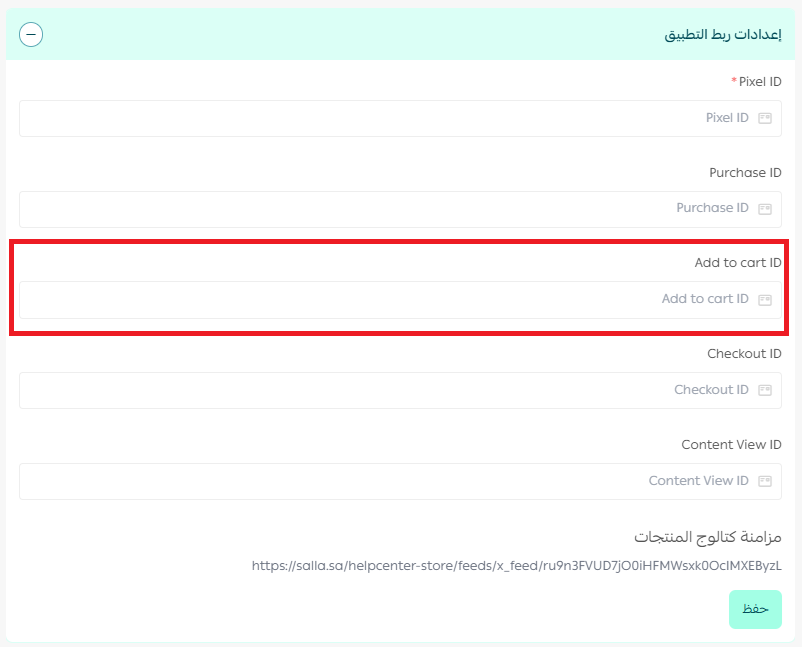
5. Create a code for the Checkout ID event.
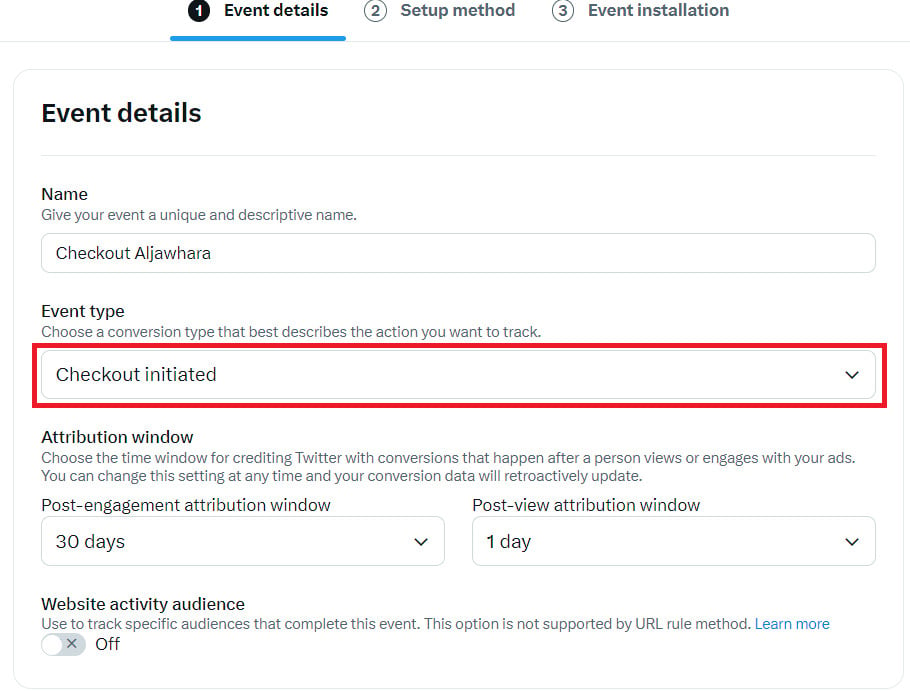
6. Create a code for the Content View ID event.
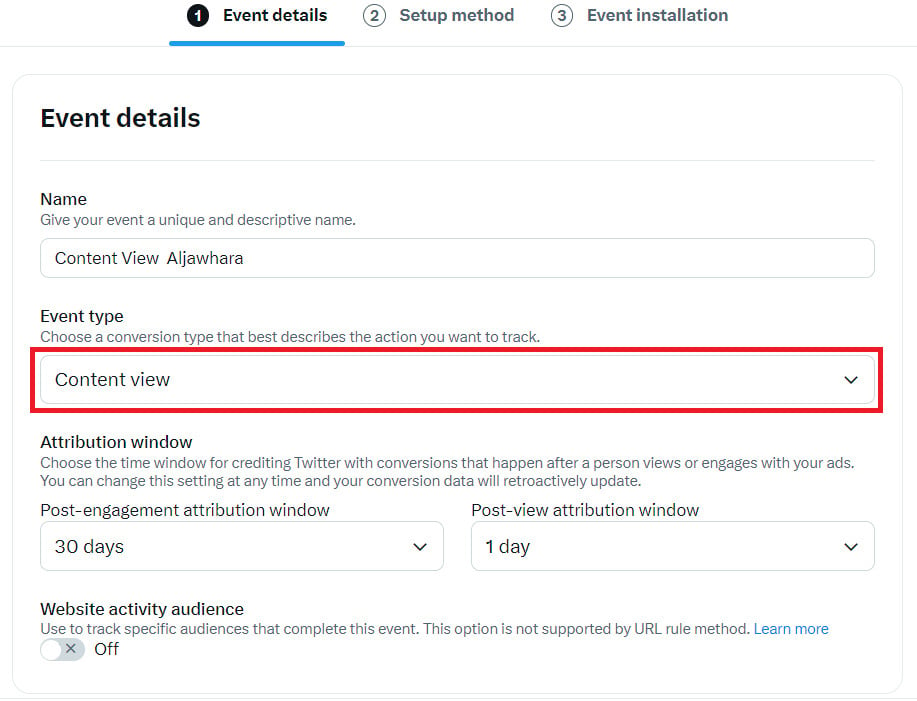
Once every code is in place in the X Pixel - Catalog settings, click (Save).
For more details, see connecting your product catalog to X Shopping.
✅ What you get from connecting X Pixel - Catalog
✅ Accurate tracking of customer activity across several key events.
✅ Ads targeted on what shoppers actually do, not on assumptions.
✅ Custom audiences you can use to scale campaigns and lift conversions.
✅ Detailed reports that sharpen your advertising decisions.
✅ Wider reach to new customers who share interests with your existing ones.
Frequently asked questions
❓ Which events can I track with X Pixel - Catalog?
Purchase, add to cart, checkout, and content view. Each one has its own ID field in the app settings, and each ID is created separately in the X Events manager.
❓ Where do I find my pixel code?
In the X Events manager. Click (Copy) next to the pixel, then paste it into the pixel field in the app settings.
❓ Do I have to create every event separately?
Yes. Repeat the same three steps in the Events manager for each event, then paste each generated code into its matching field in the app settings.
❓ What does the attribution window do?
It sets how long after seeing or engaging with your ad a conversion still counts. You can change it whenever you like, and X updates your conversion data retroactively.
Connect your store to X Pixel - Catalog and give your campaigns the one thing that makes an ad budget work: real data on what your customers do.