Are your marketing tasks eating the same hours every day, leaving none for strategy?
Emailing customers one by one, remembering birthdays, chasing abandoned carts — none of it scales, and the timing slips the moment you get busy. Mailchimp email marketing automation takes that work off your desk: you build a customer journey once, and Mailchimp sends the right message to the right person at the right moment, based on what each customer actually does. In this guide, you'll learn how to build a customer journey in Mailchimp, add journey points to it, and manage it once it's live.
Mailchimp email marketing automation lets you build a customer journey that runs on its own. You pick a starting point, such as a birthday, a tag, or an abandoned cart, then add rules and actions that decide what happens next. Mailchimp sends each message automatically and reports on opens, clicks, and sales.
📌 Article overview
- What you get from email marketing automation
- How to create a customer journey in Mailchimp
- How to manage a customer journey
- Frequently asked questions
🚀 What you get from email marketing automation
With automation running in Mailchimp, you can:
- Send personalized emails automatically, based on what a customer has done or bought.
- Set triggers such as buying a product, opening an email, or having a tag added.
- Build long-term loyalty with new customers and prospects alike.
- Track performance as it happens, with reports on opens, clicks, and the sales they produced.
- Create sequences that follow the customer from the first interaction through to repeat purchases.
👣 How to create a customer journey in Mailchimp
A customer journey is your own automated marketing workflow: it can add tags, send targeted emails, and handle other tasks for you without anyone pressing send.
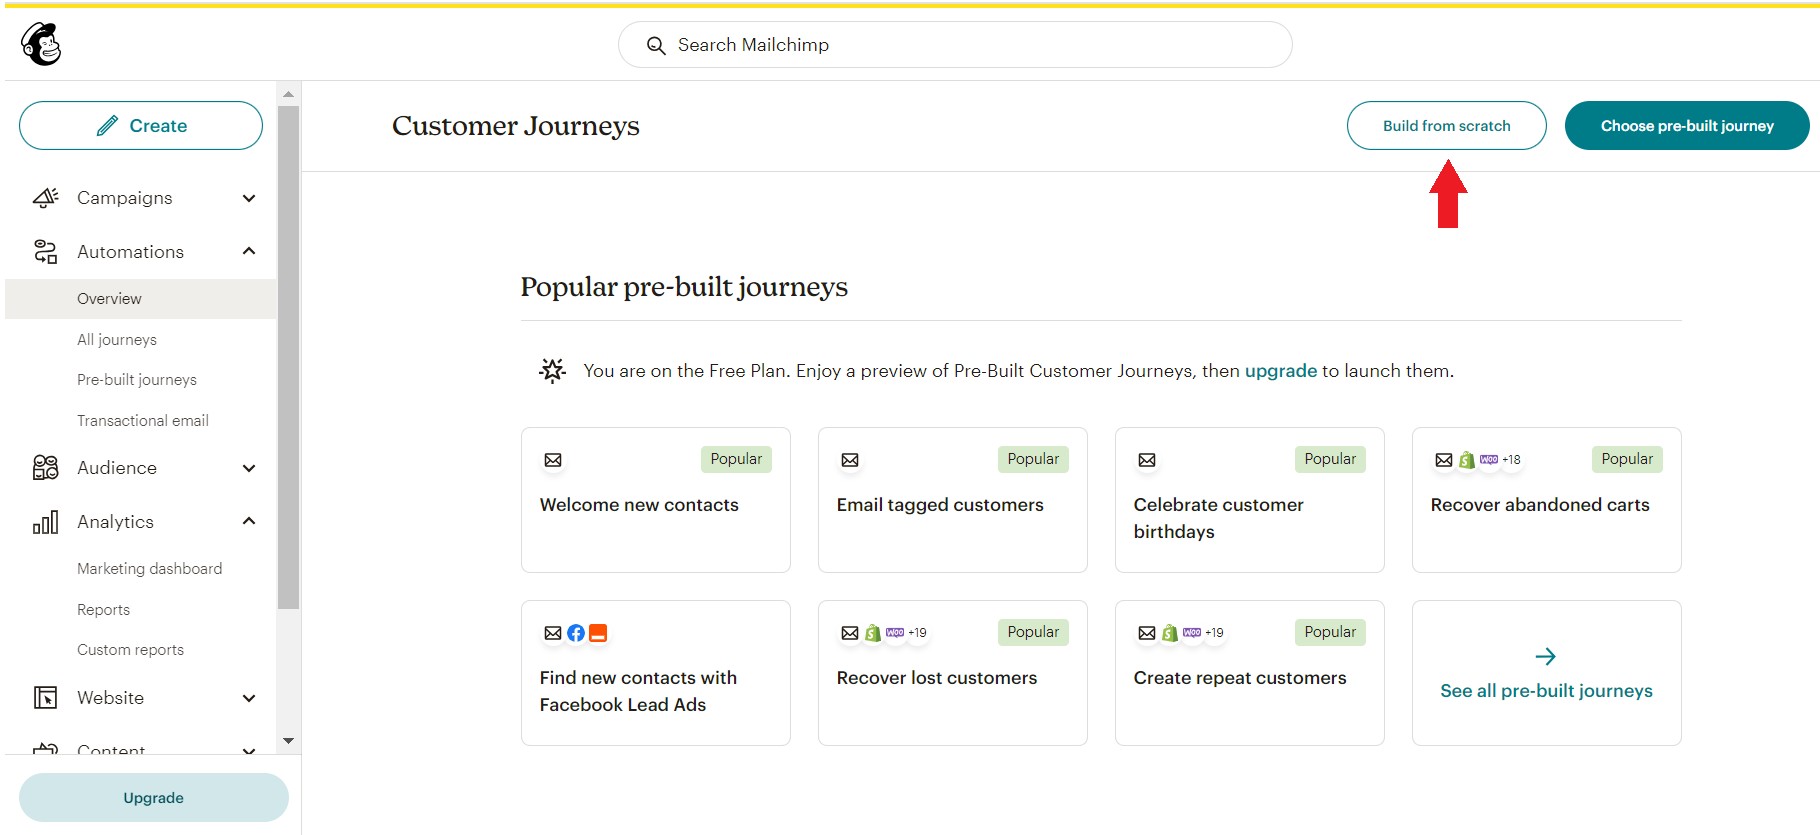
1. From the Automations page, click (Overview), then click (Build from scratch).
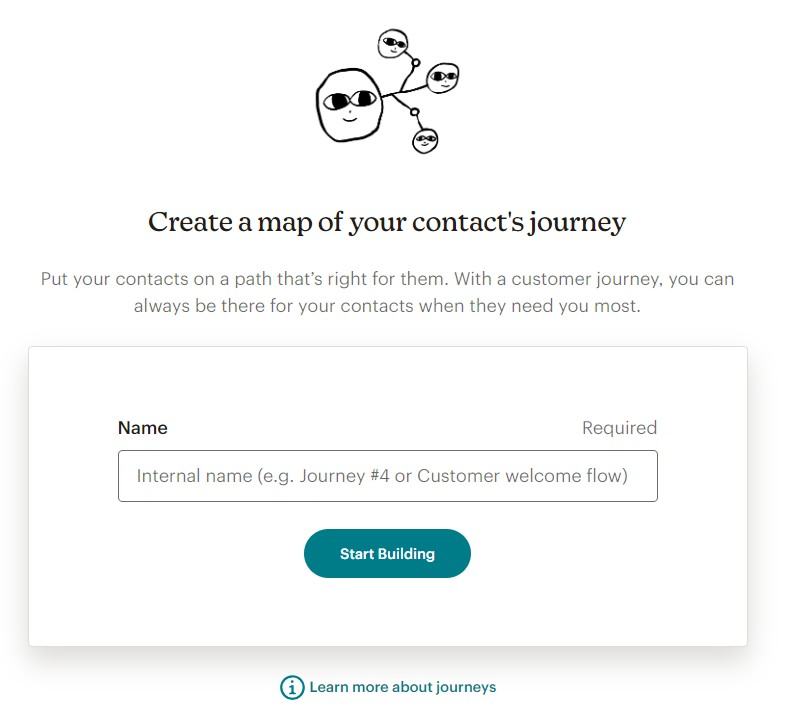
2. Enter a name for your journey, then click (Start Building).
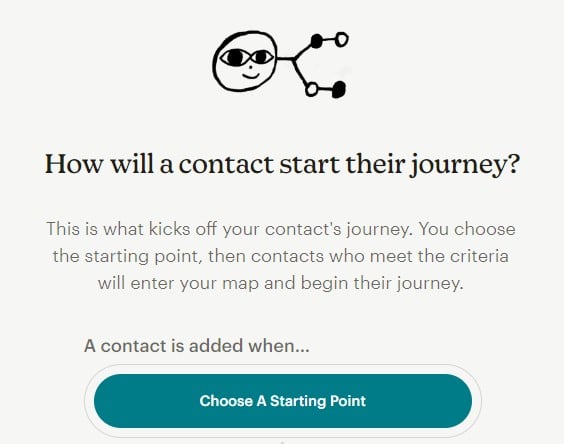
3. To set the starting point for your journey, click (Choose A Starting Point).
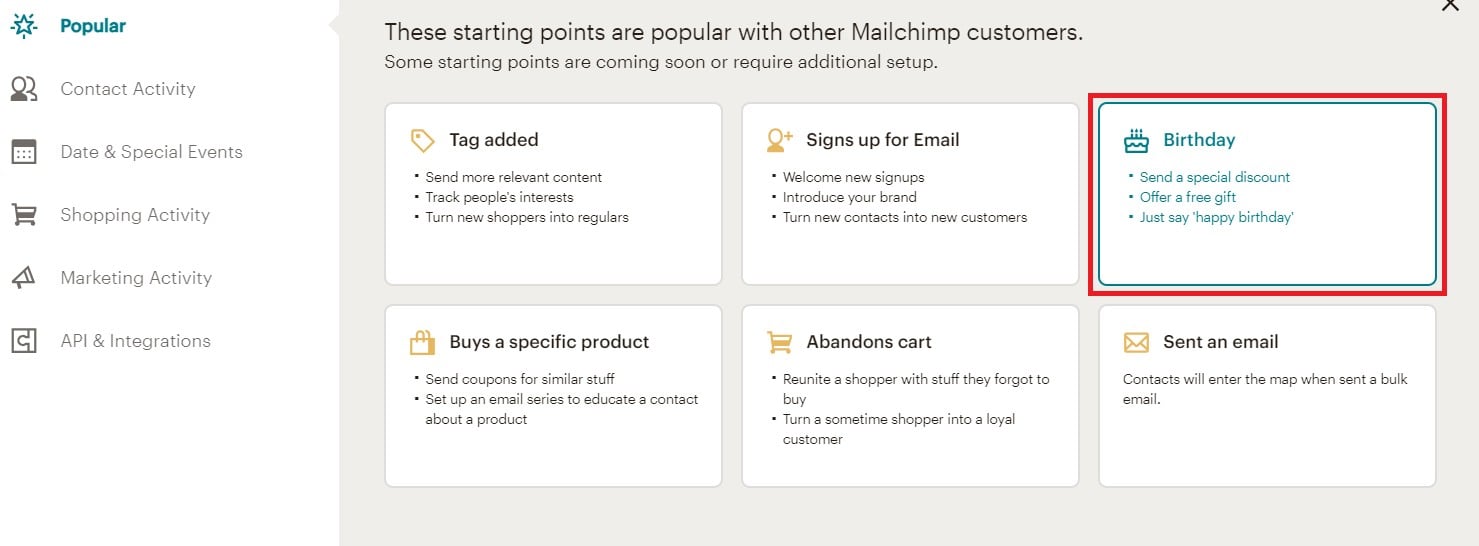
Then pick the starting point that fits what you're trying to do. The most useful ones are:
- Tag added — send more relevant content, track what people are interested in, and turn new shoppers into regulars.
- Email signup — welcome new subscribers, introduce your brand, and turn new contacts into first-time customers.
- Birthday — send a special discount, offer a free gift, or simply say happy birthday.
- Purchase of a specific product — send coupons for similar items, or run an email series that teaches the customer how to get the most from what they bought.
- Abandoned cart — bring the shopper back to the items they left behind, and turn a one-time visitor into a loyal customer.
- Email sent — contacts enter the journey when you send a bulk email.
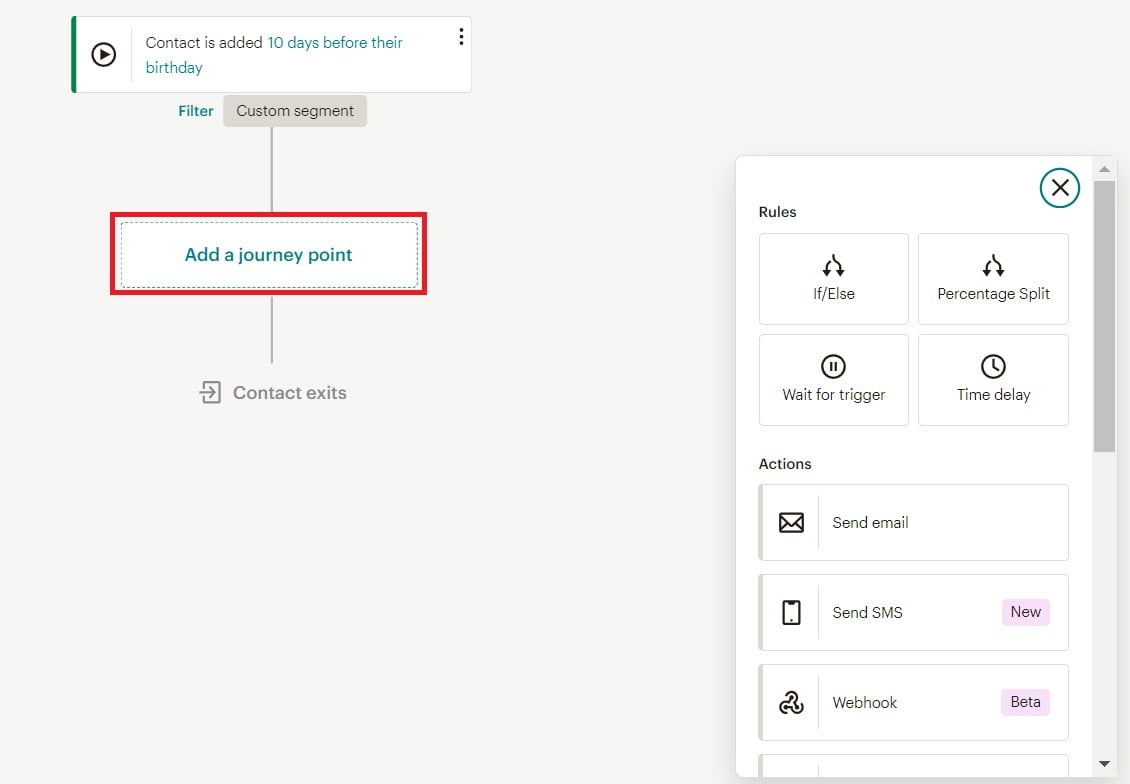
💡 Example: email a coupon to a customer 10 days before their birthday, but only if they have confirmed their subscription to your list.
The Mailchimp help center has a useful reference on all the starting points you can add.
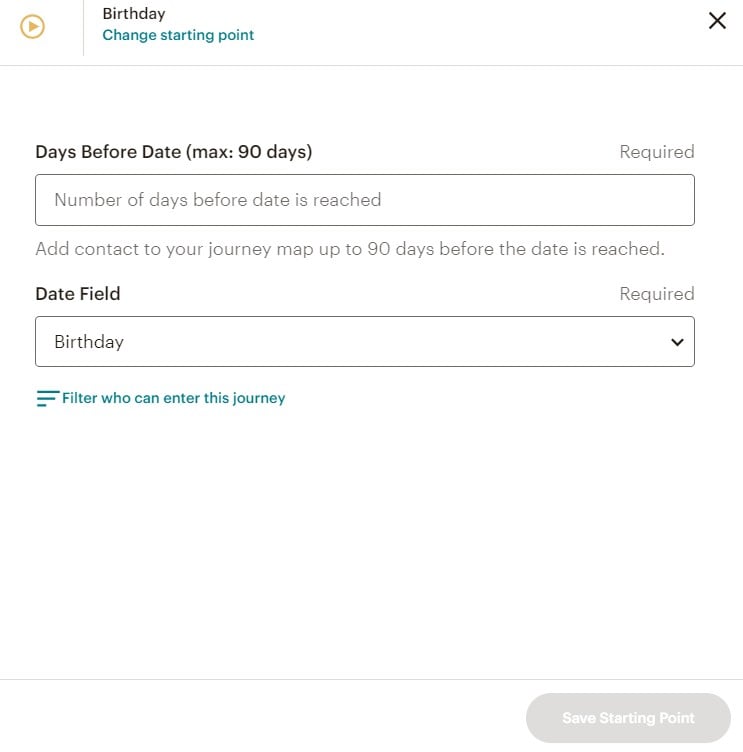
4. Configure the starting point
Set how many days before the customer's birthday the journey should begin.
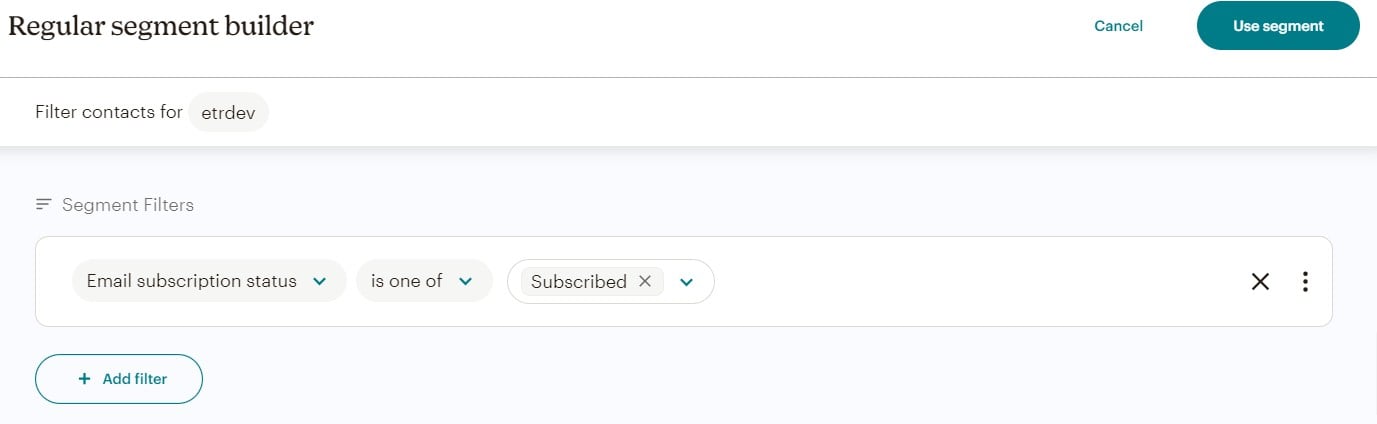
Then click (Filter who can enter this journey) to set the conditions a contact must meet to enter.
Filter by subscription status set to Subscribed, then click (Use segment).
Then click (Save Starting Point).
5. Add journey points
Once the starting point is set, choose the Rules and Actions that make up the journey itself. These are called journey points.
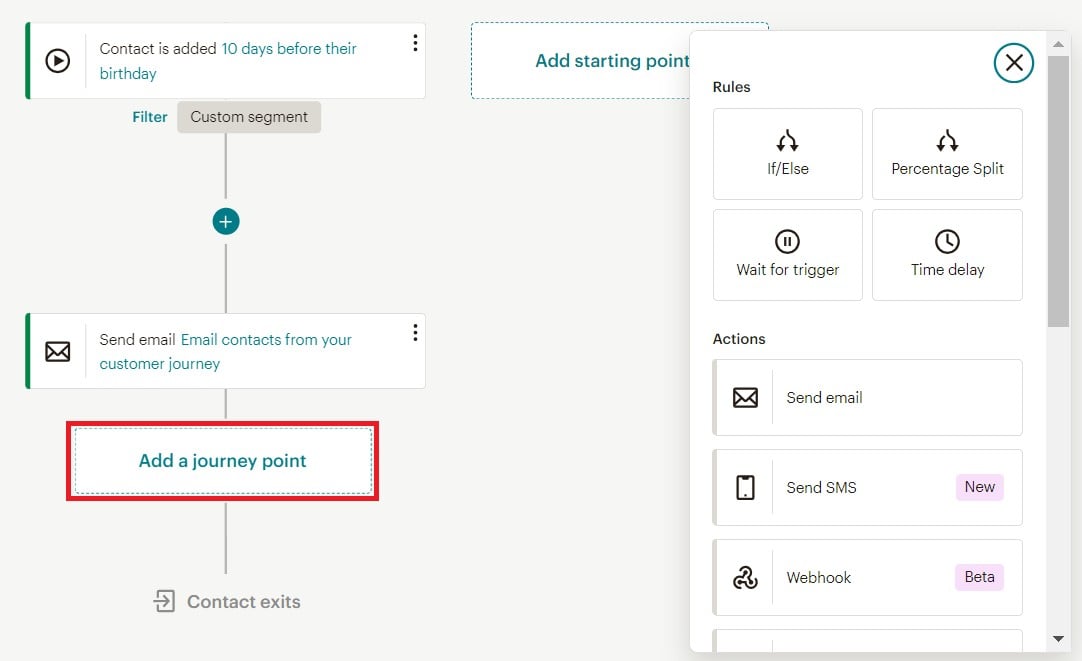
To add one, click (Add a journey point) and choose the send email action (Send email).
Set up the email you want to send.
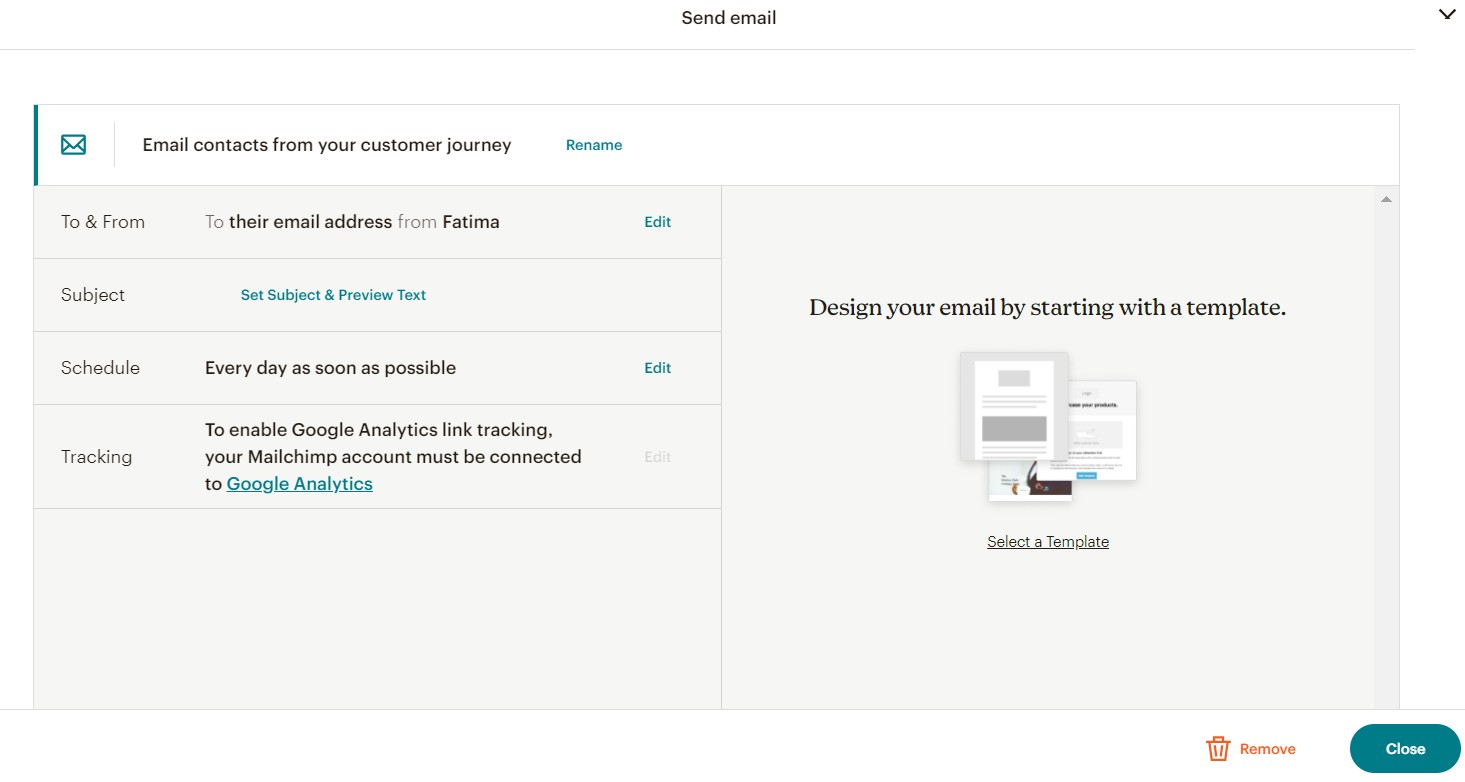
Then design the email, or pick one of the templates you saved earlier.
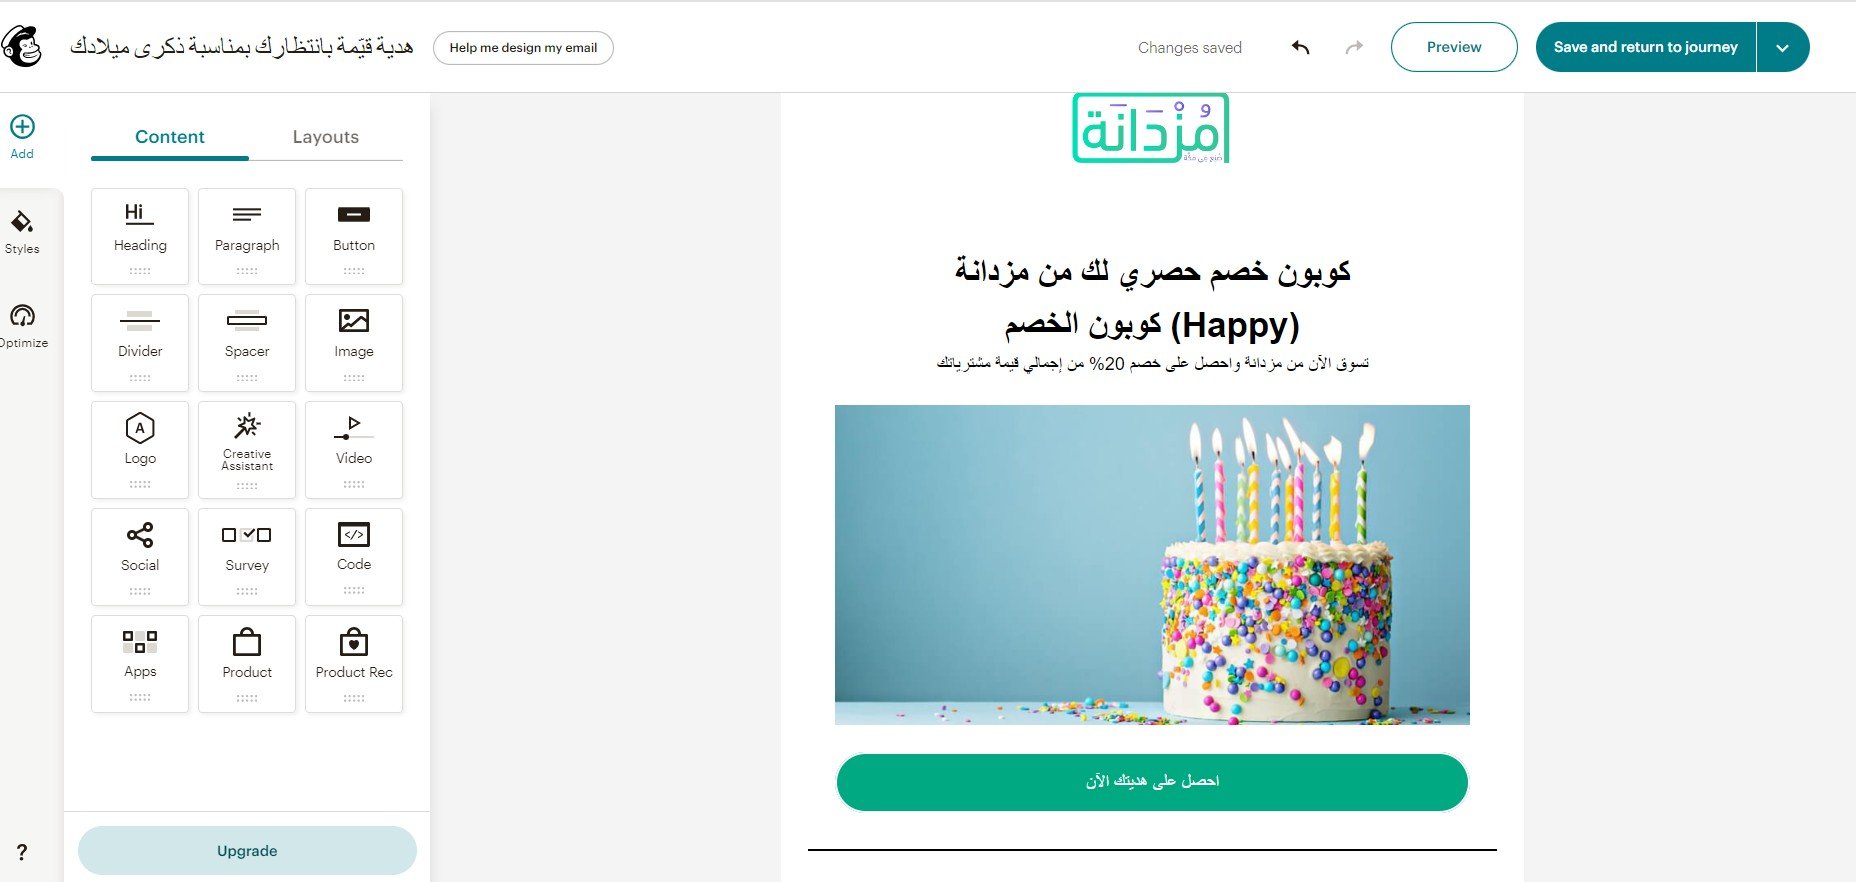
6. Add more journey points
To extend the journey, click (Add a Journey Point) again and add the Rules and Actions you need.
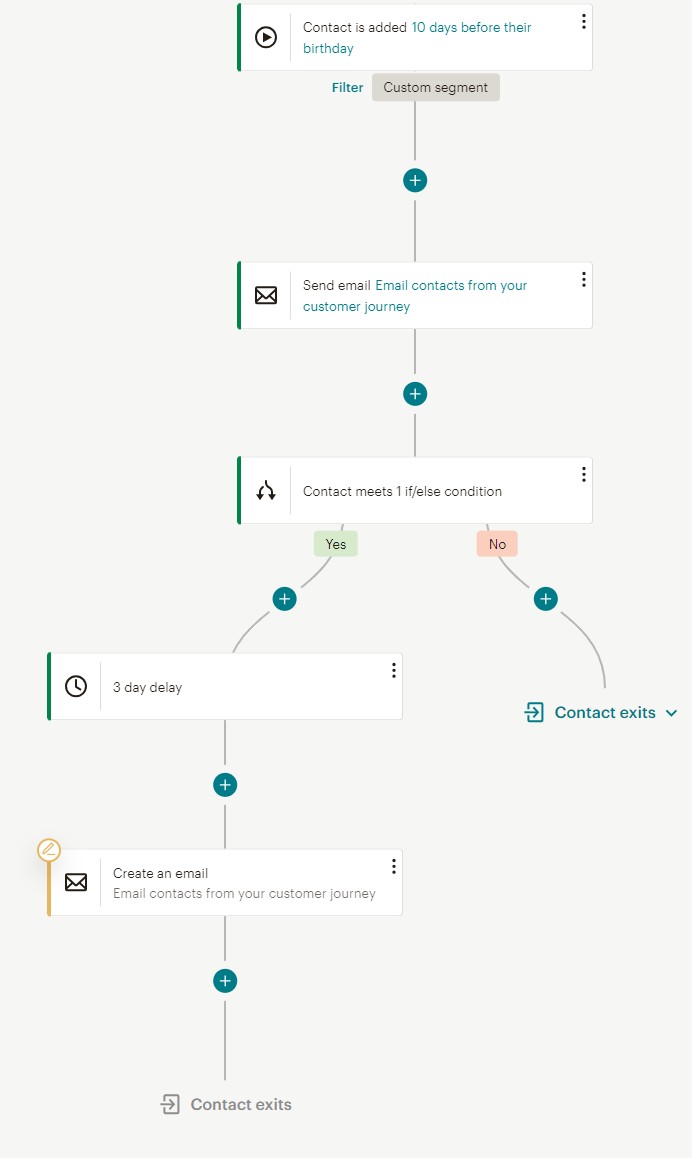
For example, wait 3 days after the first email, then send a second one only to contacts who didn't engage with the first.
7. Turn your journey on
When the journey map is ready, click continue to activate it.
🧭 How to manage a customer journey
View stats and the contact queue
The journey's home page shows how many contacts have entered the journey, how many are still moving through it, and how many have finished. To see the stats for a journey that is currently paused, click view data (View Data).
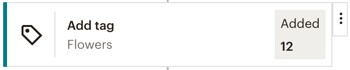
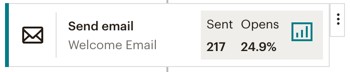
Key stats also appear on the tag and email actions themselves as contacts reach those journey points.
To open the full report for an email, click the report icon.
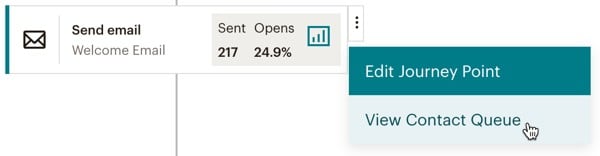
To see how many contacts have reached a given journey point, click the three vertical dots and choose view contact queue.
Pause a journey and edit it
You can pause a journey map to change its starting points, rules, and actions.
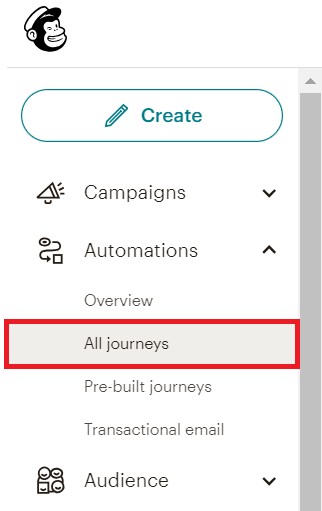
1. From your Mailchimp home page, click all journeys (All Journeys).
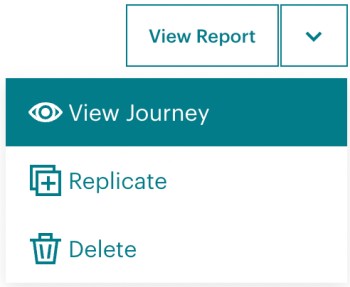
2. Open the drop-down menu for the journey you want to work on and choose view journey (View Journey).
3. Click pause and edit (Pause & Edit).

With the map paused, you can change any starting point, rule, or action.
When you're ready to restart it, click (Turn Back On).

Copy and paste a journey point
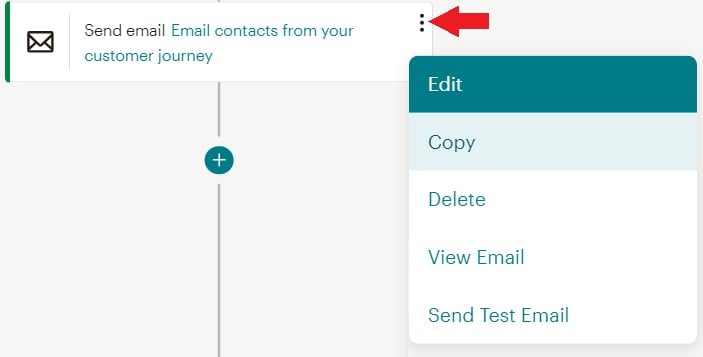
Copying a journey point duplicates a rule or an action along with its settings, so you don't have to rebuild it.
1. Click the three vertical dots on the rule or action you want to duplicate, then click (Copy).
2. Click (Paste here) at the spot where you want the copied journey point to sit.
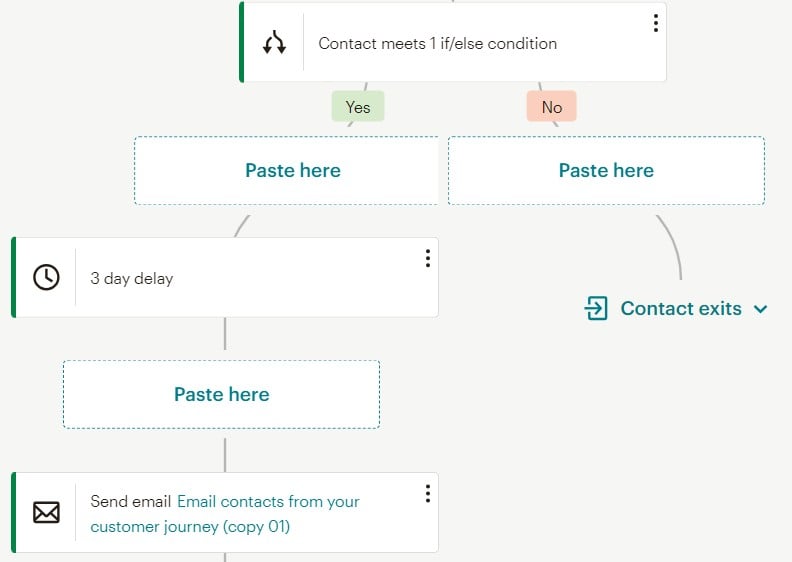
You can now click the copied journey point to customize it.
❓ Frequently asked questions
What is a customer journey in Mailchimp?
It's an automated workflow you build once. A starting point decides who enters it, and the journey points after that decide what happens to them — emails sent, tags added, waiting periods, and so on.
Which starting point should I choose?
Pick the behavior you want to react to. Birthdays suit a goodwill discount, abandoned carts suit a reminder, and a specific product purchase suits a follow-up on related items.
Can I limit who enters a journey?
Yes. Use (Filter who can enter this journey) on the starting point, for example to include only contacts whose subscription status is Subscribed.
Can I edit a journey that is already running?
Yes, but pause it first. Click (Pause & Edit), make your changes to the starting points, rules, and actions, then click (Turn Back On).
How do I know whether a journey is working?
The journey home page shows how many contacts entered, are in progress, and have finished. Open the report icon on any email for the full picture, including opens, clicks, and sales.
Turn email marketing from a daily chore into a system that runs itself.
Start today by building a customer journey in Mailchimp that reaches your customers at every moment that matters, from the first welcome to the repeat order.
For more details, see:
- Email marketing strategies and tips
- How to create an email marketing campaign in Mailchimp and review its performance
- Best practices for writing a persuasive email, with examples