Google is asking you to prove you own your domain before it will connect anything — where do you actually do that?
Some services, including Google Search Console and other Google products, will not activate or connect to your store until they know the domain is really yours. The proof is a small DNS record. To verify domain ownership, you add a TXT record to your domain's DNS settings, and Salla gives you that screen inside the dashboard. In this guide, you'll learn what the verification actually proves, how to get the TXT value from Google, where to add it in Salla, and how to confirm it worked.
To verify domain ownership, open Google Search Console, enter your domain, and copy the TXT value it gives you. In Salla, go to Store and sales channels, then Store domain, then DNS settings, and add a new record of type TXT with @ as the name and the copied value as the content. Then return to Google and click Verify.
📌 Article overview
- What domain ownership verification is
- How to verify domain ownership through Google Search Console
- How to add a TXT record in your Salla DNS settings
- How to confirm the verification succeeded
🎯 What is domain ownership verification?
Domain ownership verification is a check that you control the domain you are claiming. Only someone with access to a domain's DNS settings can add a record to it, so the service issues you a unique TXT value, and if that value appears in the domain's DNS, the service accepts you as the owner. That is the whole mechanism: the record is the proof, and adding it is what unlocks the service.
👣 How to verify domain ownership through Google Search Console
1. Go to Google Search Console.
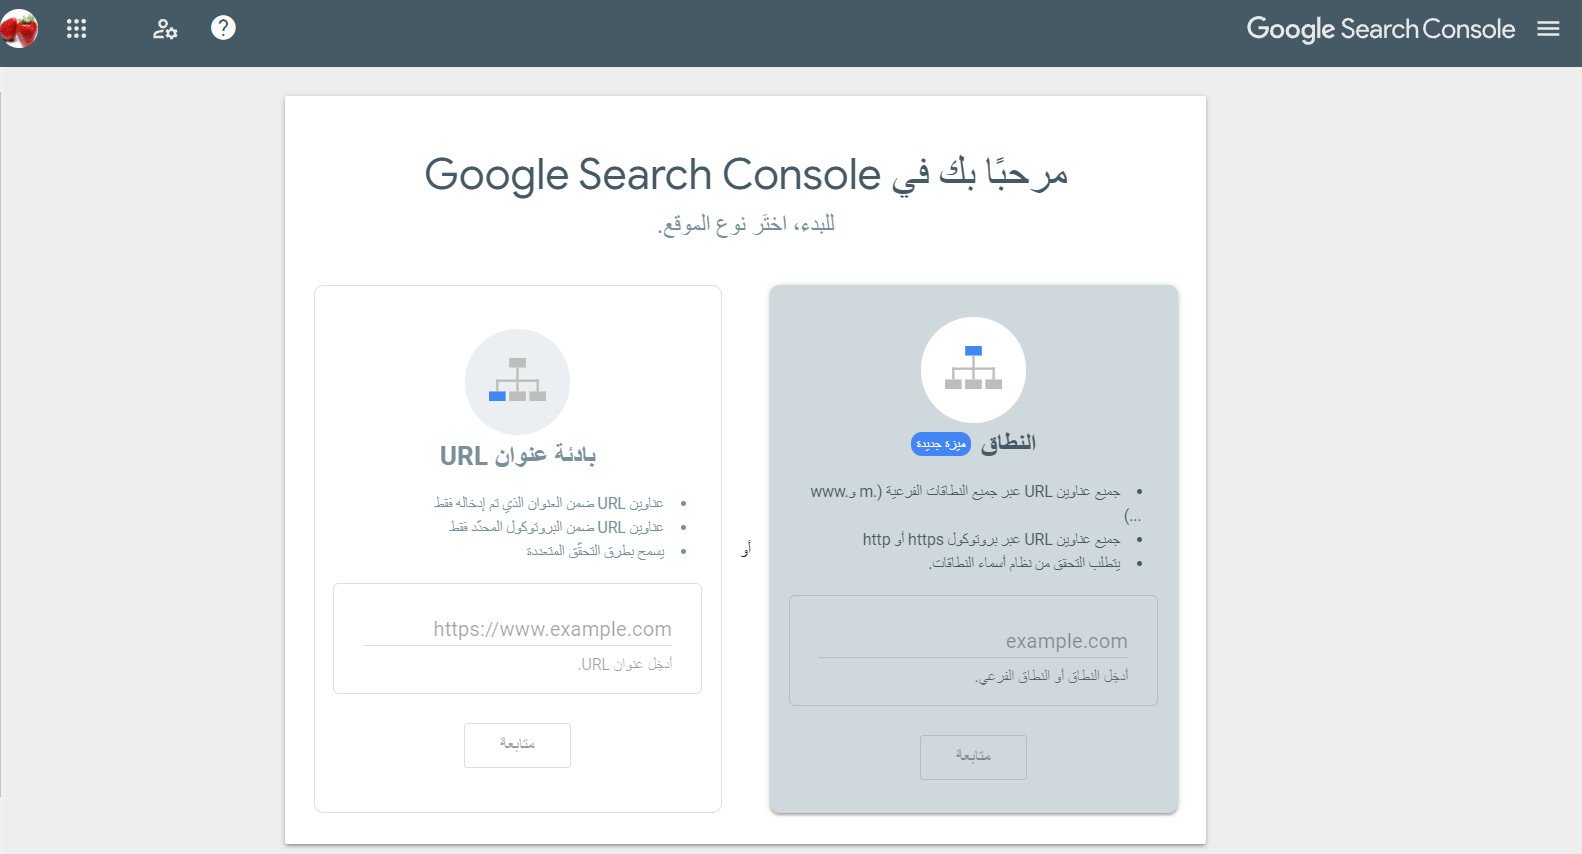
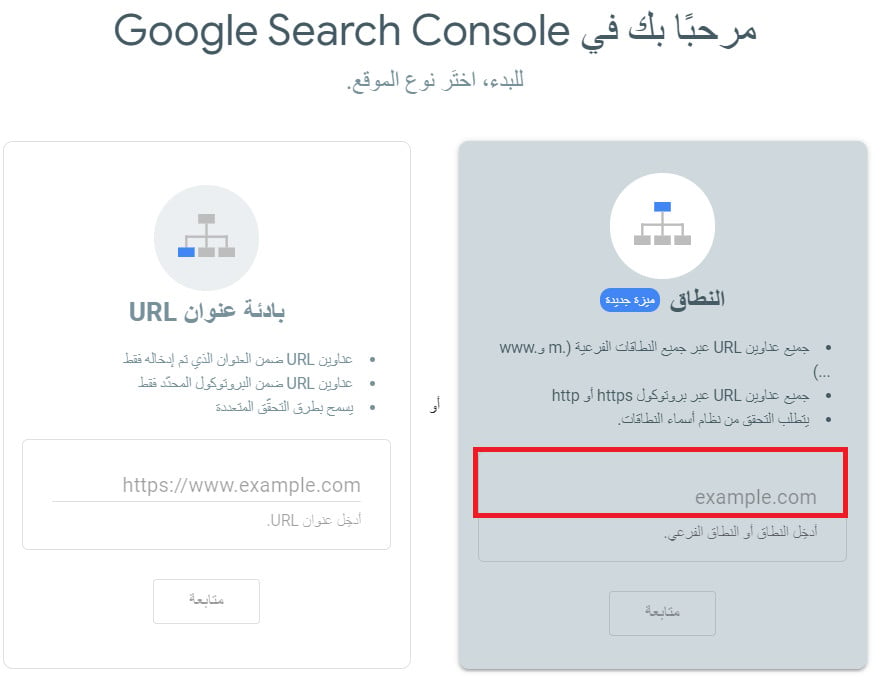
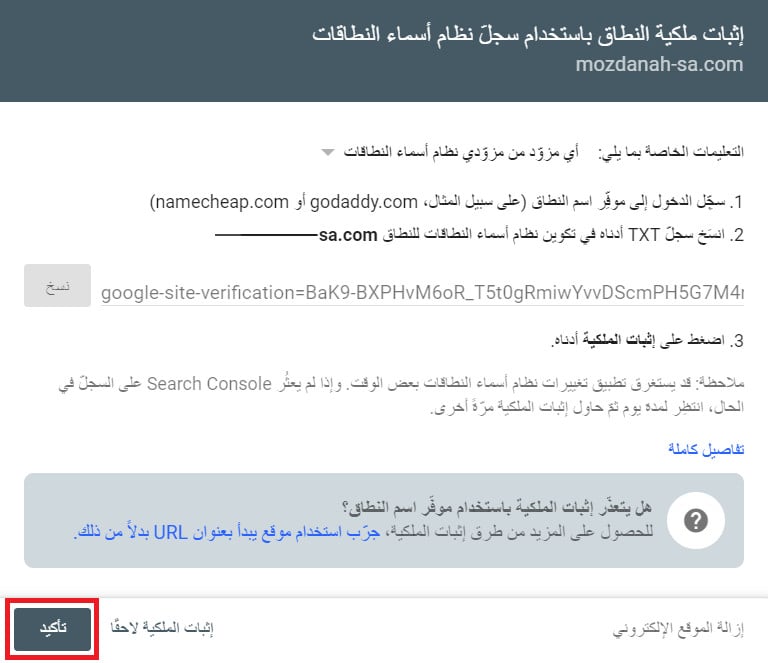
2. Enter your domain in the field provided, then click (Continue).
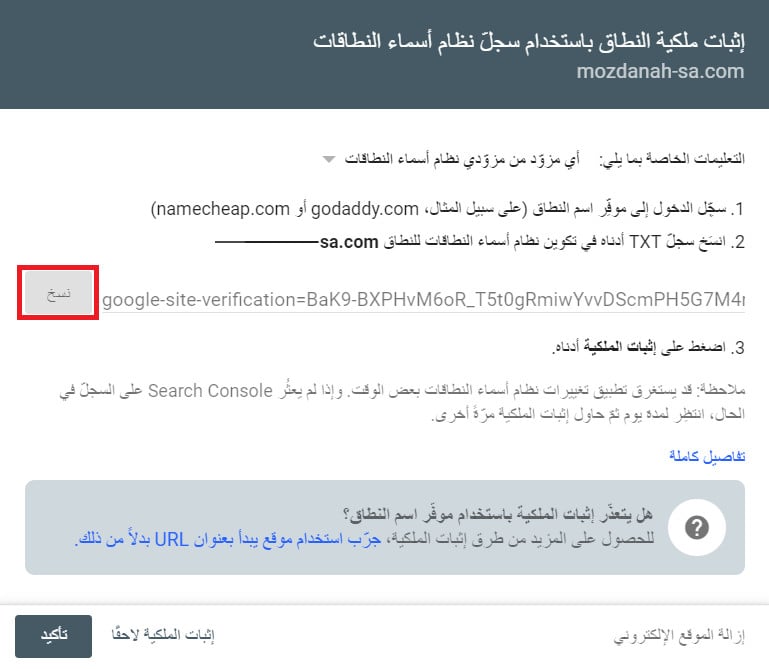
3. On the ownership verification page, click (Copy) to copy the TXT value.
4. From the main menu, under (Store and sales channels), choose (Store domain).

5. On the store domain page, click (DNS settings).

6. Click (+ Add new record).

7. Fill in the record exactly as follows:
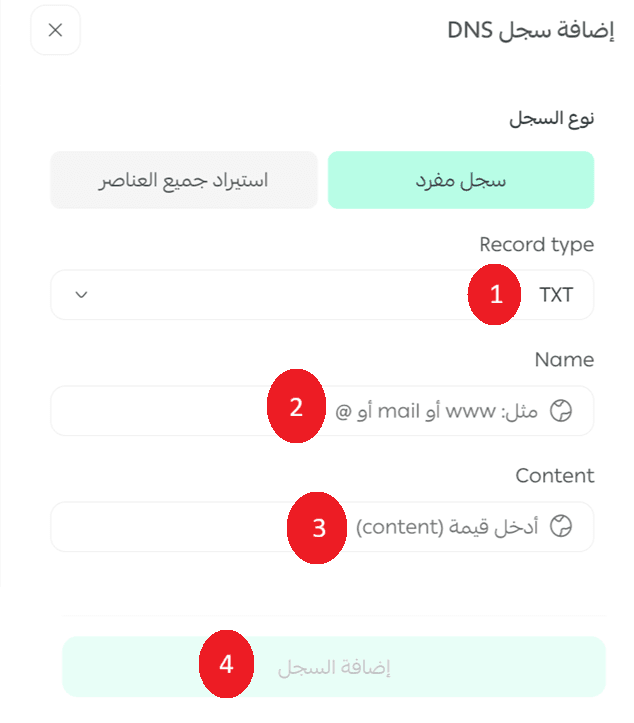
Field |
What to enter |
Type |
Select TXT as the verification record type. |
Name |
Enter @ only. |
Content |
Paste the TXT record you copied in step 3. |
Then click (Add record), and Salla will carry out the ownership check on your behalf.
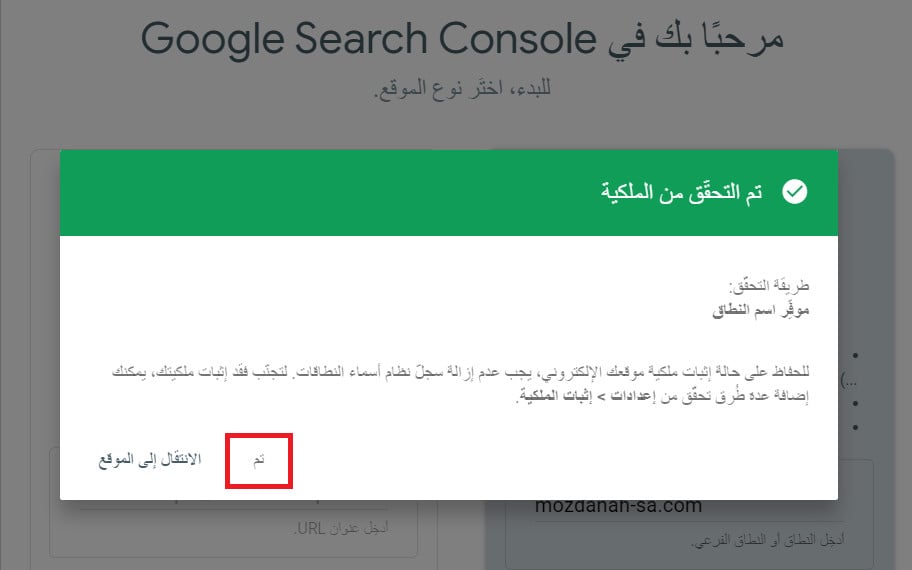
8. Go back to the ownership verification page in Google Search Console and click (Verify).
That is it. Ownership of the domain is now verified.
📝 Important notes
The TXT value Google gives you is unique to your domain and your Google account. Copy it exactly, with no extra spaces, and do not reuse a value from another site.
Use @ in the Name field, not your domain name. In DNS, @ means the root of the domain itself.
❓ Frequently asked questions
Why does a TXT record prove that I own the domain?
Because only someone with access to the domain's DNS settings can create one. When Google finds the exact value it issued sitting in your DNS, that is evidence the request came from the owner.
What should I enter in the Name field?
Enter @ and nothing else. It tells the DNS zone to attach the record to the root domain rather than to a subdomain.
Where are the DNS settings in the Salla dashboard?
From the main menu, open (Store and sales channels), choose (Store domain), then click (DNS settings). The (+ Add new record) button is on that page.
Can I use the same steps for other Google services?
Yes. Other Google services that ask you to confirm the domain before connecting use the same method: they issue a TXT value, and you add it in Salla's DNS settings the same way.
Domain verification is a one-time piece of setup that unlocks everything Google needs to trust your store. Get the TXT record right the first time and the rest of the connection is straightforward.