Selling handmade work, designs, or services where every order is priced by what the customer actually needs?
That's what the custom-order service product type is for. These products have no fixed price — the price is set according to custom requirements or criteria. The type suits a wide range of offerings, such as clay or crochet handcrafts, drawings and artwork, nutrition plans, and research work — anything built as a direct response to a customer's needs. In this guide, you'll learn how to add a custom-order service product, manage its options, design an order form with exactly the fields you need, control when fields appear, and highlight the product's key specifications.
To add a custom-order service on Salla, click (Products) from the side menu of your dashboard, then (New product), and select the product type as a custom-order service. Enter the basic details and save, then manage its options from (Options and quantity) and build its order form from the (Order form) tab.
📌 Article overview
- Add a new custom-order service product
- Manage the product's options
- Design an order form
- Control the order form fields
- Highlight the product's key specifications
- Frequently asked questions
🚀 Adding and managing custom-order service products
First: add a new custom-order service product
1. From the side menu of your dashboard, click (Products).

2. From the products page, click (New product).
3. Select the product type as a custom-order service.
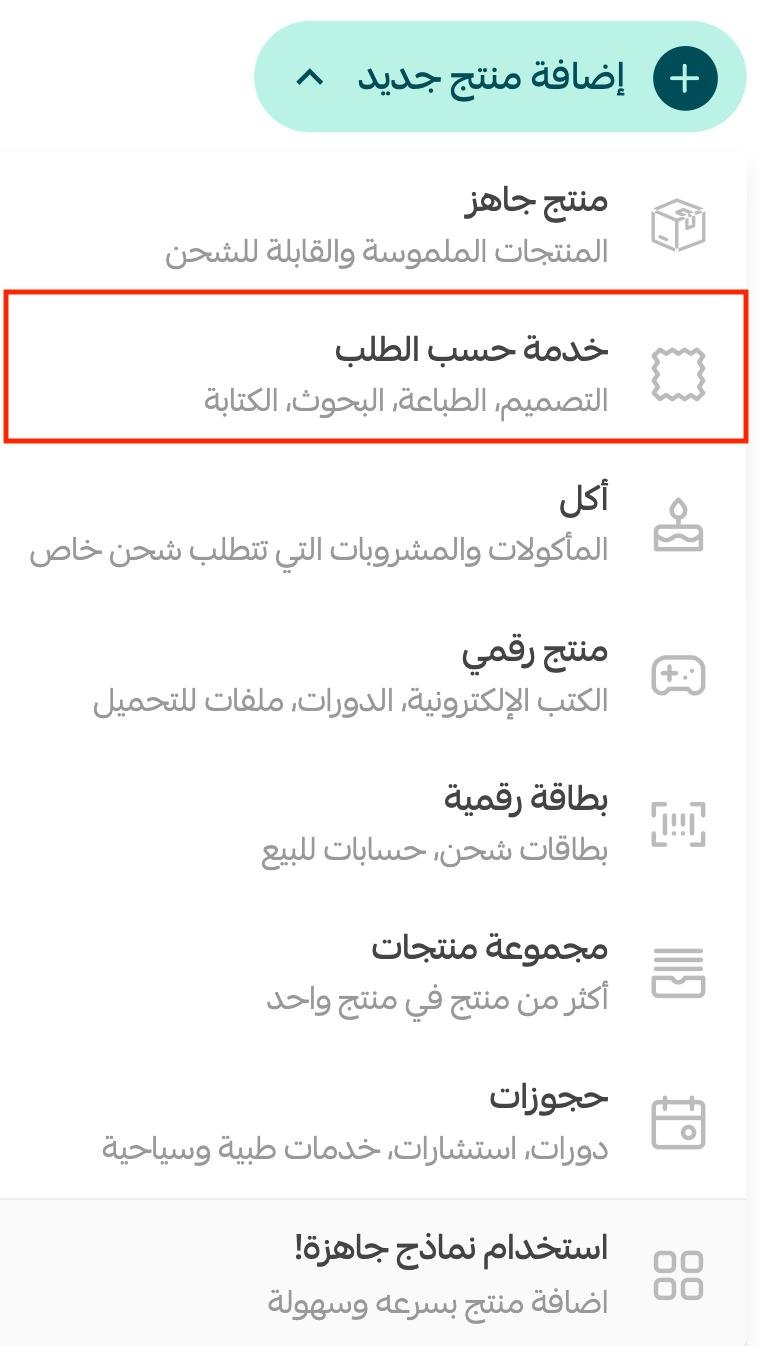
4. Enter the product's basic details, then click (Save).
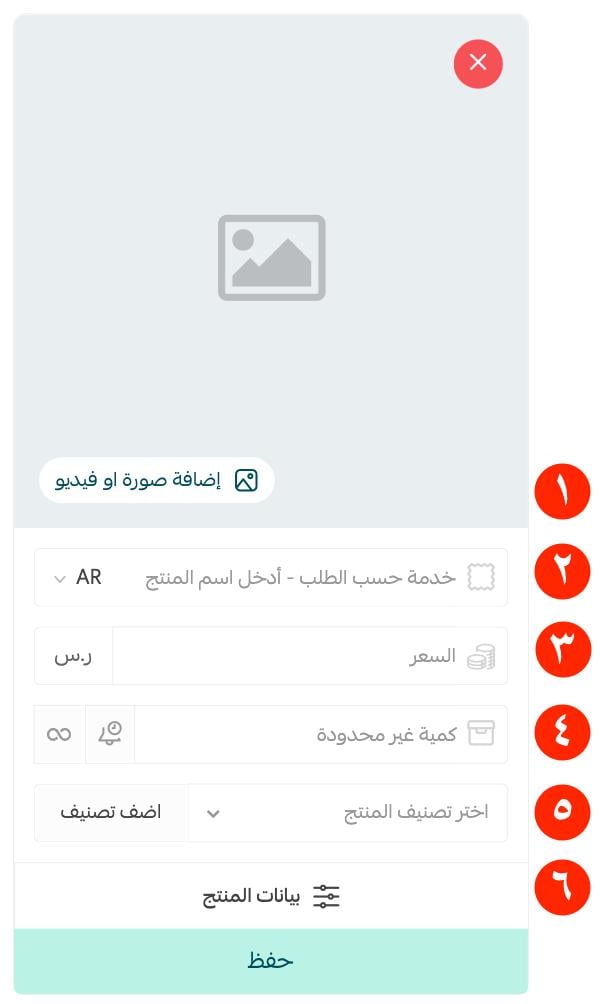
In order, they are:
1. Product images — add one or more images. For more details, see uploading product images and videos.
2. Product name — the name customers will see.
3. Product price — the selling price.
4. Product quantity — the available quantity. Note that the (Options and quantity) button only appears after you add the custom-order product's image, name, and quantity and save it for the first time.
5. Product category — helps you customize product display, product reports, and more. For more details, see managing product categories.
6. Product details — to customize details such as quantity, price, barcode, and more.
After saving, the product card looks like this:
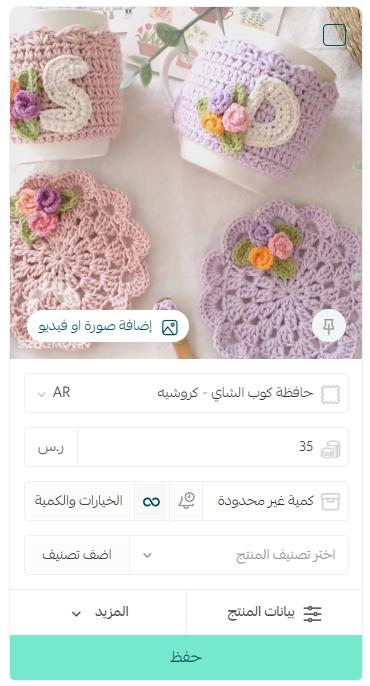
For more details, see the product card and adding a new product.
And for more details, see adding product options and controlling how they appear to the customer.
Second: manage the custom-order service product's options
To manage (Options and quantity), first make sure you've added the product image, entered the name and price, and saved for the first time.
Then click (Options and quantity) to control the custom-order service's multiple options and start setting its various prices and quantities.
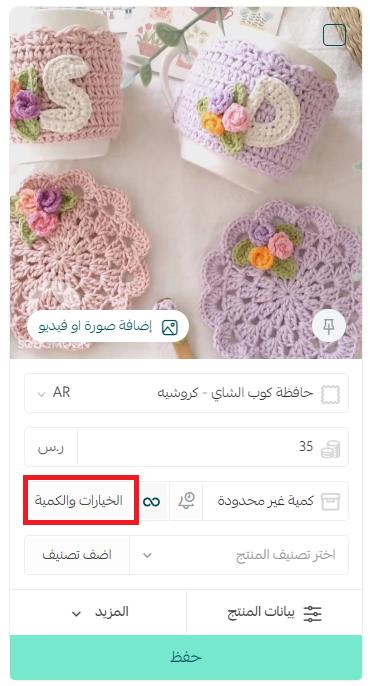
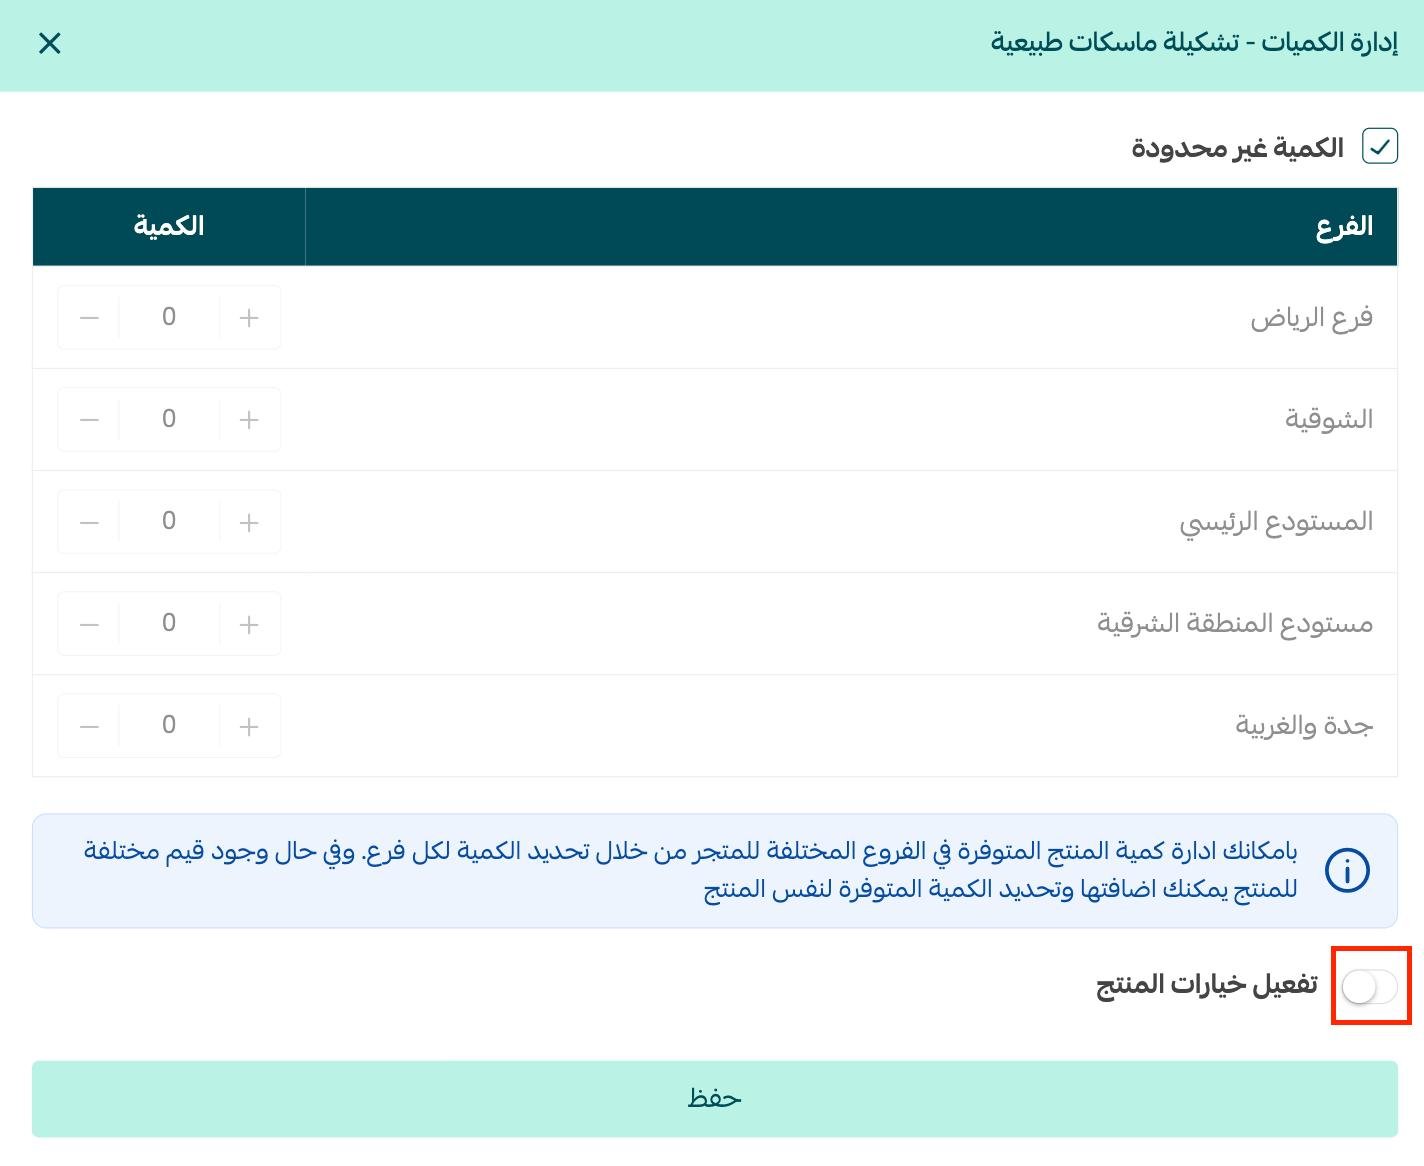
The quantities management page opens — click (Enable product options).
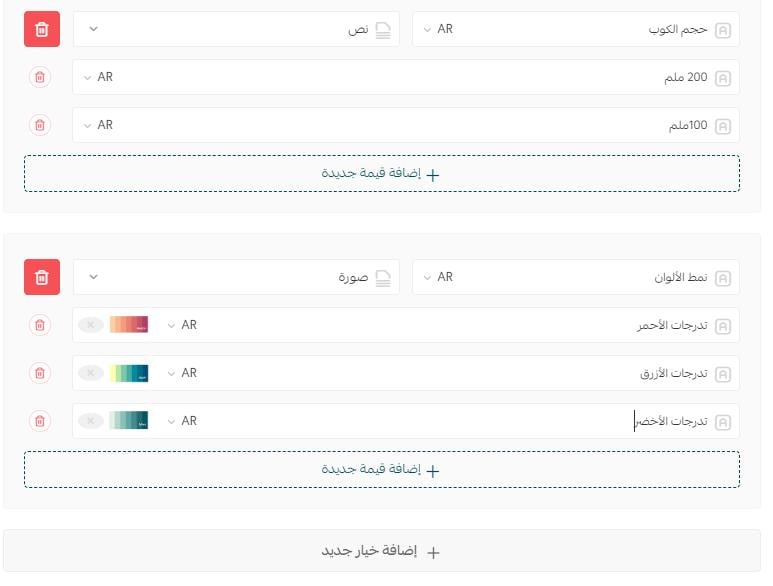
Enter the custom-order service's options — an option can be text, a color, or an image.
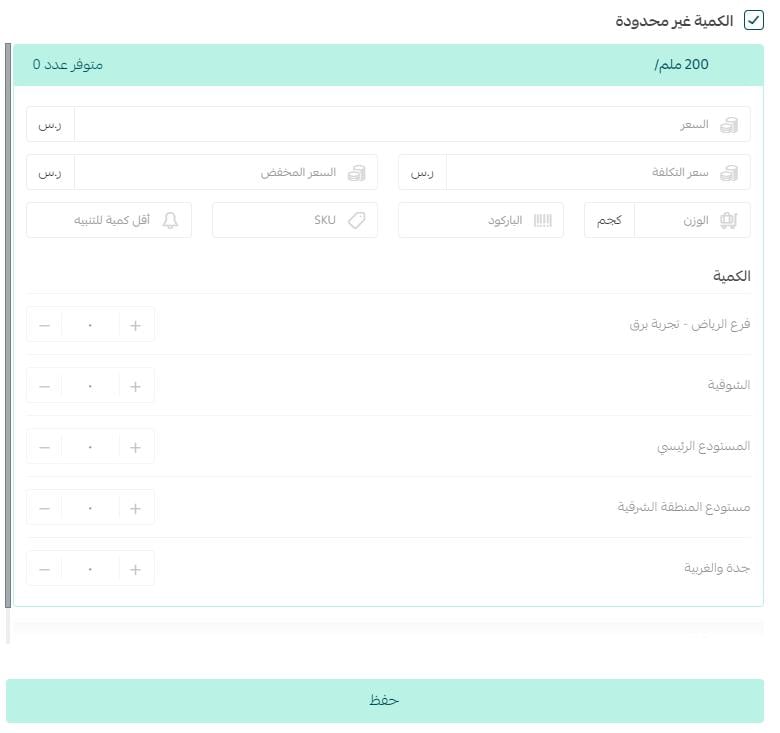
Then enter the prices and quantities.
The custom-order product card can appear to the customer like this:
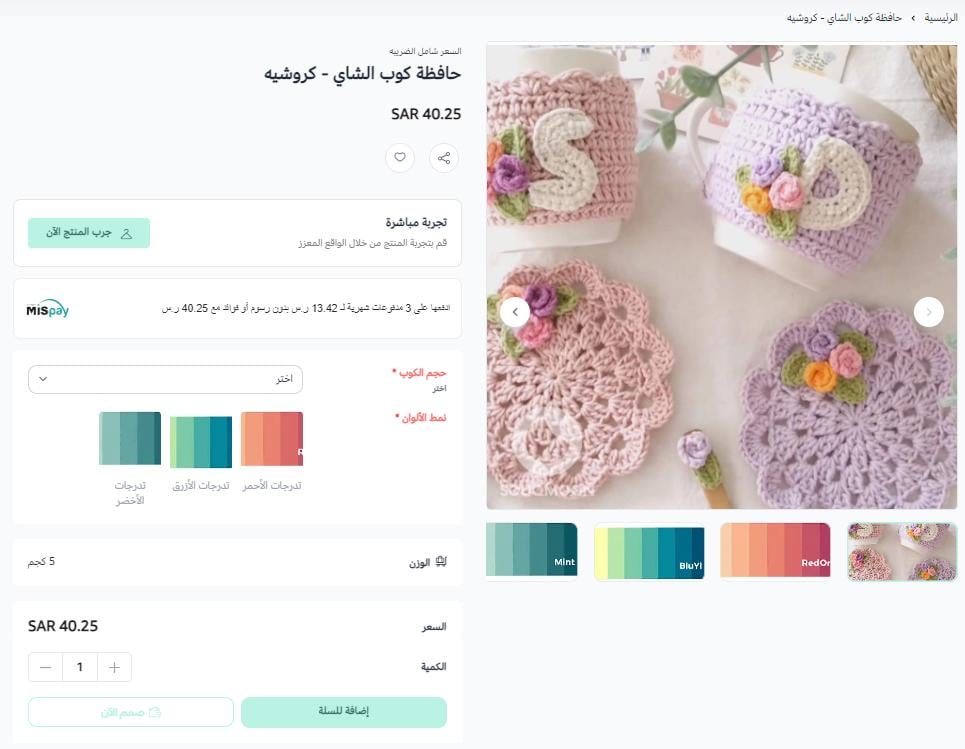
For more details, see adding product options and controlling how they appear to the customer.
Third: design an order form that makes the product easy to request
1. From the product card, click (Product details).
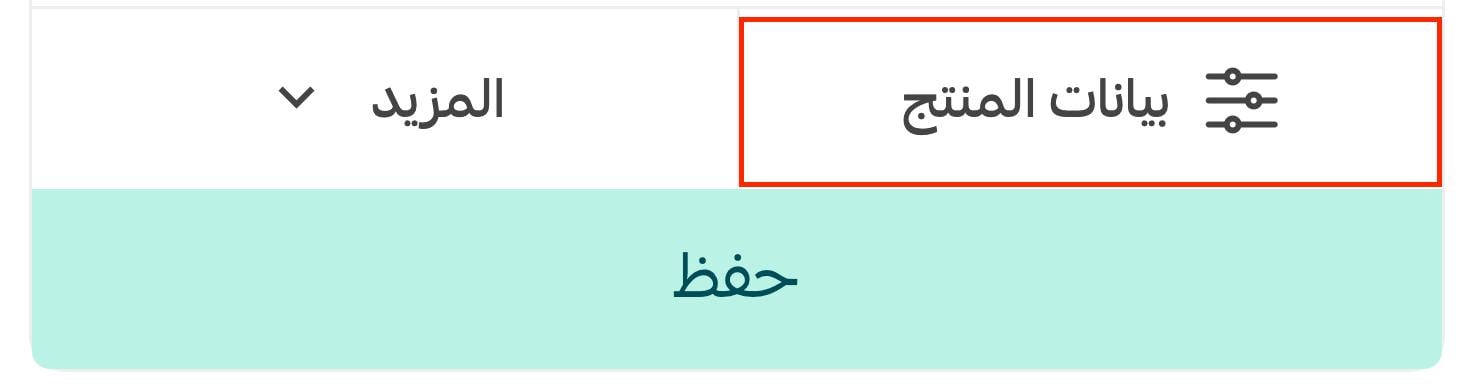
2. On the product details page, click the (Order form) tab.
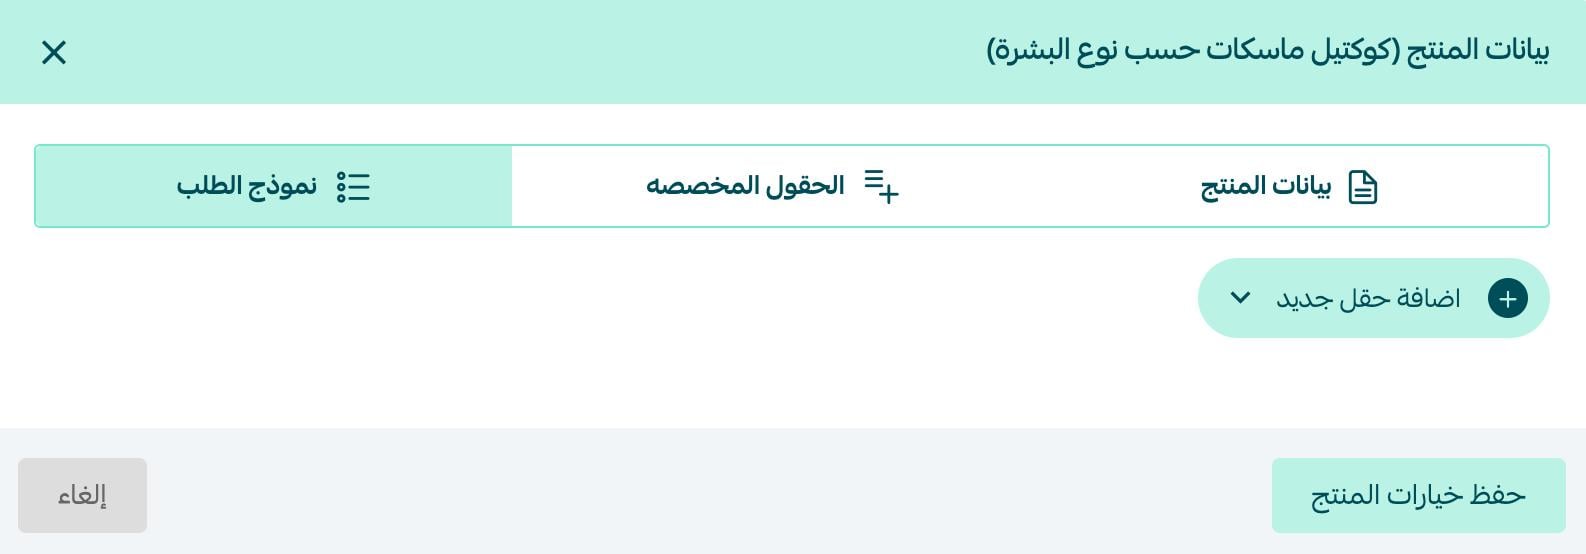
3. Click (+ Add new field), then choose the field type you want in the order form.
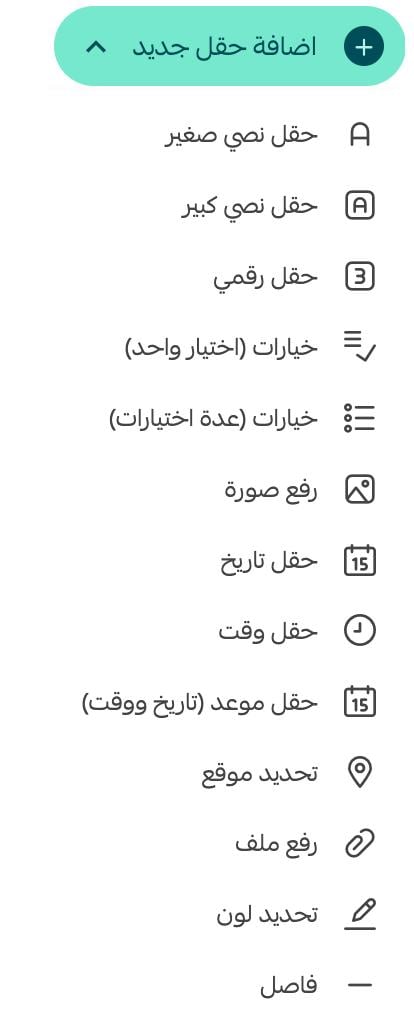
In order, the field types are:
- Small text field: adds a short text field to the order form.
- Large text field: adds a long text field (a paragraph), where the customer can enter a more detailed explanation.
- Numeric field: adds a field that requires a number.
- Options (single choice): adds a list where only one item can be selected — for example, asking the customer which file type they want.
- Options (multiple choices): adds a multi-select field — for example, asking the customer about color preferences.
- Image upload: for when you want the customer to upload an image — one they want printed on the product, for example.
- Date field: adds a date field — for example, so the customer can set the final delivery date for the requested work.
- Time field: adds a time field — for example, so the customer can set the time the work will be reviewed.
- Appointment field: combines date and time — such as the delivery appointment for the service or product.
- Location: adds a location-picker field to the order form.
- File upload: adds a file-upload field, with control over the allowed file formats.
- Color picker: adds a field for selecting a specific color.
- Divider: adds a separator between the different fields in the order form.
4. Fill in the required details for the field type, then click (Save product options).

- Set up a small text, large text (paragraph), or numeric field
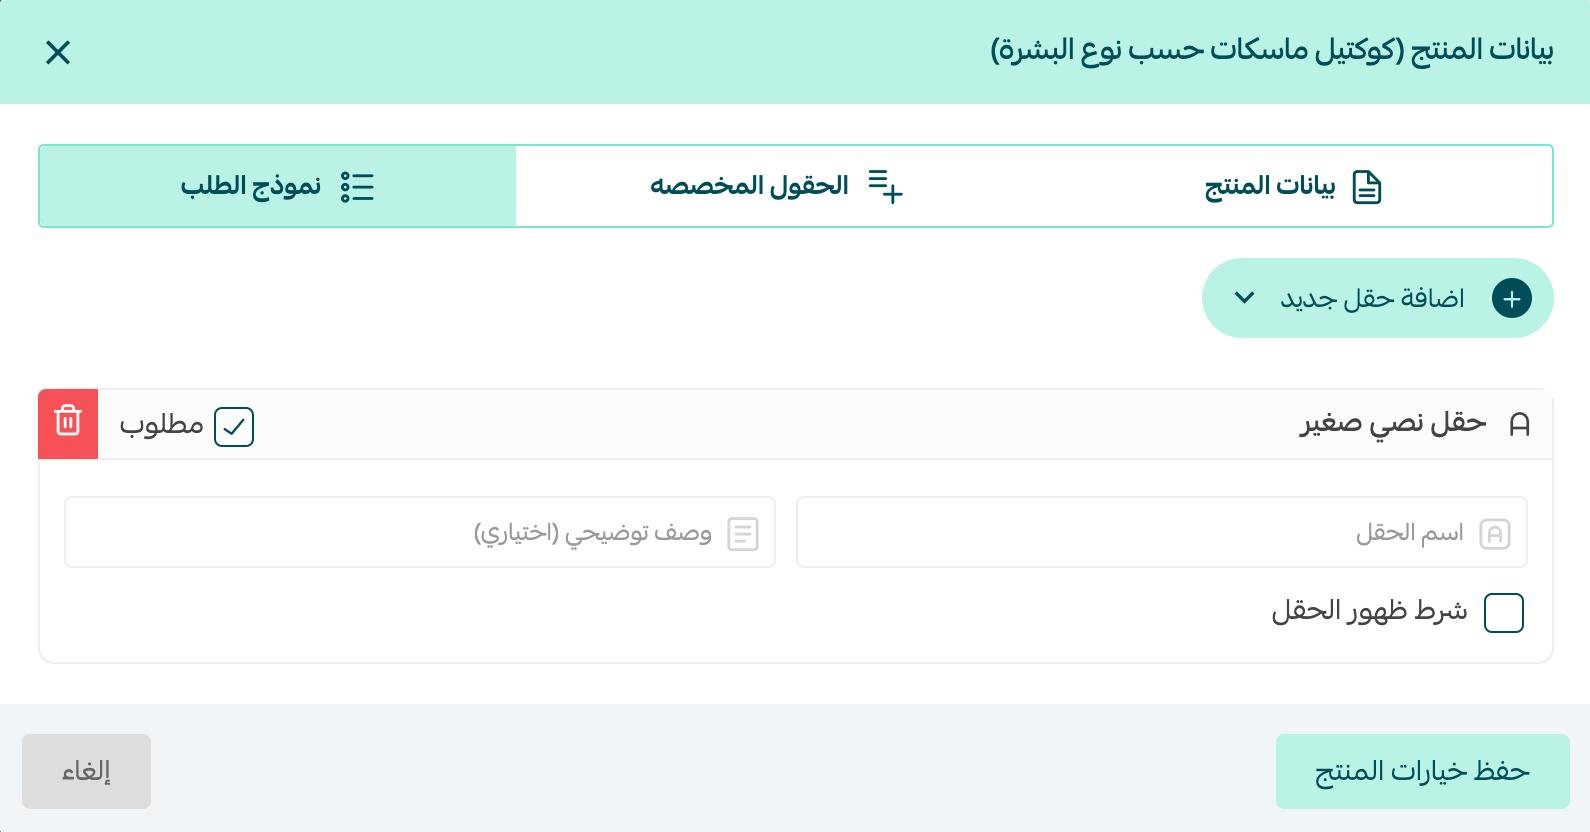
Complete the following details:
- Required — when checked, the order can't be completed unless the customer fills in this field.
- Field name — keep it clear, short, and descriptive of what you need.
- Field description — an explanation of what the field is for; optional.
- Field display condition — the field only appears if the customer enters a specific value in another field.
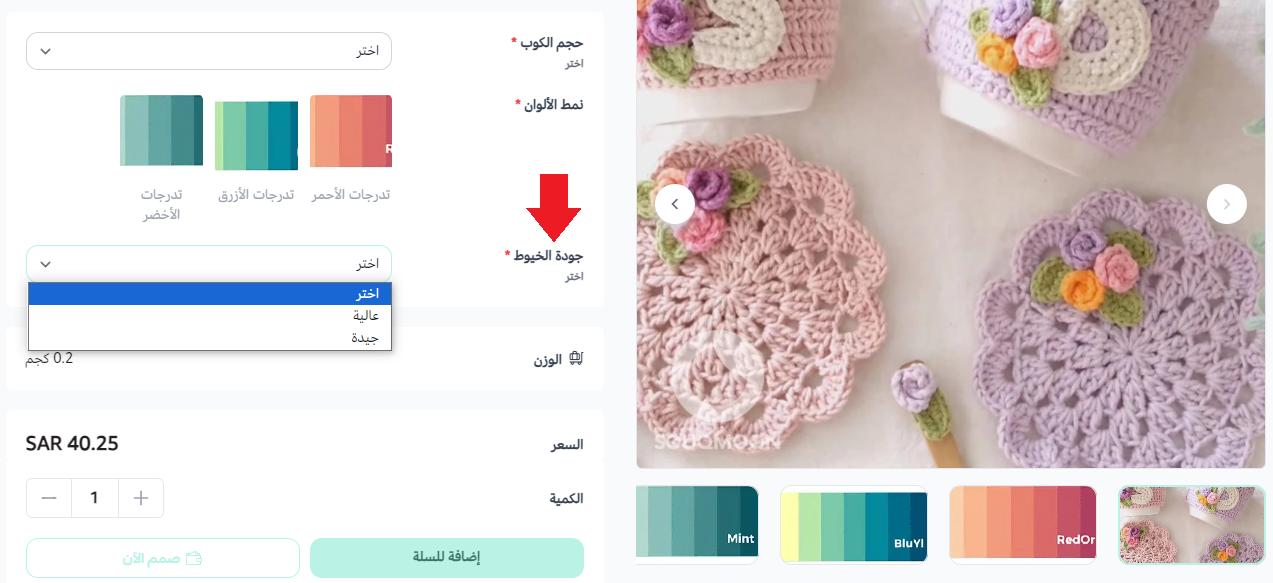
- Single-choice options field and how the customer sees it
Enter the details the options field needs: the field name, a description, and the values the customer chooses between.
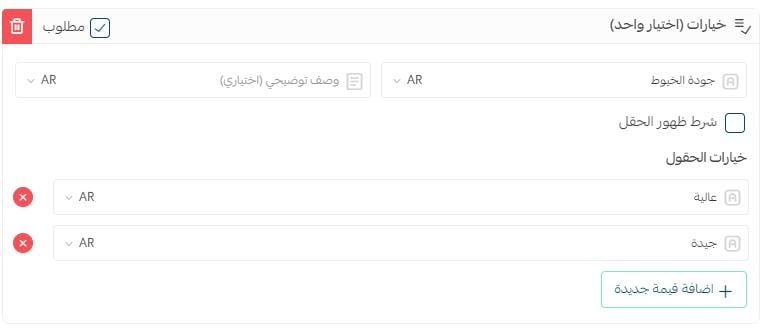
The field appears to the customer on the product page like this:
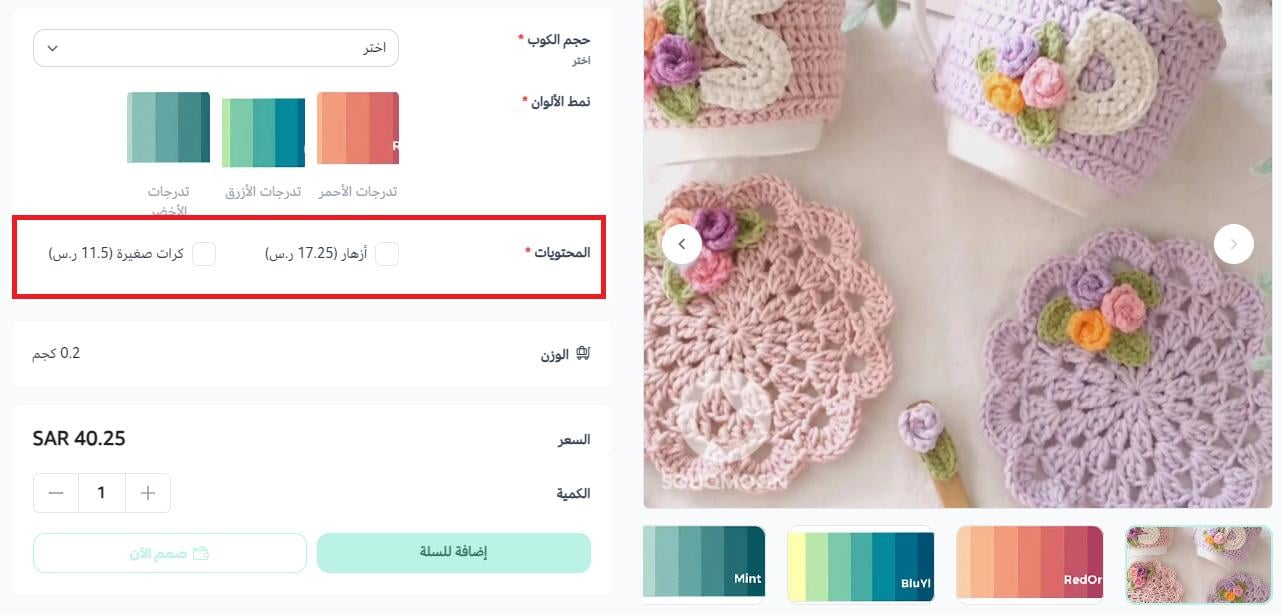
- Multiple-choice options field and how the customer sees it
Enter the details the options field needs: the field name, a description, and the values the customer chooses from.
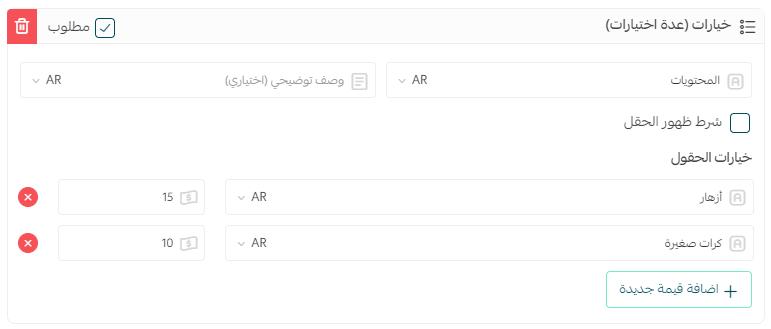
The field appears to the customer on the product page like this:
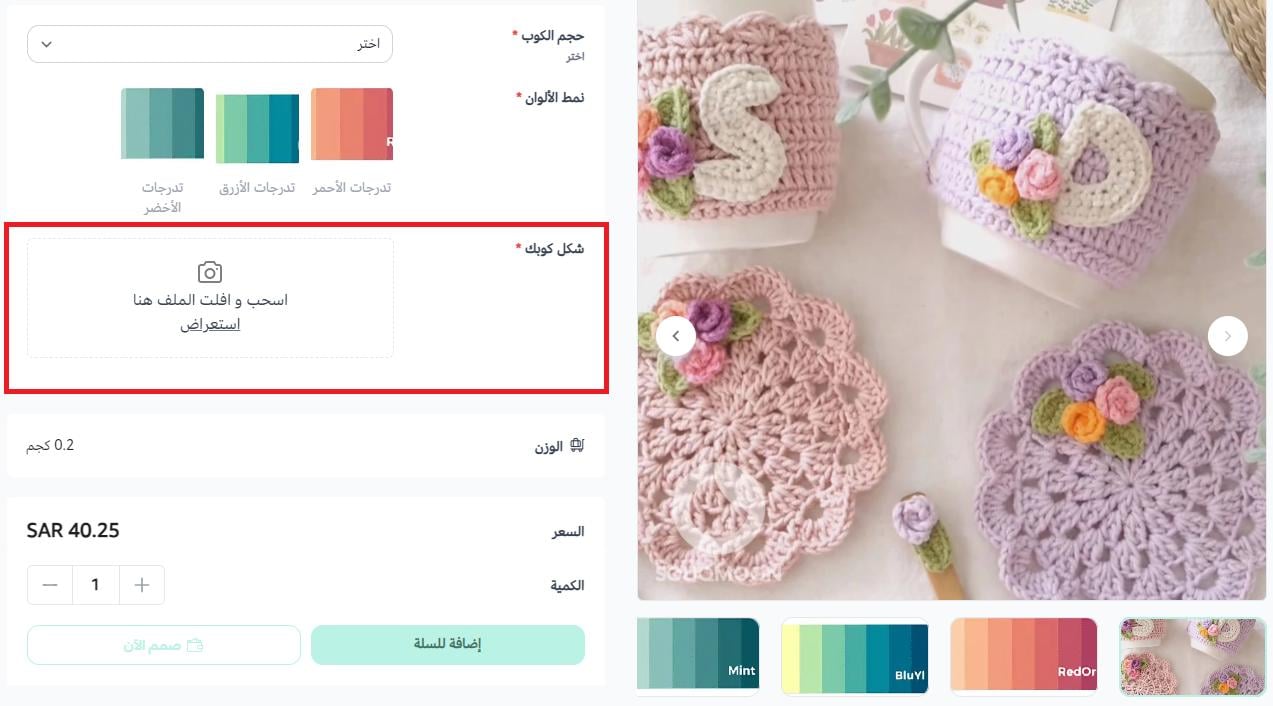
- Add an image-upload field to the customer's order form
To show an upload option in the order form, add an image field.

Then enter the required details, and it appears to the customer on the product page like this:
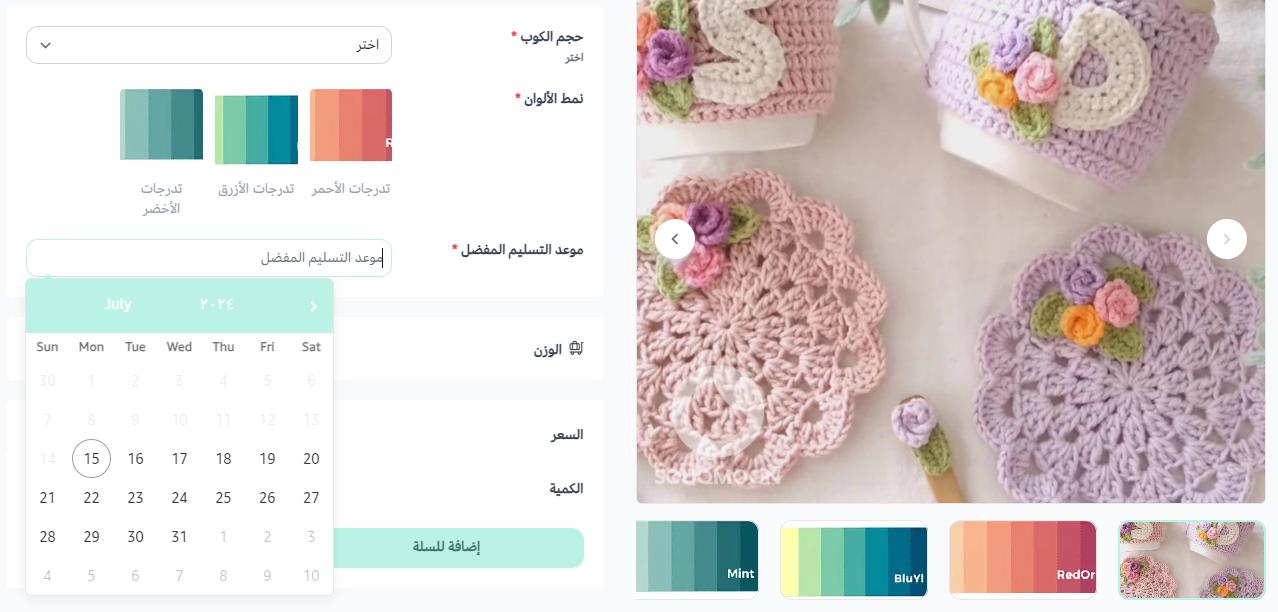
- How the date field appears on the product page
The customer sees it on the product page like this:
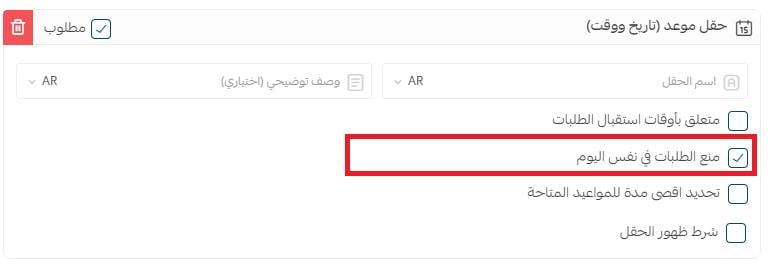
- Block same-day appointments
In the appointment field, turn off the (Tied to order receiving times) option, then select (Block same-day orders) and click (Save).
- Attach the customer's map location to the order details page
You can also view the map the customer attached on the order details page in your dashboard.
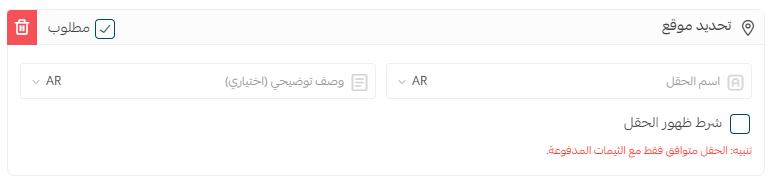
When setting up the map field:
- Write the map field's name.
- Add a description for the map.
- You can make the field required.
- You can show the map field conditionally.
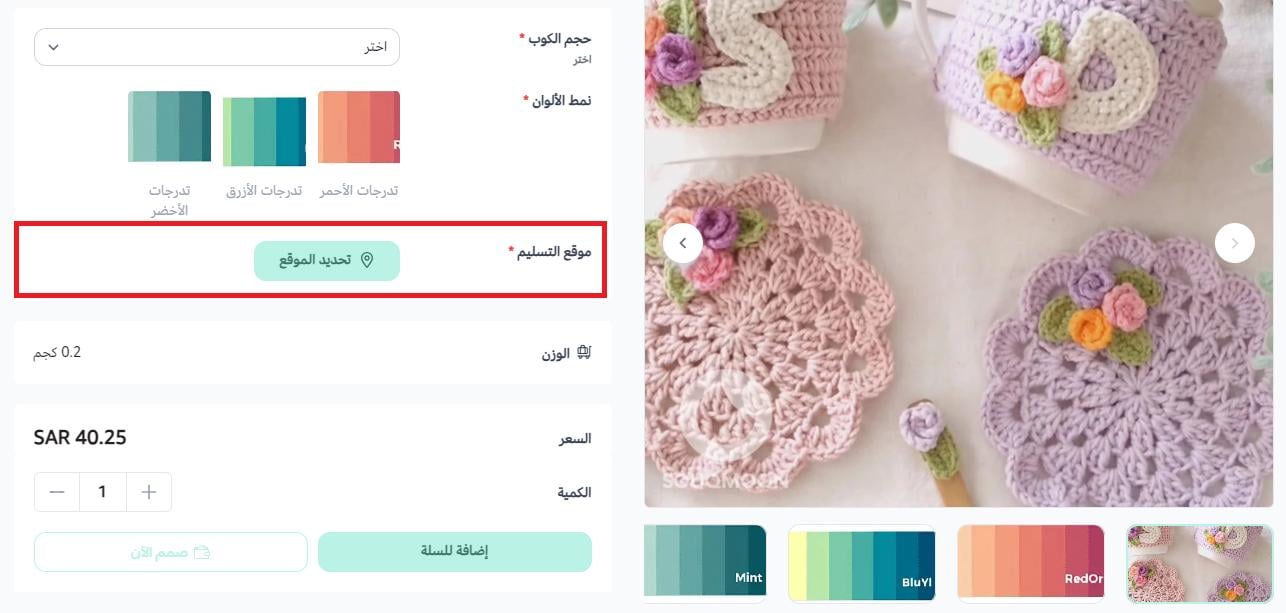
It appears on the customer's page like this:
📝 Important notes
- You can add one map field or several.
- The map field is useful for pinpointing where the service will be delivered — for example, the wedding hall's location for wedding photography services.
- Let the customer upload a file on the product page
Add a file-upload field to the order form, enter the required details, and click (Save).
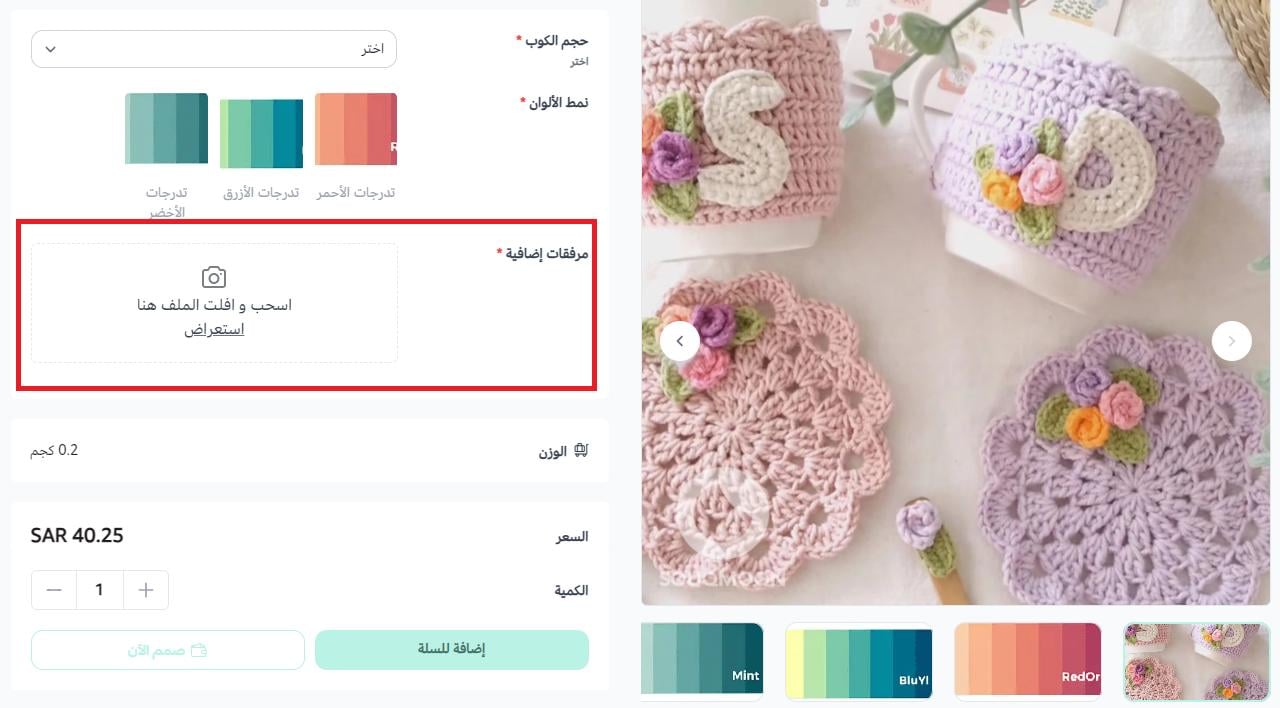
It appears in your store like this:
📝 Important notes
- Only one file-upload field can be added.
- You can view the uploaded file on the customer's order page in your dashboard.
- Supported file types: png, jpg, pdf, word, exl, svg, txt.
- How the selected color reaches you
You can see the color the customer selected on the order details page in your dashboard.
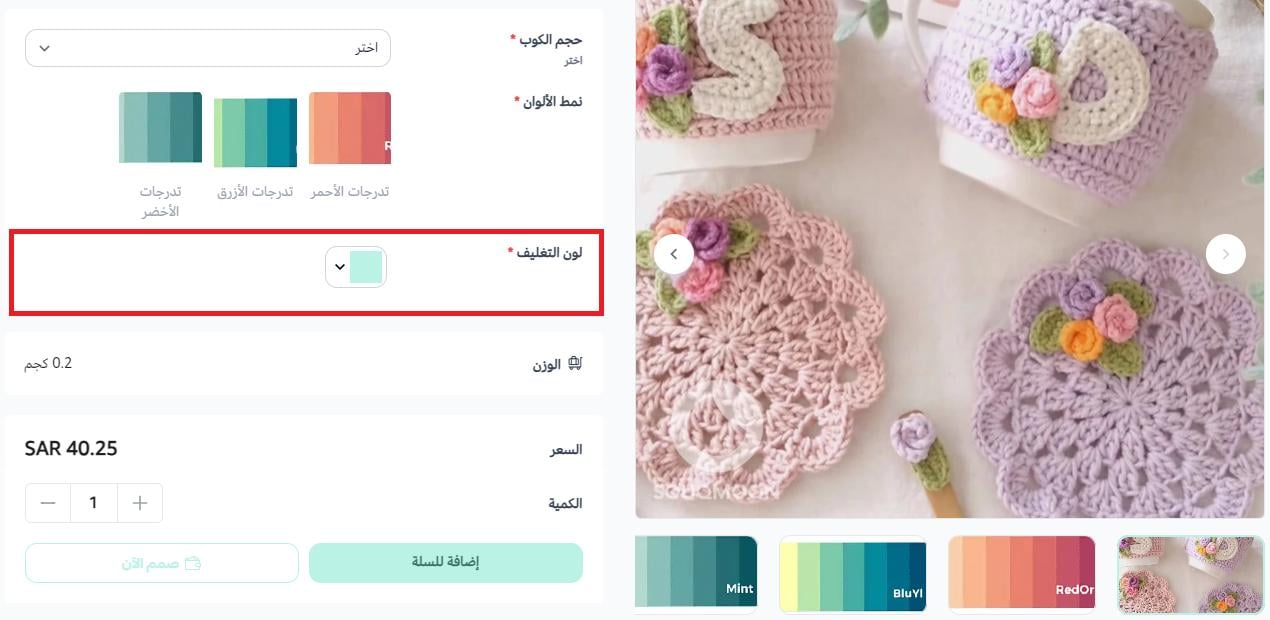
You add the color-picker field to the order form, and set its properties, from the (Order form) tab.
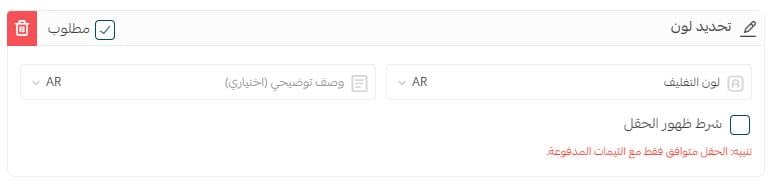
📝 Important notes
- The color field is a full palette: the customer can pick the exact shade they need, without being limited to a preset set of colors.
- A common use: letting the customer set the logo color for logo design services.
Fourth: control the order form fields
- Reorder the fields in the order form, or delete one
Use the field's control toolbar in the fields section to move it with the up and down icons:
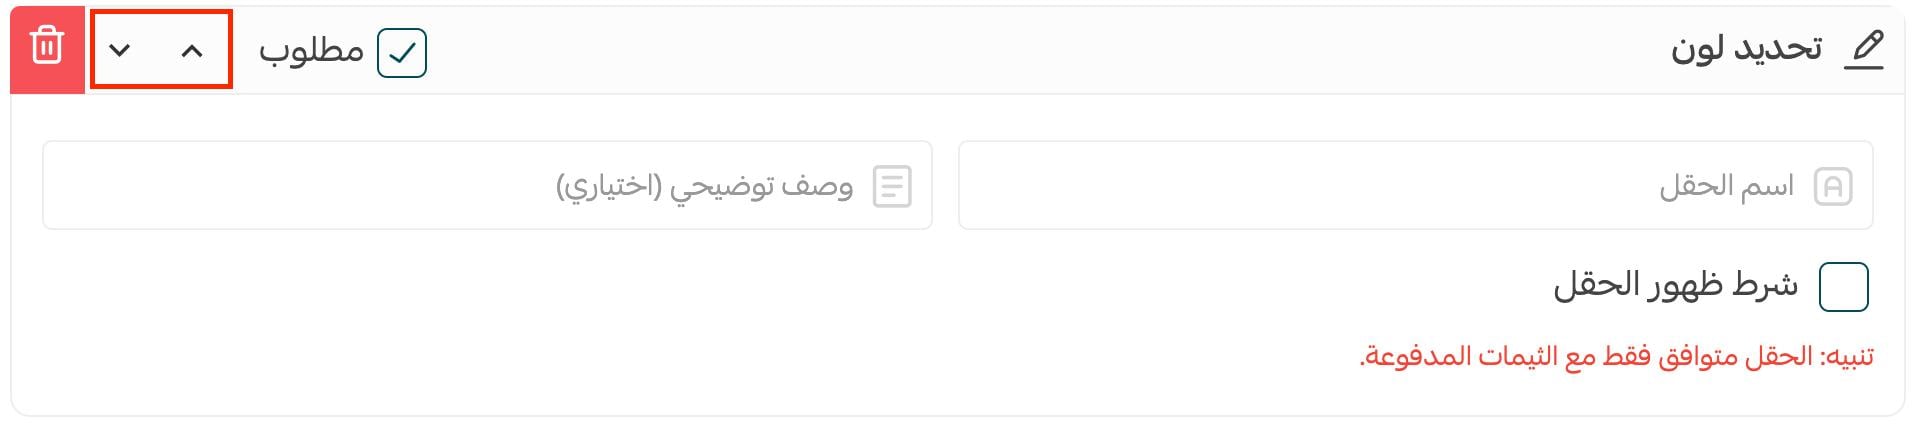
The icons are:
- Move the field up.
- Move the field down.
- Delete the field from the order form.
- Control when a field appears while the customer fills in the order
On the product details page, in the (Order form) tab, every field you add has a setting called the field display condition.
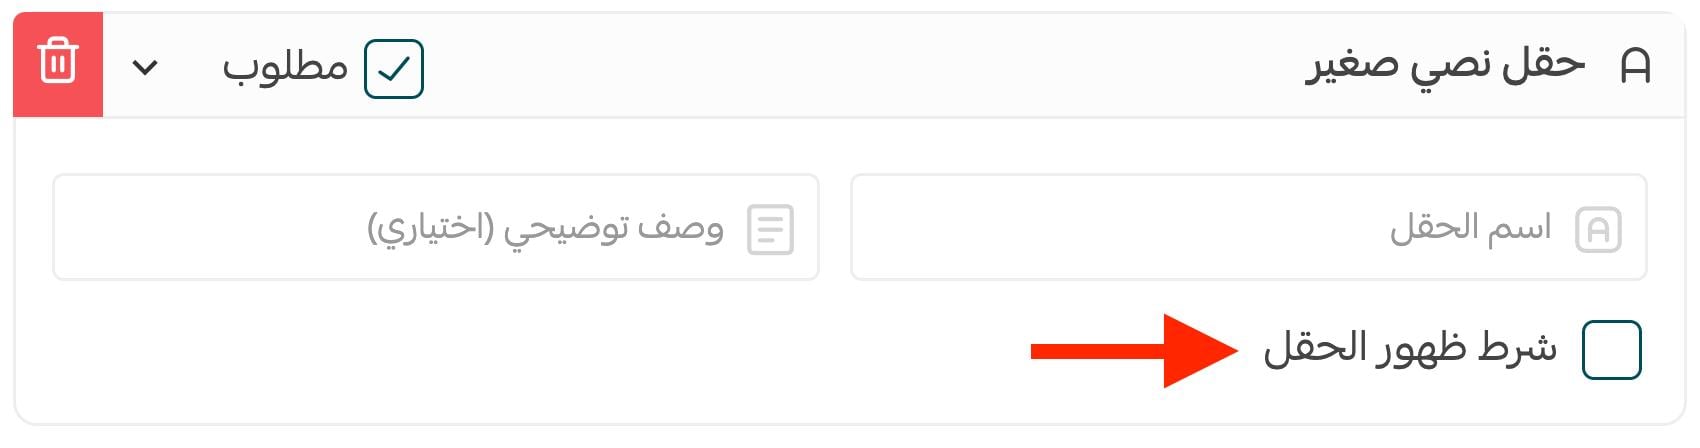
It means the field won't appear unless the customer enters a specific value in another field.

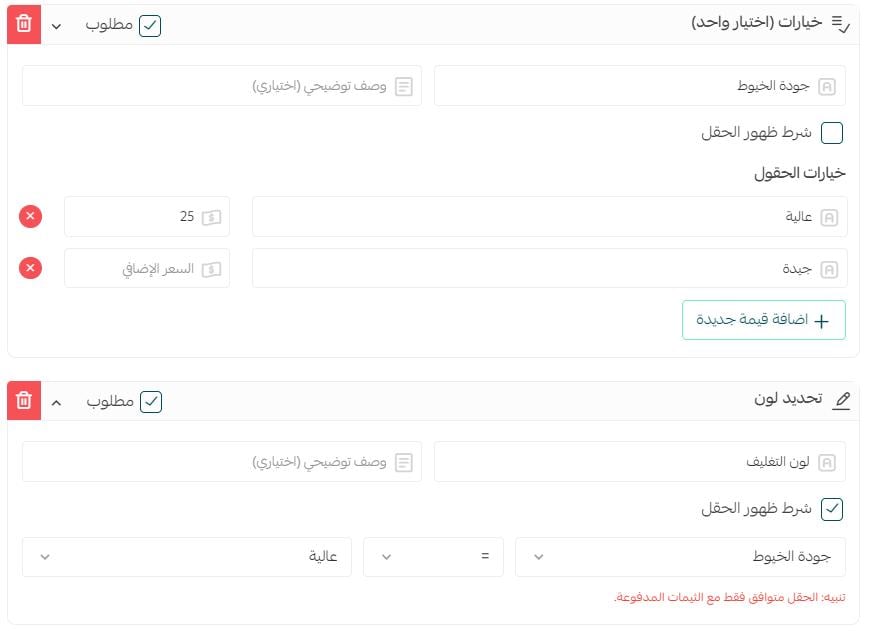
The condition consists of, in order:
- The field name whose value controls whether the current field appears.
- The comparison operation (equals, greater than, less than, not equal).
- The field value.
💡 Example: The (wrapping color) field won't appear unless the customer selects (high) thread quality.
Fifth: highlight the product's key specifications for the customer
From the product details page, click the (Custom fields) tab, then add a (Product specifications) section or a (Special message) section.
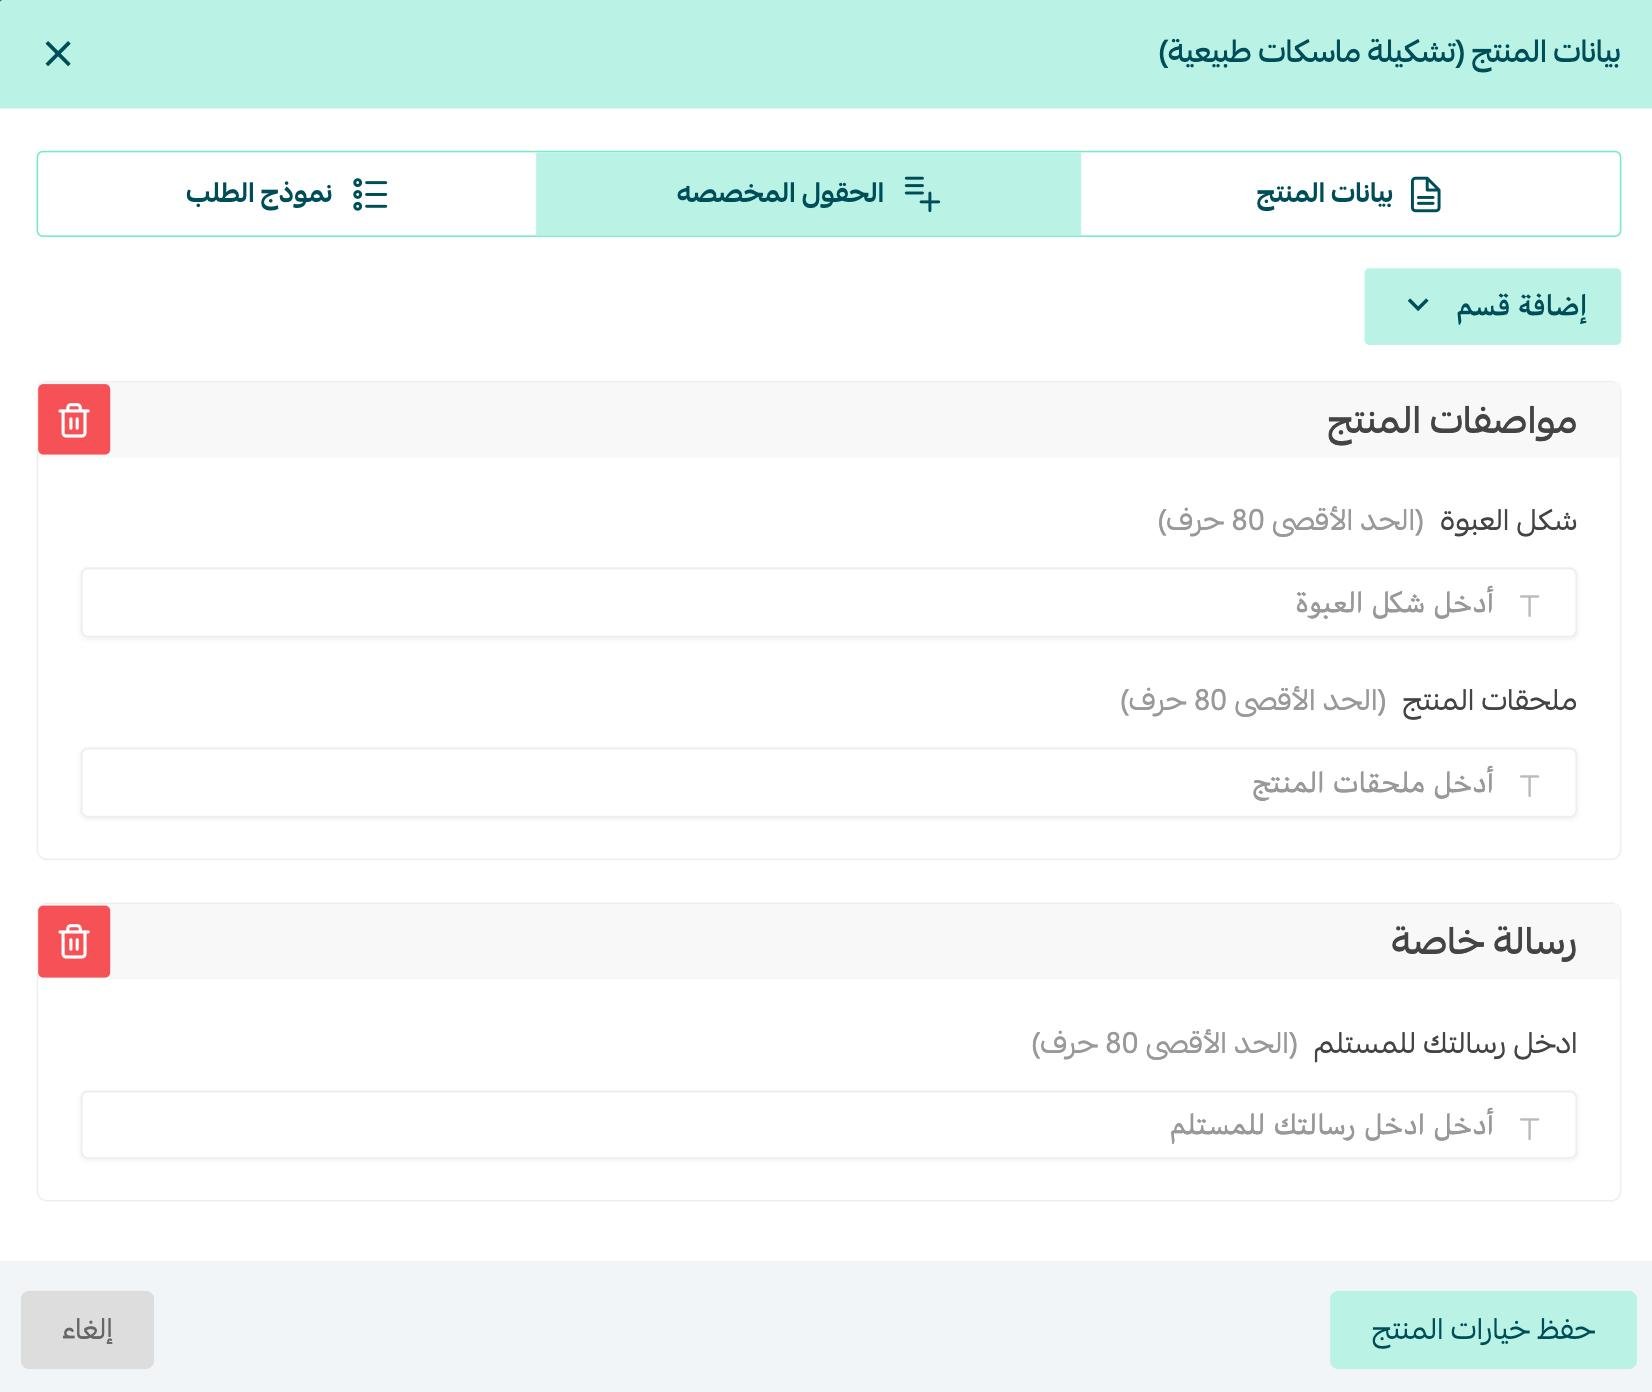
For more details, see setting up custom fields.
❓ Frequently asked questions
How do I send the customer a price quote after agreeing on the service details?
For more details, see custom-order service — sending a price quote from your store.
Which file types can customers upload in the order form?
The file-upload field supports png, jpg, pdf, word, exl, svg, and txt files, and you can only add one file-upload field per order form. The uploaded file shows on the customer's order page in your dashboard.
Can a form field appear only in certain cases?
Yes — set a field display condition so the field only appears when the customer enters a specific value in another field, using equals, greater than, less than, or not equal comparisons.
For more details about adding the other product types:
- Adding a sponsorship product
If you need help with adding products, you can use Merchant Services, which offers professional product listing and image design, along with product description writing and product photography. These services help your products show up better, look more appealing, and support the success of your business.