Adding a language to your store is the easy part. Deciding when customers get to see it is the part that matters.
Once a language is added, you manage store languages one at a time from a single control menu: activate a language, hide it again, switch instant translation on for it, open the text editor to fix the wording, or check how much of your content it has actually covered. That means you can add a language, keep it hidden while you translate it properly, and only then show it to shoppers. In this guide, you'll learn where those controls live and what each one does.
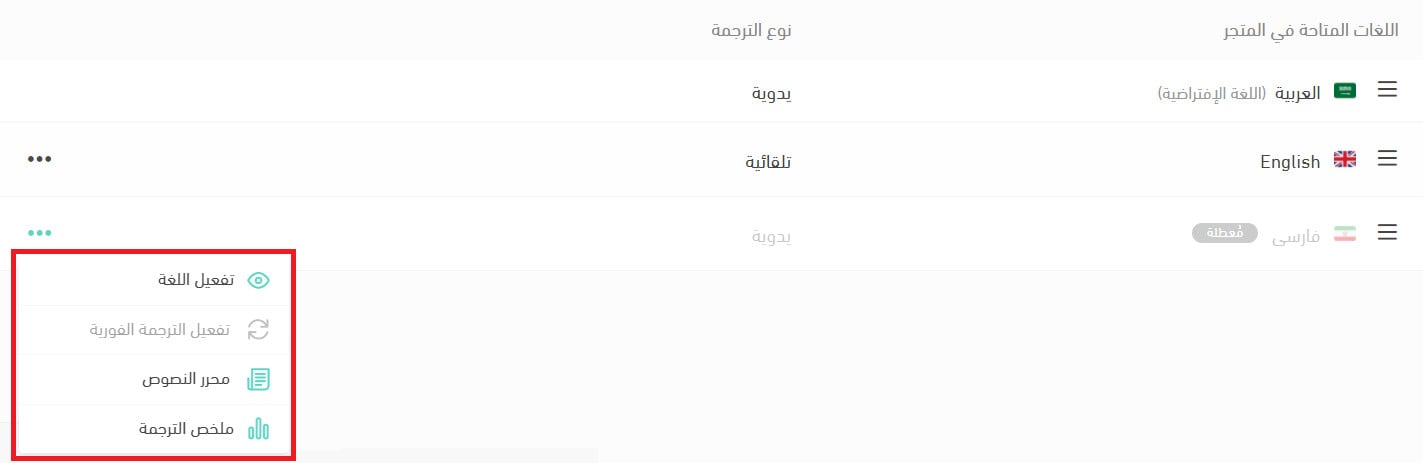
Every language you add to your store has its own controls. Open Store settings, click Languages, then click the (...) button next to a language to activate or disable it, switch instant translation on, open the text editor, or review its translation summary.
📌 Article overview
- How to open the language controls
- Frequently asked questions
👣 How to open the language controls
1. From the dashboard side menu, click (Store settings).

2. From Store settings, click (Languages).
3. On the languages page, click the (...) button next to the language you want.

A menu opens with the commands for managing that language.
For more answers, see frequently asked questions about languages.
❓ Frequently asked questions
How do I activate or disable a language I have added?
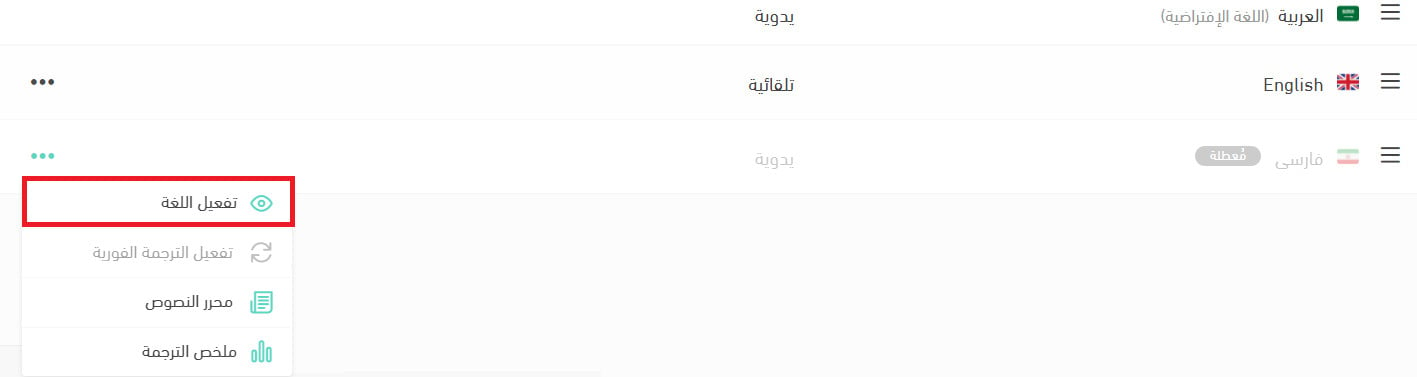
To activate any language added to your store, click (Activate language) in the language control menu.
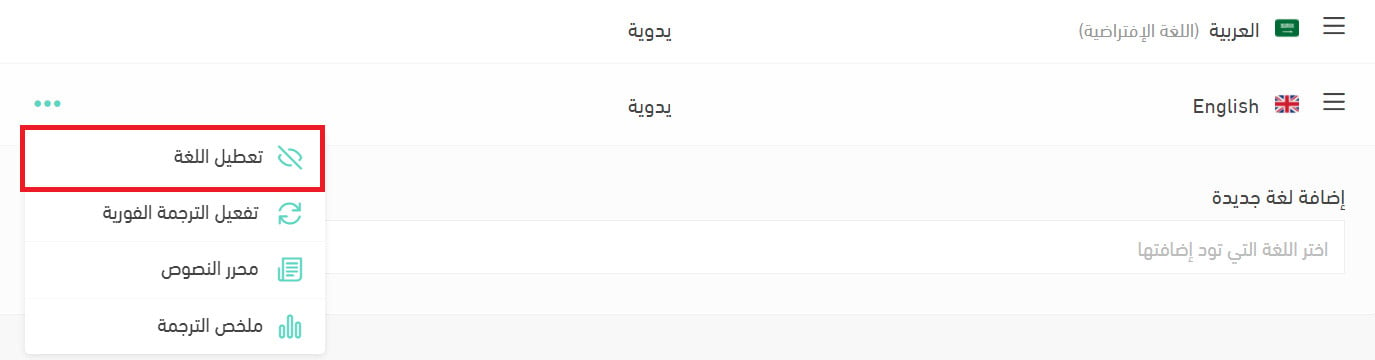
To stop the language appearing in your store, click (Disable language).
What happens when I disable a language?
Take Turkish as the example, disabled in the store below.

First, it no longer appears to store visitors.

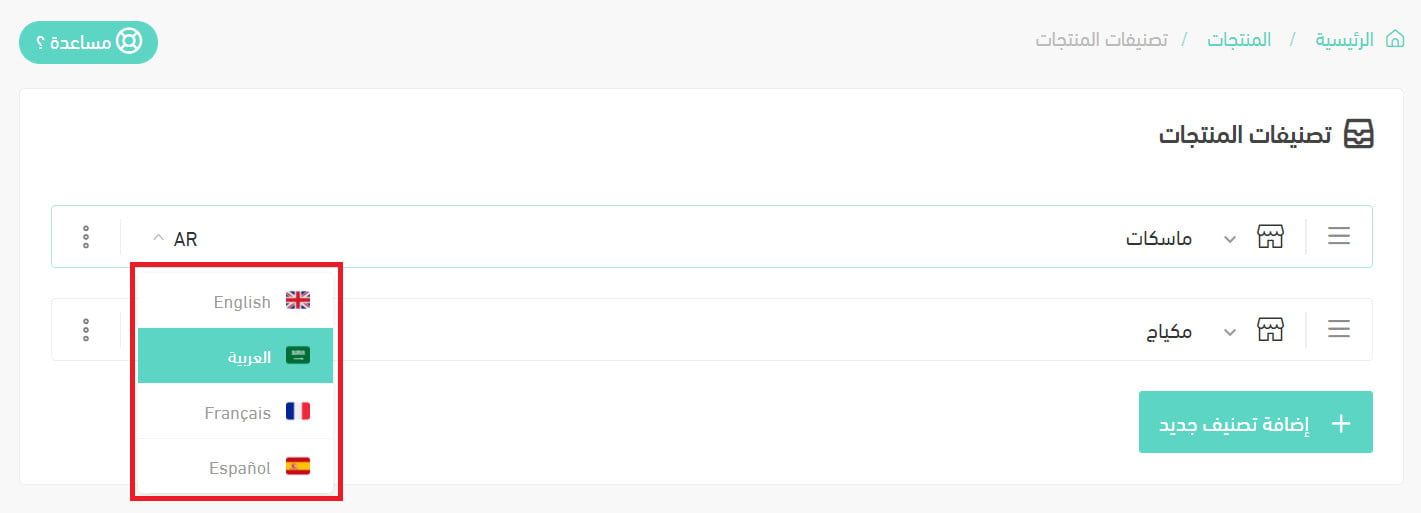
Second, it no longer appears in the dashboard's language list for translatable fields.
Third, it still appears in the text editor.
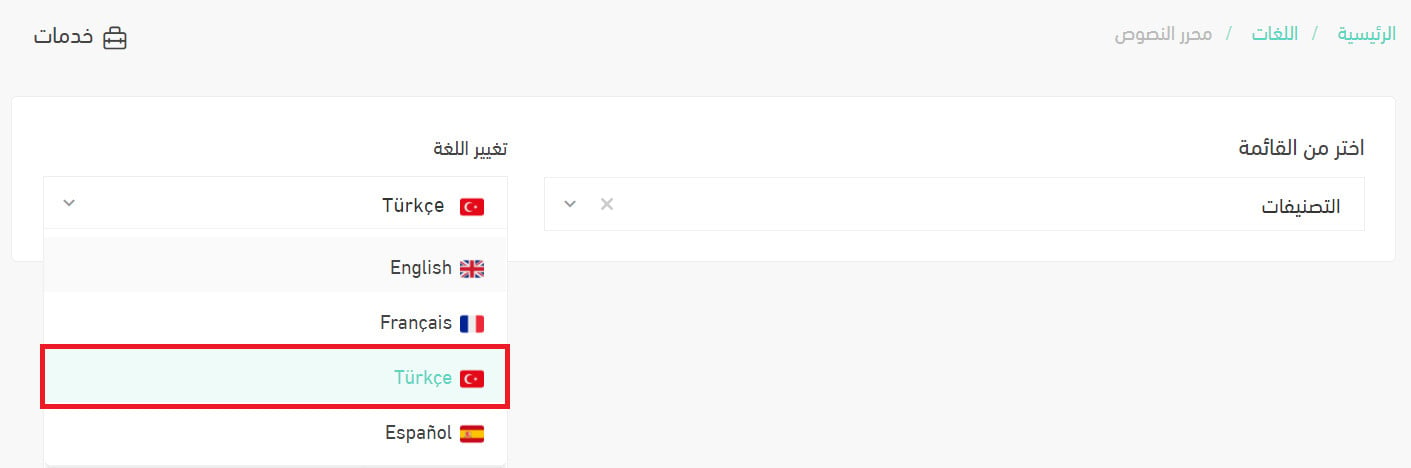
That last one is deliberate: it lets you add a new language, leave it disabled while you finish translating it, and activate it only when the translation is ready.
What translation options does Salla offer?
There are two, and you can combine them.
Method 1. Instant translation.
Switch instant translation on and your entire store is translated automatically at the click of a button.

For the full walkthrough, see translating your store with instant translation.
Method 2. Manual translation.

For the full walkthrough, see translating your store manually with the text editor.
How do I switch on instant translation?
Click (Activate instant translation) for any language added to your store.
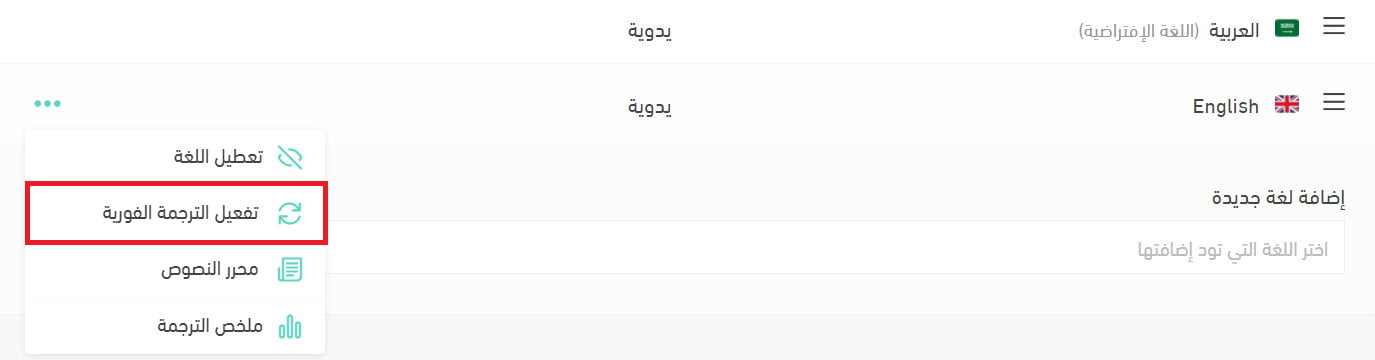
For the full walkthrough, see translating your store with instant translation.
Can I rewrite the translation of any text in my store?
Yes. Open the text editor for the language you want and change the wording of whichever strings you like.
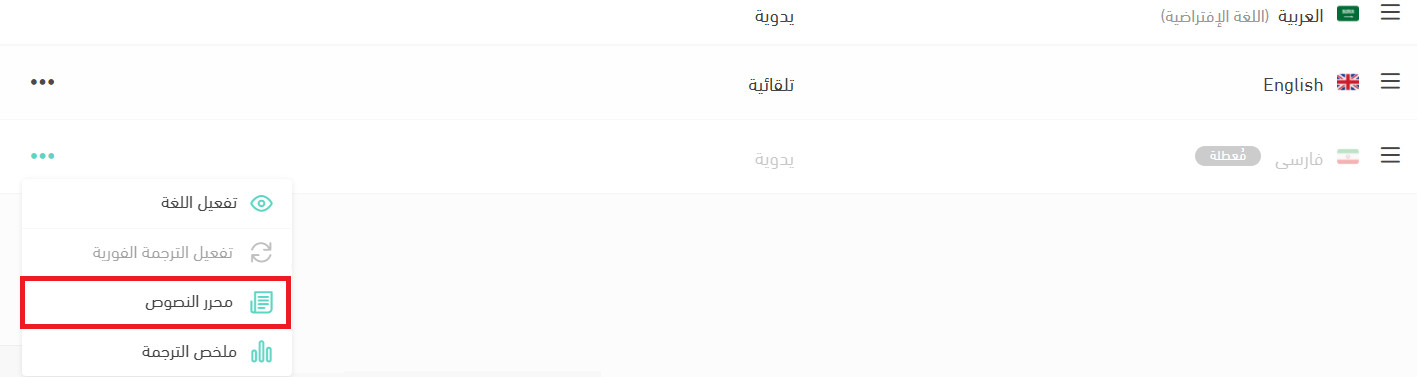
For the full walkthrough, see translating your store manually with the text editor.
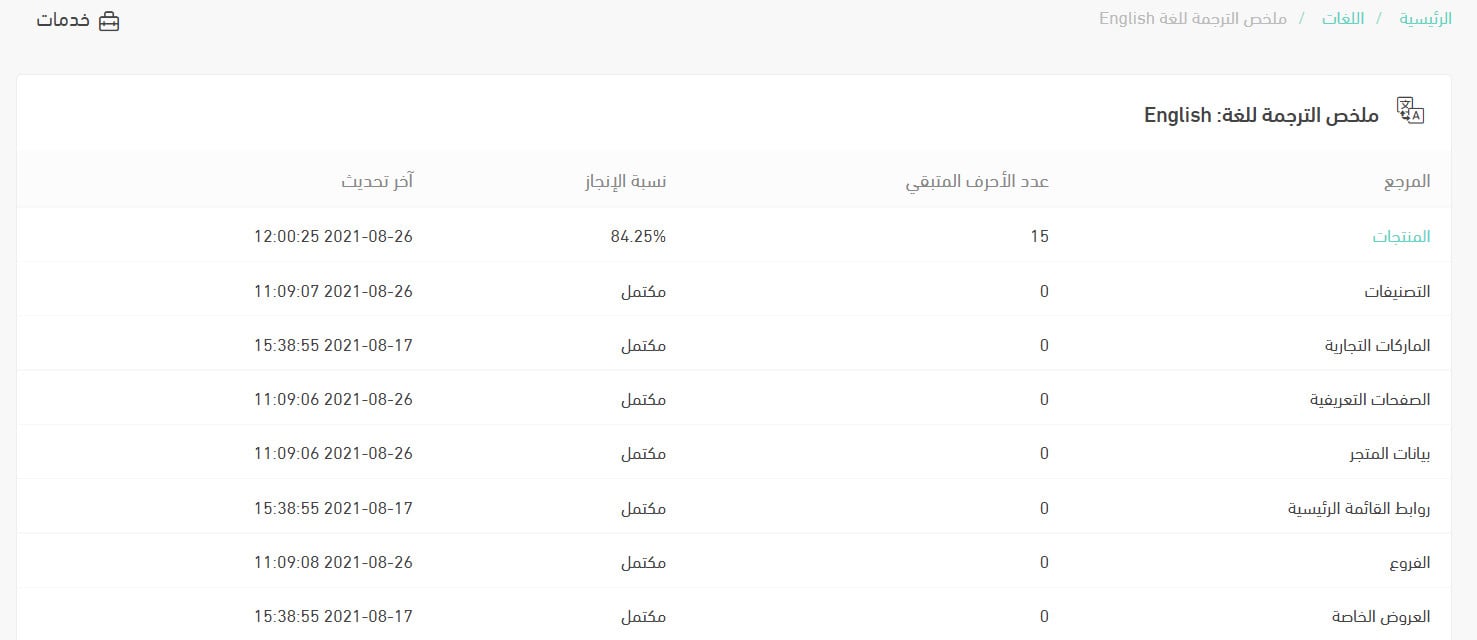
What is the language translation summary for?
The translation summary is how you review the latest state of translation across the different parts of your store, and how you track the progress of whoever is doing the translating.
For each language, it shows the completion percentage of every section, the number of characters still untranslated, and the date that section's translation was last updated.
Click any section that is not fully translated to see more. For example, click (Products).
You then see the detail of what has been translated and what is left.
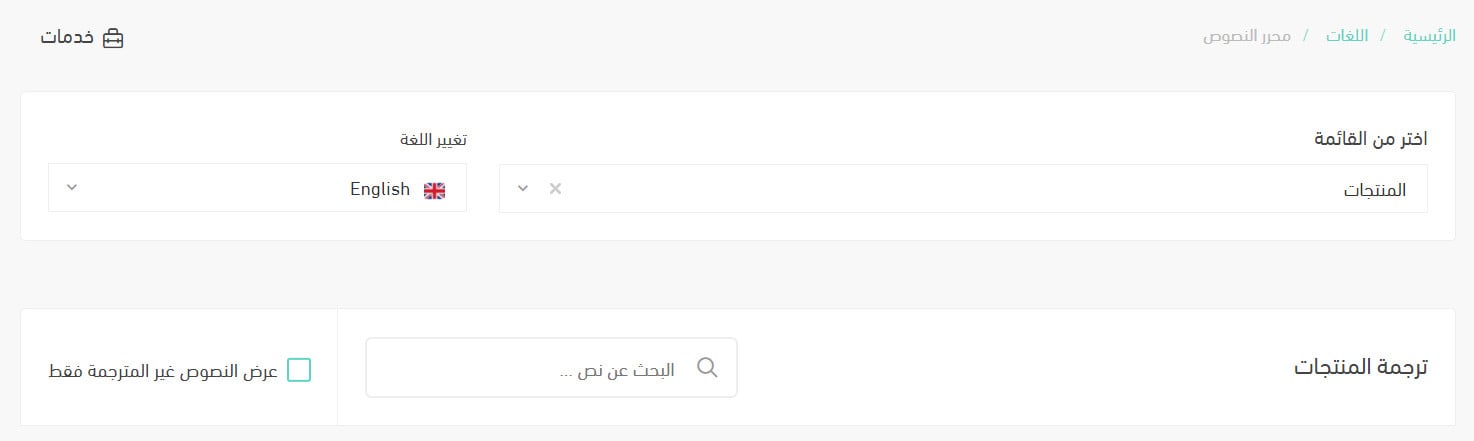
For the full walkthrough, see translating your store manually with the text editor.
The useful habit here is the disabled-but-translating one: add the language, leave it hidden, work through the text editor, watch the summary climb, and only then let shoppers see it. A half-translated storefront costs more trust than a missing language does.