Are your emails, your text messages, and your push alerts telling each customer the same story?
Most stores end up running marketing from a handful of tools that never talk to each other, and the customer feels the gaps. WebEngage pulls those channels back together: email, SMS, WhatsApp, and marketing notifications all run from one place, and every campaign is built around what a shopper actually does in your store. That makes the customer journey easier to follow and far easier to improve. In this guide, you'll learn how to install WebEngage, upgrade your plan, manage the app, and remove it.
WebEngage is a customer engagement platform you install from the Salla App Store. It runs email, SMS, WhatsApp, and marketing notifications from a single dashboard, and builds campaigns around each shopper's behavior in your store, so the whole customer journey stays in one place.
📌 Article overview
- What the WebEngage app does
- How to connect the WebEngage app to your store
- How to manage the WebEngage app
- Frequently asked questions
👣 How to connect the WebEngage app to your store
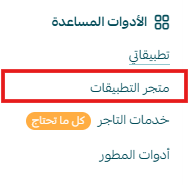
1. From the main menu, click (All), then from the helper tools section, click (App Store).
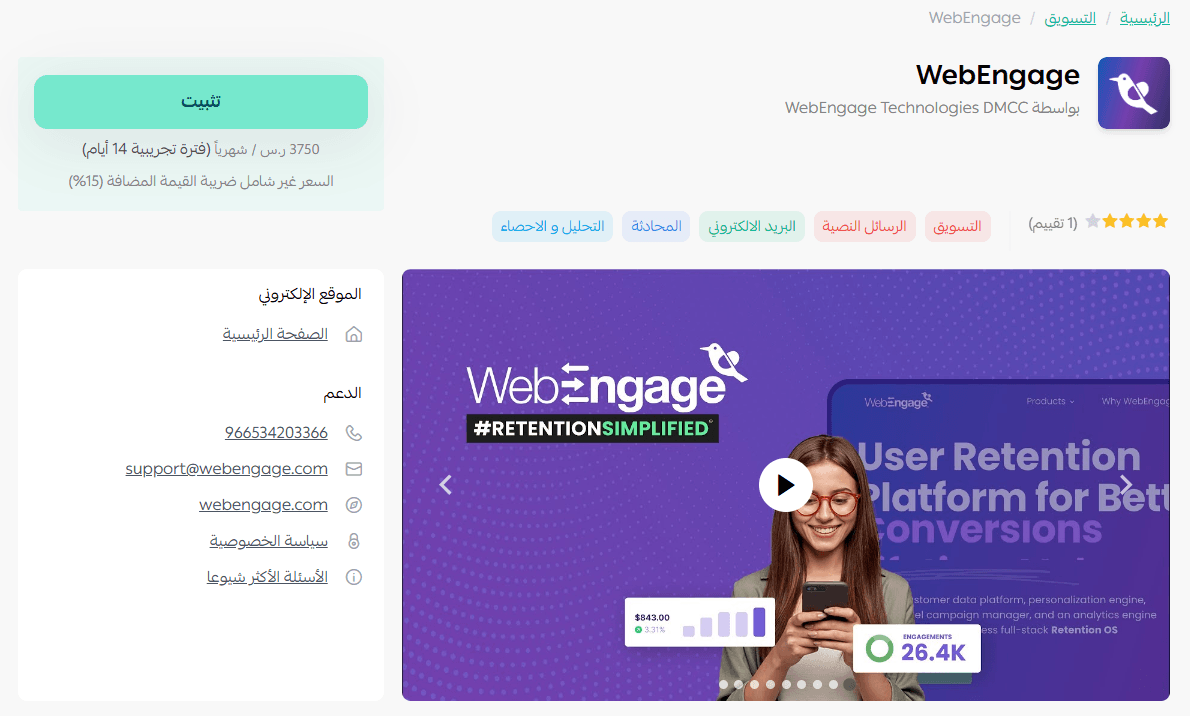
2. On the WebEngage app page, click (Install).
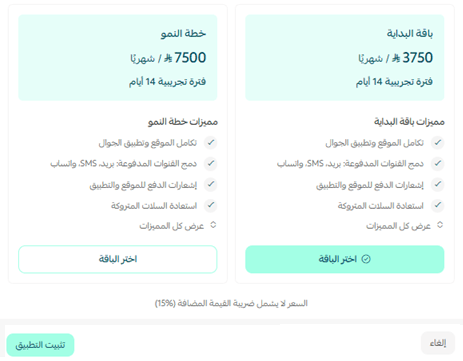
3. Choose the plan that suits you, then click (Install app).
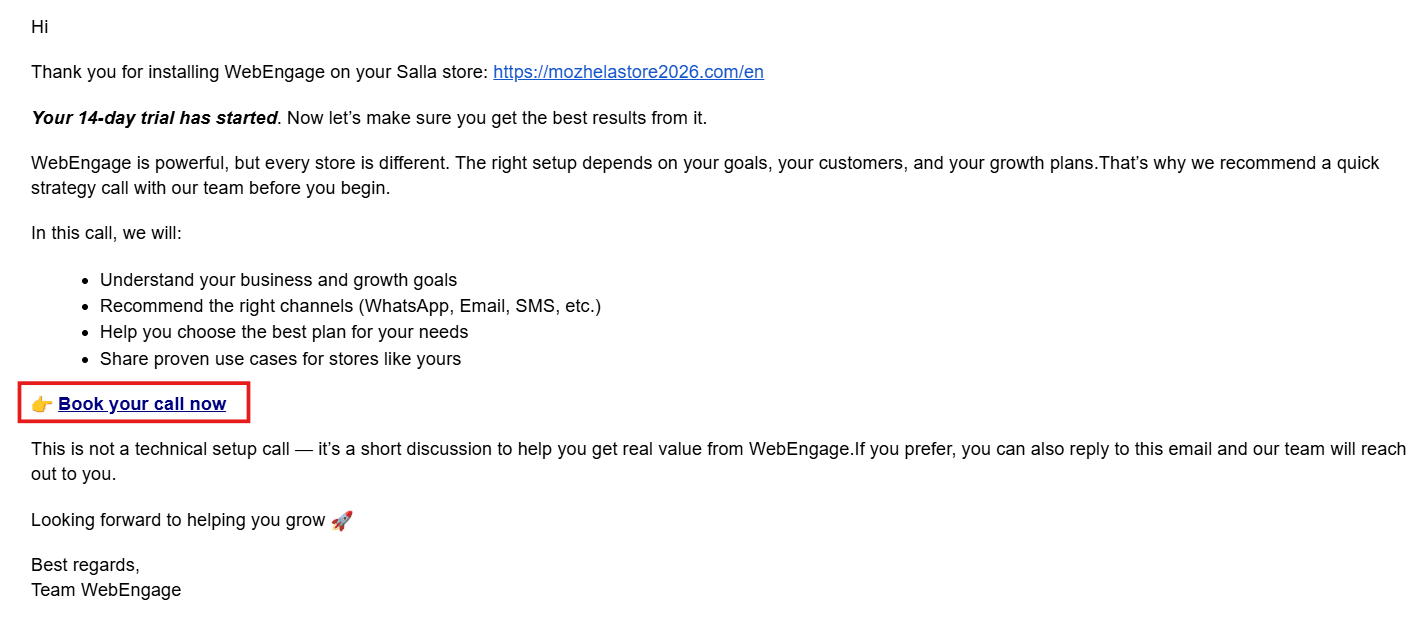
4. You'll receive an email with the details for booking a session with the WebEngage team.
5. Fill in the connection details in your Salla store, then click (Save). [Verify: the Arabic does not name the fields on this screen.]
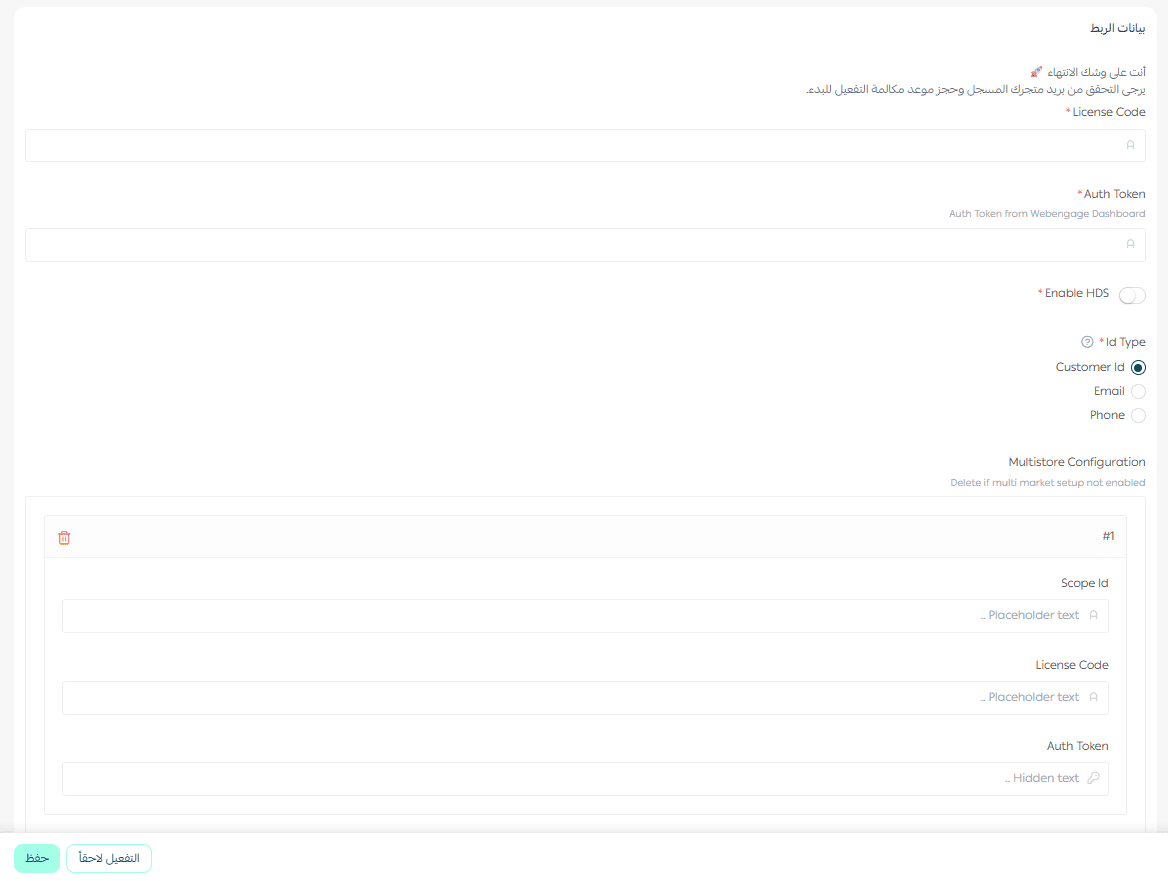
🚀 How to manage the WebEngage marketing notifications app
Upgrade your plan
1. From the app details page in your store, click (Upgrade plan).

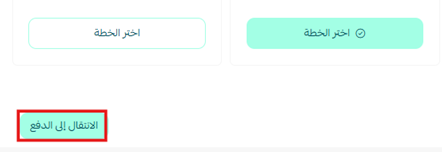
2. Choose the plan you want, then click (Go to payment).
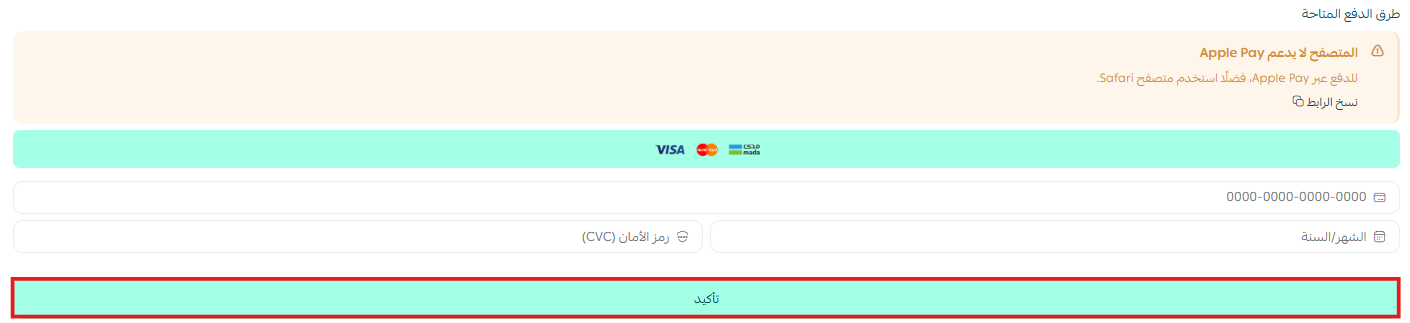
3. Fill in your payment details and click (Confirm) to complete the upgrade.
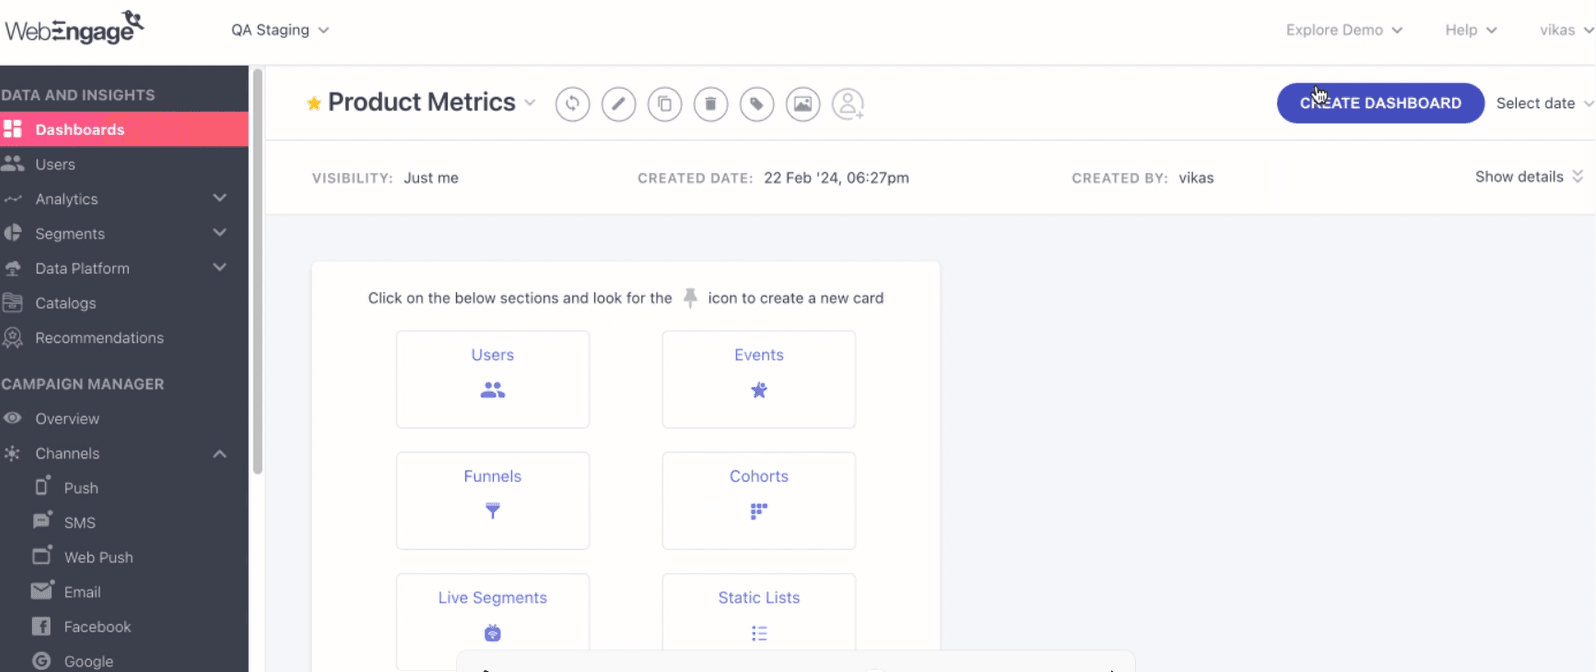
Customize the app
🎯 You manage the app from the dashboard on the WebEngage site.
Delete the app
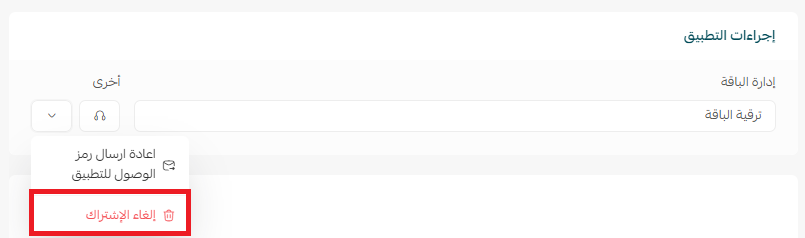
1. From the app options menu, click (Cancel subscription), then choose your reason for cancelling.
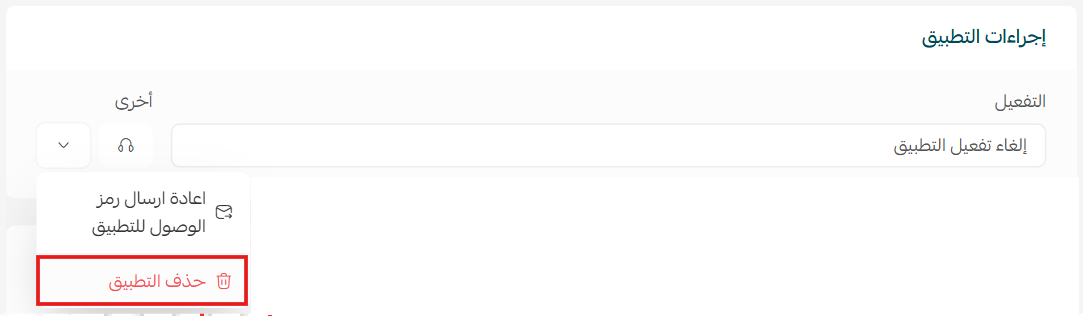
2. From the app options menu, click (Delete app), then choose your reason for deleting.
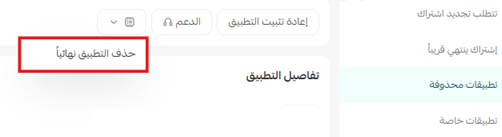
3. On the Deleted apps page, open the app options menu and click (Delete app permanently) to remove it from your store for good.
📝 Important notes
- Installing the app is not the last step: WebEngage emails you to book a session with its team before you go live.
- Campaigns are created and tracked on the WebEngage site; your Salla dashboard handles the plan, the connection details, and the app itself.
❓ Frequently asked questions
Which channels can I use with WebEngage?
Email, SMS, WhatsApp, and marketing notifications, all managed from the same place.
Do I have to book a session with the WebEngage team?
After you install the app, you receive an email with the booking details for that session, so plan for it as part of setup.
Where do I build and manage my campaigns?
In the dashboard on the WebEngage site, which is also where you follow how each campaign performs.
Can I switch to a bigger plan later?
Yes. Open the app details page in your store, click (Upgrade plan), choose the new plan, and complete payment.
Is cancelling the subscription the same as deleting the app?
No. Cancelling ends the subscription, deleting removes the app from your store, and (Delete app permanently) on the Deleted apps page clears it for good.
Customers do not experience your channels one at a time; they experience one relationship with your store. Running email, SMS, WhatsApp, and notifications from a single view is what keeps that relationship consistent. For more details, visit the WebEngage app page.