Your menu is your storefront. It should look like it.
The Menu theme used to be available only in the app builder. It is now on web stores too, as the first Salla template that supports the menu feature, built for restaurants and cafes and the things they actually need: an embedded Google map, calorie counts on items, control over the lists, and more. In this guide, you'll learn how to apply the Menu theme to your store, which new home page elements it adds and how to customize each one, and how to change the way your products are displayed.
The Menu theme is a Salla store template built for restaurants and cafes. Buy it from the theme store, then customize it from the store design page. It adds Google Maps embedding, calorie display, menu control, and a set of new home page elements you arrange yourself.
📌 Article overview
- How to apply the Menu theme to your store
- The new elements the Menu theme adds, and how to customize them
- How to customize the way products are displayed
🚀 How to apply the Menu theme to your store
1. From the dashboard side menu, click (Theme store).
2. On the theme store page, search for the (Menu) theme.

3. On the theme details page, click (Buy).
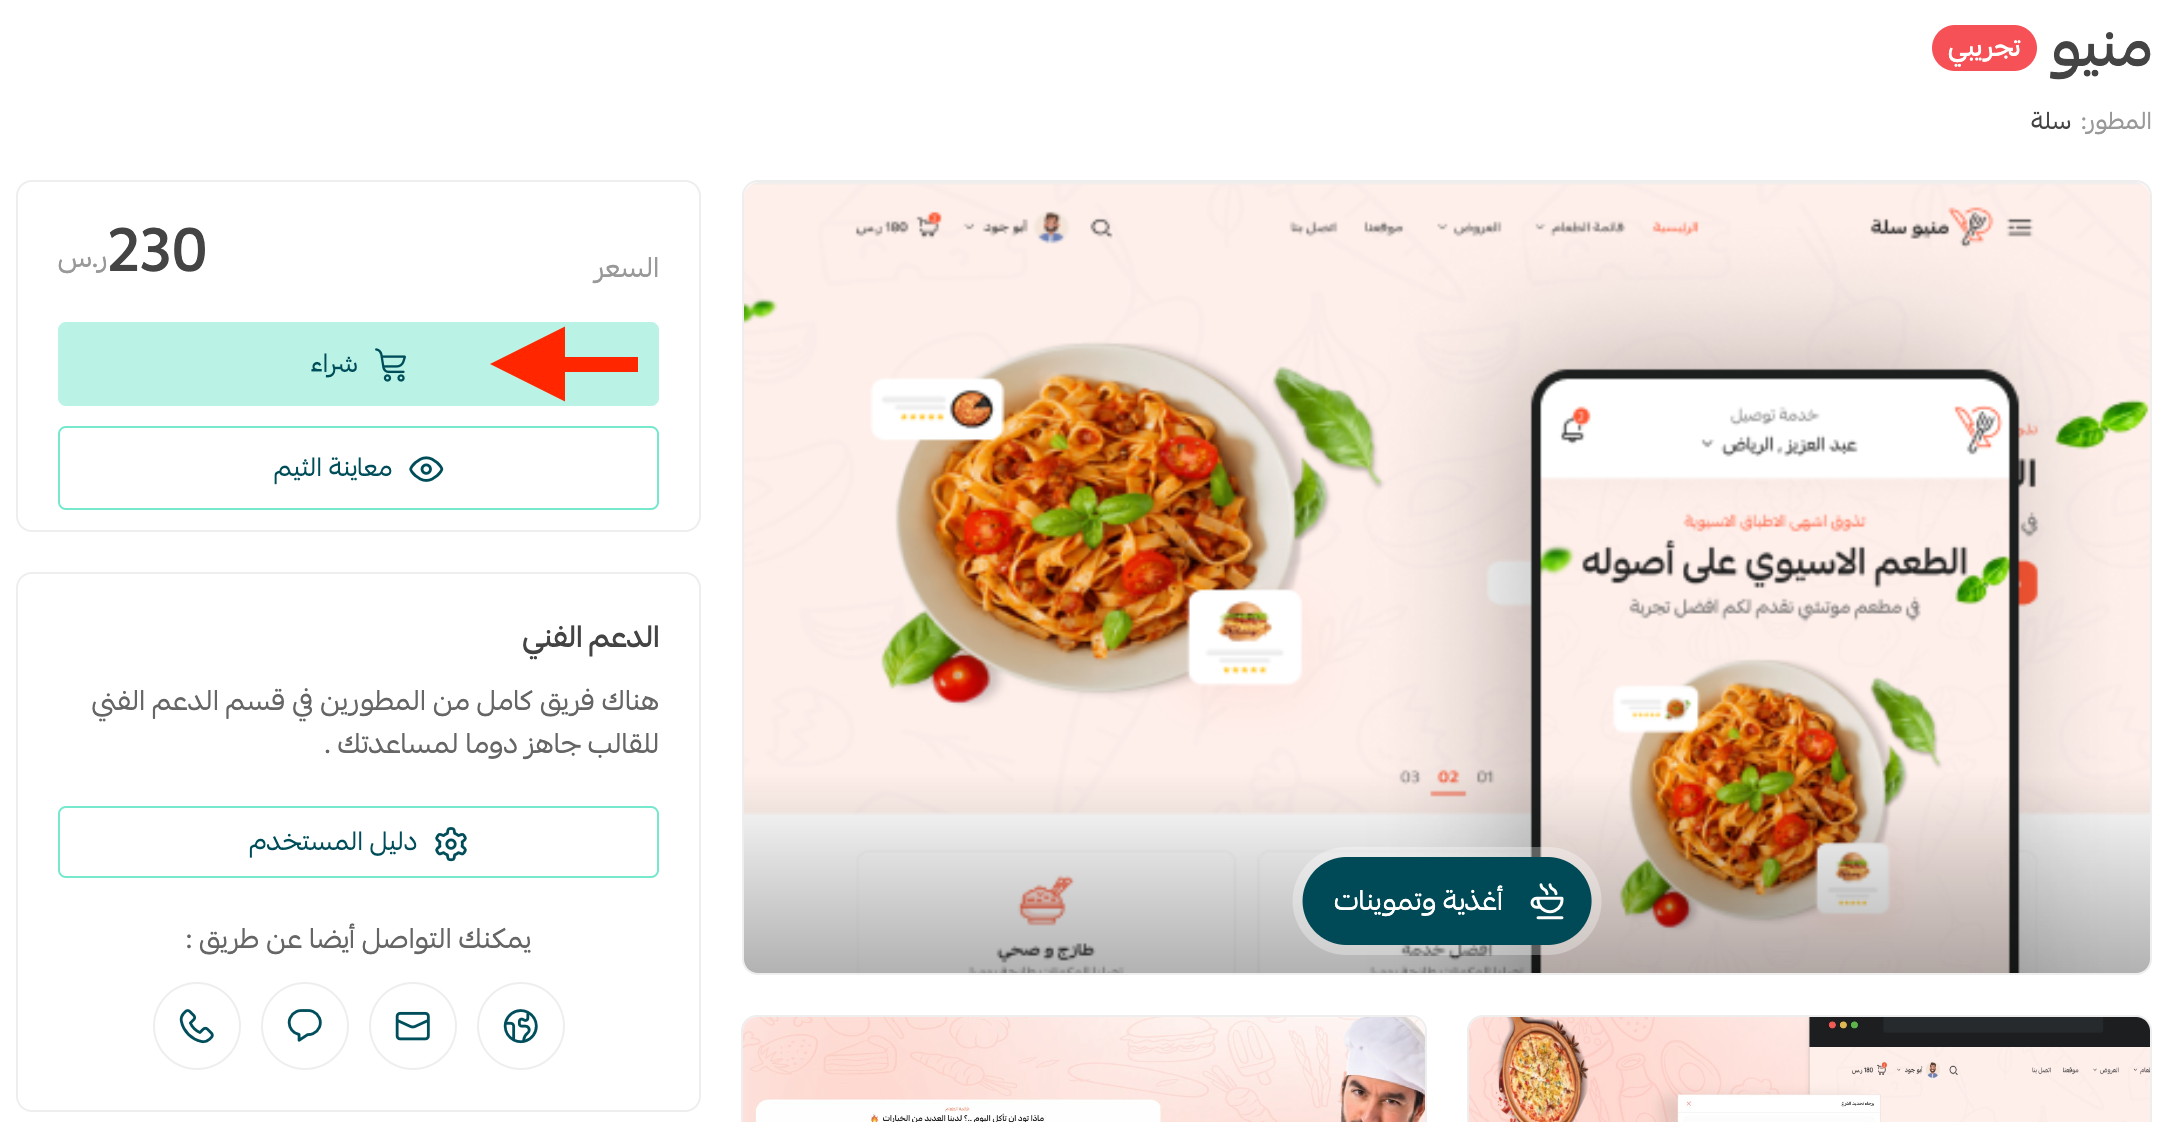
Once you have bought the theme, customize it however you like from the store design page.
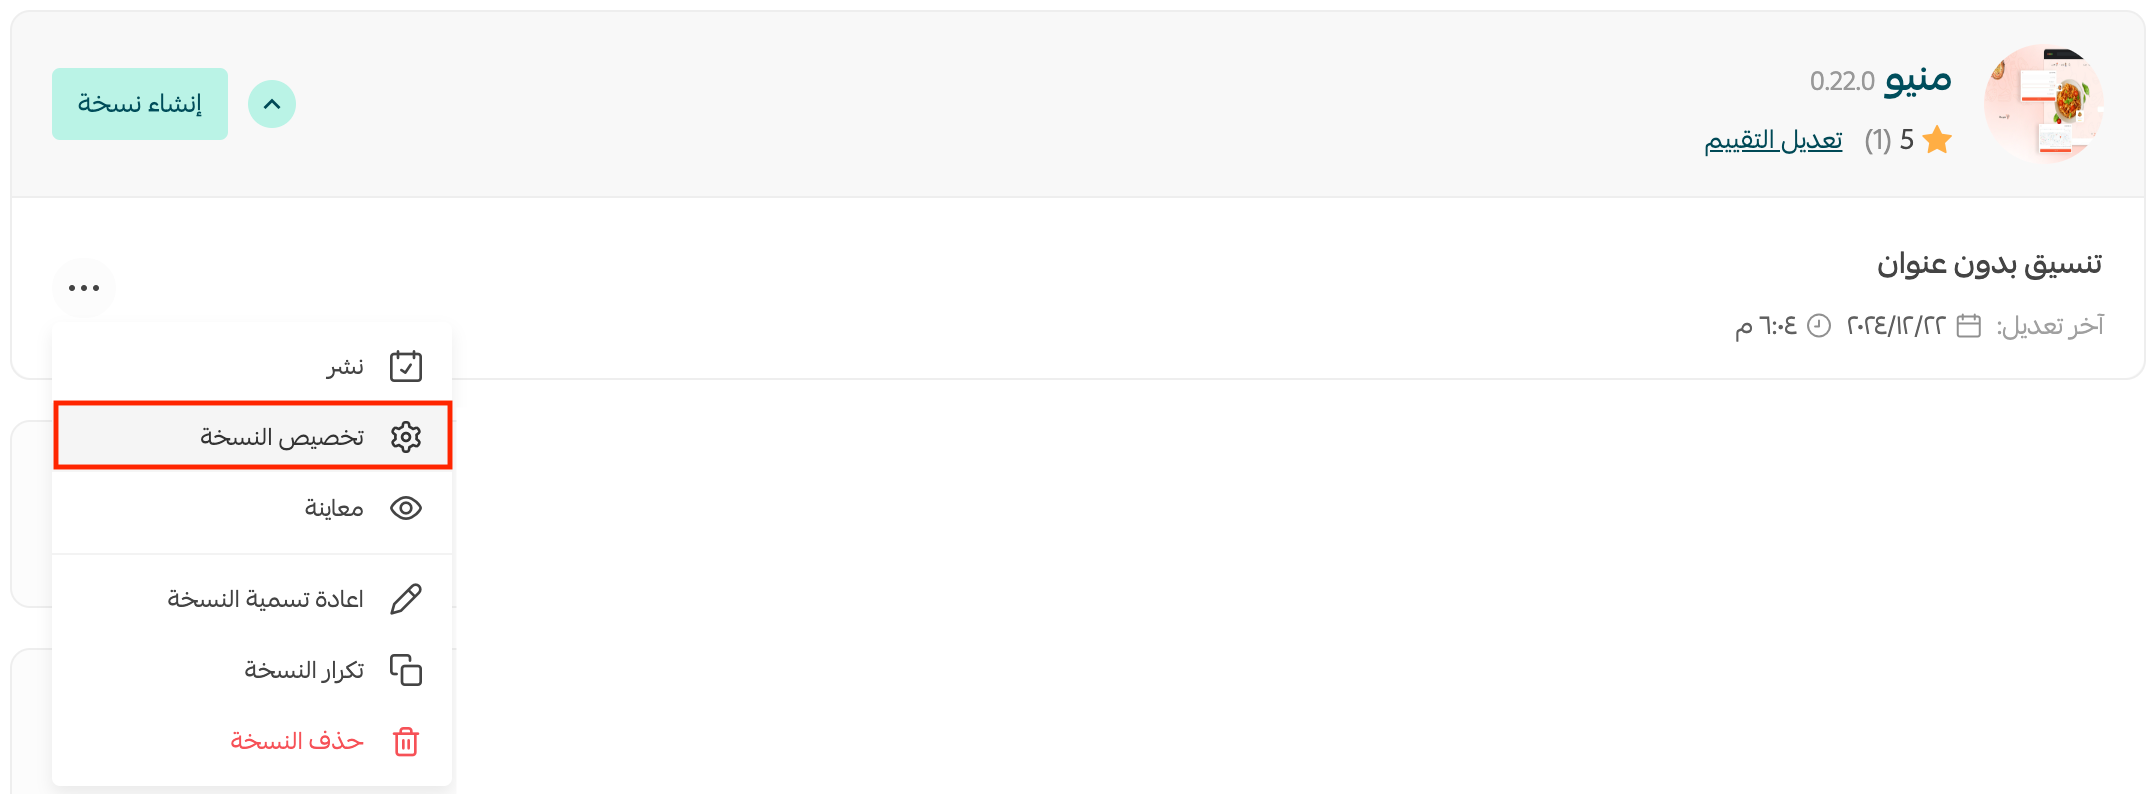
You can preview how your store looks with the theme applied, straight from the theme customization page.
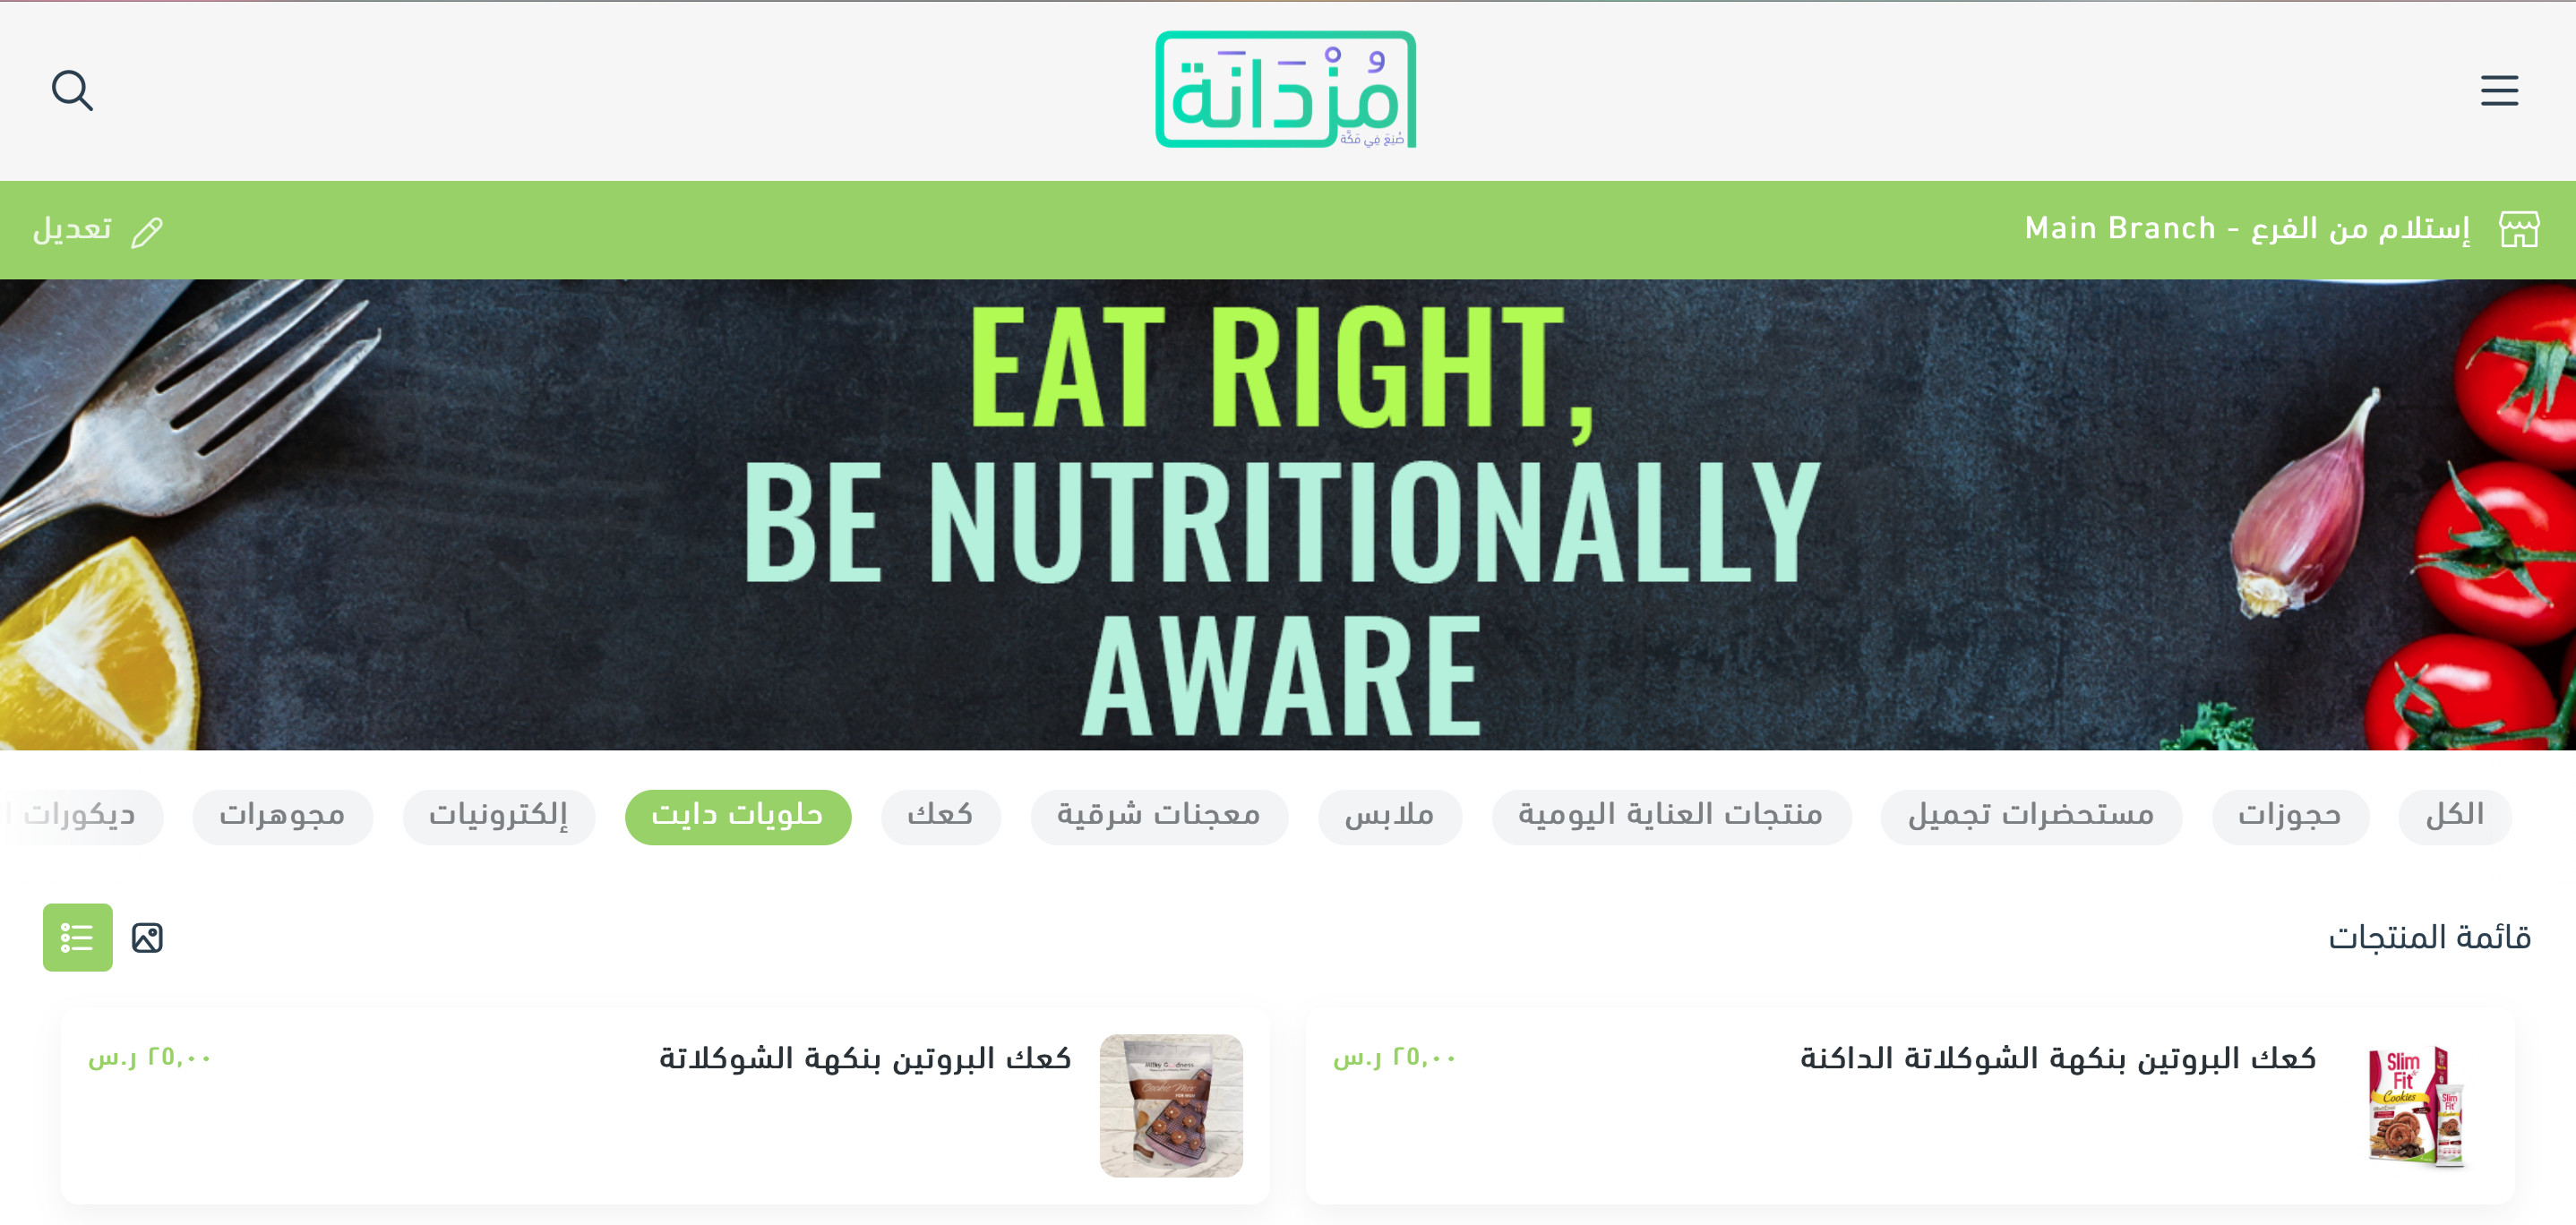
See a live store using the Menu restaurants theme.
For more on:
- Managing and customizing your theme design
✅ The new elements added to the Menu theme
The Menu theme brings in a set of new and improved elements that make your store look more polished.
To add them, open the Menu theme customization page and click (Home page elements).
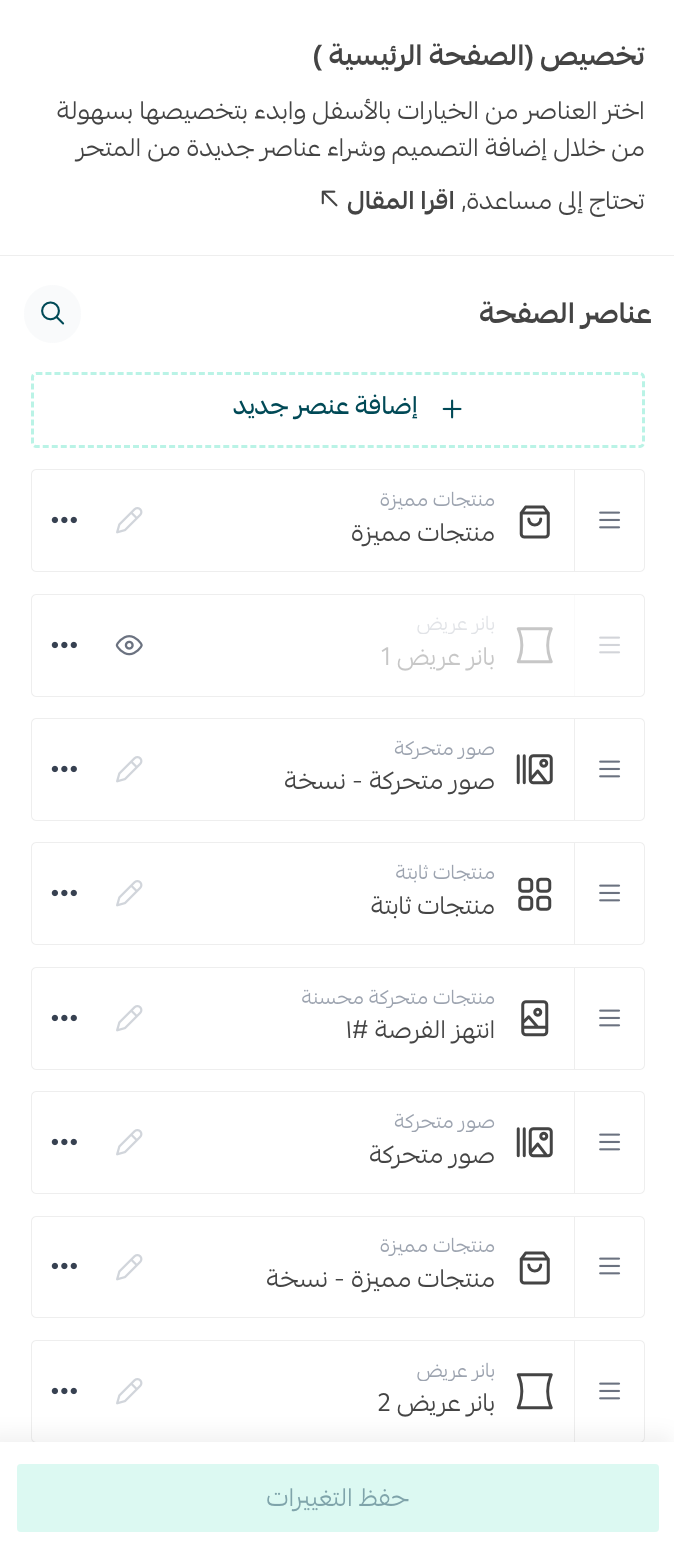
Then click (Add new element). The elements you can add to your store appear.
📝 Important notes
The elements marked with a star are the ones that are new to this theme.
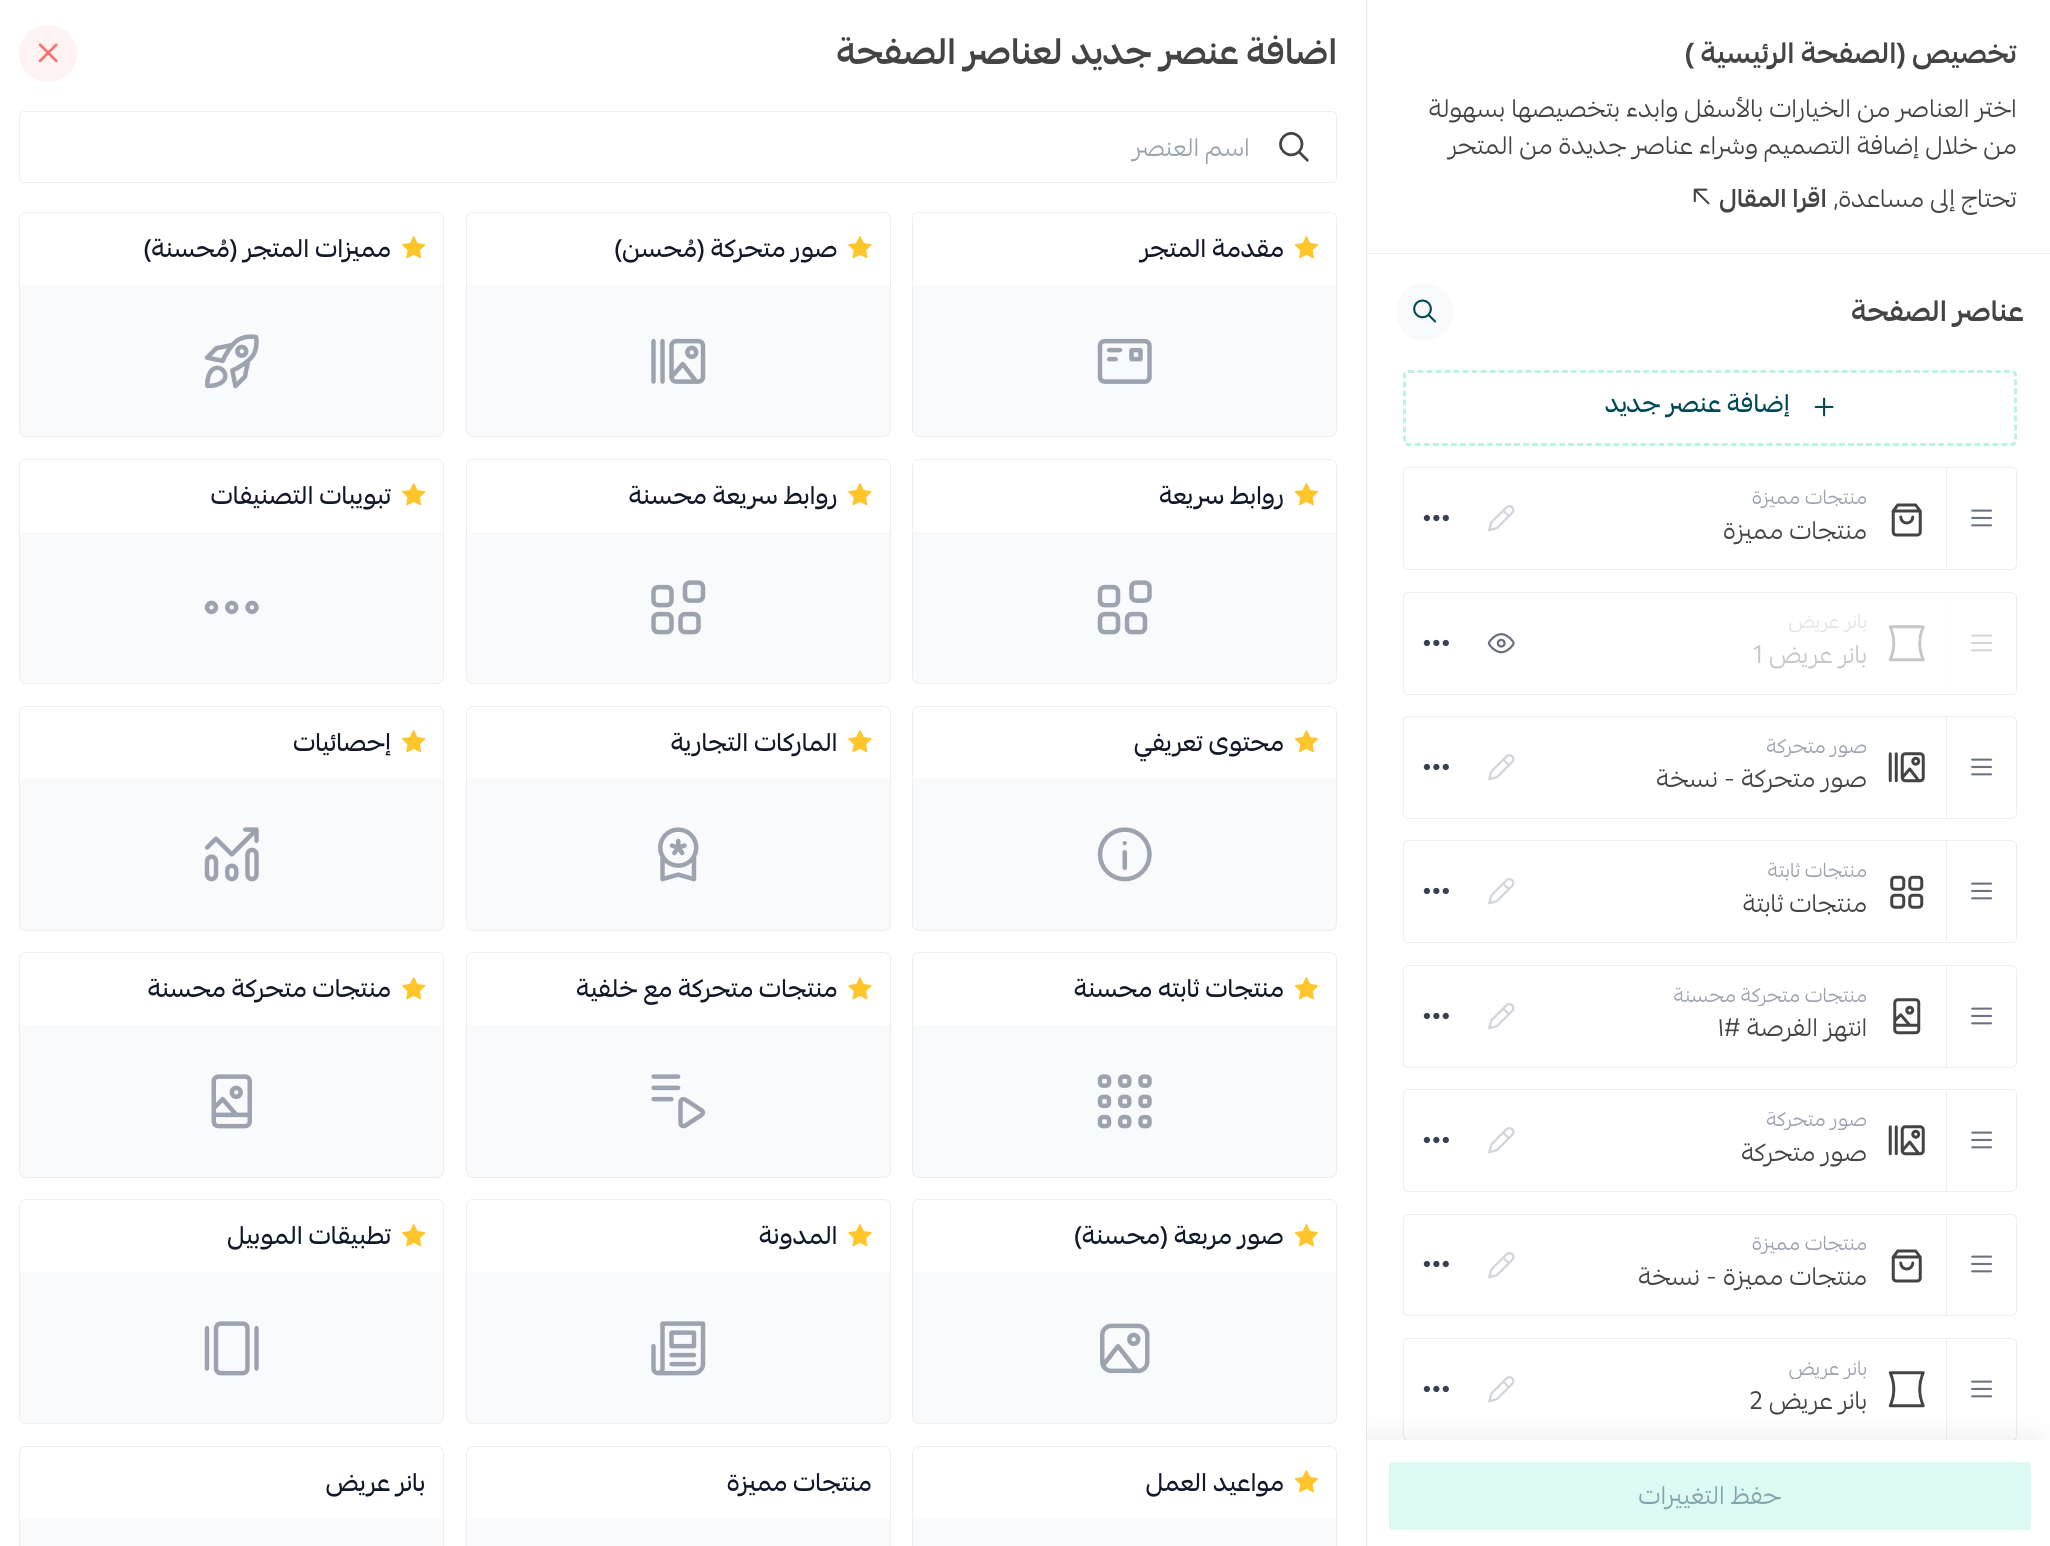
Here is how to customize the most useful of them.
1. Store intro
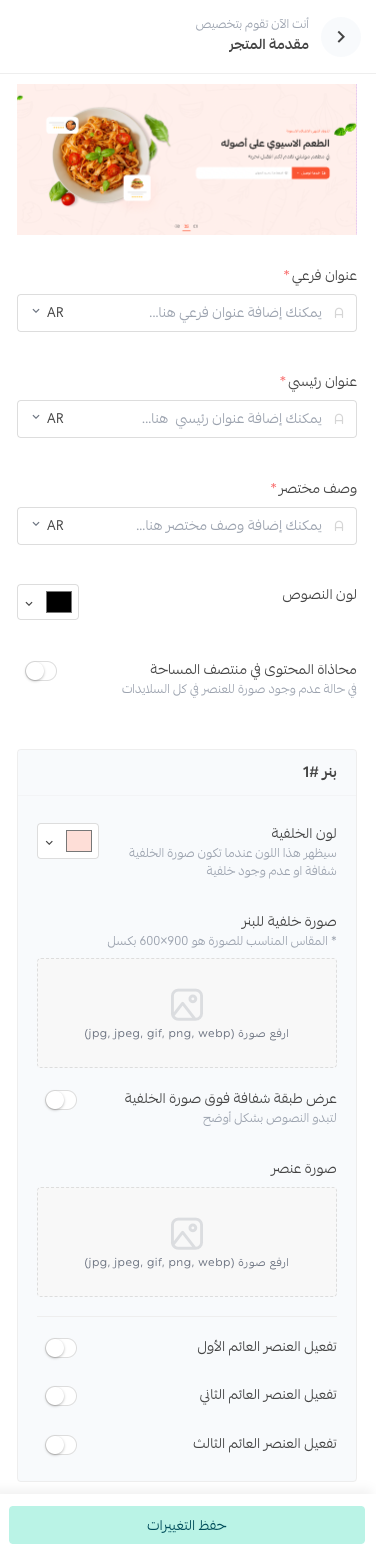
Customize your storefront by entering the headings and description, setting the text color, and adding up to 4 banner images with a background color of your choice.
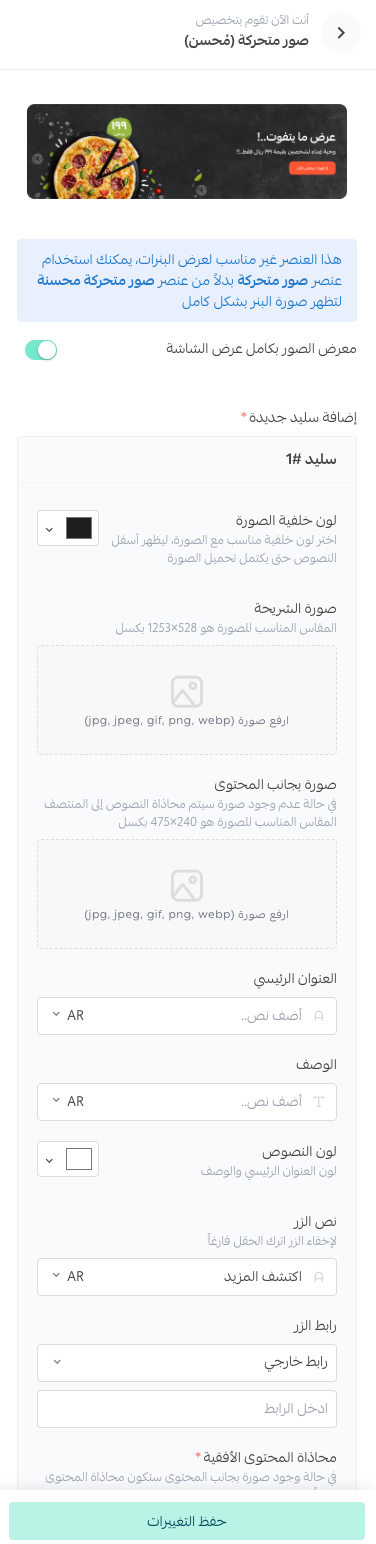
2. Animated images (improved)
Add up to 10 image slides, each with its own heading, description, color, and destination link.
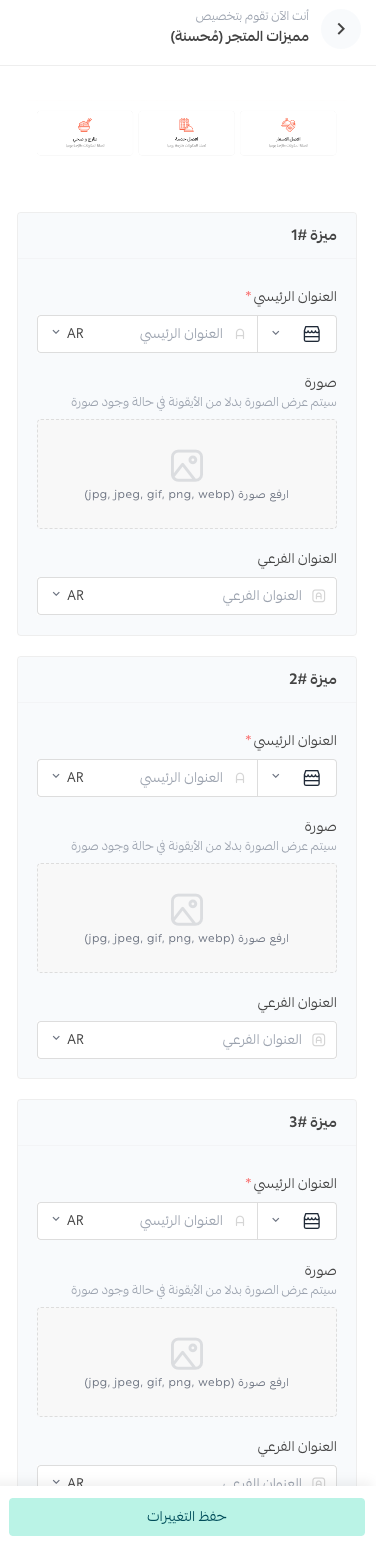
3. Store features (improved)
Add up to 6 features, and control the image, the main heading, and the subheading for each one.
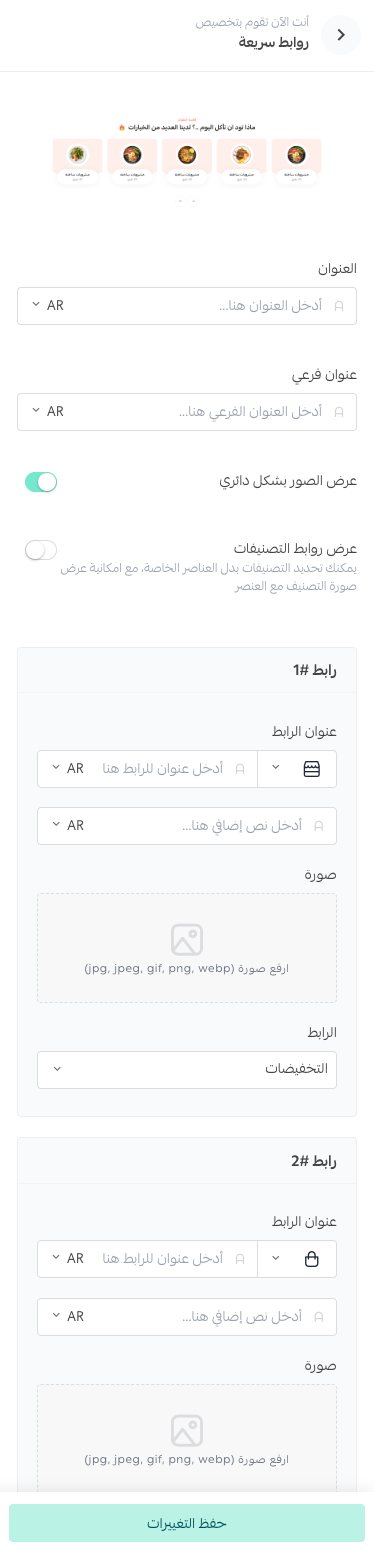
4. Quick links
Add up to 10 quick links, and control the heading, the supporting text, an optional image, and the link itself.
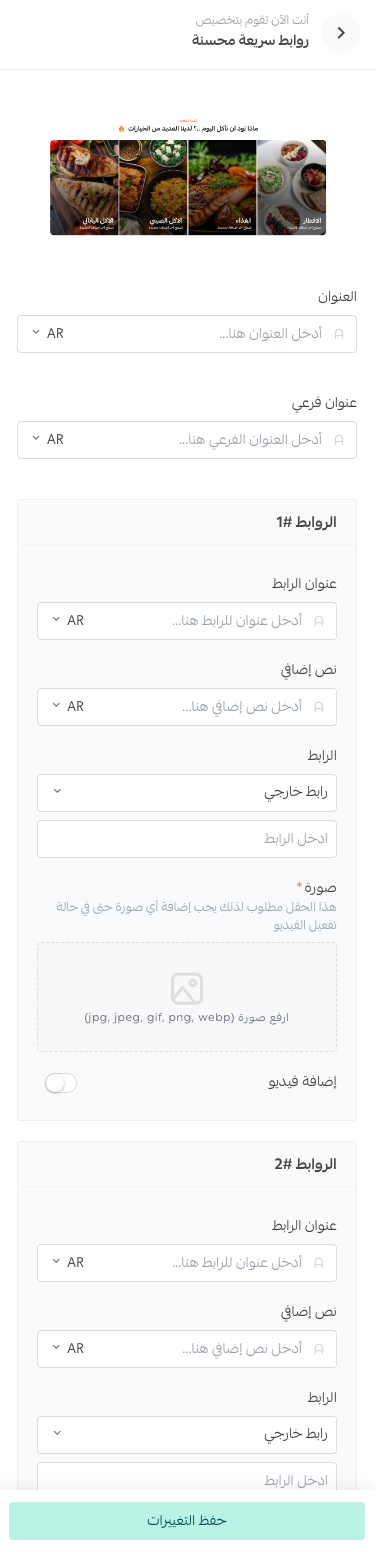
5. Improved quick links
Turn on the (Add video) option across up to 10 improved quick links.
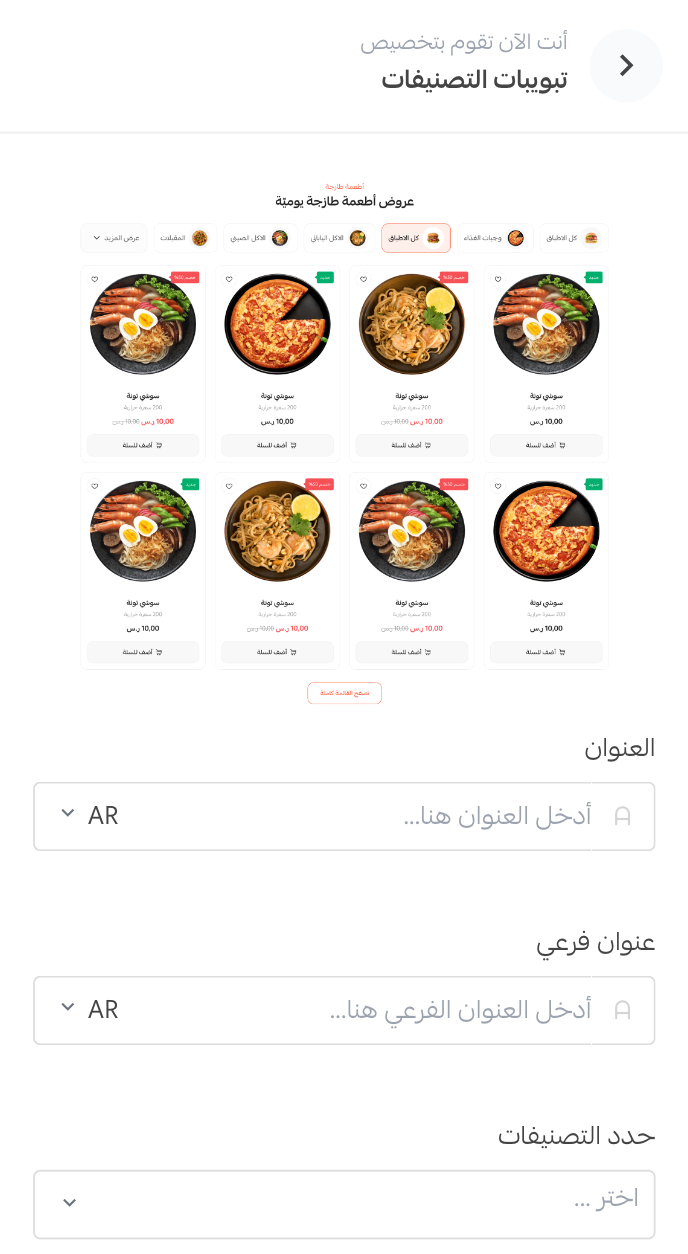
6. Category tabs
The categories you choose appear clearly and simply, with their main headings and subheadings.
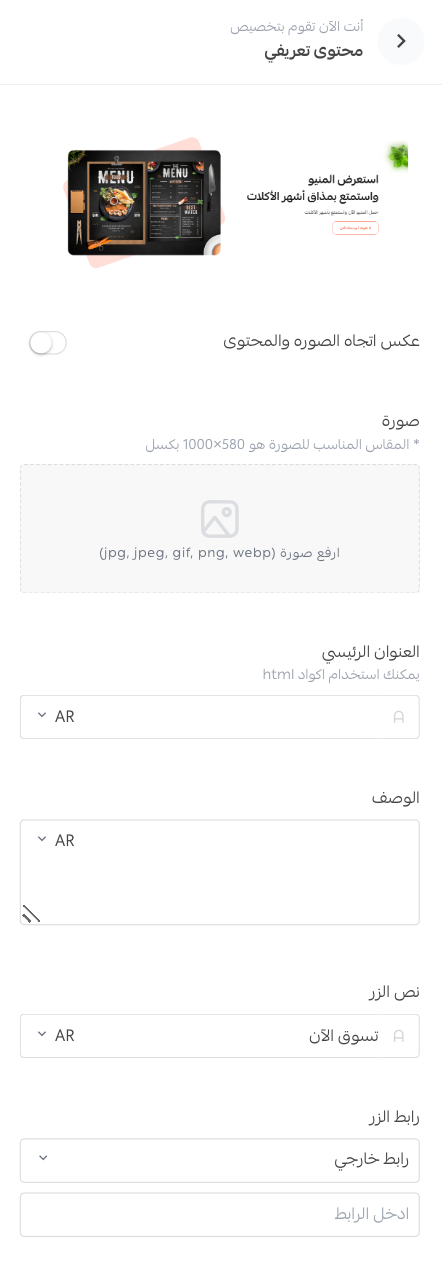
7. Introductory content
Add an image, a main heading, and a description, then set the button text and its link. The result appears as a promotional and introductory section.
8. Brands

Enter a heading for the brands section, then pick the brands you want from your brand list.
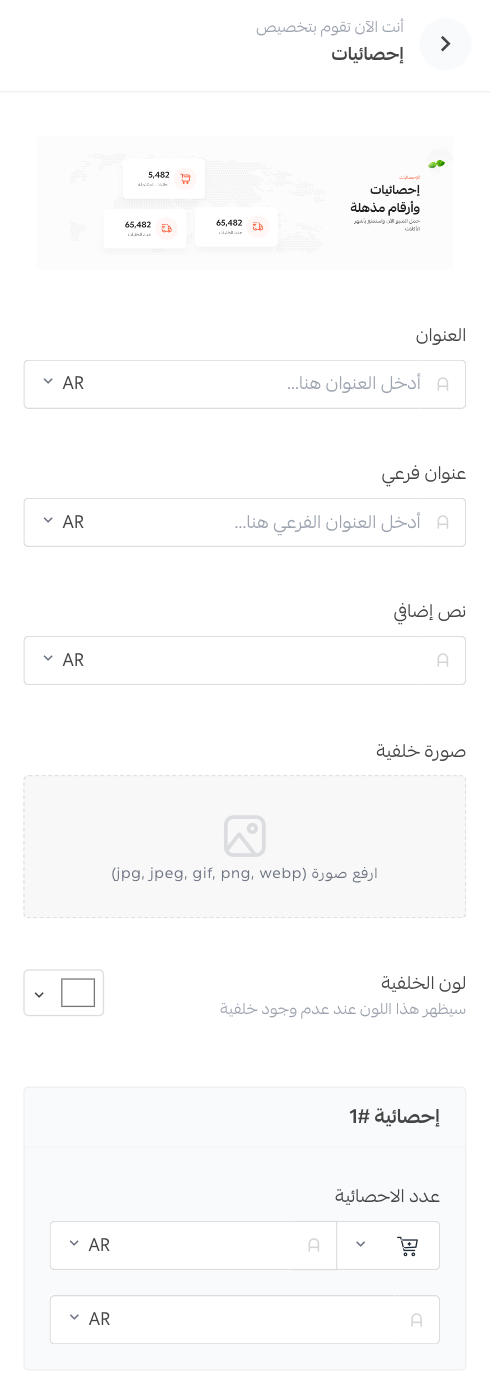
9. Statistics
Numbers earn trust. Add up to 3 statistics, each with a main heading and a subheading, and set a background image and its color.
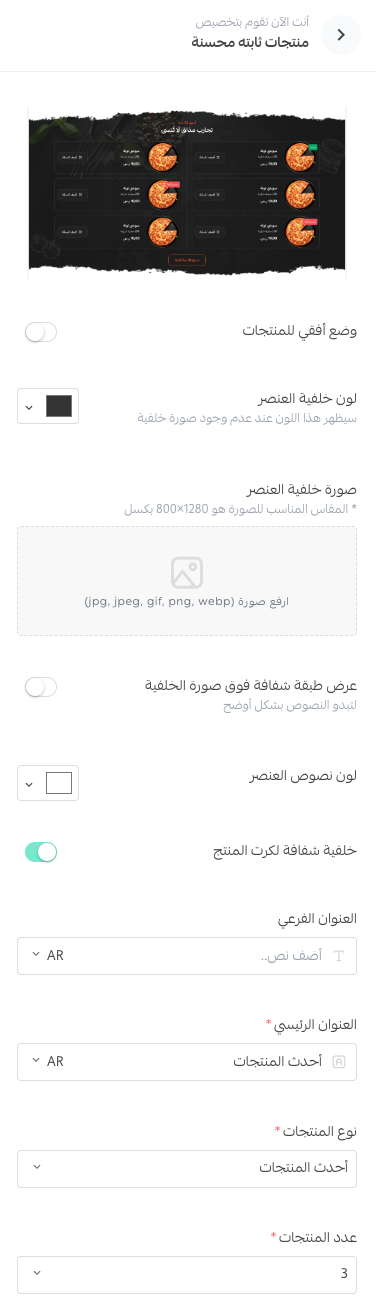
10. Improved static products
Display products in a fixed grid or a horizontal row. Set the element's background color and background image, the text color, and the product type and count, up to 15 products.
11. Animated products with a background
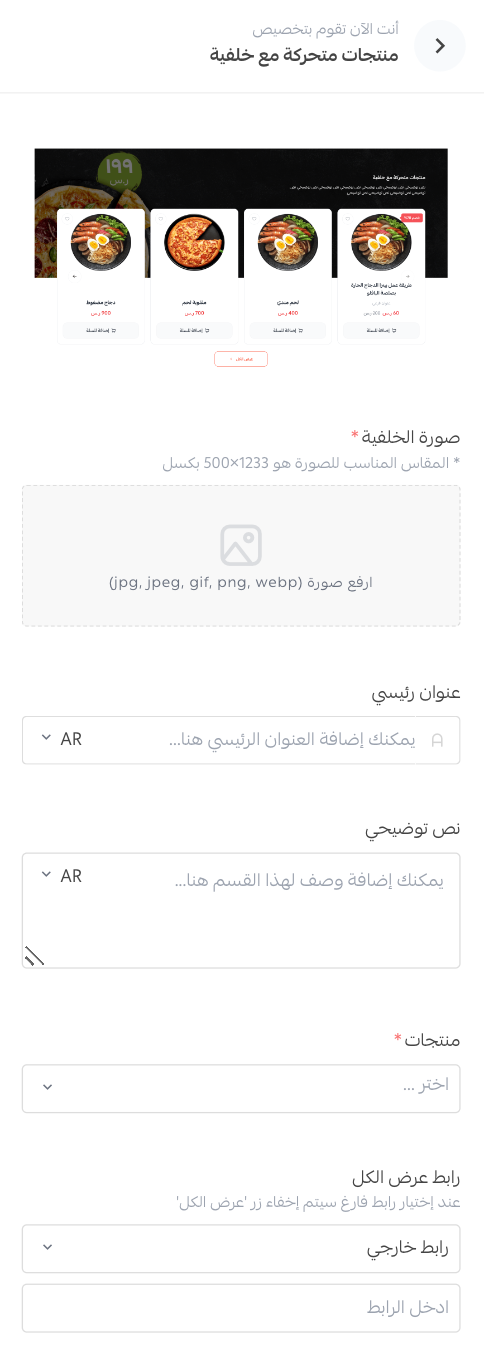
Attach a background image, add a main heading and supporting text, then choose the products and the link.
12. Improved animated products
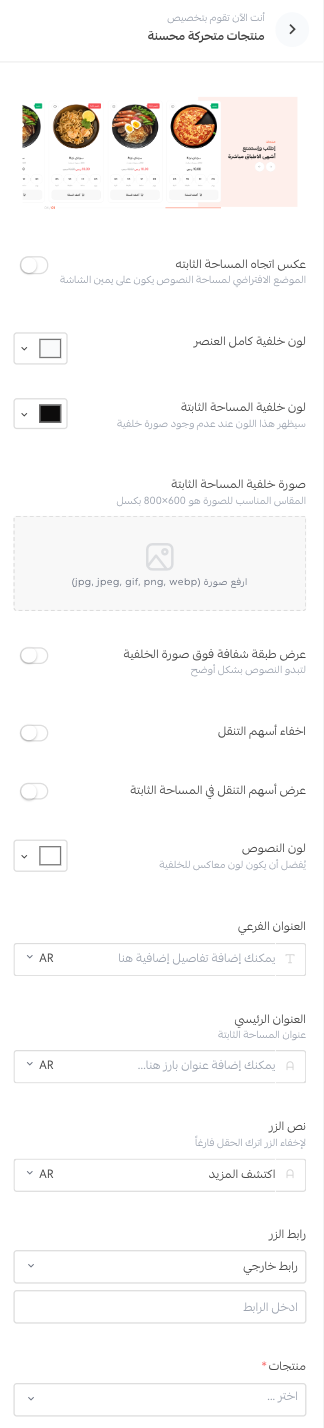
Set where the text area sits, choose the element's background color and the color of the fixed area, attach a background image for that fixed area, and decide whether a transparent layer sits over it. The extra options give you full control over how the products are shown.
13. Improved square images
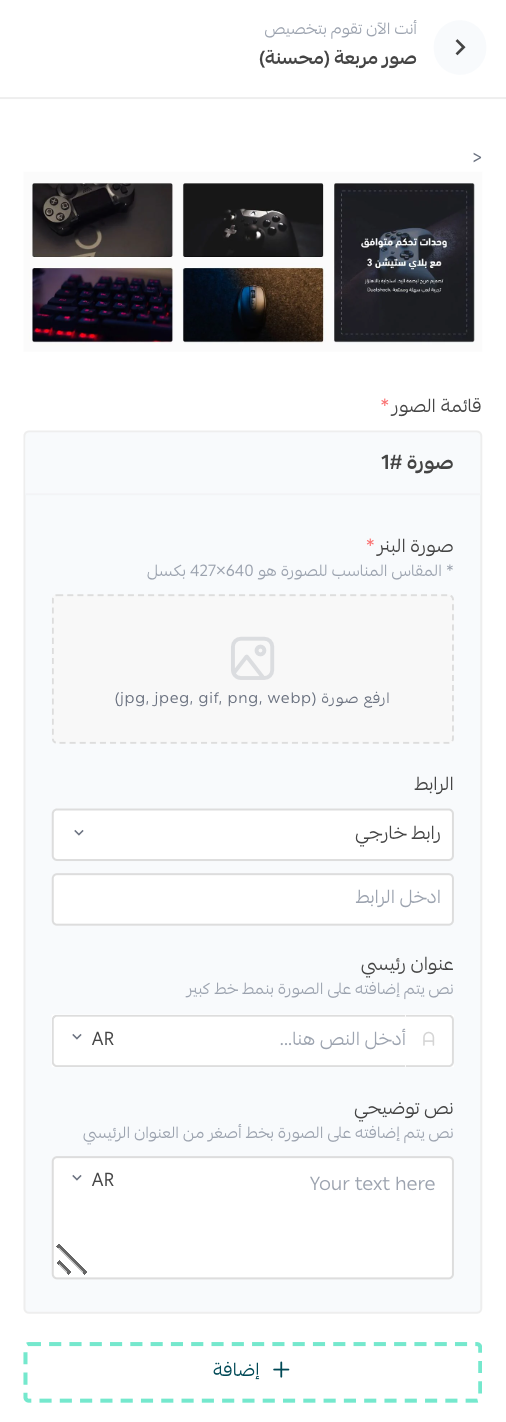
Attach up to 5 square images for your products or your promotions, point each one at an internal or external link, and add a main heading and supporting text.
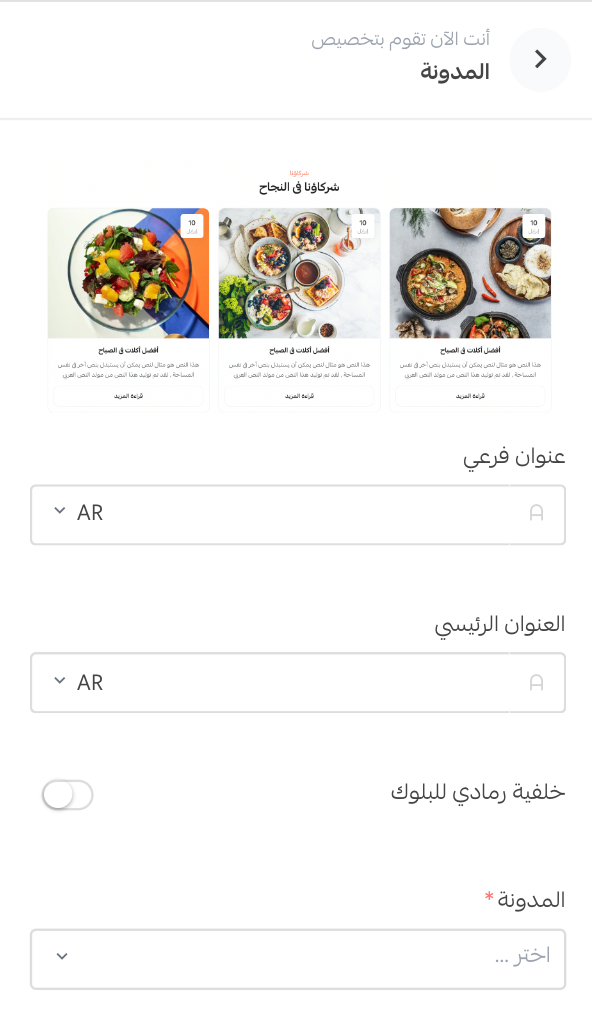
14. Blog
Enter the main heading and the subheading, choose the article list, then pick a background color for the section.
For more on managing your store's blog on Salla.
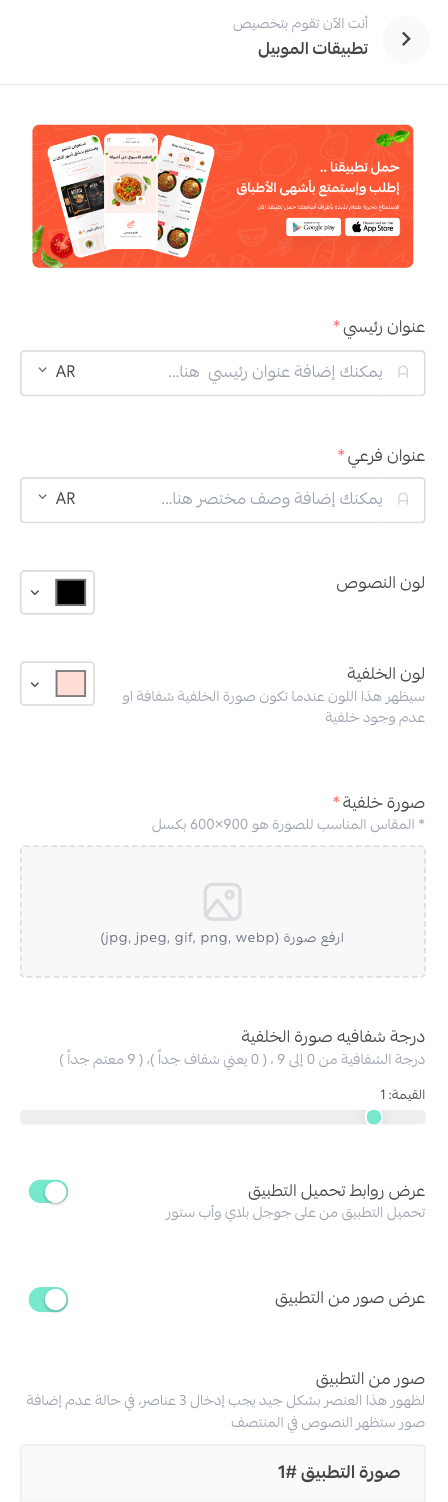
15. Mobile apps
Enter the details the element asks for, and add up to 3 images to showcase your app on your storefront.
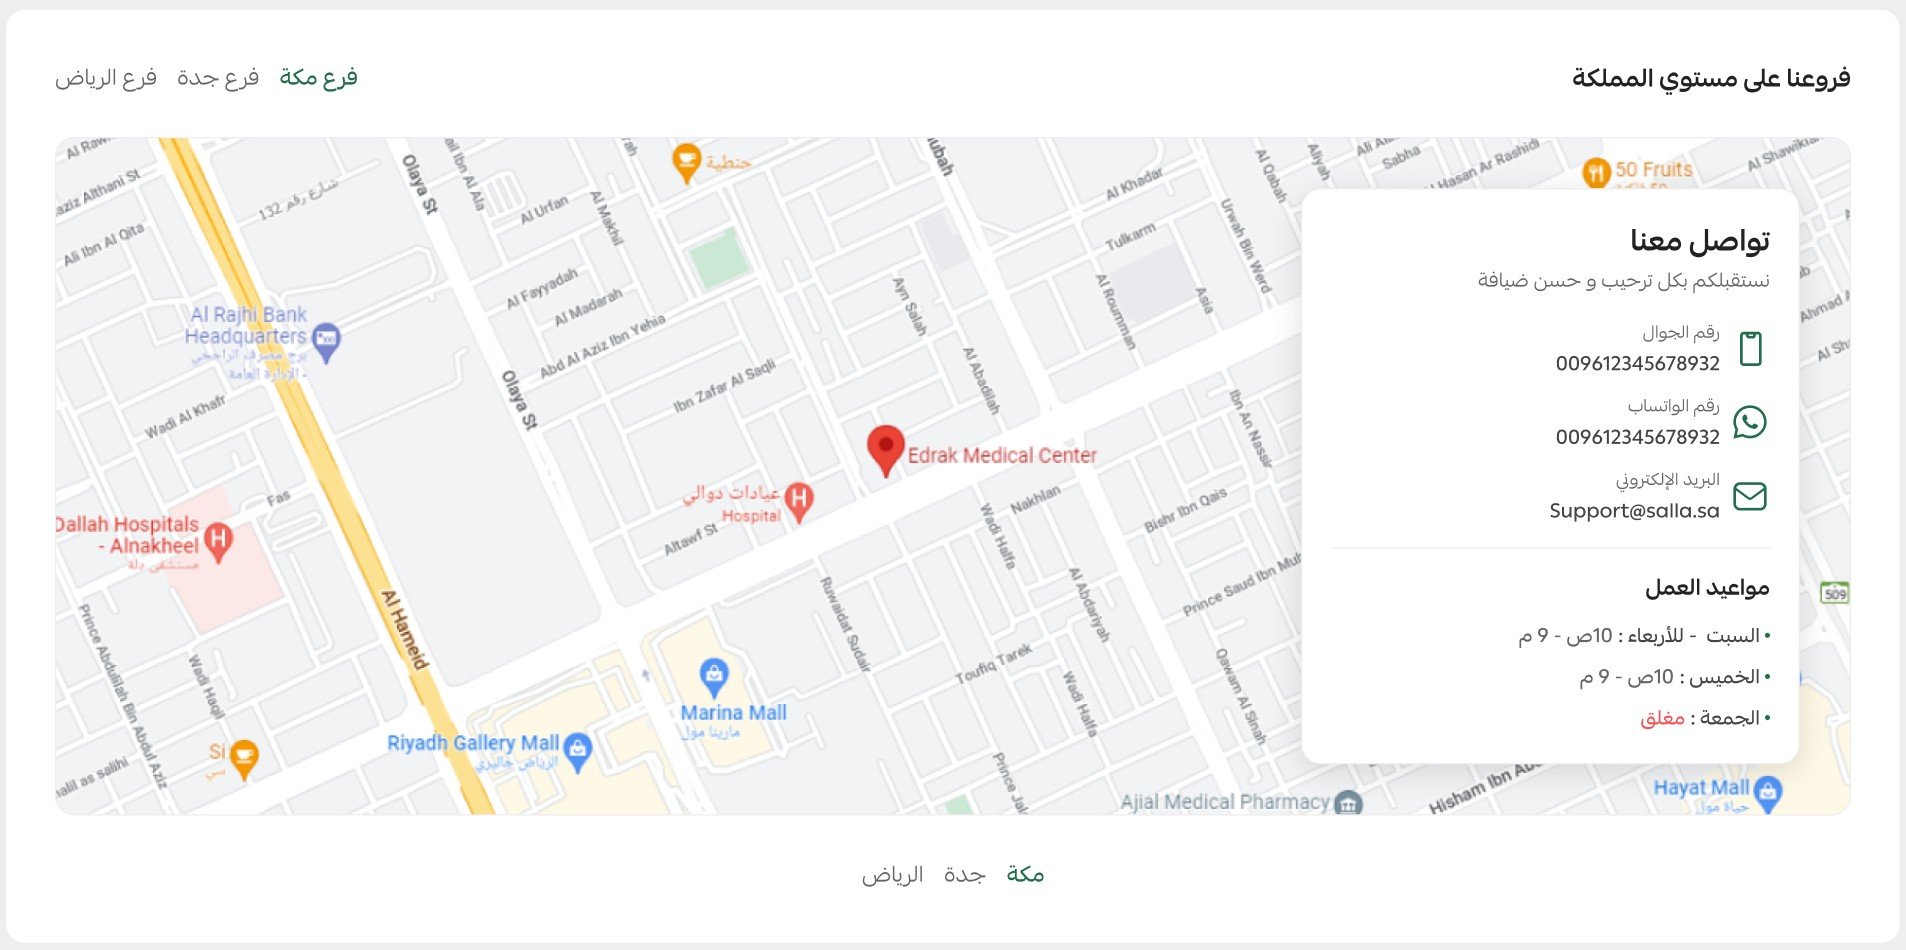
16. Business hours
Add your map location and set your opening hours.
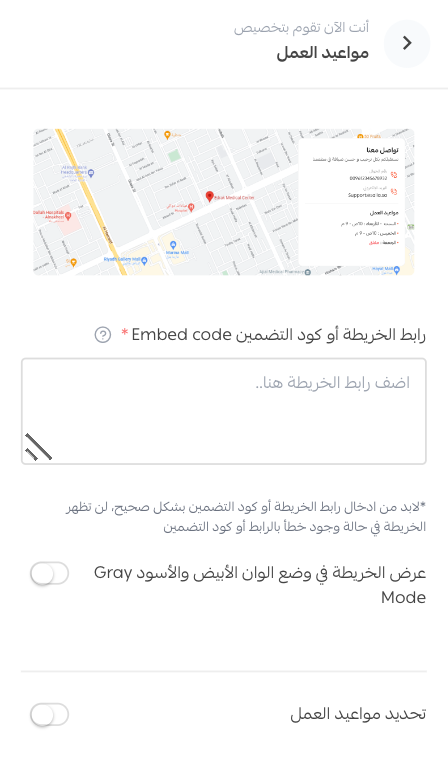
This is how it appears in your store.
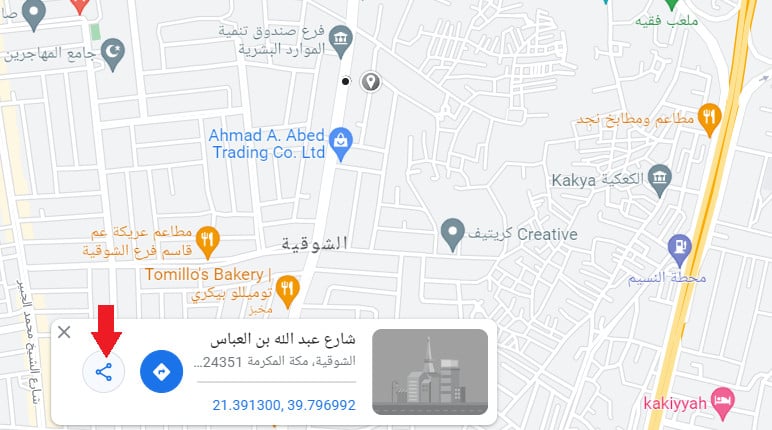
👣 How to get your map link
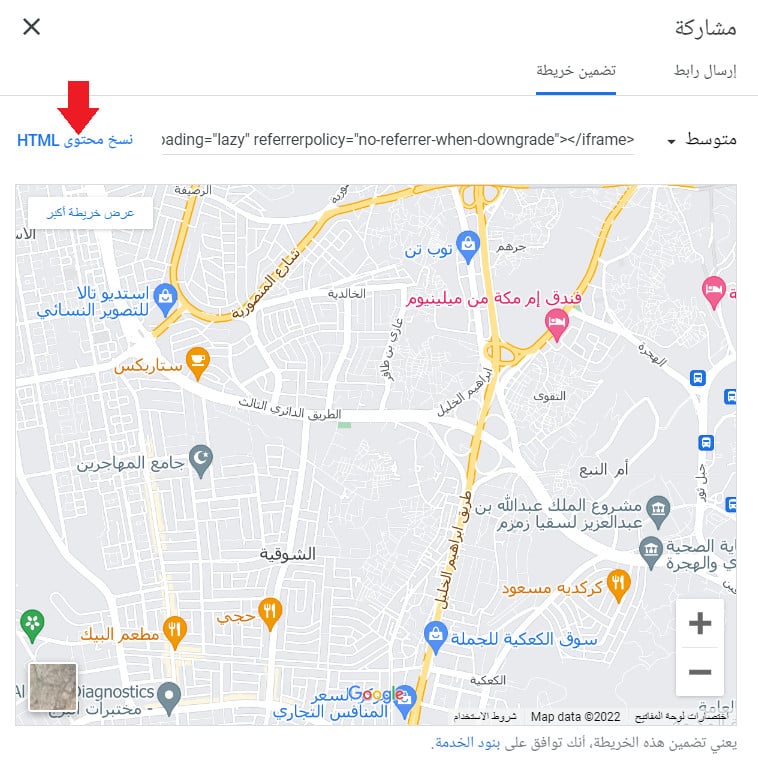
1. Find the place in Google Maps and click (Share).
2. Click (Embed a map).
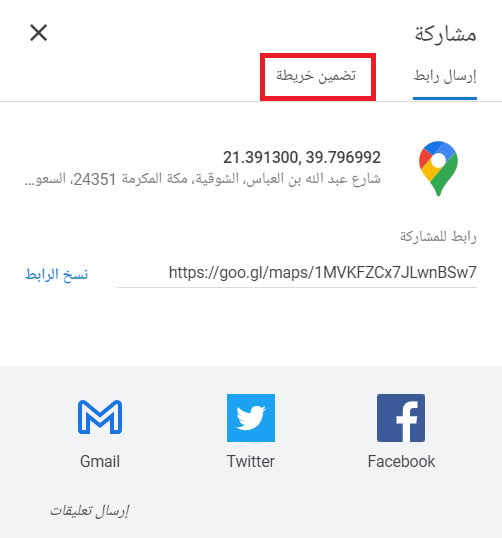
3. Click (Copy HTML) to copy the code to your clipboard.
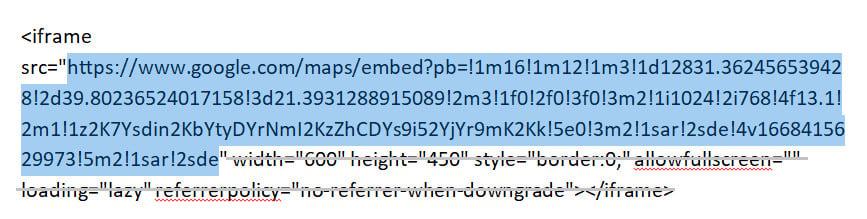
4. Paste the code into any text editor and copy the full value of the SRC attribute, as shown below.
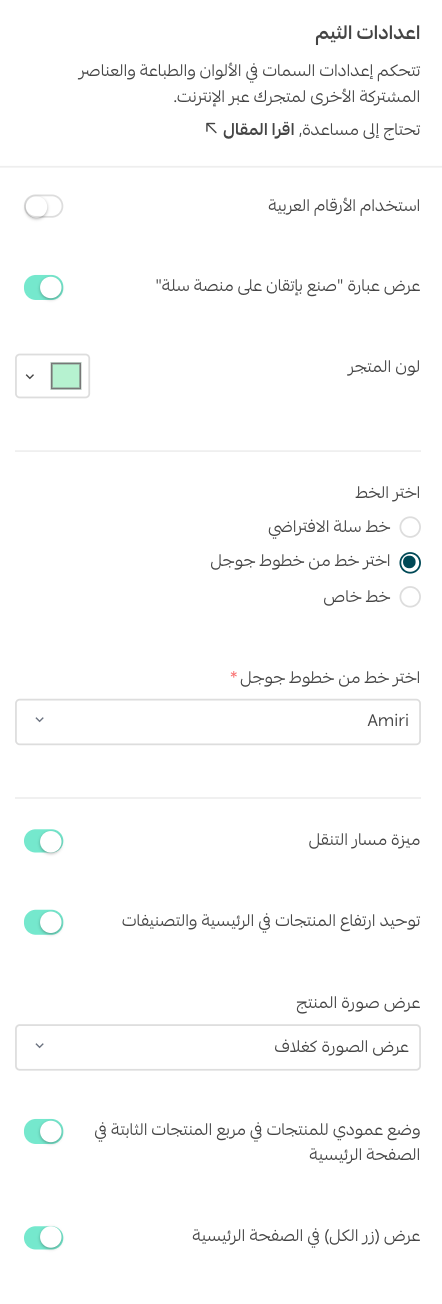
🎯 How to customize the way products are displayed
The Menu theme lets you:
1. Set your store color.
2. Display product images vertically.
Both live under the theme design options.
For more on customizing your home page.
❓ Frequently asked questions
How do I apply the template to my store's app?
Through the app builder. The article on designing your app with the Menu template walks you through it.
Which stores is the Menu theme built for?
Restaurants and cafes. It is the first Salla web theme to support the menu feature, alongside Google Maps embedding, calorie display, and list control.
How do I tell which elements are new in this theme?
Open (Home page elements), click (Add new element), and look for the star. Starred elements are the ones the Menu theme adds.
Can I see the theme before I buy it?
Yes. Open the demo store linked earlier in this article, and once you own the theme you can preview your own store from the theme customization page.
✅ More support
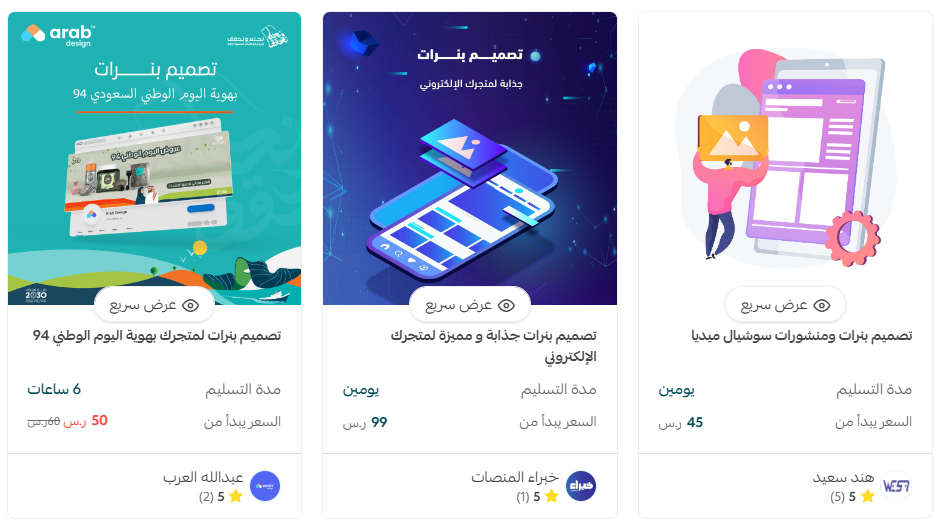
If you want help with your store design, merchant services connects you with Salla-verified providers for work like logo design, banner and divider design, and color coordination.
✅ More learning resources
Learn with trainer Mohammed Al Badr how to improve the user experience and design an online store that draws visitors in, moves them to buy sooner, and leaves an impression that lasts.
A restaurant menu online has the same job as a printed one: make it easy to find the dish, and easy to want it. Set your elements up in that order and the theme does the rest.