How much of your product catalog can you actually change without leaving the products page?
More than most merchants realize. The products page is where day-to-day product management happens: adding options like size and color, pricing those options, showing a discount percentage, fixing quantities after an import, categorizing, and deciding what order shoppers see your products in. In this guide, you'll learn the main features on the products page and how to use each one.
The products page gives you full control over your catalog from the product card: add and manage product options, price each option with or without an extra cost, update prices in bulk with an Excel file, show the discount percentage in your store, set quantities, add categories quickly, and sort how products appear.
📌 Article overview
- Adding multiple options to your products from the product card
- Managing your product options
- Showing the discount percentage on a product in your store
- Showing hidden products and setting quantities
- Adding a category to a product quickly
- Sorting your products
- Tips for presenting your products better
- Frequently asked questions
🚀 Adding multiple options to your products from the product card
From the products page, you can add options to a base product and control their settings straight from the product card.
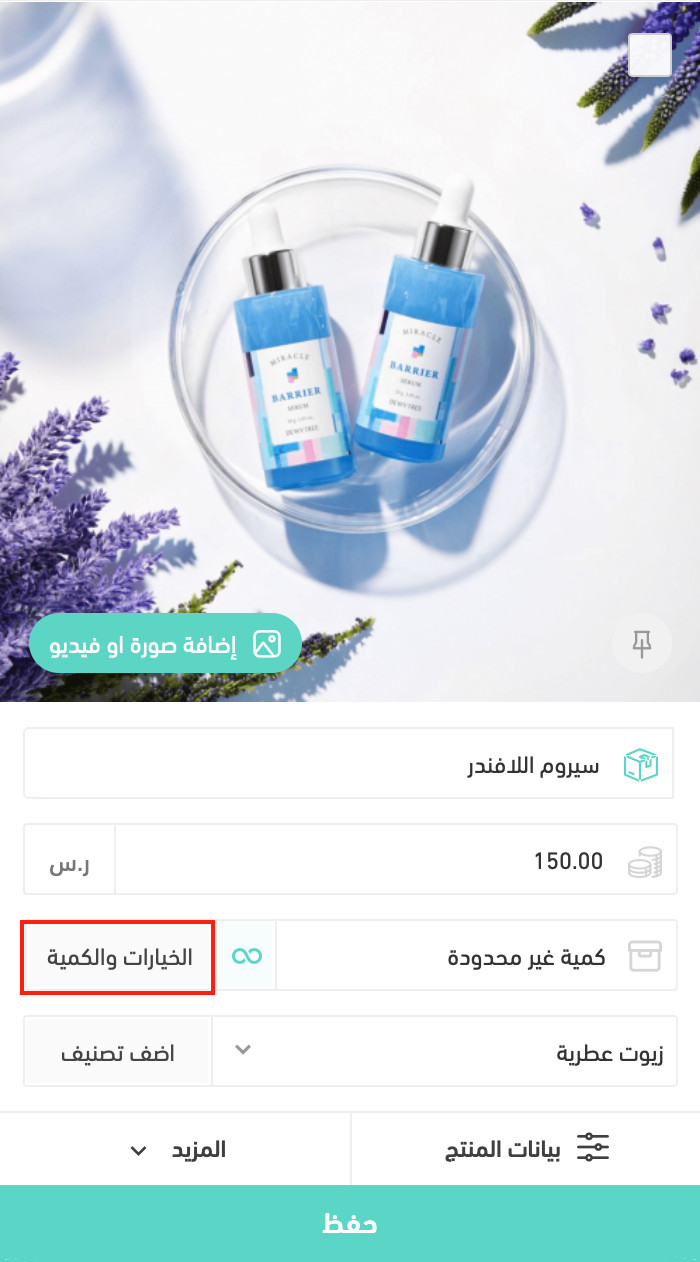
1. On the product card, choose (Options and quantity).

2. Turn on product options.

3. Enter a name for the option, such as (Size), in the (Option name) field, then add its values, such as (Medium, Small), in the (Value) field.
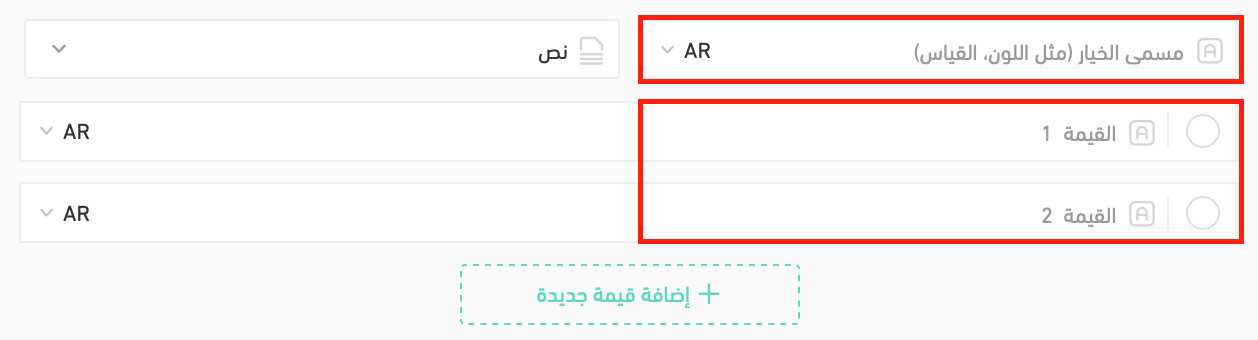
To add more values to the same option, click (Add new value).
4. To add another option, click (Add new).
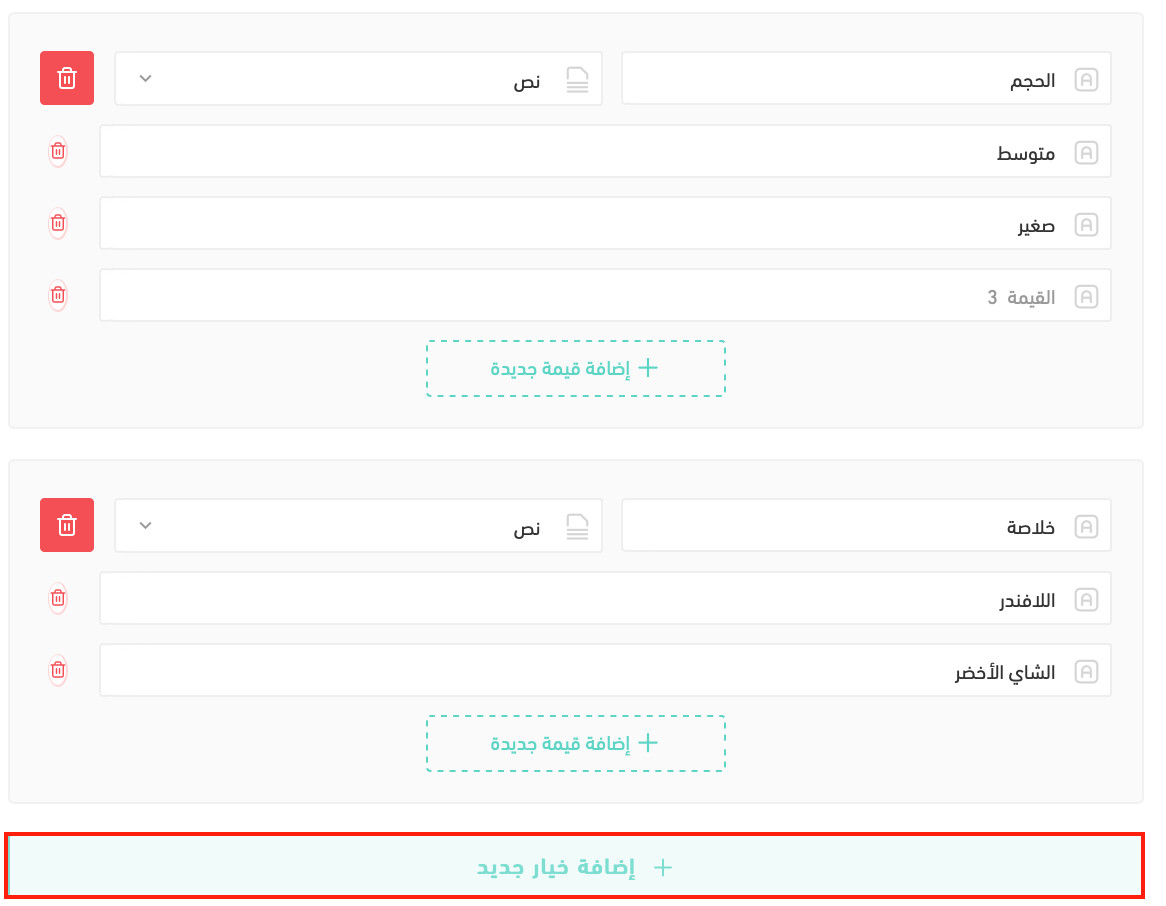
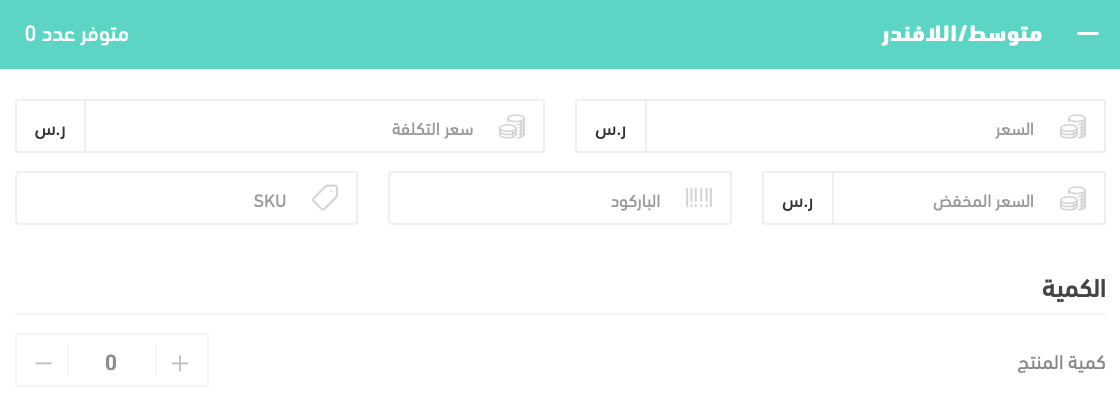
5. To control the details of an option, click the (+) sign.

6. Add the details you want to record for that option.
💰 Managing your product options
Adding the extra cost to an option's price
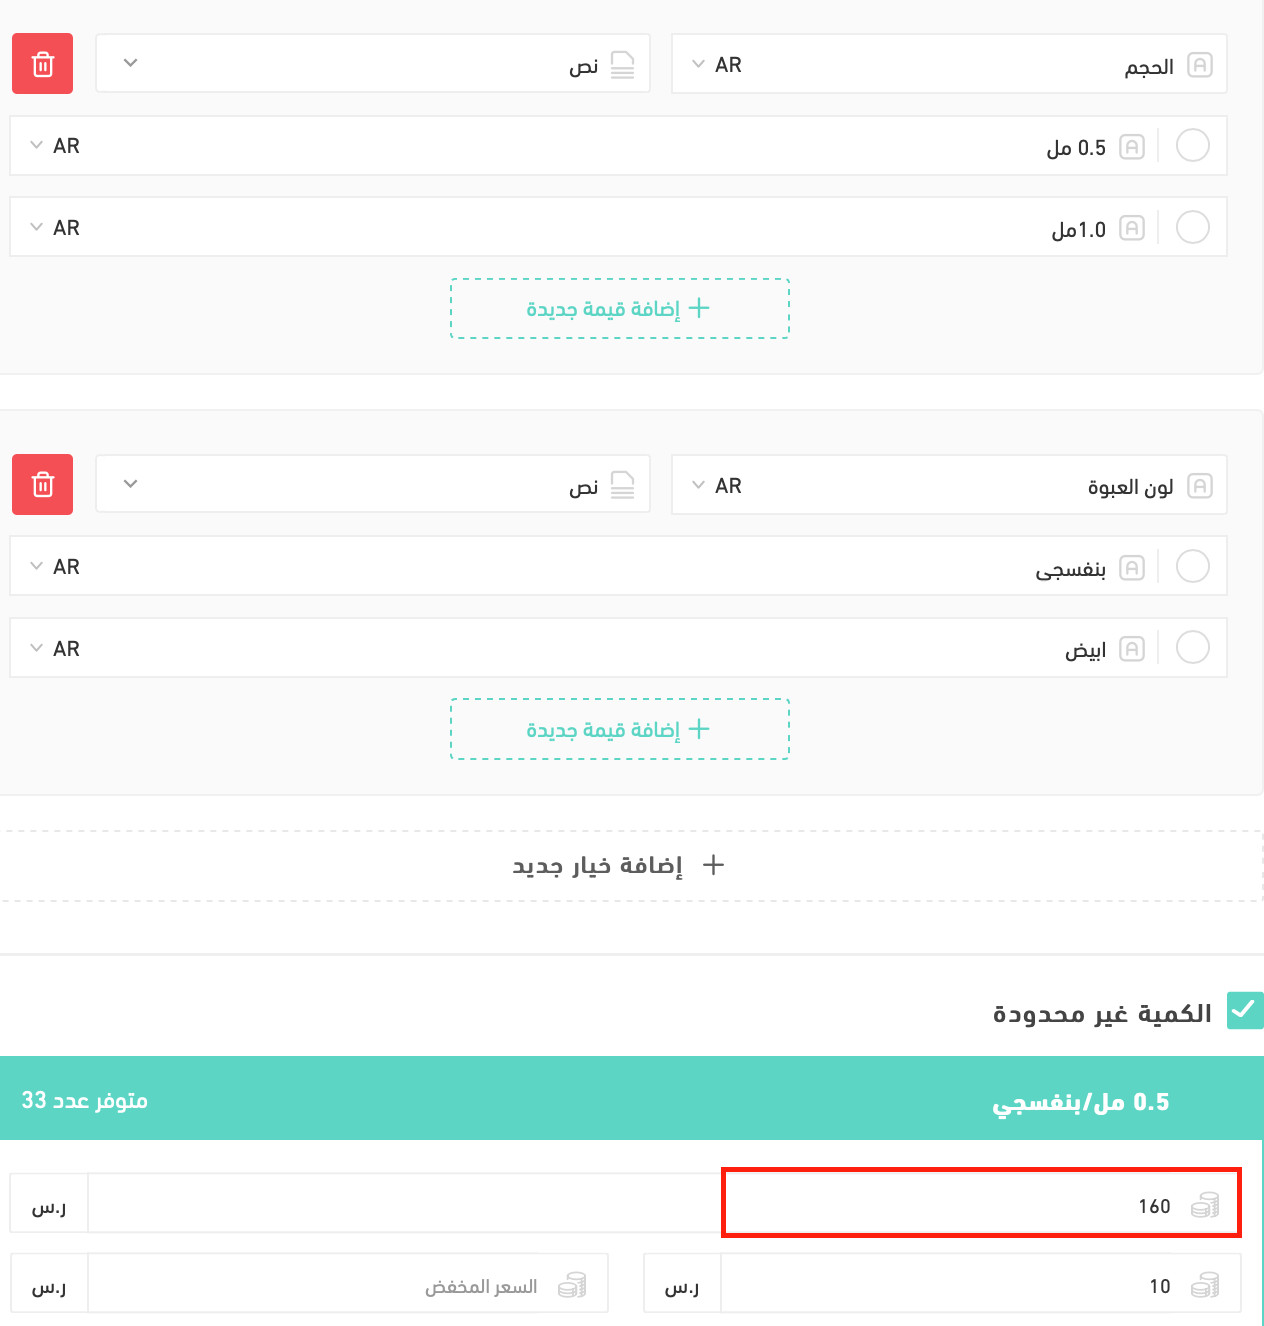
When a product has options that cost you different amounts — several colors, for example — enter the all-in price in the (Price) field of the option concerned.
How to enter the all-in price for options on a ready-made product:
1. From the products page, open the product card and click (Options and quantity).
2. Choose the option you want and click the (+) sign to show its details.

3. Enter the price with the extra cost included.
Managing option prices with no extra cost
When the options on a base product cost the same as the product itself, leave the (Price) field empty and the base product's price is used automatically.
How to manage option prices with no extra cost:
Go to the products page, and from the product card click (Options and quantity).
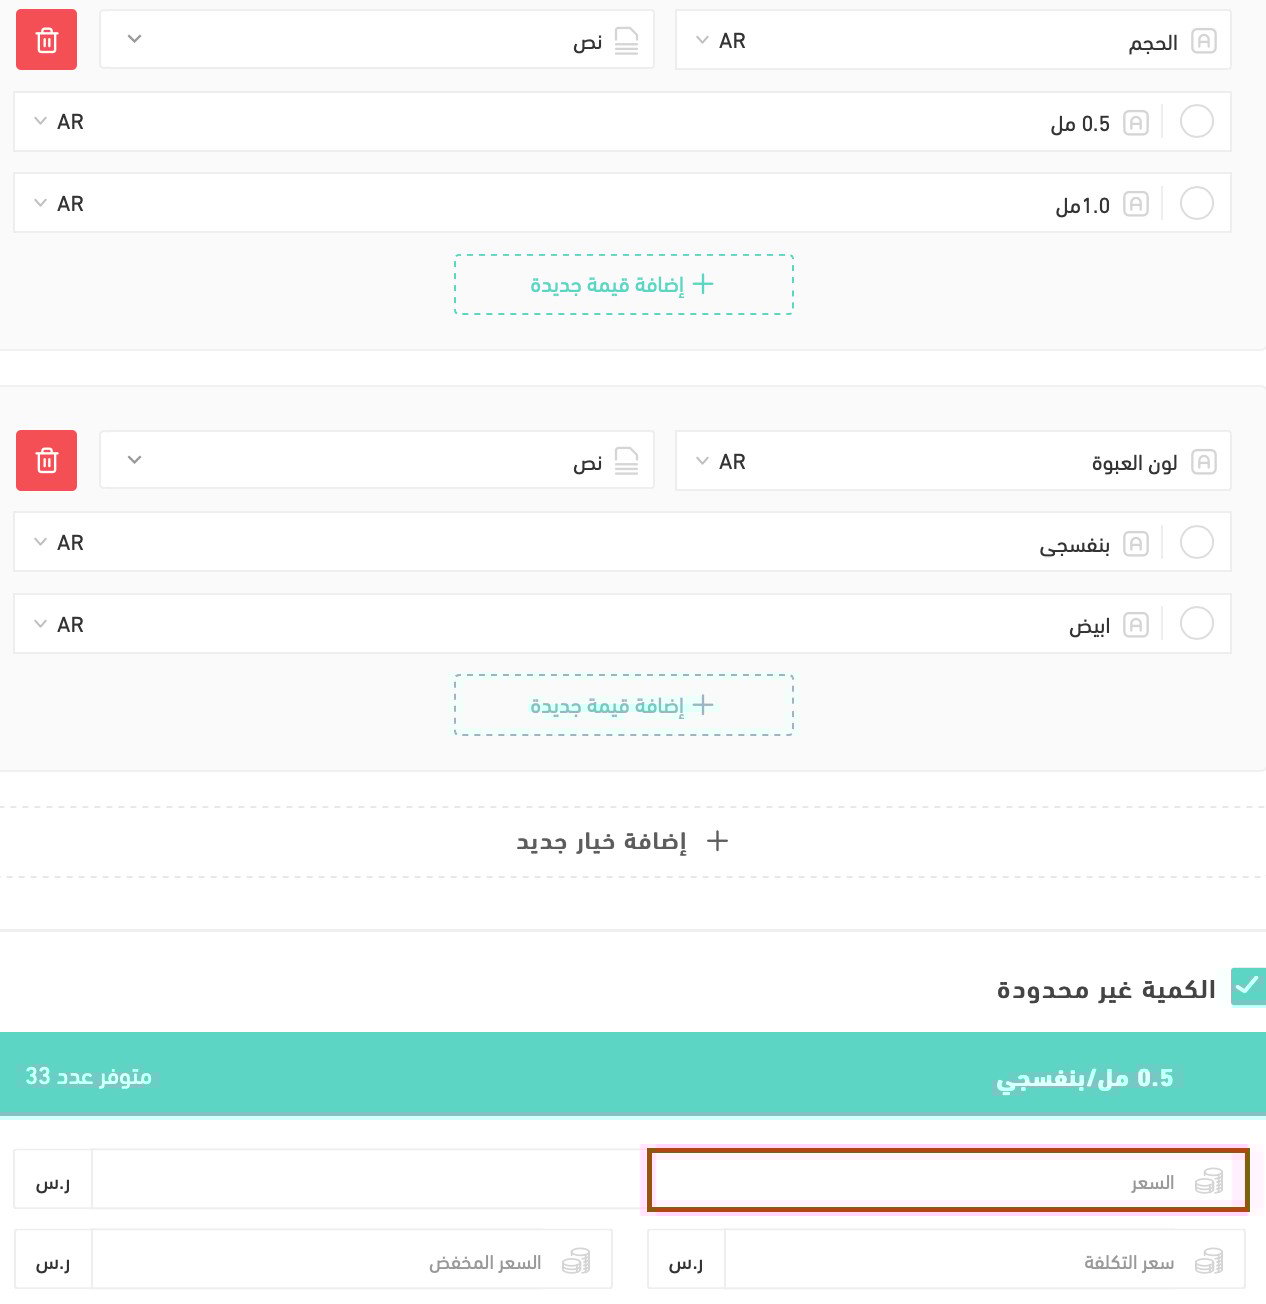
Then select the option you want and leave the price field empty.
Editing option prices with an Excel file
When you put a base product on sale, you can update all of its option prices at once by exporting and importing an Excel file.
How to update option prices in bulk:
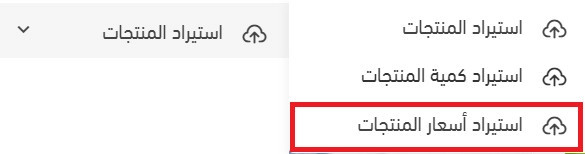
1. From the (Services) menu on the products page, click (Import product prices).
2. On the update existing product prices page, click (Export the price update template).
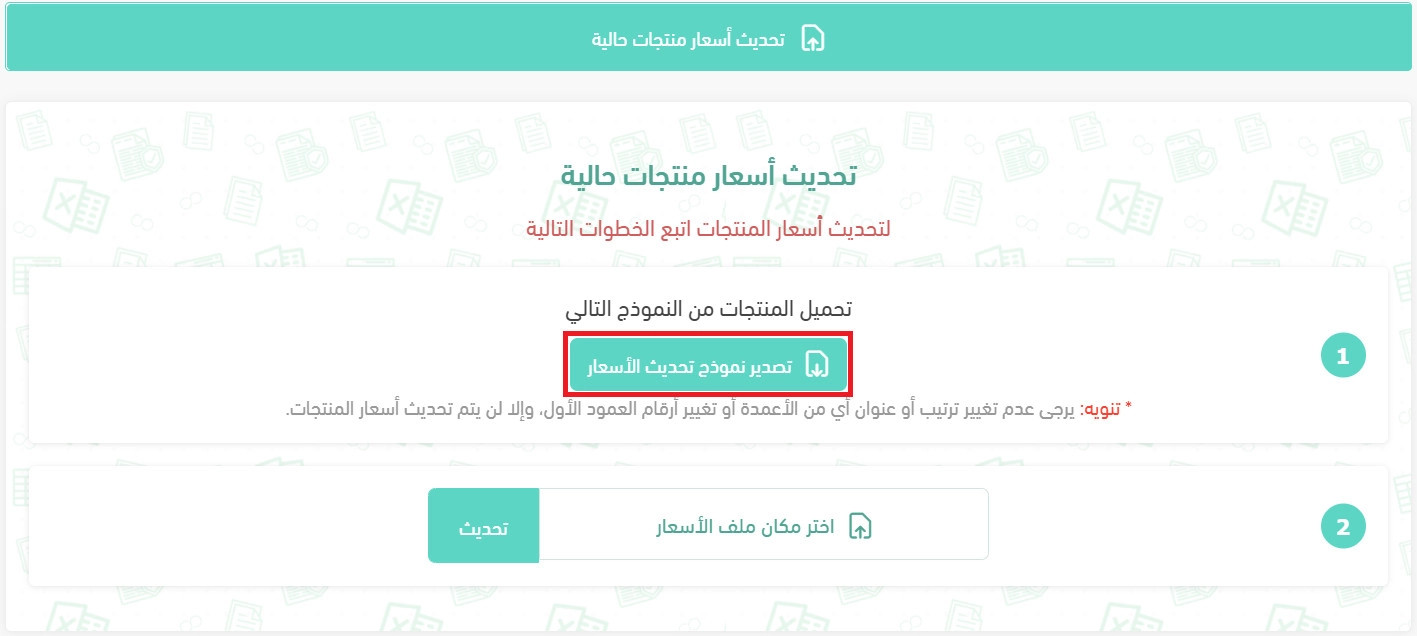
Your product prices are exported in an Excel file and sent to the store's email address.

3. Edit the price file to suit what you need.
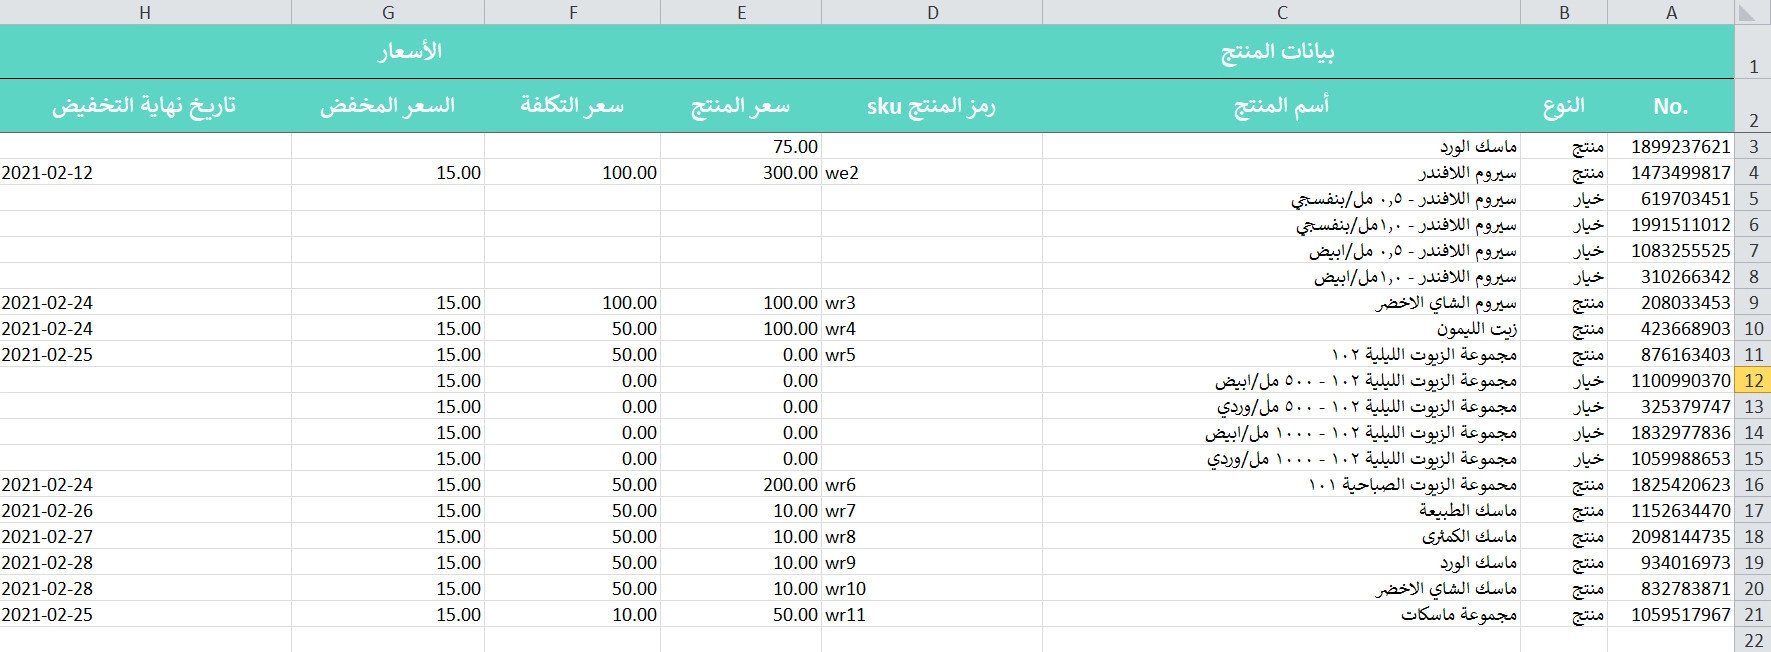
4. Back on the update existing product prices page, click (Choose the price file), select your edited file, then click (Update) to apply the new prices to your store's products.
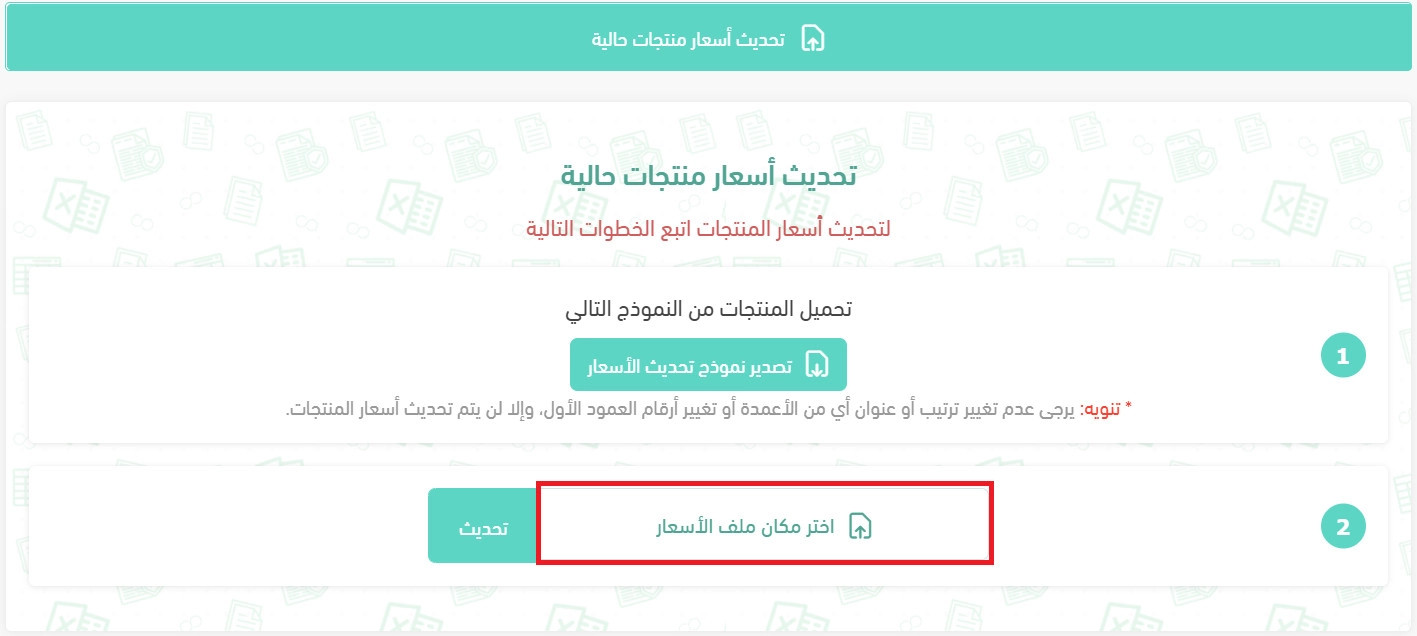
Give it a moment while the prices are updated.

For more detail, see importing product quantities and prices.
🏷️ Showing the discount percentage on a product in your store
1. From the product card on the products page, click (Product details).
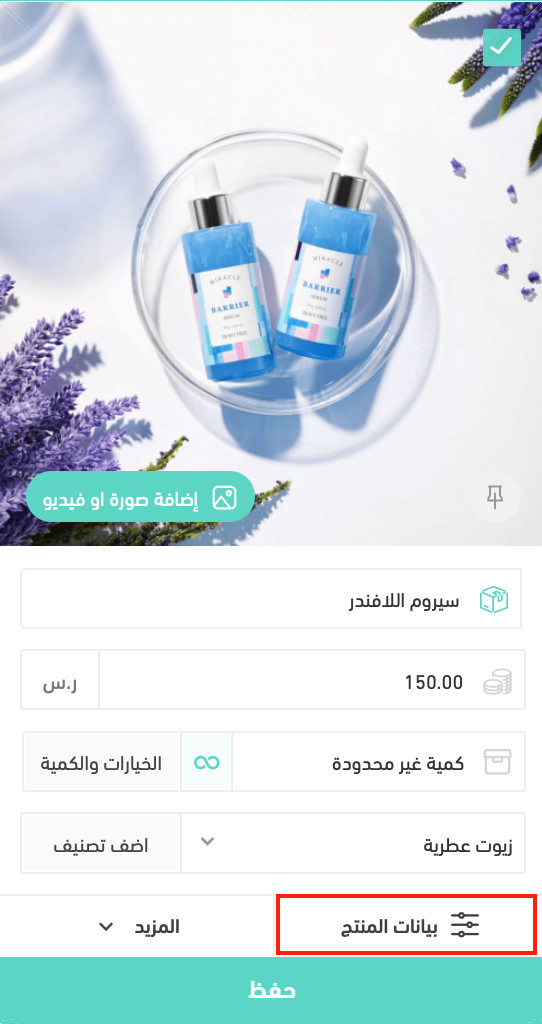
2. To show a discount percentage, enter the product's price after the reduction.
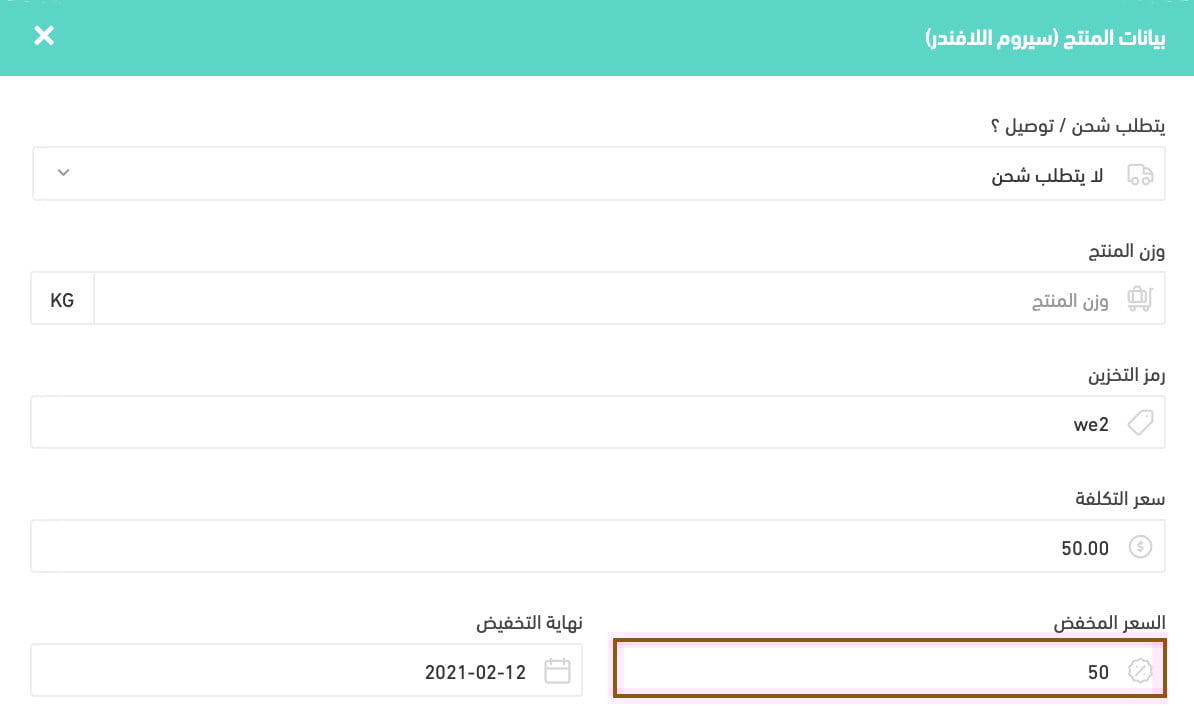
3. Click (percent) in the subtitle to show the discount percentage under the price in your store, or click (percent) in the promotional title to show it on the product image. Click (discount) to show the discount amount instead, or choose (brand) to show the brand the product belongs to.
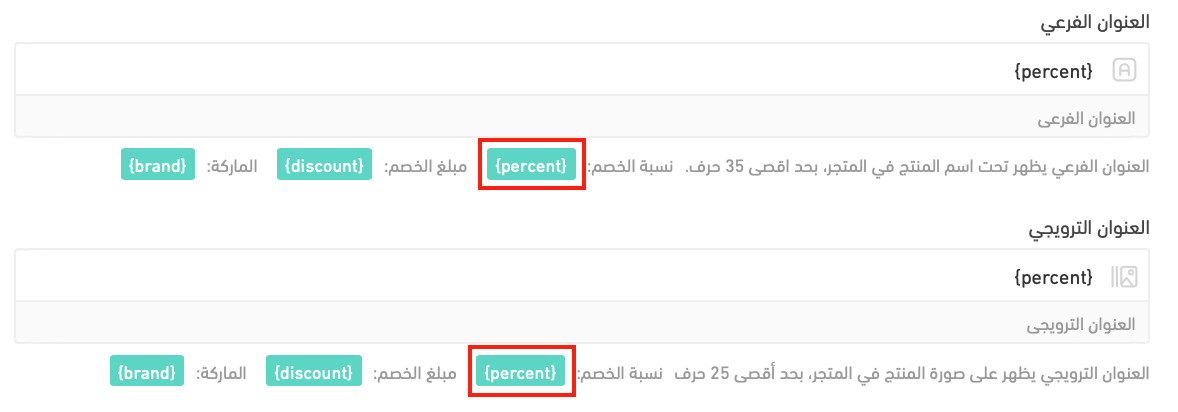
It then appears in your store like this:
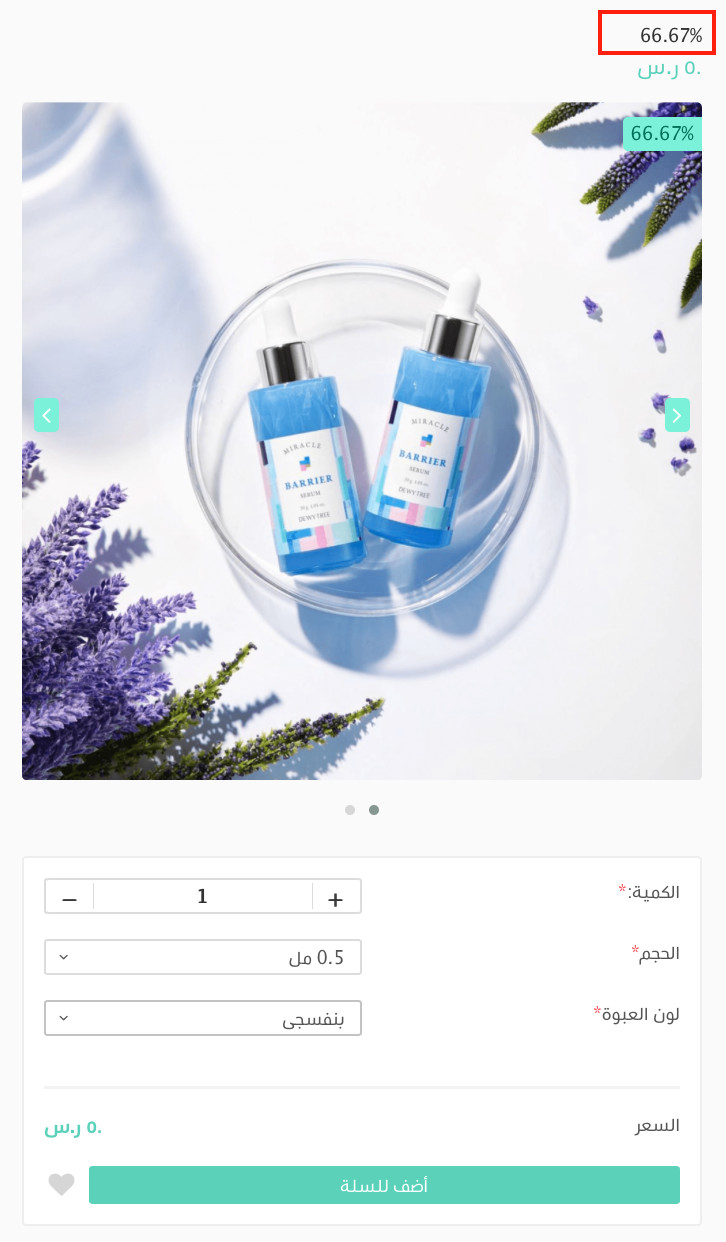
📦 Showing hidden products and setting quantities
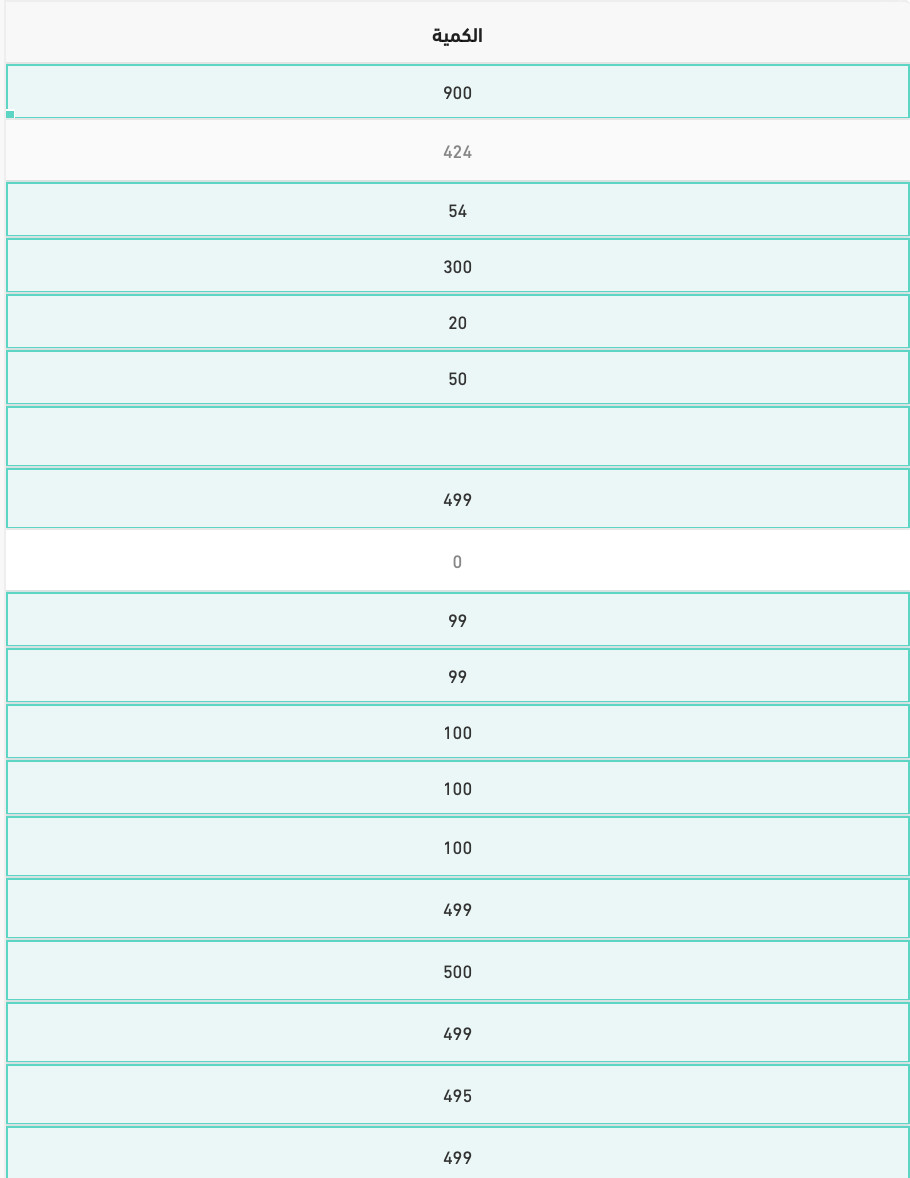
Products come out hidden after an Excel import because the import file does not support a quantity column, and quantities are set for the whole batch from the products page instead.
To show products that are hidden after an Excel import:
1. Select the hidden products, then click the selected products menu.
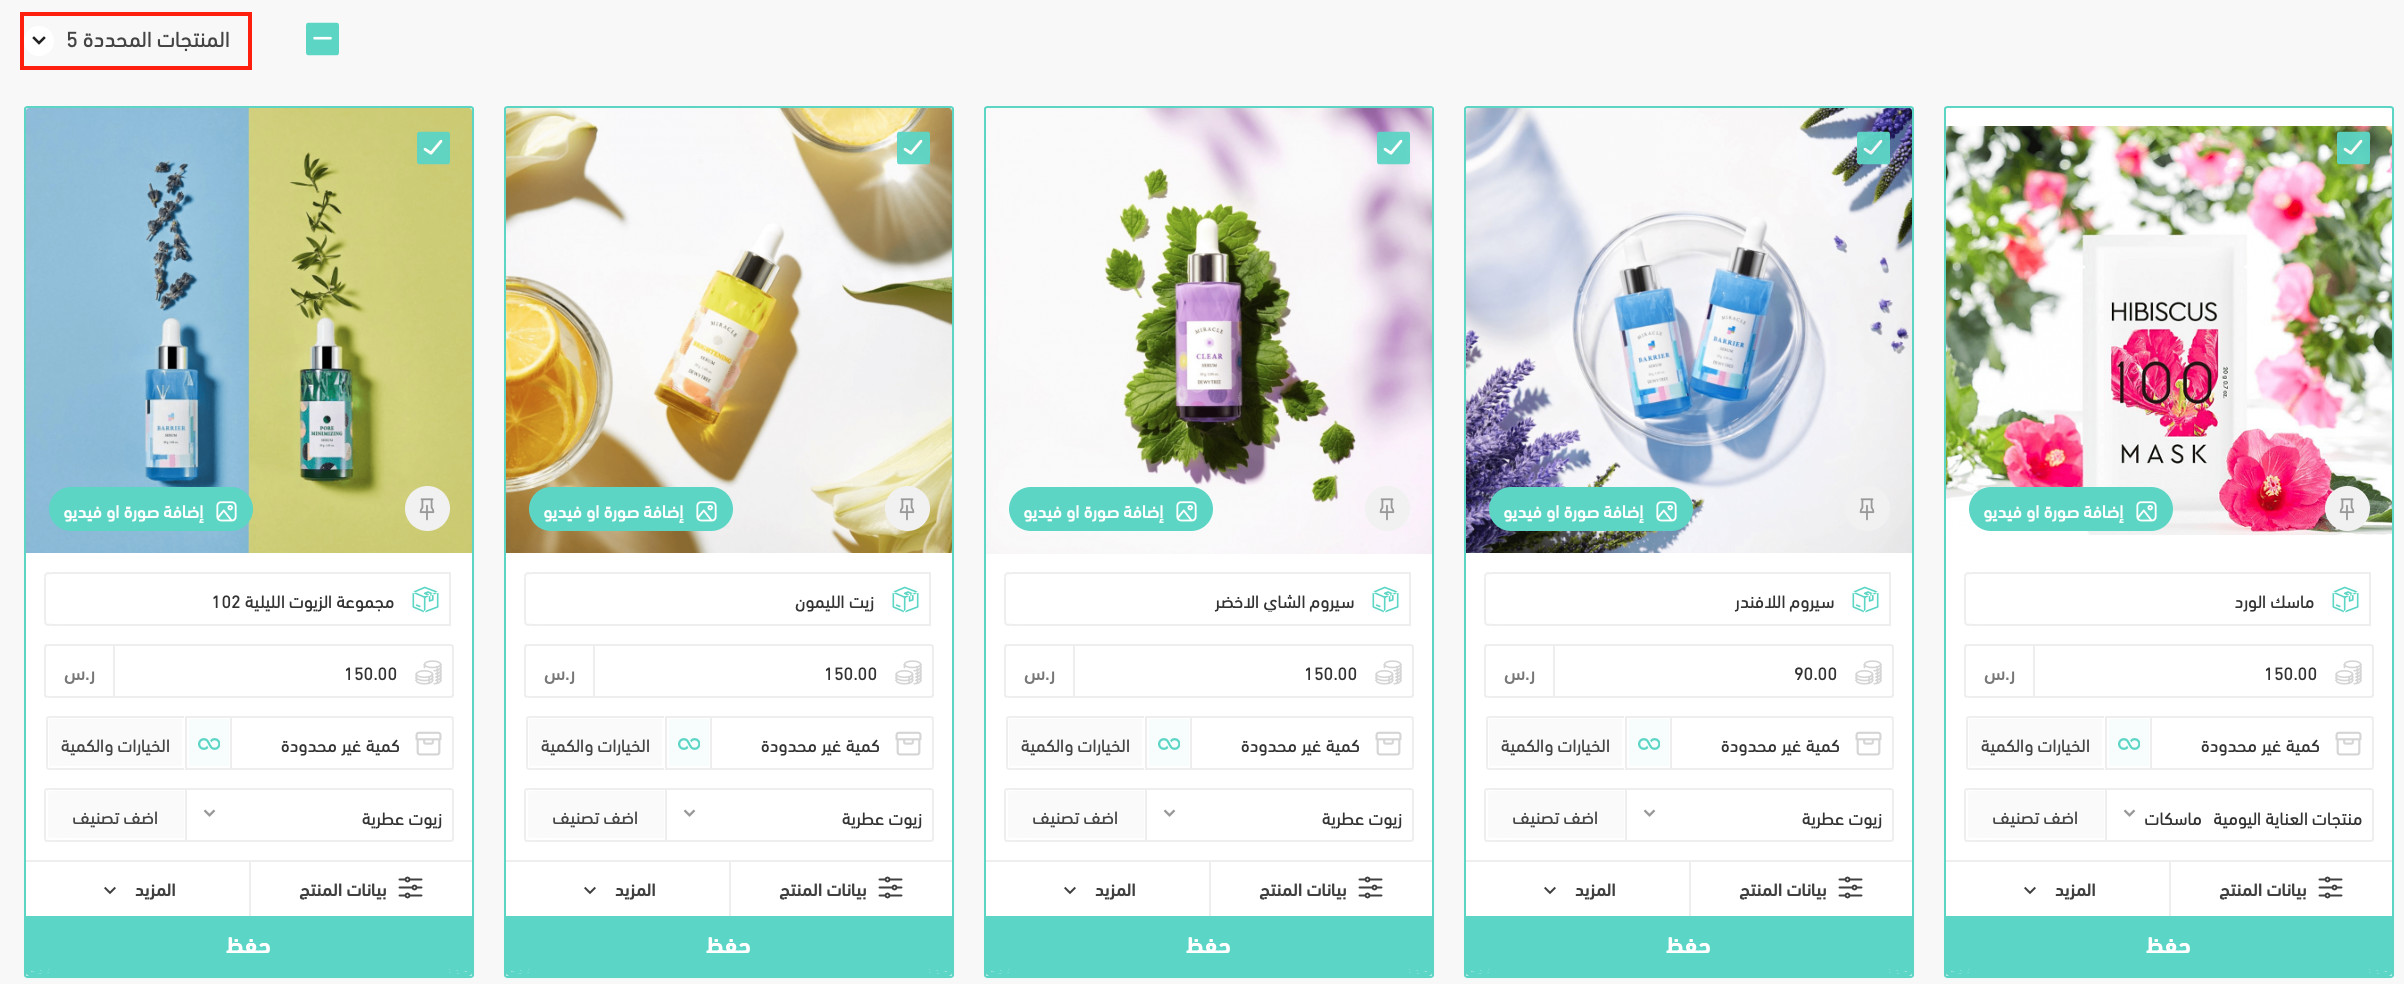
2. From the selected products menu, choose edit quantities.
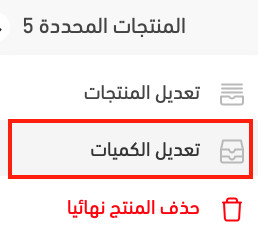
3. Add the quantities and the products are shown automatically.
Setting an unlimited quantity for a product and its options
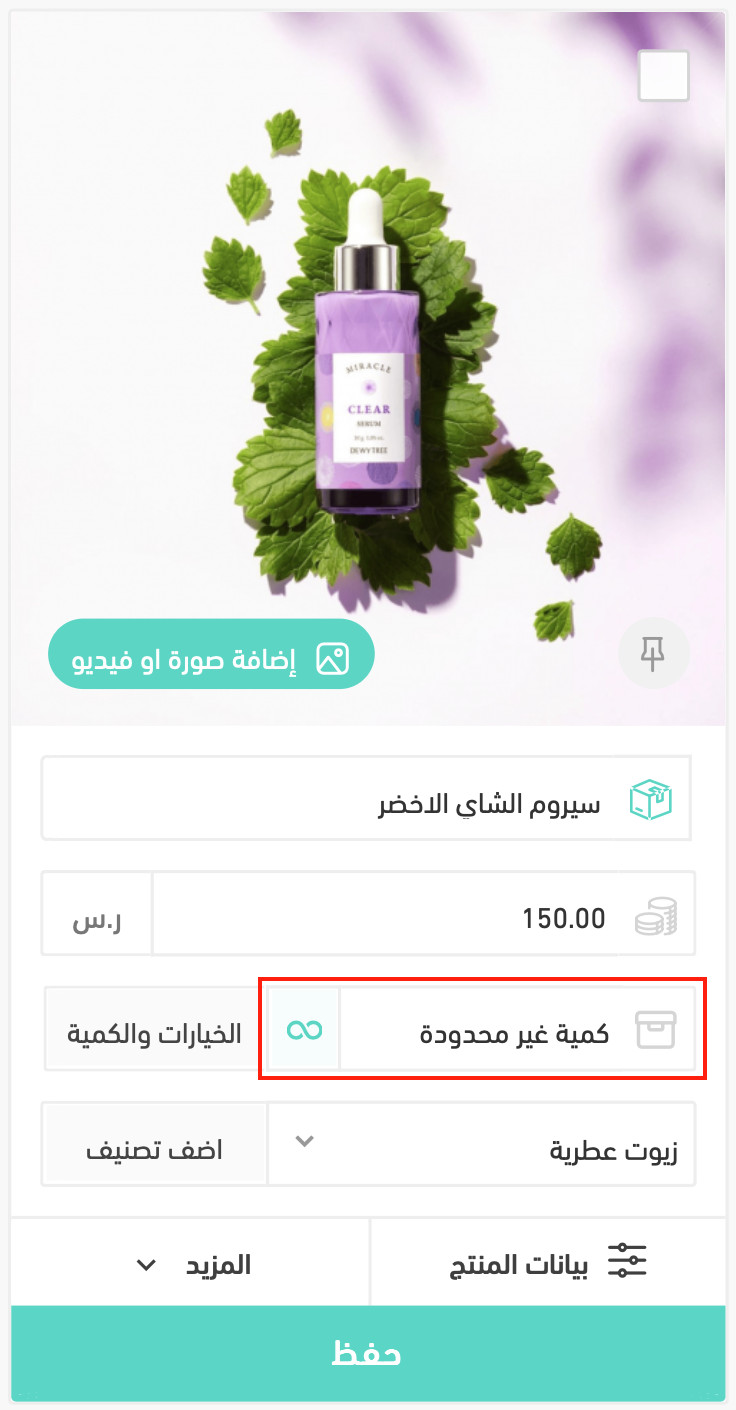
From the product page, you can set an unlimited quantity on the base product in a couple of clicks.
1. On the product card, clear the number of products or click the ∞ sign.
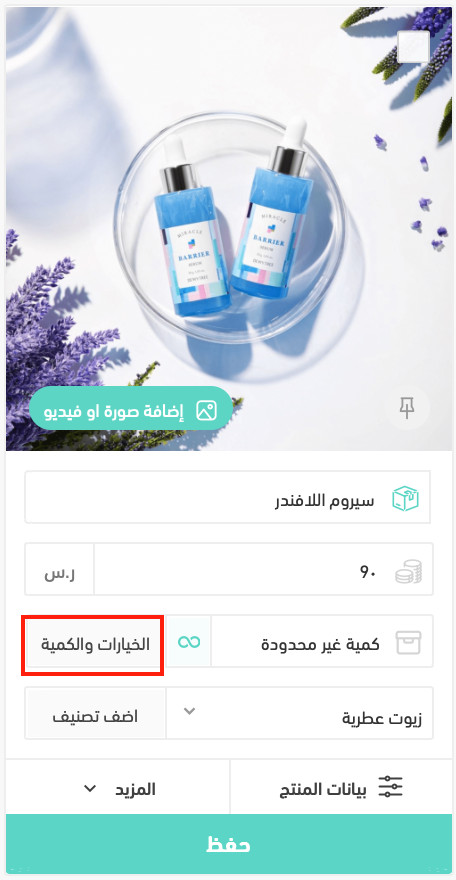
To set an unlimited quantity for the options of a ready-made product:
1. On the product card, click options and quantity.
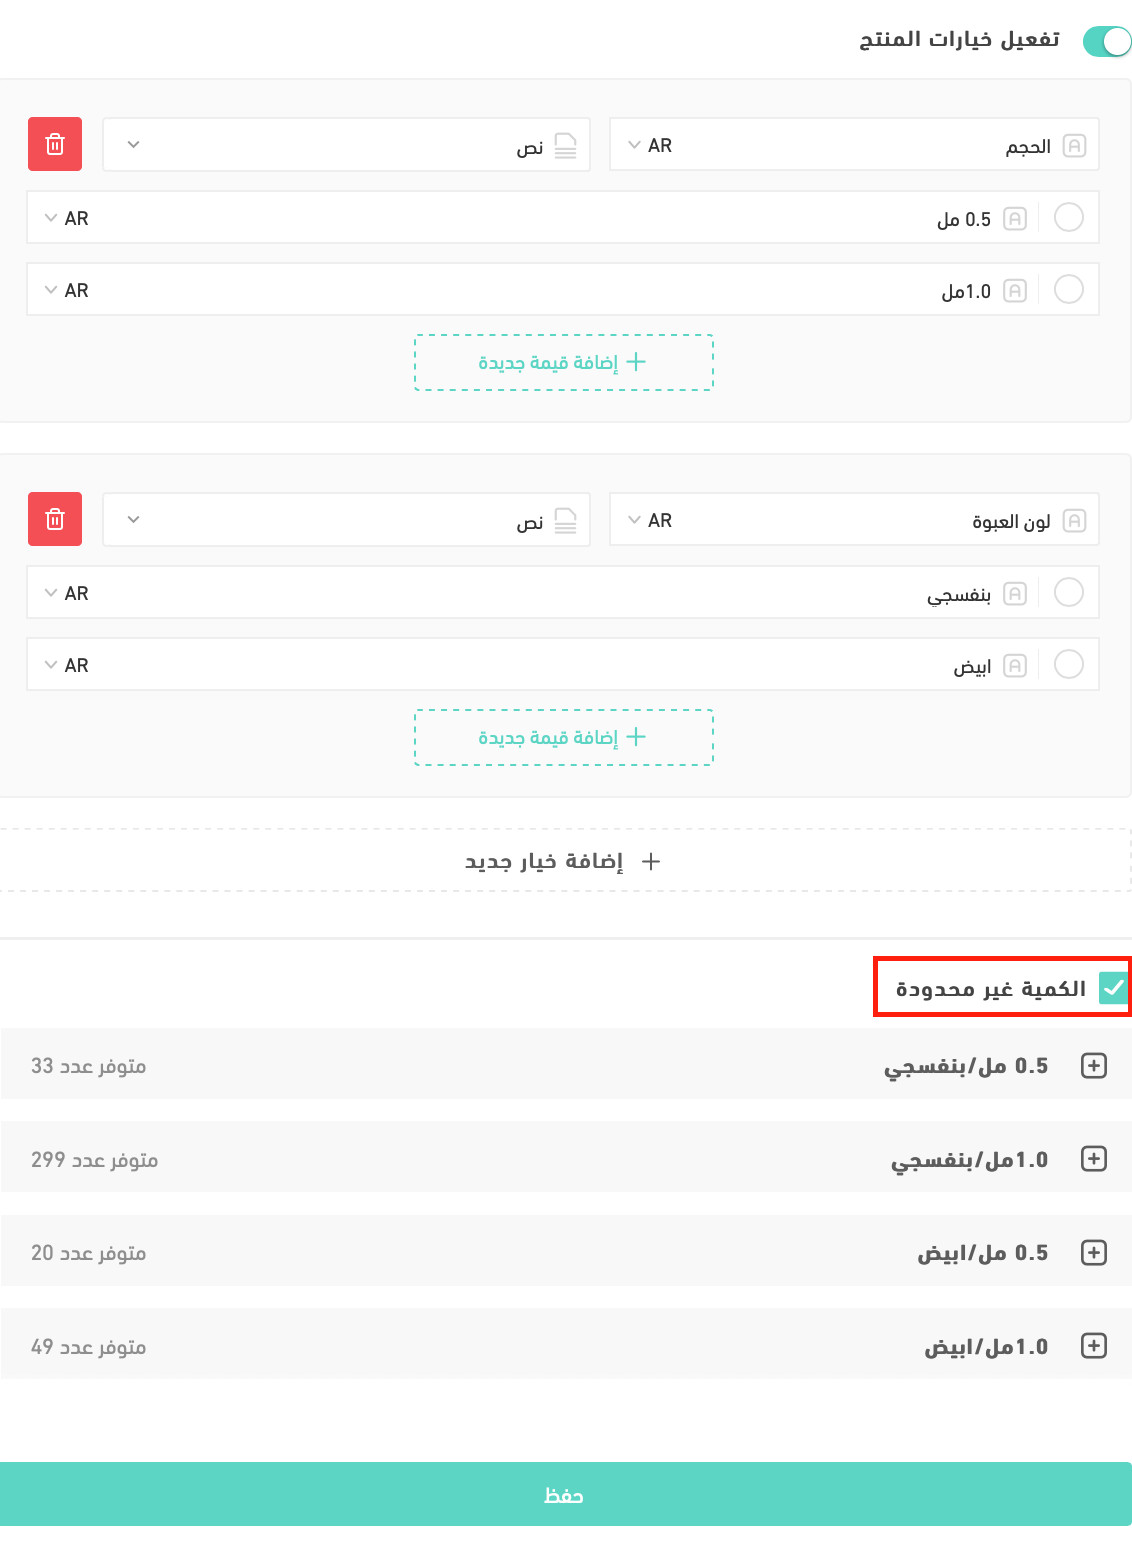
2. At the bottom of the card, turn on the unlimited quantity option.
🗂️ Adding a category to a product quickly
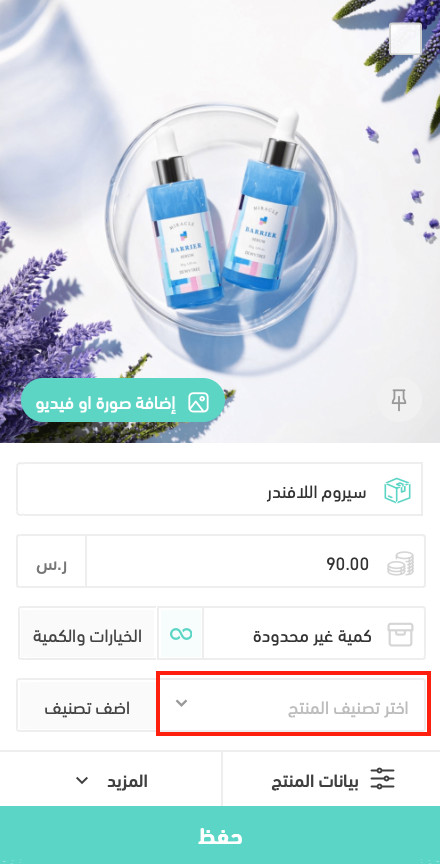
From the product card, you can put your product into an existing category or create a new one on the spot.
1. To put your product into an existing category, choose (Product category).
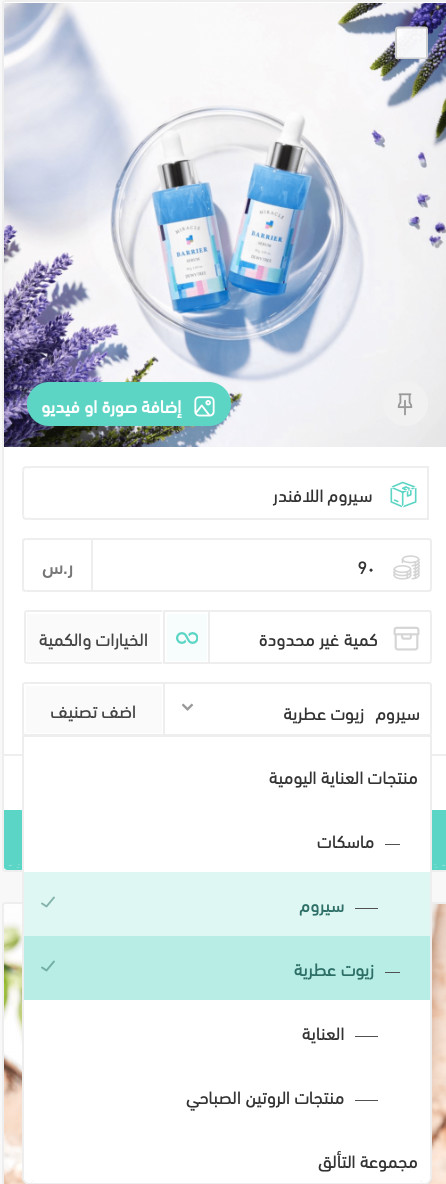
2. Then choose the category you want from the list.
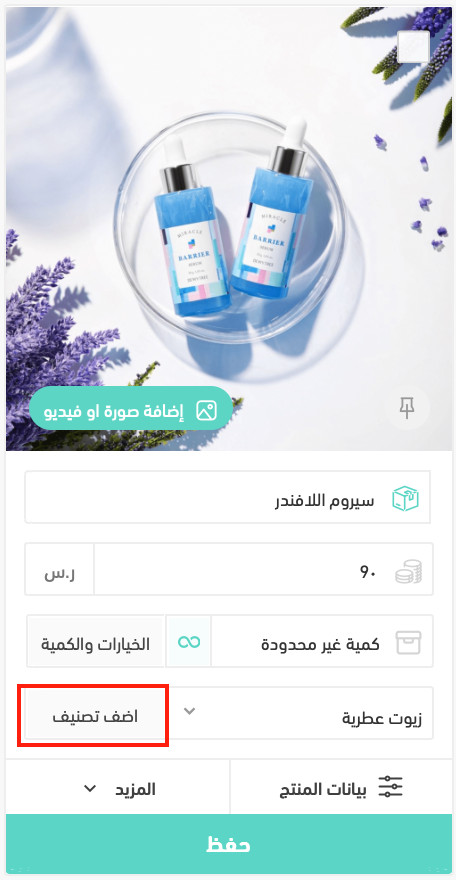
To add a new category to the product:
1. On the product card, choose (Add category).
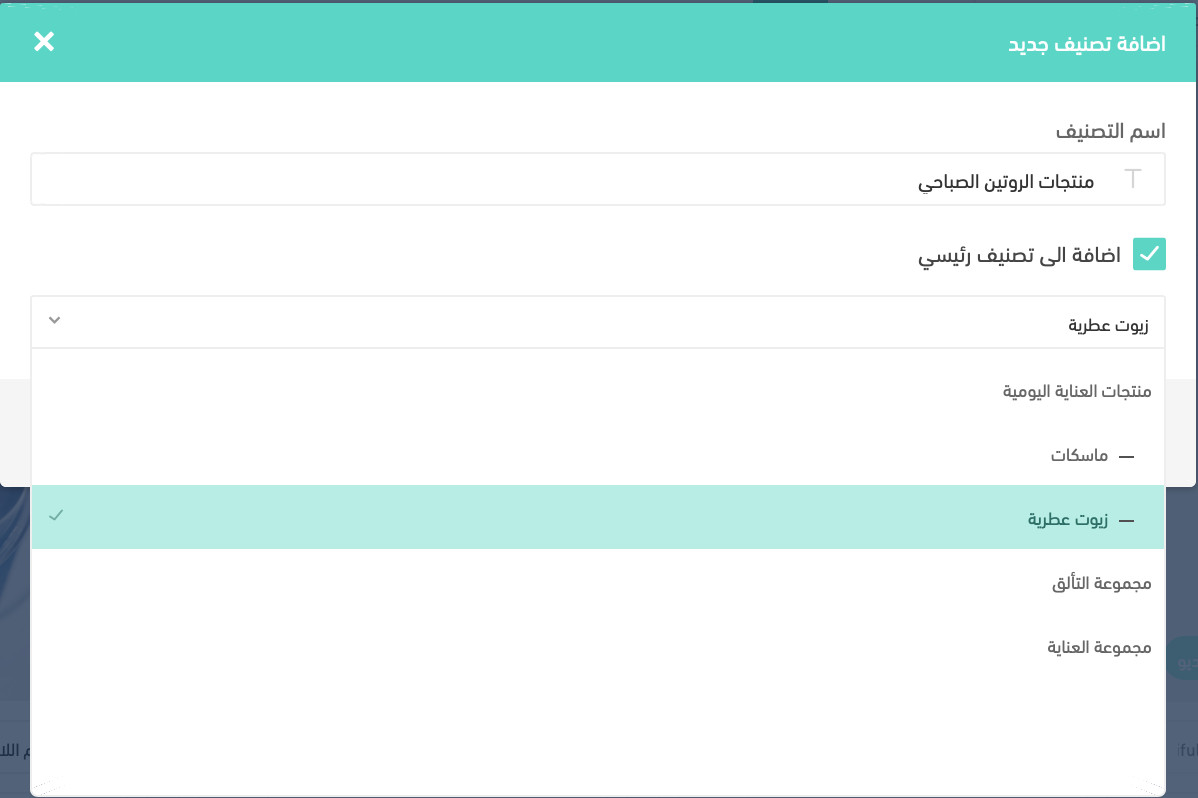
2. Add the new category. You can nest it under a parent category by turning on (Add to a main category).
↕️ Sorting your products
The products page lets you decide the order your products appear in.
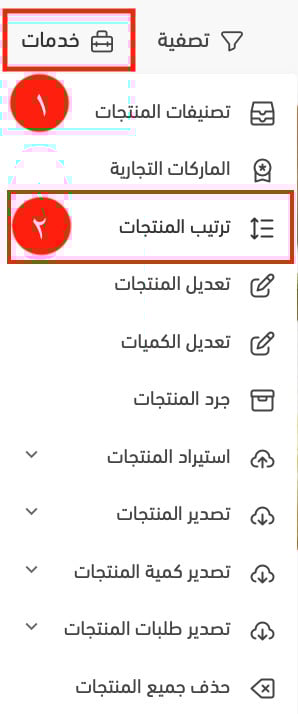
1. Click (Services) on the products page, then choose sort products.
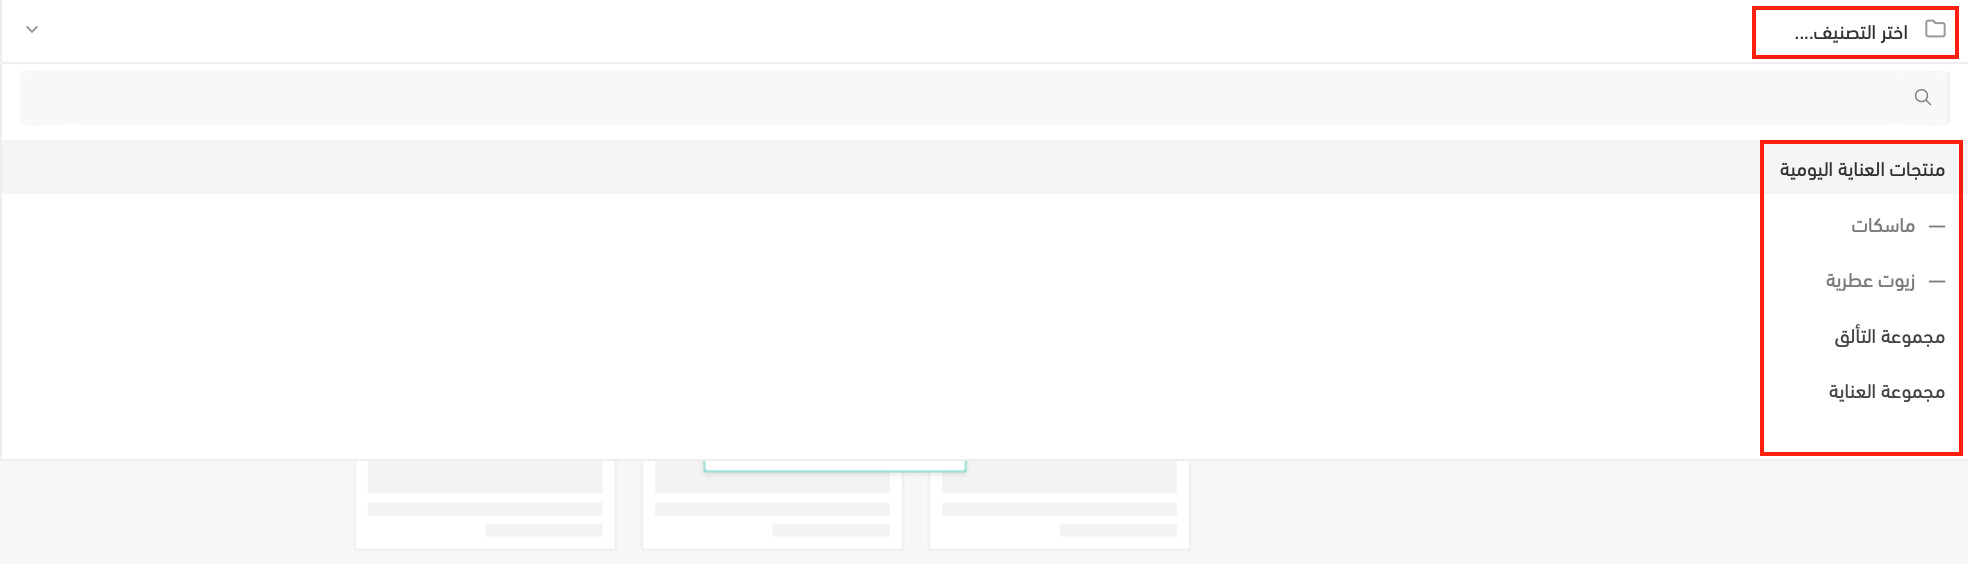
2. Choose the section you want to sort.
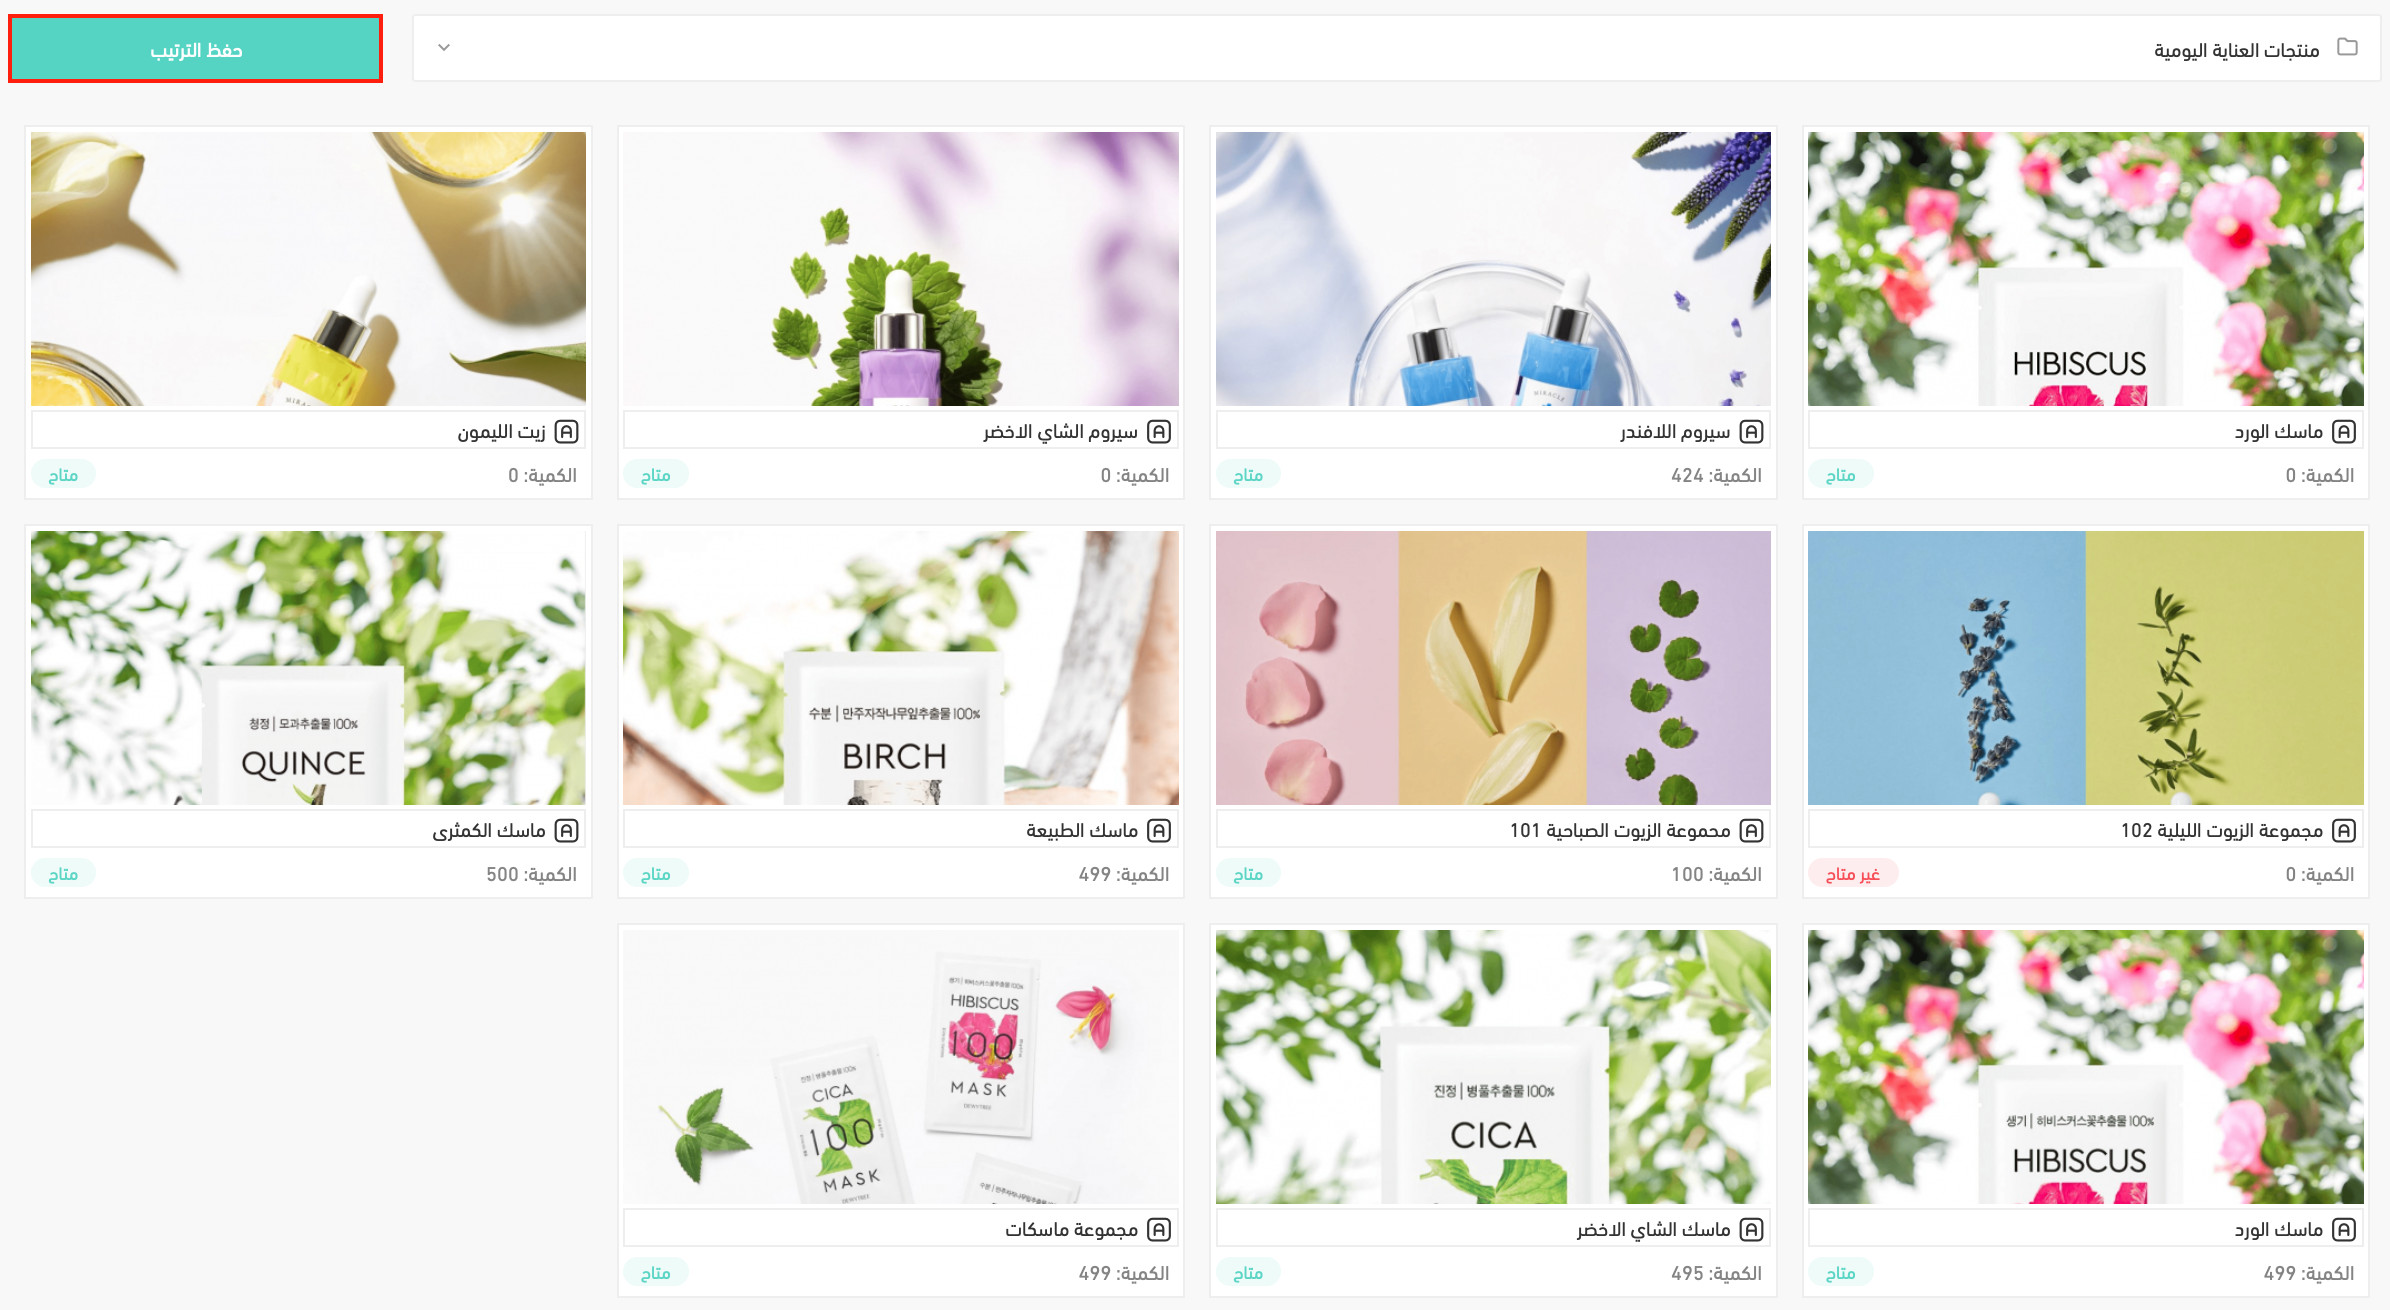
3. Drag the products into the order you want, then click (Save order).
💡 Tips for presenting your products better
- Add several images per product to help convince the customer to buy.
- Write a product description covering what it is made of and how to use it.
- Turn on suggested products (You may also like).
For more detail, see turning on the (You may also like) option.
- Use high-quality product images with a consistent look.
- Check that each product sits in the right category.
❓ Frequently asked questions
How do I add a size or color option to a product?
Open the product card, choose (Options and quantity), turn on product options, then enter the option name and its values.
Do I have to price every option?
No. Leave the price field empty and the option takes the base product's price. Fill it in only when the option costs more, and enter the all-in price.
Can I update many option prices at once?
Yes. From (Services) on the products page, export the price update template, edit it, then upload it again to apply the new prices.
Why are my products hidden after importing an Excel file?
The import file does not support a quantity column. Select the hidden products, choose edit quantities, and add the quantities to show them.
How do I set an unlimited quantity?
On the product card, clear the quantity or click the ∞ sign. For the options of a ready-made product, open options and quantity and turn on unlimited quantity at the bottom of the card.
Everything here lives on one page, which is the point: the fewer places you have to visit to fix a price, a quantity, or a category, the more time your catalog gets to stay accurate.