If you have more than one branch, why should a customer's order travel across the country to reach them?
Retail selling lets you manage your online store's stock branch by branch, so orders are prepared and handed over from the location nearest the customer. That cuts shipping costs and takes pressure off your store's fulfillment. In this guide, you'll learn how to install the Retail stores app, turn the feature on, decide how customers browse your products, set your stock deduction strategy, show branch availability on product pages, and configure shipping.
Retail selling lets you manage your online store's inventory by branch, so each order is fulfilled from the branch closest to the customer. Install the Retail stores app, turn the feature on in your store settings, then choose how customers browse, how stock is deducted, and how shipments are handled.
📌 Article overview
- What is the Retail stores app?
- Before you start: install the Retail stores app
- How to customize retail selling
- Frequently asked questions
🎯 What is the Retail stores app?
Retail stores is a tool that lets you manage your online store's inventory by branch. Customer orders become easier to handle and can be delivered from the branch nearest the customer, which lowers shipping costs and lifts your store's performance.
🚀 Before you start: install the Retail stores app
Install the Retail stores app first, then customize its settings. To install the app in your store:
1. From the side menu of your dashboard, click (My installed apps).

2. From the Salla App Store banner, click (Browse Salla App Store).

3. From the Retail stores app, click (Install).
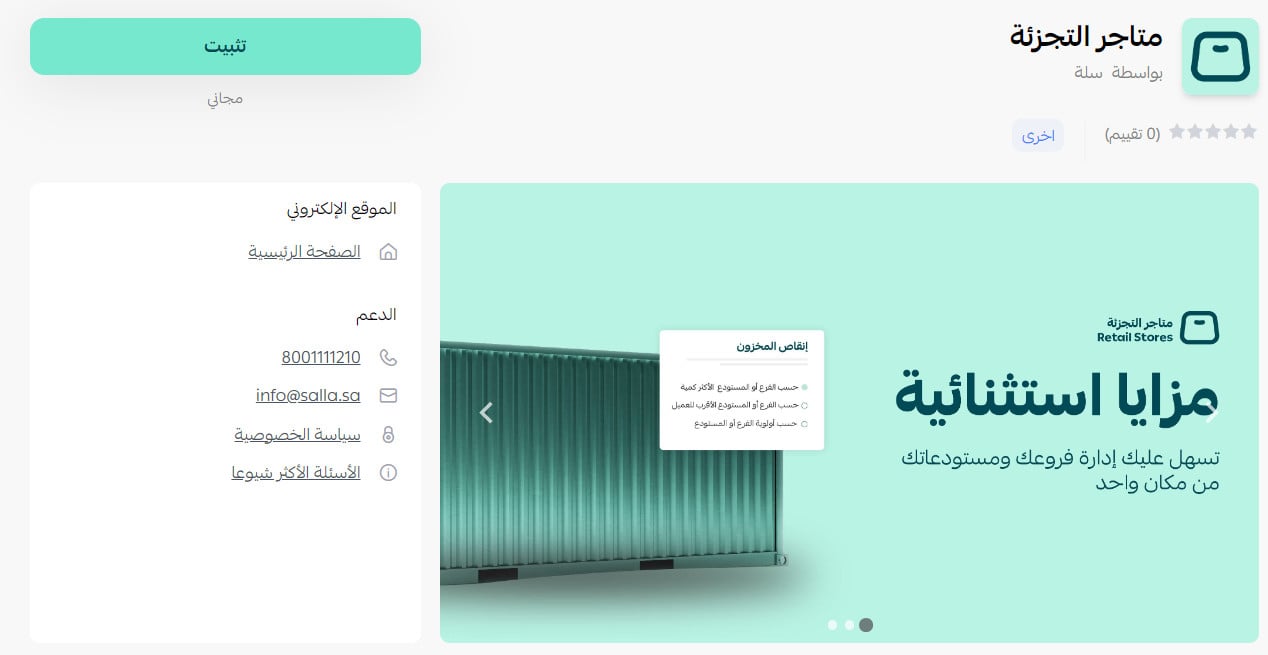
The app is now installed on your store.
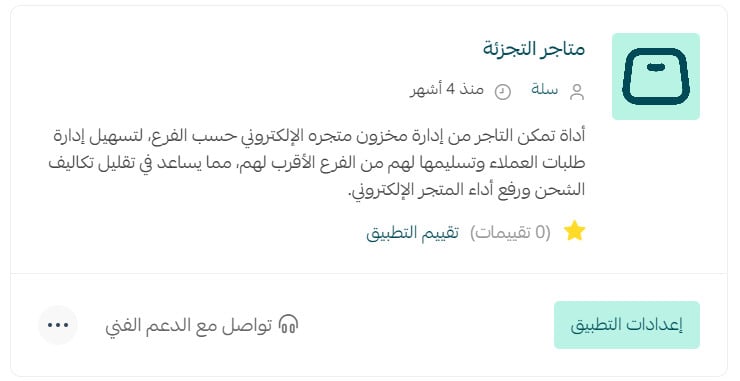
For more details, see managing my store's apps.
For more details, see frequently asked questions about retail selling.
👣 How to customize retail selling
Customizing retail selling covers five things:
1. Turning retail selling on
2. Choosing how customers browse your products
3. Setting your stock deduction strategy
4. Showing product availability on the product page
5. Customizing shipping settings
1. Turn retail selling on
1. From the side menu of your dashboard, click (Store settings).

2. From the store settings page, click (Retail stores settings).

3. From the retail stores settings page, click (Activate).
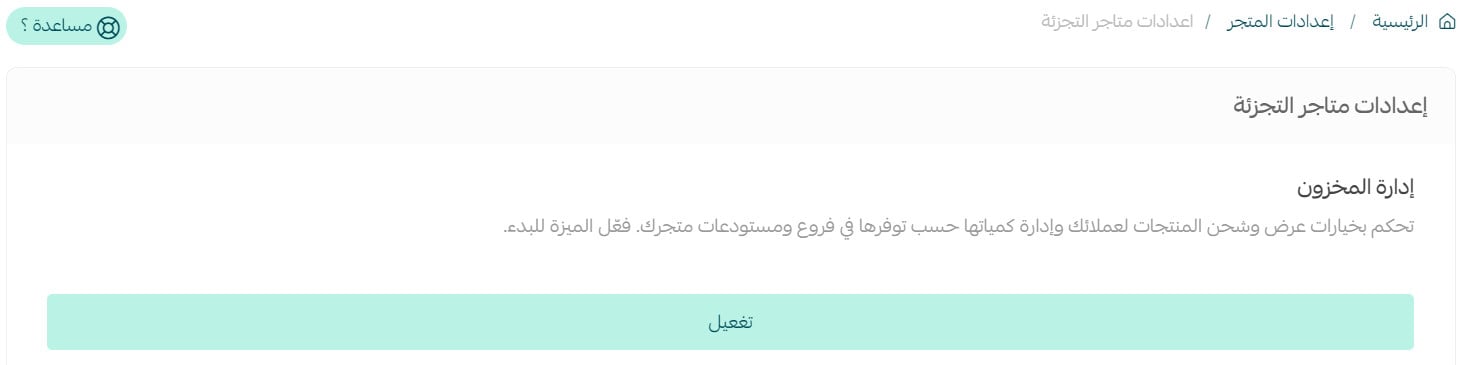
That's it — retail stores is active, and your products are linked to the default branch.

2. Choose how customers browse your products
You can let customers browse every product in your store, or narrow what they see by city, by country, or by the branch nearest them.
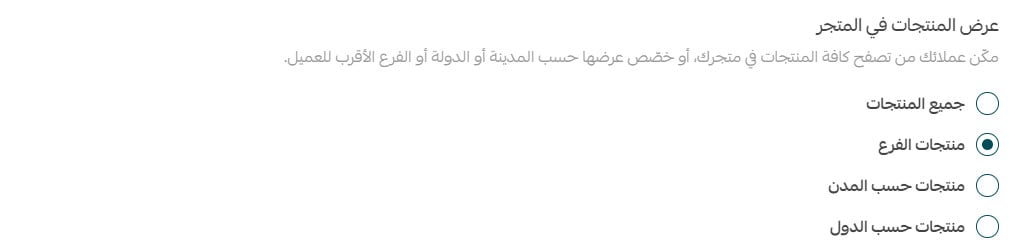
Here is how the display options compare:
Display option |
Selection |
How it is shown |
Notes |
All products (default) |
- |
The default display. |
Every product in the store is shown, with no filtering by branch, city, or country. |
Branch products |
Choosing a branch is required. |
Two ways to pick the branch, city, or country: the default display or a pop-up window. |
- |
Products by city |
Choosing a city is required. |
Two ways to pick the branch, city, or country: the default display or a pop-up window. |
You get the option to send the order as several shipments from different store locations. |
Products by country |
Choosing a country is required. |
Two ways to pick the branch, city, or country: the default display or a pop-up window. |
You get the option to send the order as several shipments from different store locations. |
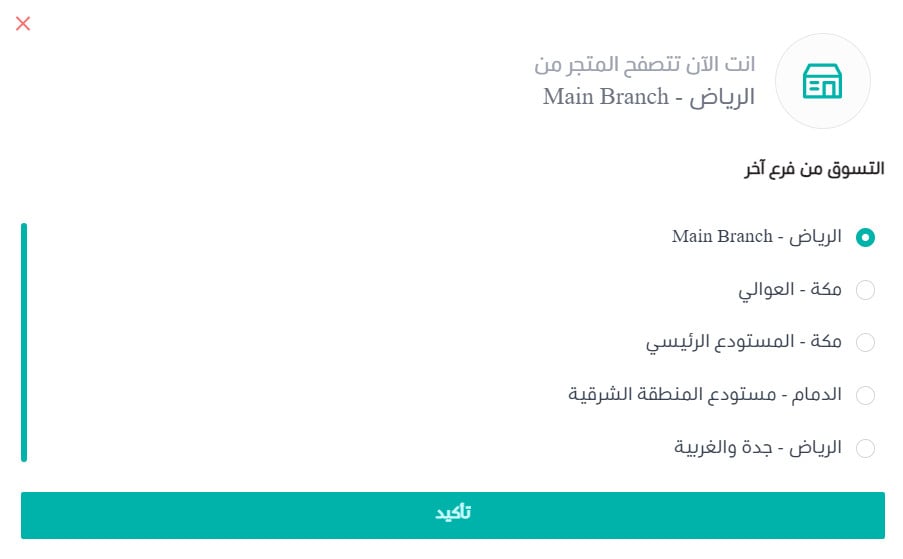
You also choose how the branch selector itself appears to the customer.
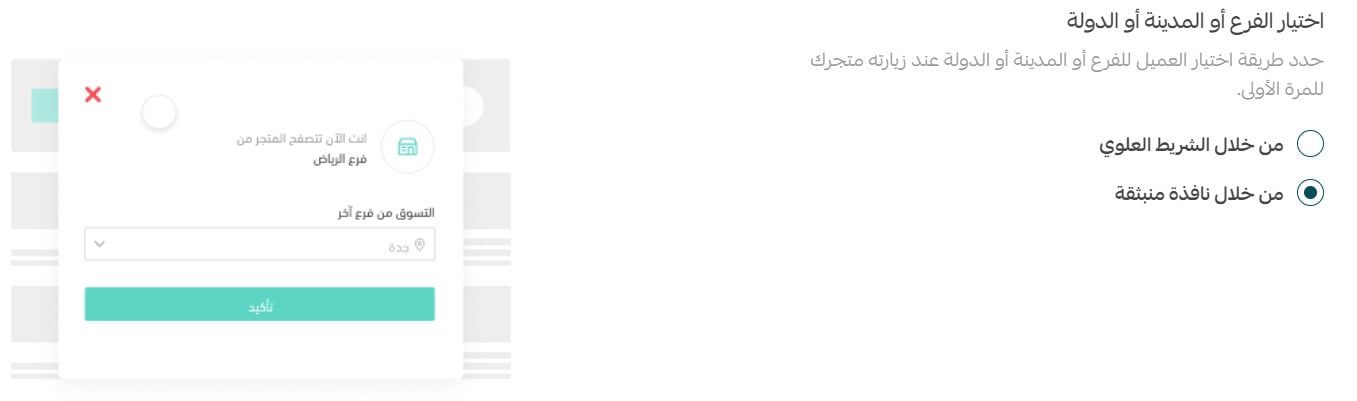
1. Top bar
A list of branches or cities appears — depending on the display option you picked above — and the customer chooses from it.

2. Pop-up window
When a customer visits the store, a pop-up asks them to choose the branch they want to shop from.
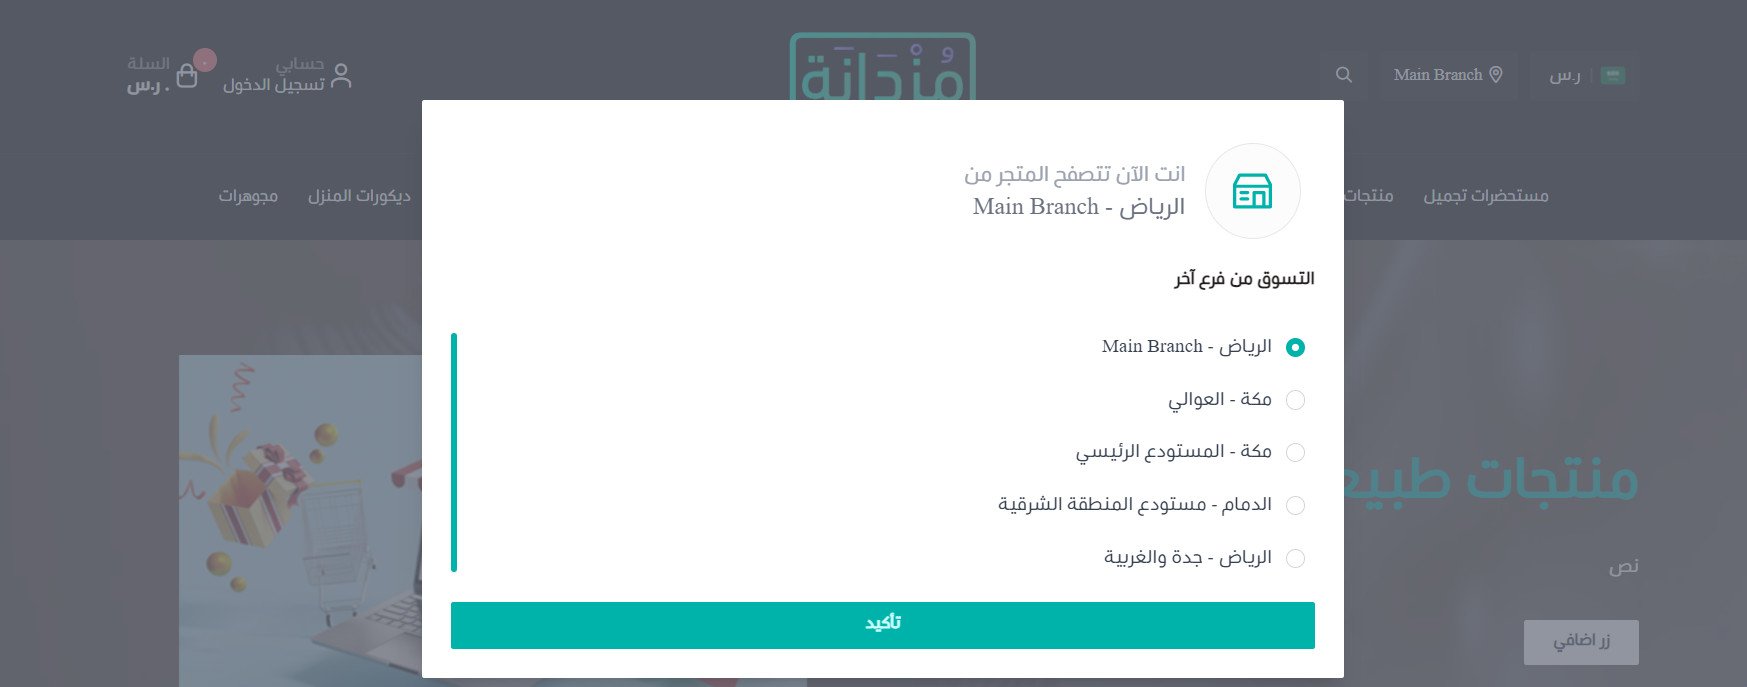
💡 Example: here is how the store selection window looks with each display option.
All products:
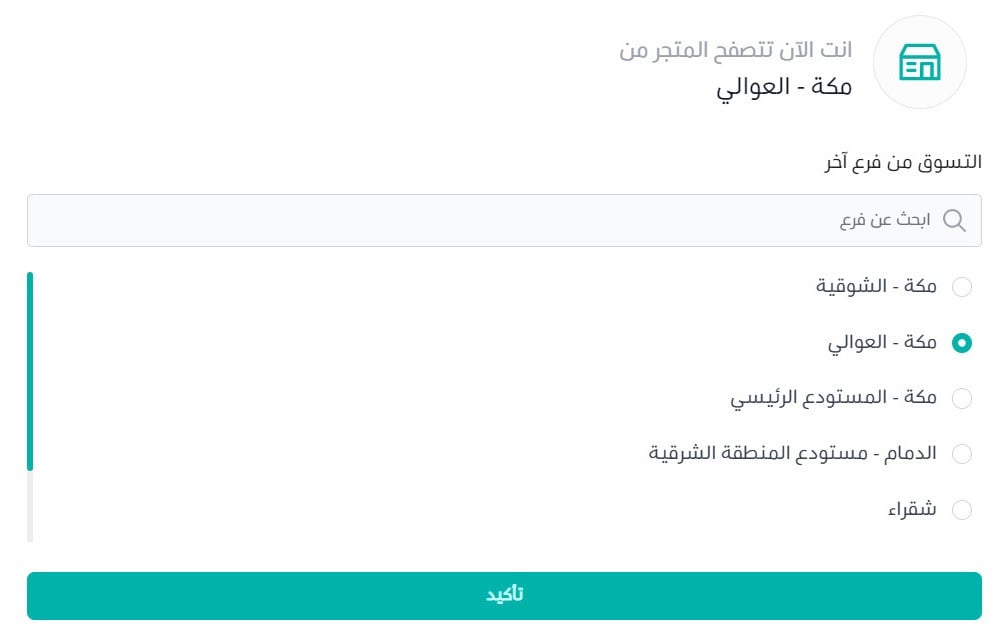
By city:
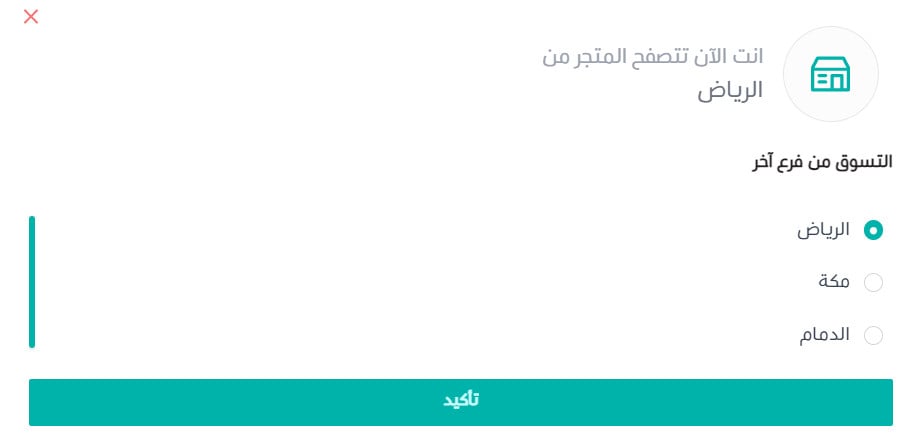
By branch:
3. Set your stock deduction strategy
This decides which branch a purchased item is deducted from. You have three options:
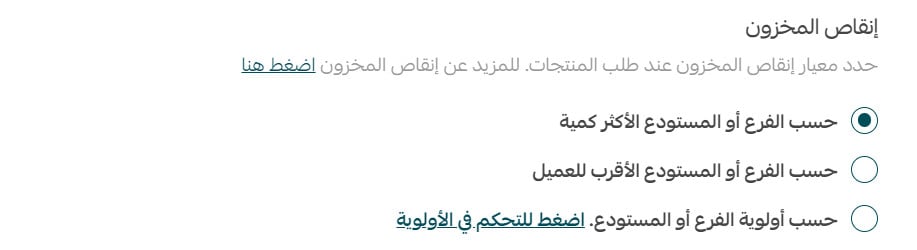
- By the branch or warehouse with the most stock. The quantity comes out of whichever branch or warehouse holds the largest amount of that product.
- By the branch or warehouse closest to the customer. The quantity comes out of the branch or warehouse nearest the customer's location.
- By branch or warehouse priority. The quantity comes out according to the order you have ranked your branches or warehouses in.
4. Show product availability on the product page
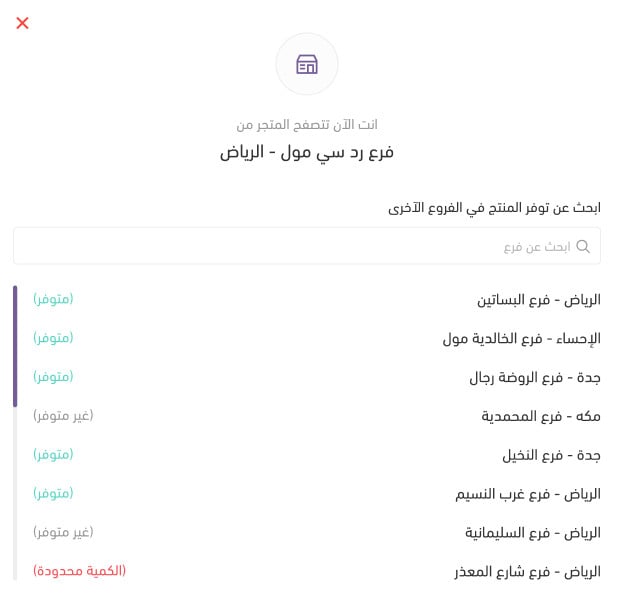
You can turn on product availability on the product page, which lists your branches with the product's status in each one: available, unavailable, or limited quantity. It helps the customer pick the right branch when they pay and collect the product there.

With (Show product availability) on, customers see a button on the product details page for checking availability across branches.
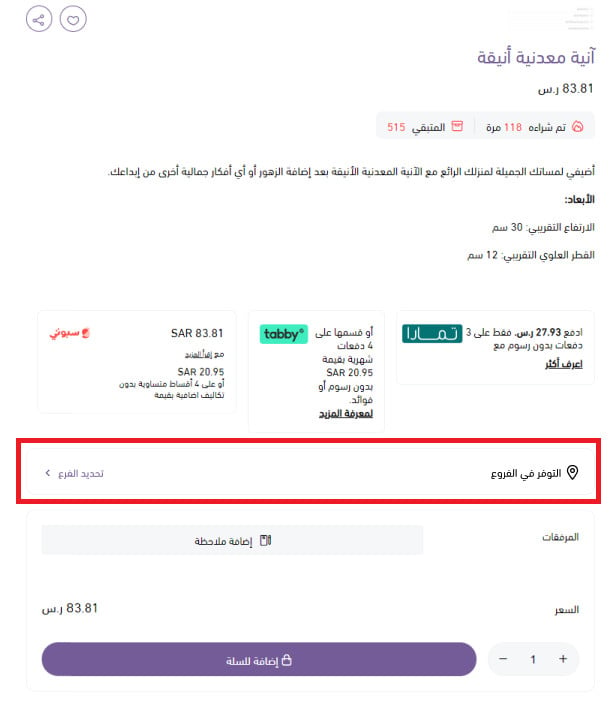
Clicking it opens a window listing your branches and whether the product is available, unavailable, or down to a limited quantity.
📝 Important notes
Limited quantity means the product's stock at that branch is below 50.
5. Customize shipping settings
Shipping settings break into four parts:
1. Shipping one order's products from several branches
2. Calculating shipping cost
3. Automatic assignment to shipping companies
4. Shipping unlimited-quantity products from the default branch
1. Shipping one order's products from several branches
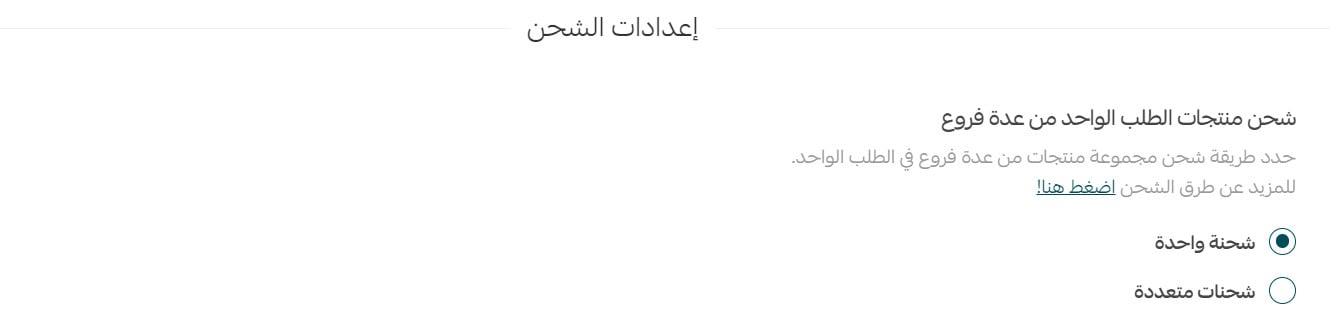
When a customer orders products that sit in different branches, you can ship them one of two ways:
A single shipment
The order's products are grouped into one shipment, with a single waybill issued from the chosen branch to the customer's location. This happens in two cases:
- All of the order's products come from one branch.
- The order's products come from several branches, and you handle the case yourself by exporting them as one shipment from the branch you choose.
Multiple shipments
Several waybills are issued for the order's products, one per branch, all going to the customer's location. In this case, shipping options are hidden from the customer at checkout.
This option is only available when product browsing is set to by city or by country.
2. Choose how shipping cost is calculated
When an order is split across several shipments, you can calculate the shipping cost one of two ways:
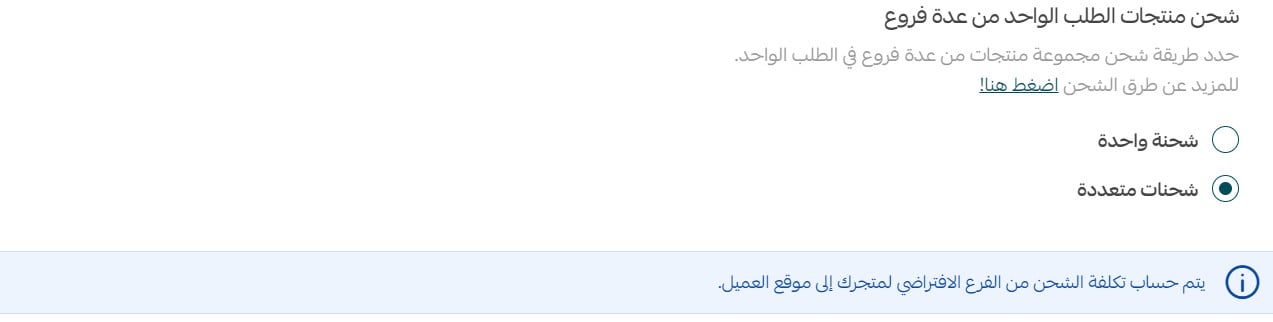
Option one: a flat fee
Set one fixed shipping amount for any multi-shipment order.
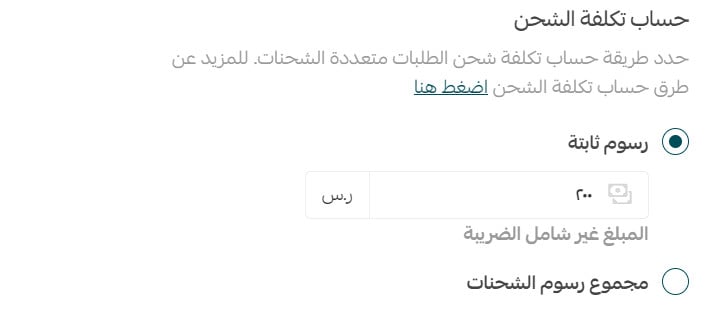
Option two: the sum of the shipment fees
The cost of each shipment in the order is added together.
The customer sees the shipping fee at checkout, without a list of shipping companies.
3. Customize automatic assignment to shipping companies
Orders can be assigned to shipping companies automatically, based on:
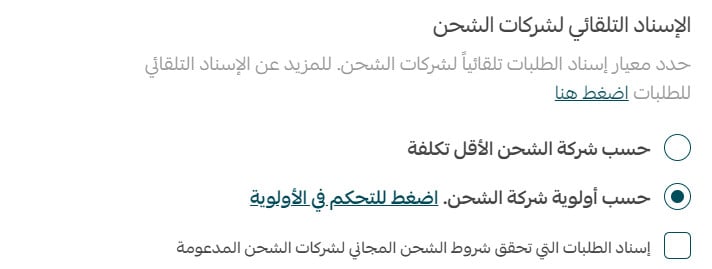
Option one: the lowest-cost shipping company
The order goes to the cheapest shipping company that covers the customer's area.
Option two: shipping company priority
The order goes to a shipping company following the priority order you set in advance. Salla checks whether the first company delivers to the customer's area; if it doesn't, it checks the next one, and so on.
Turning on the free shipping companies option:
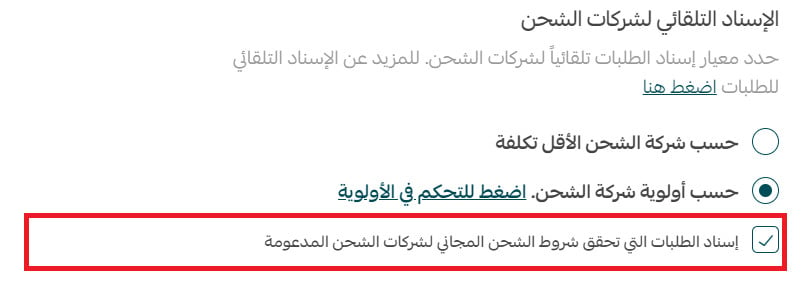
With this option on, when a customer's order meets the free shipping conditions you set in your shipping and delivery settings:
- The shipping amount is free.
- The free shipping company is used instead of the company set for automatic assignment.
For more details, see setting up free shipping.
4. Ship unlimited-quantity products from the default branch

- If the product has unlimited quantity and this option is on, the quantity is deducted from the default branch.
- If the product has unlimited quantity and this option is off, the quantity is deducted according to the stock deduction strategy you chose.
For more details, see frequently asked questions about retail selling.
For more details, see managing multiple shipments for an order.
For more details, see the customer experience in Salla retail stores.
❓ Frequently asked questions
Which plan includes this feature?
It is available to stores on the Special plan only.
How do I remove the Retail stores app from my store?
You can delete the app while it is not activated, but you cannot delete it once Retail stores has been activated in your store.
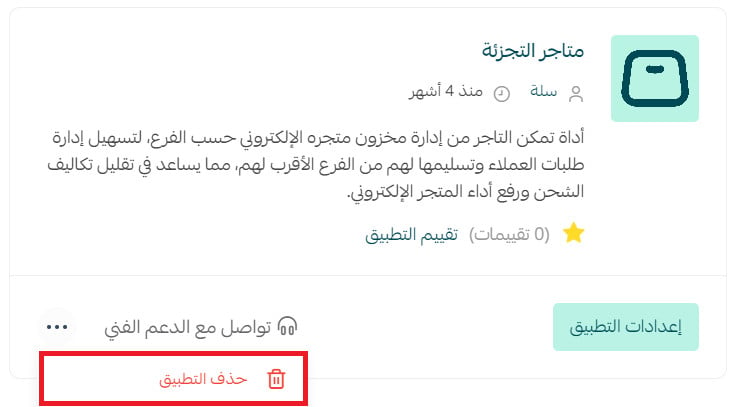
1. From the side menu of your dashboard, click (My installed apps).

2. From the all apps page, find the Retail stores app, click the (...) icon, then click (Delete app), as shown in the image.
When is a product marked as limited quantity?
When the product's stock at that branch is below 50.
When can I split one order into multiple shipments?
Only when product browsing is set to by city or by country. With the branch or all-products options, the order ships as one shipment.
Set up retail selling once and every order routes itself to the right branch — shorter deliveries for your customers, lower shipping bills for you.