Does your store ship from more than one location — or plan to soon?
Setting up your branches and warehouses correctly keeps orders, inventory, and shipping organized as your store grows. Each branch carries its own location, contact details, preparation time, and working hours, and you decide which one orders ship from. In this guide, you'll learn how to add a new branch, complete its details, and manage branches and warehouses through the most common questions merchants ask.
To add a branch on Salla, open (Store settings) from the side menu of your dashboard, click (Branches and warehouses), then (+ Add new branch). Pin the branch on the map, enter its name, country, city, contact numbers, preparation time, and cash-on-delivery support, set its working days and hours, then click (Save).
📌 Article overview
- How to add a store branch
- Enter the branch details
- Set the branch working days and hours
- Frequently asked questions
👣 How to add a store branch
1. From the side menu of your dashboard, click (Store settings).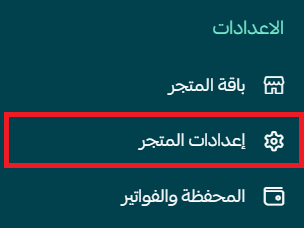
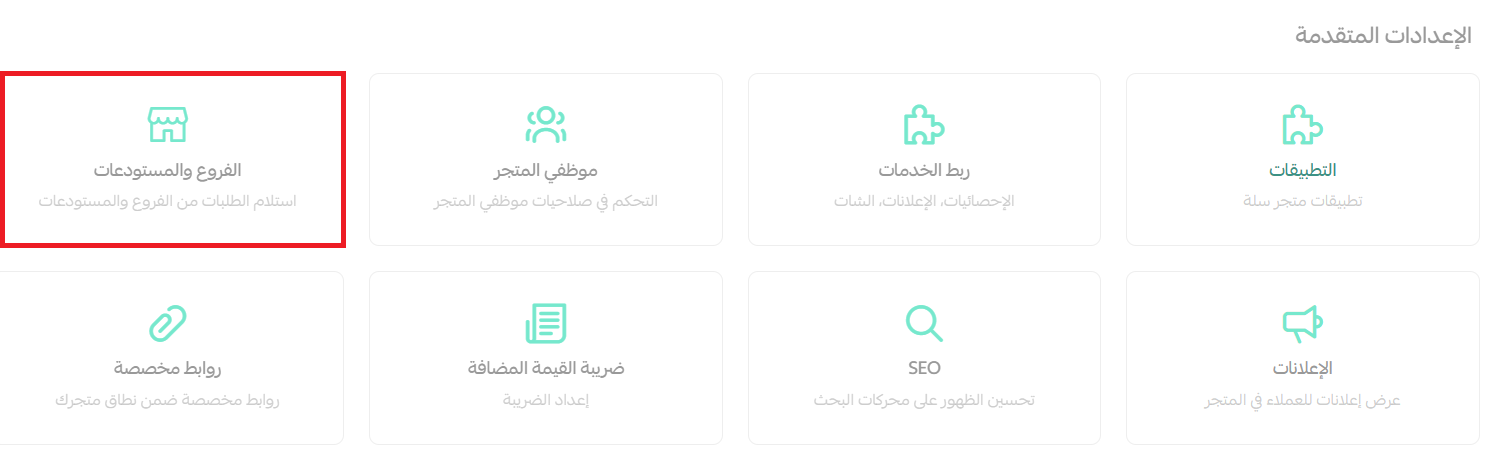
2. Click (Branches and warehouses).
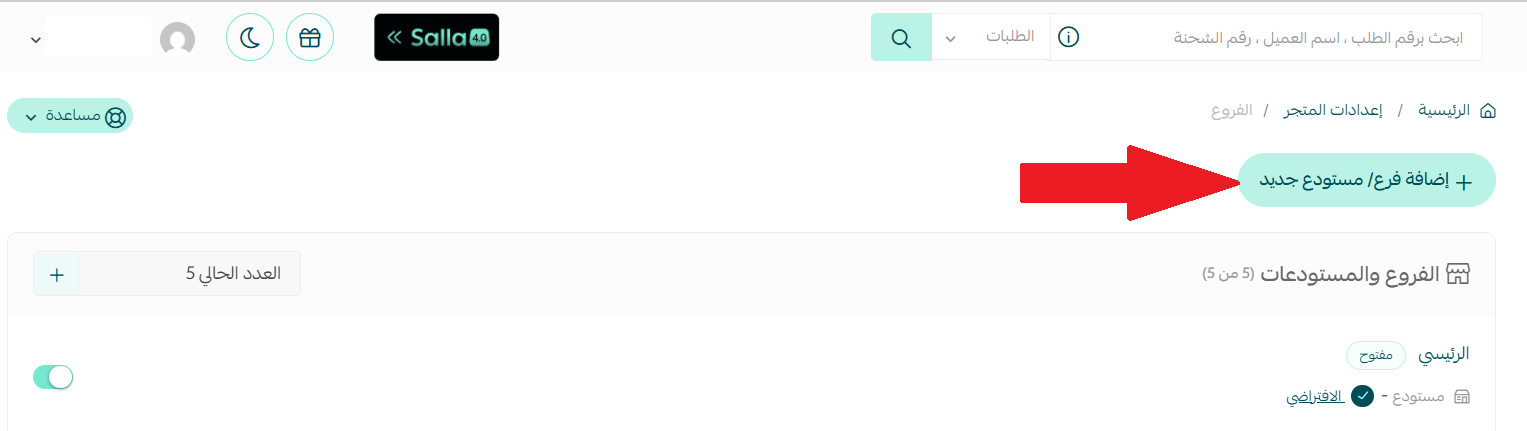
3. Click (+ Add new branch).
4. Enter the branch details, as follows:
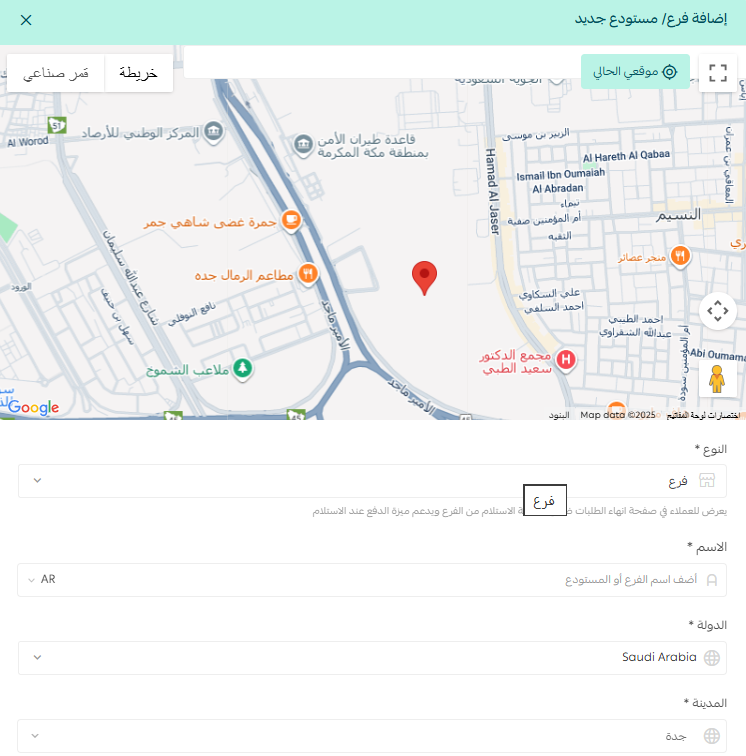
1. Pin the branch location on the map.
2. Enter the branch name.
3. Choose the country the branch is located in.
4. Choose the city the branch is located in.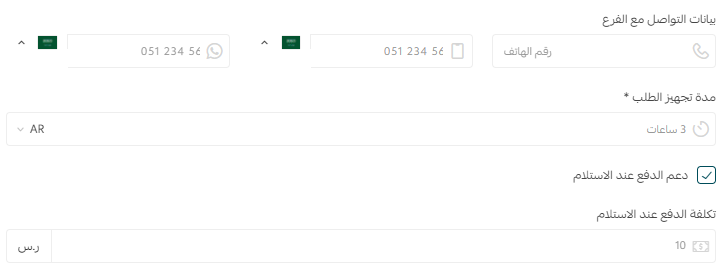
5. Enter the branch contact details (phone number, mobile number, WhatsApp number).
6. Enter how long the branch needs to prepare an order after its status changes to "in progress".
7. Choose whether the branch supports cash on delivery.
8. Enter the cash-on-delivery fee, if the branch supports it.
The last section when adding a new branch is setting its working days, as shown here:
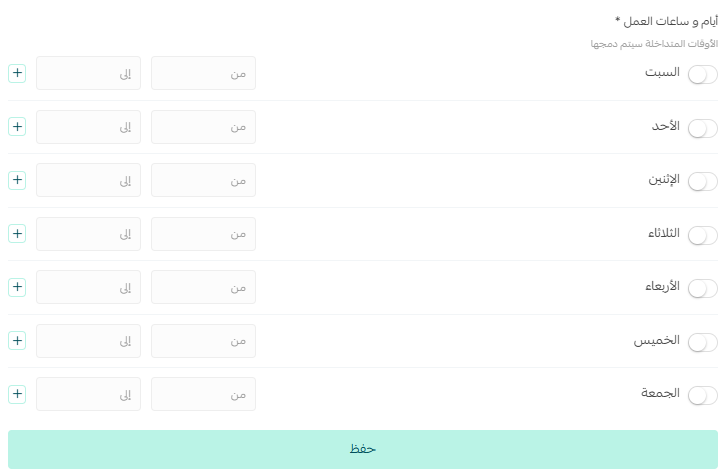
Select the branch's working days, set the working hours, then click (Save).
❓ Frequently asked questions
How many branches and warehouses come with each plan?
When you activate the Salla Plus or Pro plan, you get 5 branches and warehouses.
Can I increase the number of branches and warehouses in my store?
Yes, by purchasing additional branches for your store from the Salla shop, in one of two ways:
Either from the side menu of your dashboard, click (Store plan).
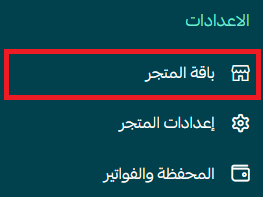
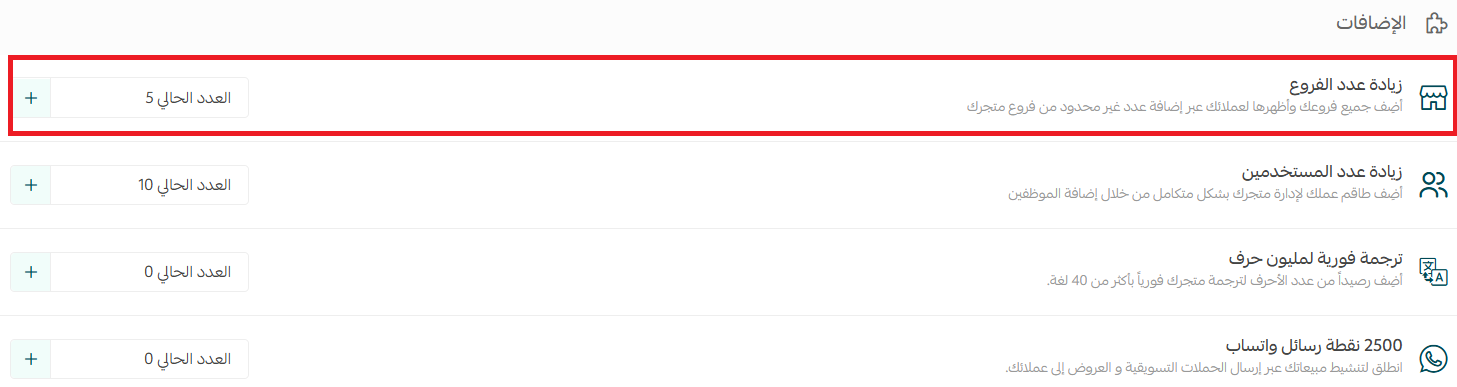
From the Salla shop page, in the add-ons section, under increasing the number of branches, click (+).
Set how many branches you want to add to your store, then choose the payment method that suits you. If you have a discount coupon for the Salla shop, enter the coupon details, then click (Confirm payment).
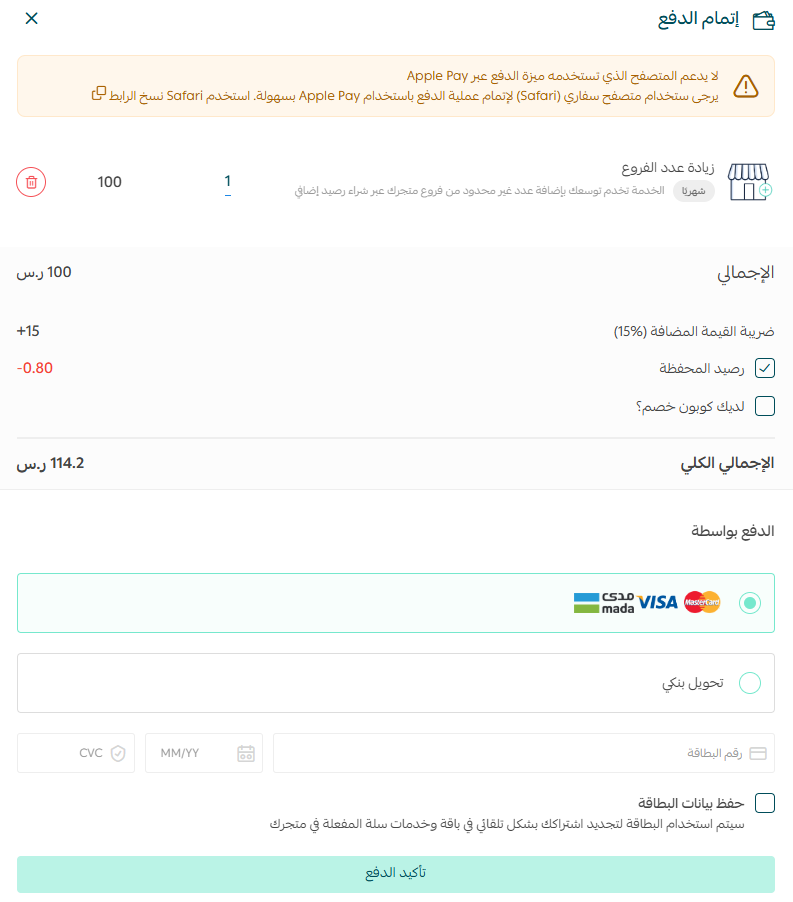
Or from the store settings page, open the (Branches and warehouses) page, then next to the current count, click (+).

Then set the number of new branches and complete the payment.
📝 Important notes
- The purchase invoice is prorated to the time remaining in your plan subscription.
- The add-on renews automatically when a card is saved in your wallet or a balance is available.
Can I hide one of the branches from the store?
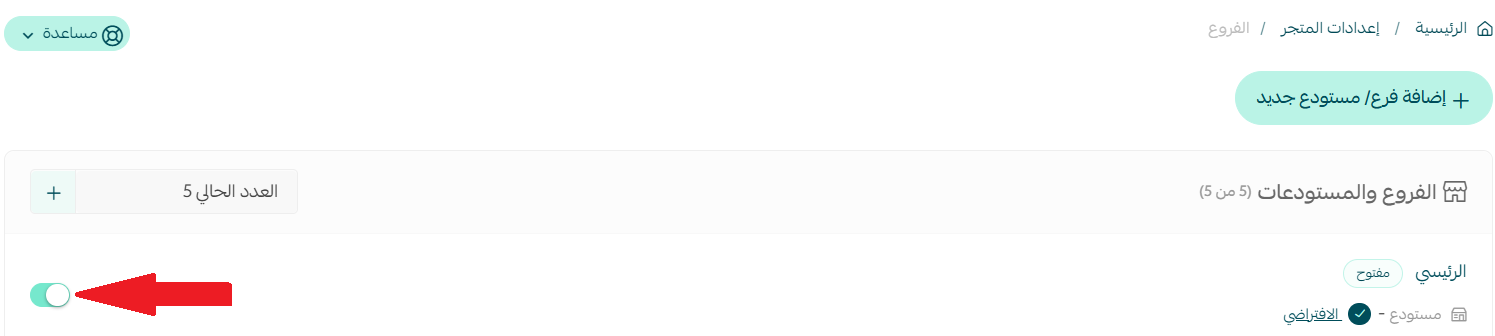
Yes. From the store settings page, click (Branches), then toggle the option to show or hide the branch in the store.
Can I set the branch working hours as shifts (morning, evening)?
Yes. Click (+) to add a shift, then enter the shift's start and end times.
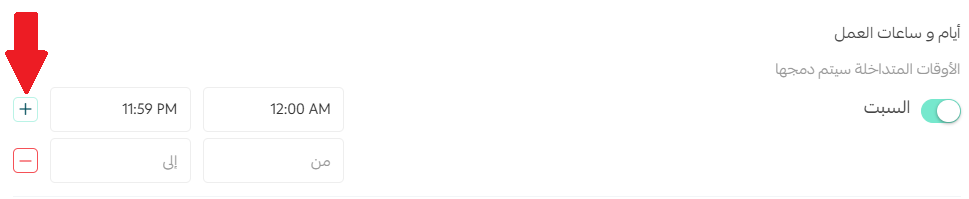
You can also delete a shift by clicking (-) next to the one you want to remove.
Can I set one of the branches or warehouses as the store's default?
Yes — click (Set as default).

The warehouse or branch is then set as the store's default, as shown here:

How do I choose which branch or warehouse an order ships from?
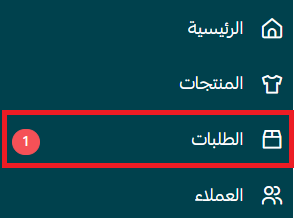
1. From the side menu of your dashboard, click (Orders).
2. Open the order you want to set the shipping branch or warehouse for, then in the shipping section, click (Edit).
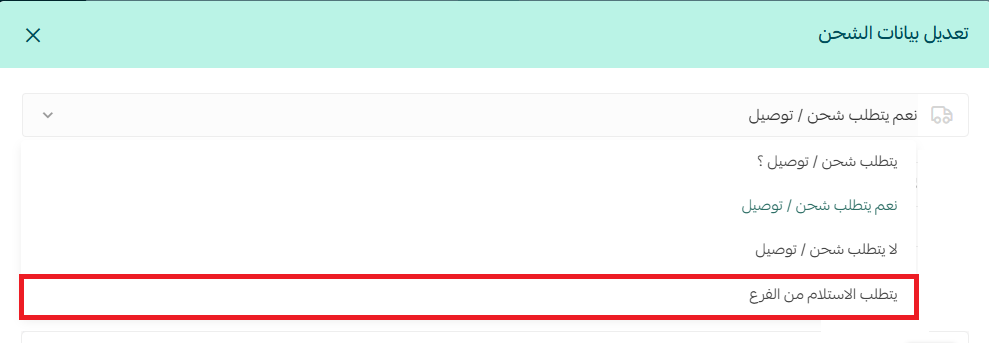
3. Choose the branch to ship from, then click (Yes).
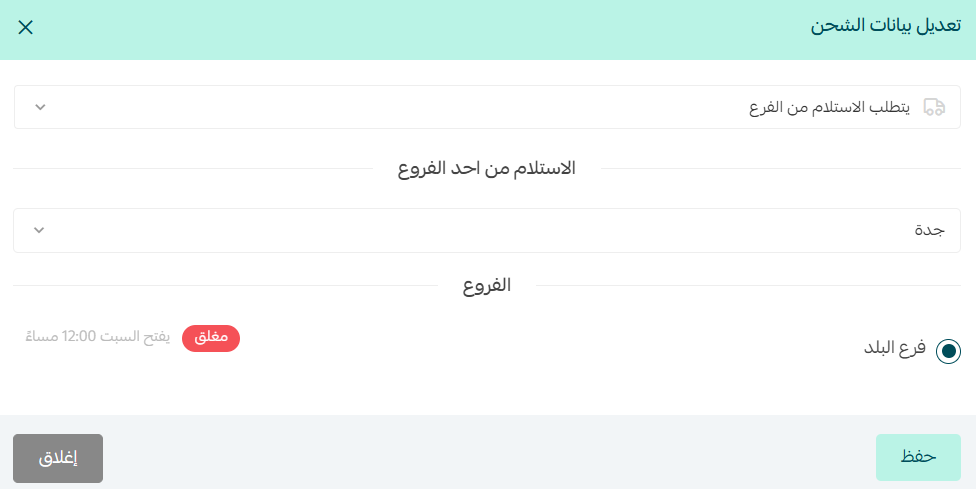
For more details, see order management options.
Keep every branch's details, hours, and shipping role up to date, and your store will route each order to the right place without you thinking twice.