Do your customers know how many calories are in the meal they're about to order?
Adding a food product to your store takes a little more care than a regular item. Shoppers buying food and drinks want the details — calories, sizes, preparation notes — and they often want to tell you something back, like the message on a cake or the time they'd like their order ready. Salla's food product type covers both sides. In this guide, you'll learn how to add a food product, enter its nutritional data, and build an order form that collects exactly what you need from each customer.
To add a food product on Salla, click (Products) in your dashboard's side menu, click (New product), choose the food product type, then enter the basic details and click (Save). From the product card, open (Product data) to add calories, and use the (Order form) tab to add the fields customers fill in when they order.
📌 Article overview
- How to add a food product
- How to add calories to a food product
- How to build the order form
- Controlling field order and conditional fields
- Frequently asked questions
🚀 How to add a food product
1. From the side menu of your dashboard, click (Products).
2. From the products page, click (New product).

3. Set the product type to food product.
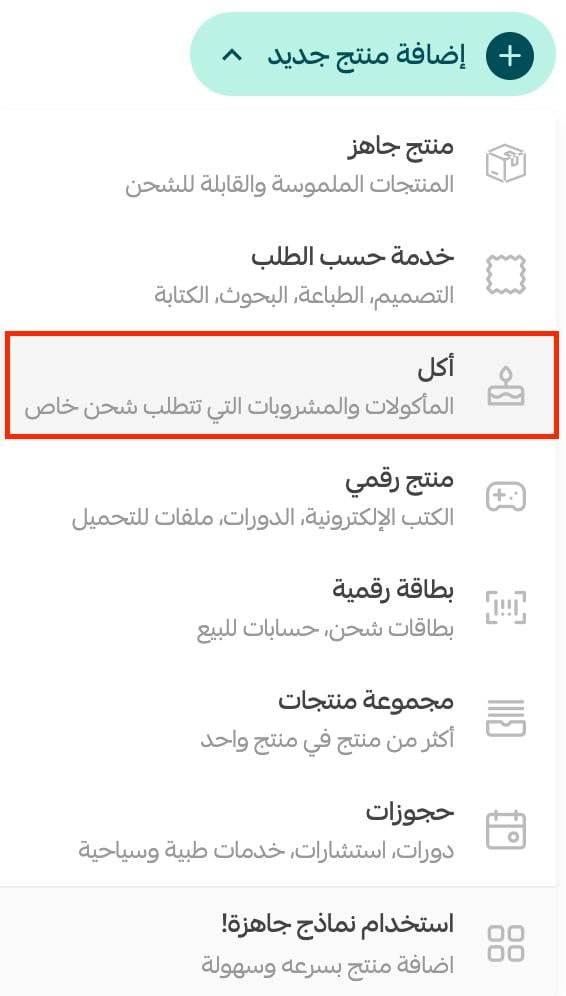
4. Enter the product's basic details, then click (Save).
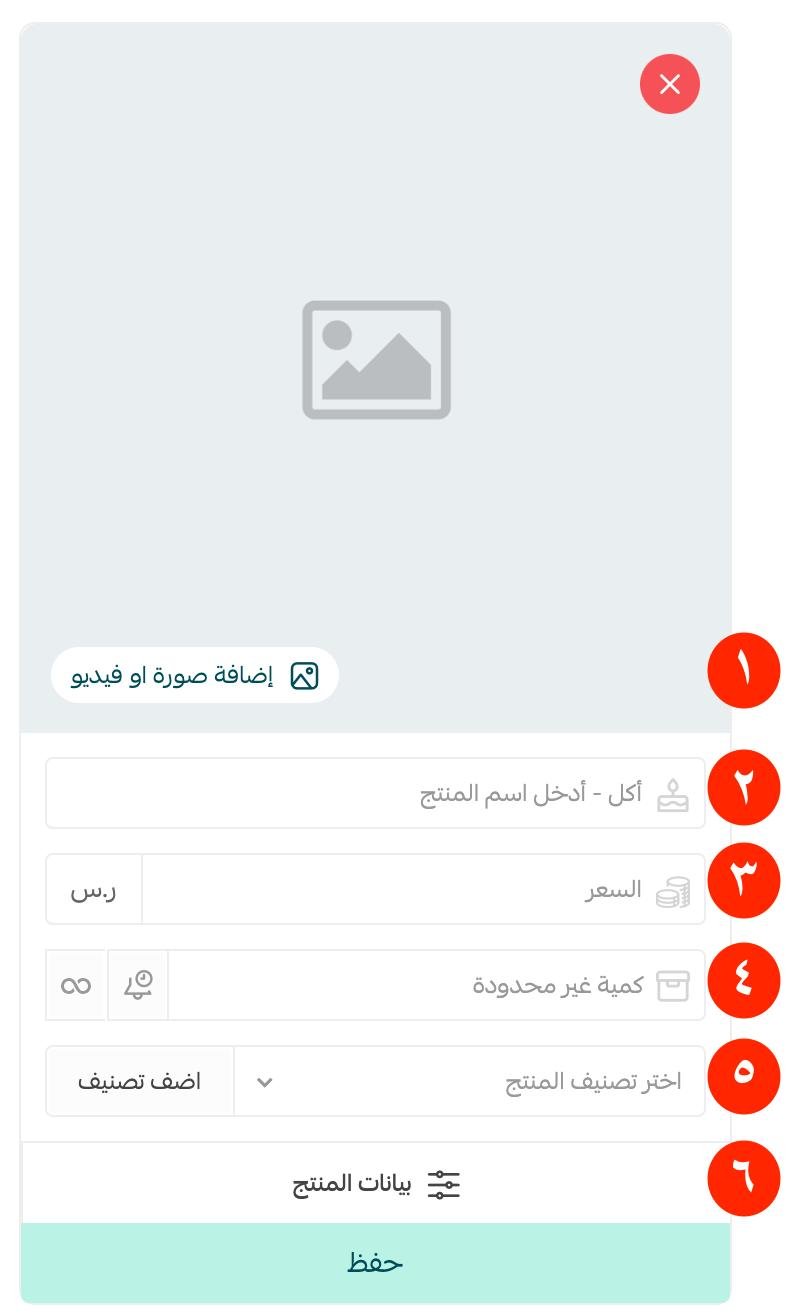
1. One or more product images. For more details, see uploading product images and videos.
2. Product name — the name your customer sees.
3. Product price — the selling price.
4. Product quantity — how much of the product you have available.
5. Product category — helps you customize how products are displayed, view product reports, and more. For more details, see managing product categories.
6. Product details — to customize quantity, price, barcode, and more.
After saving, the product card looks like this:
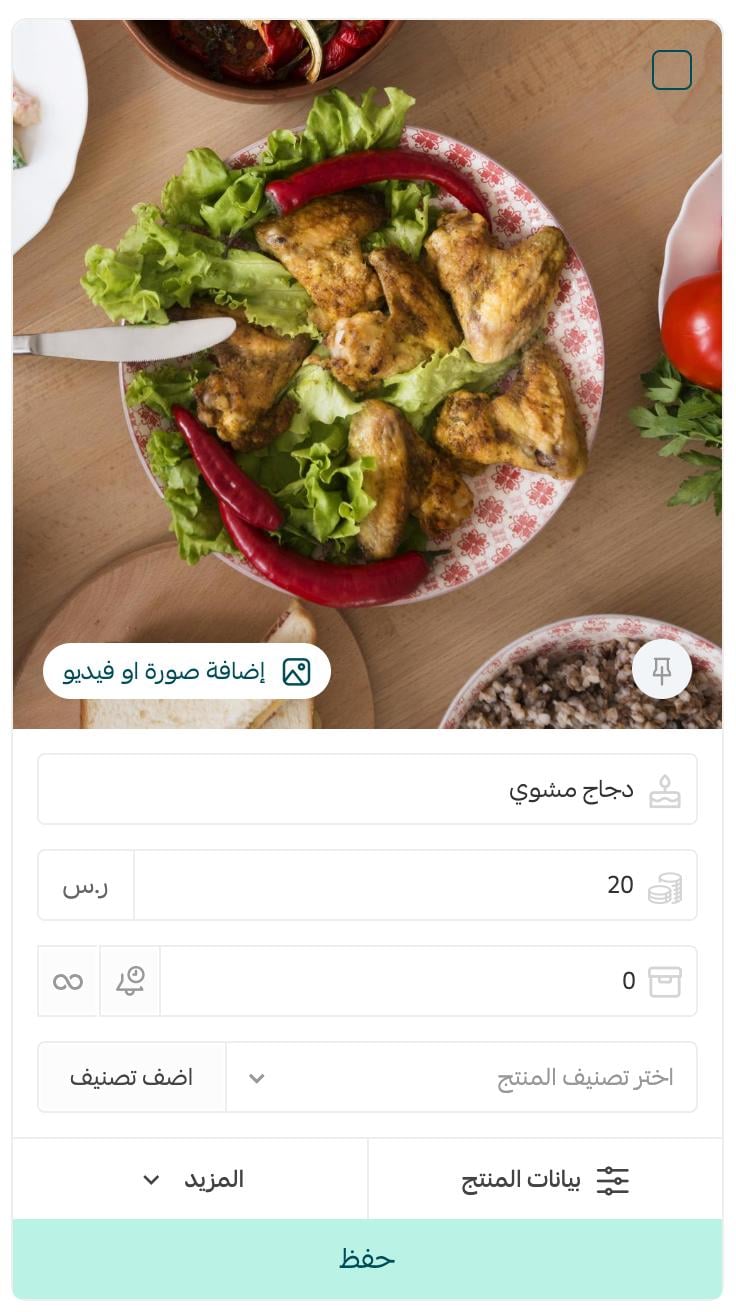
For more details, see the product card and adding a new product.
And for more on adding product options and controlling how they appear to customers.
💡 Want your food photos to sell the dish? Merchant services offers a professional product photography service.
🍽️ How to add calories to a food product
1. From the product card, click (Product data).
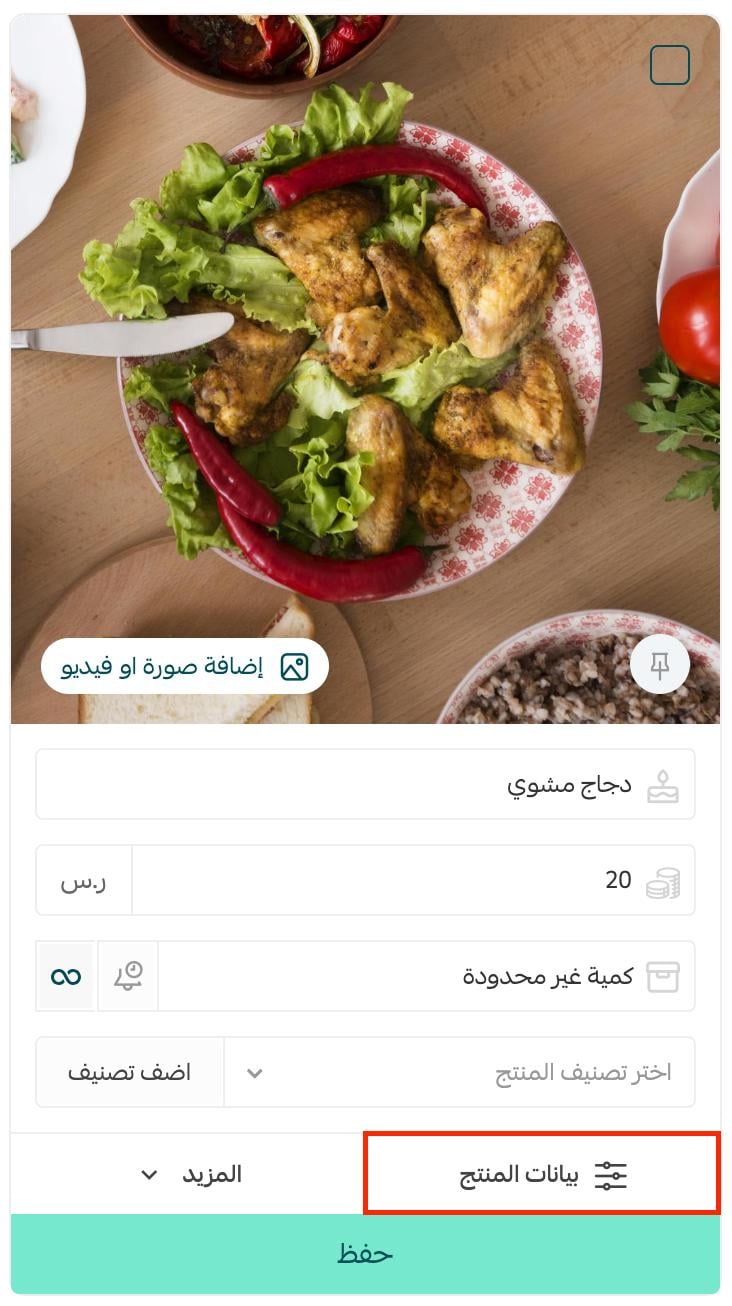
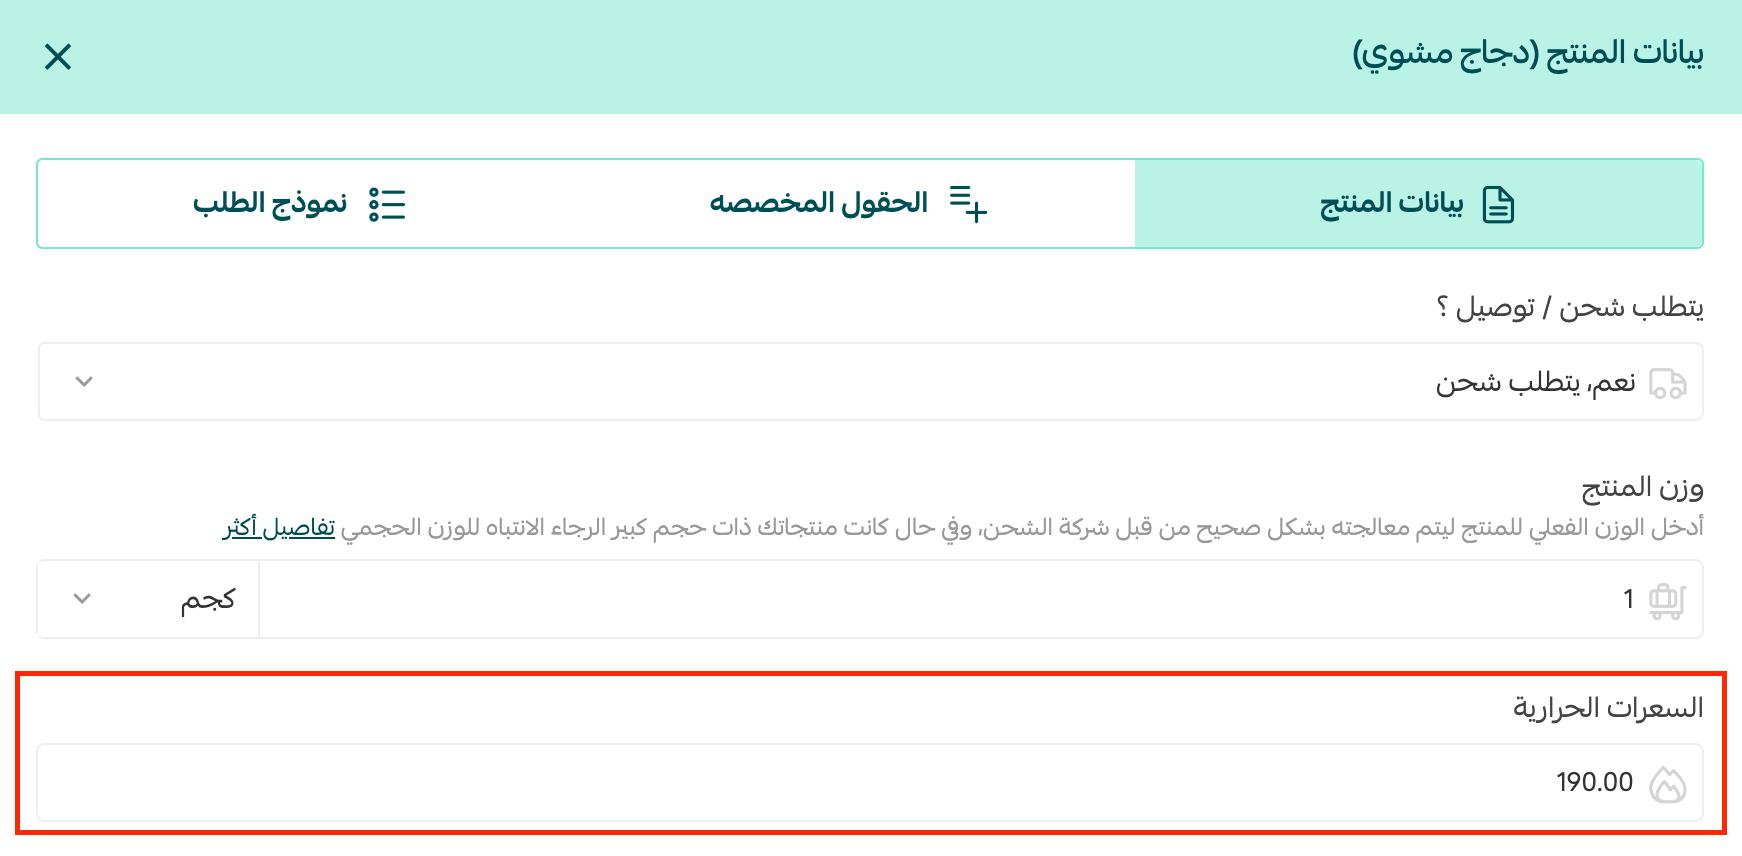
2. In (Product data), enter the product's calories, then click (Save).
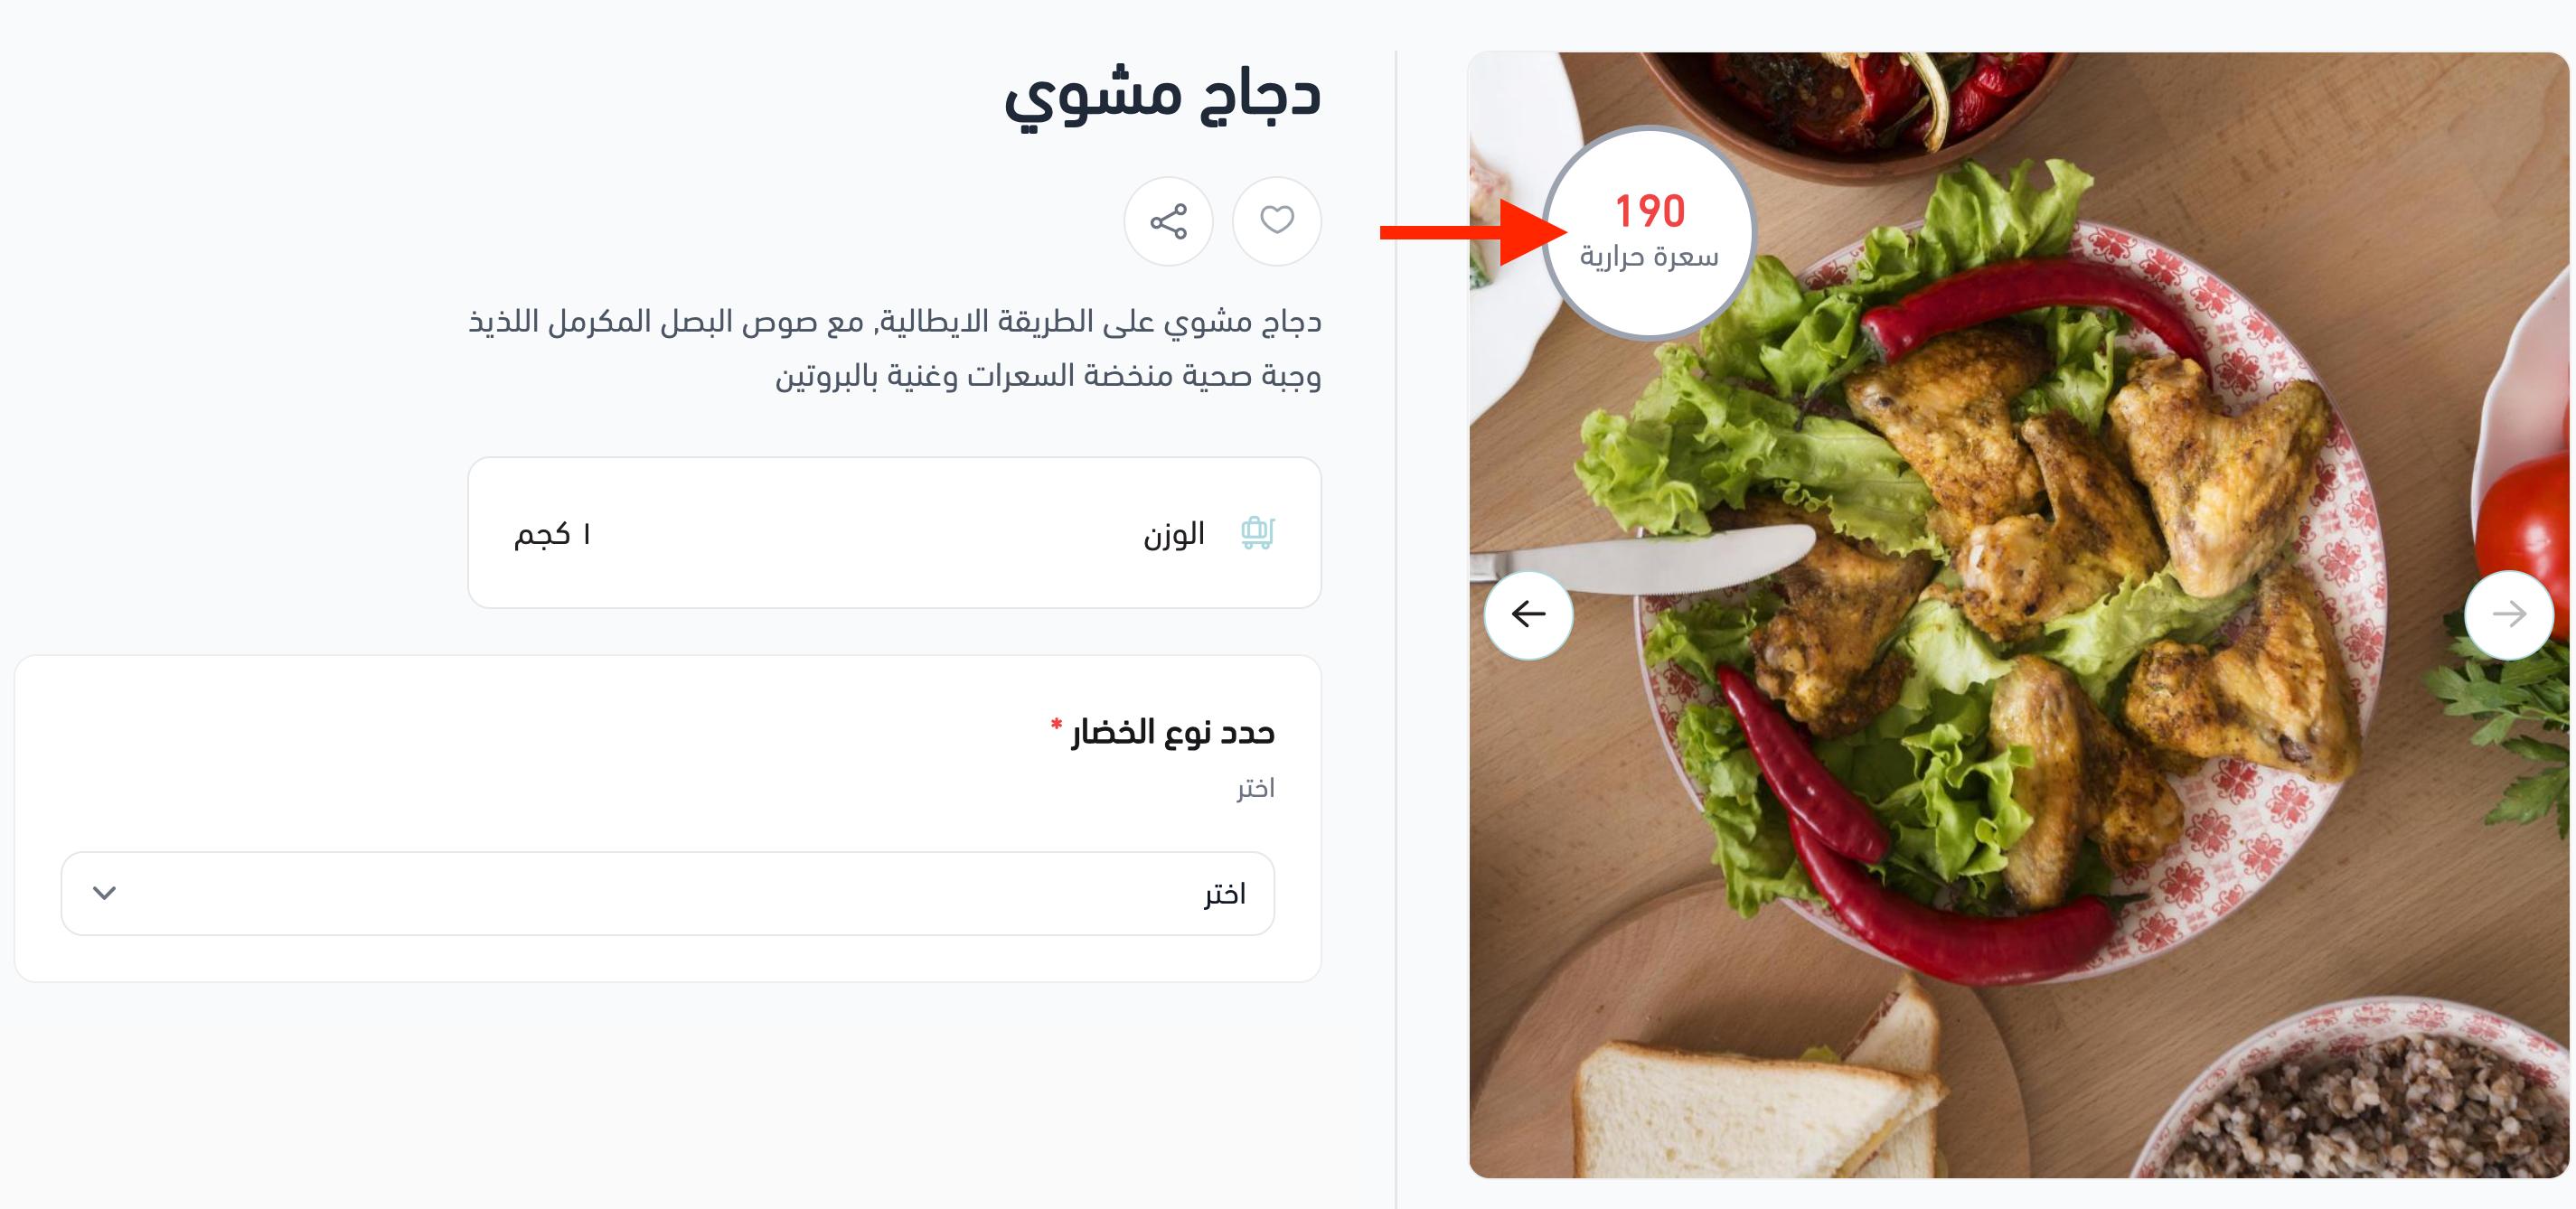
This is how it appears in your store:
📋 How to build the order form
An order form makes ordering easier for your customer — it collects the extra details you need with the order itself.
1. From the product card, click (Product data).
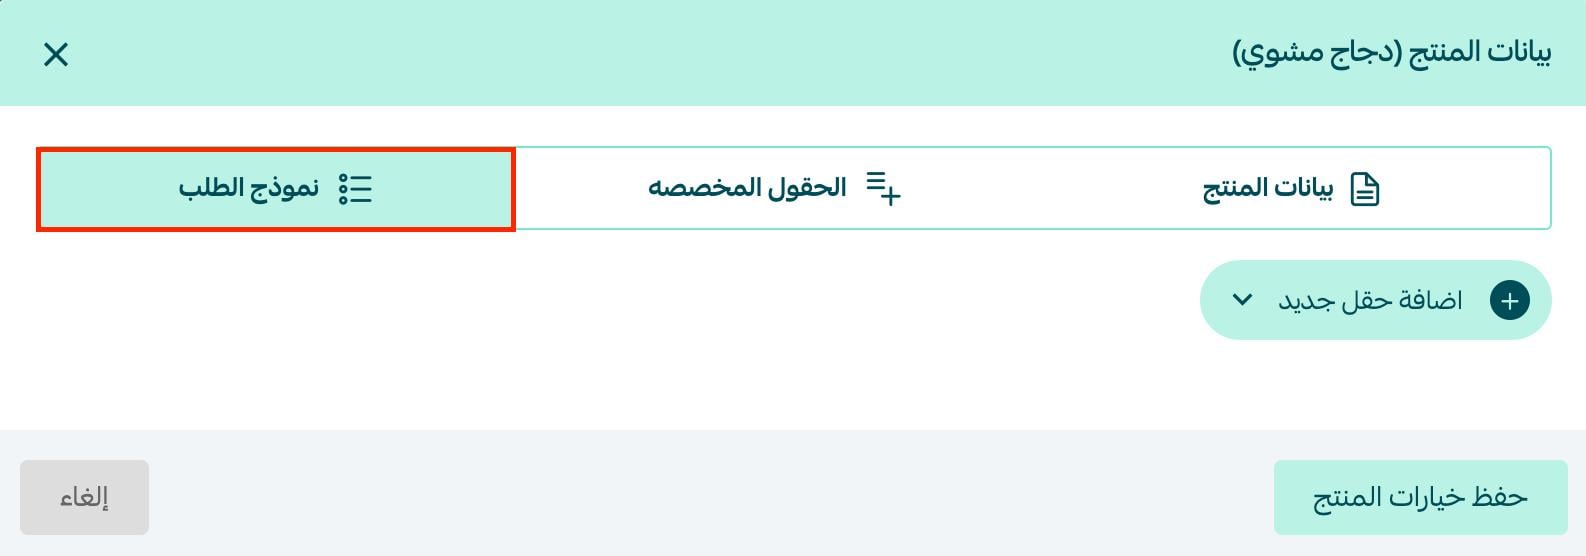
2. On the product data page, open the (Order form) tab and click (Add new field).
3. Choose the type of field you want to add to the order form.
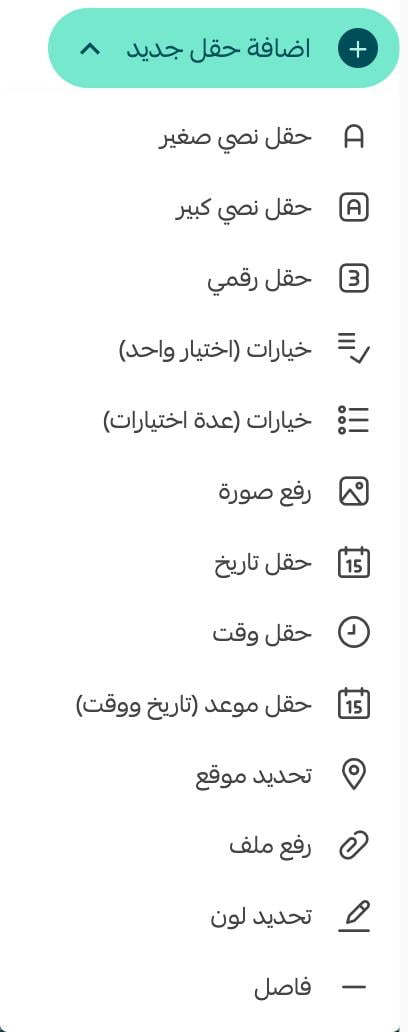
The types, in order, are:
- Short text field: adds a short text field to the order form.
- Long text field: adds a long text field (a paragraph), so the customer can write a fuller explanation.
- Number field: adds a field that requires a number.
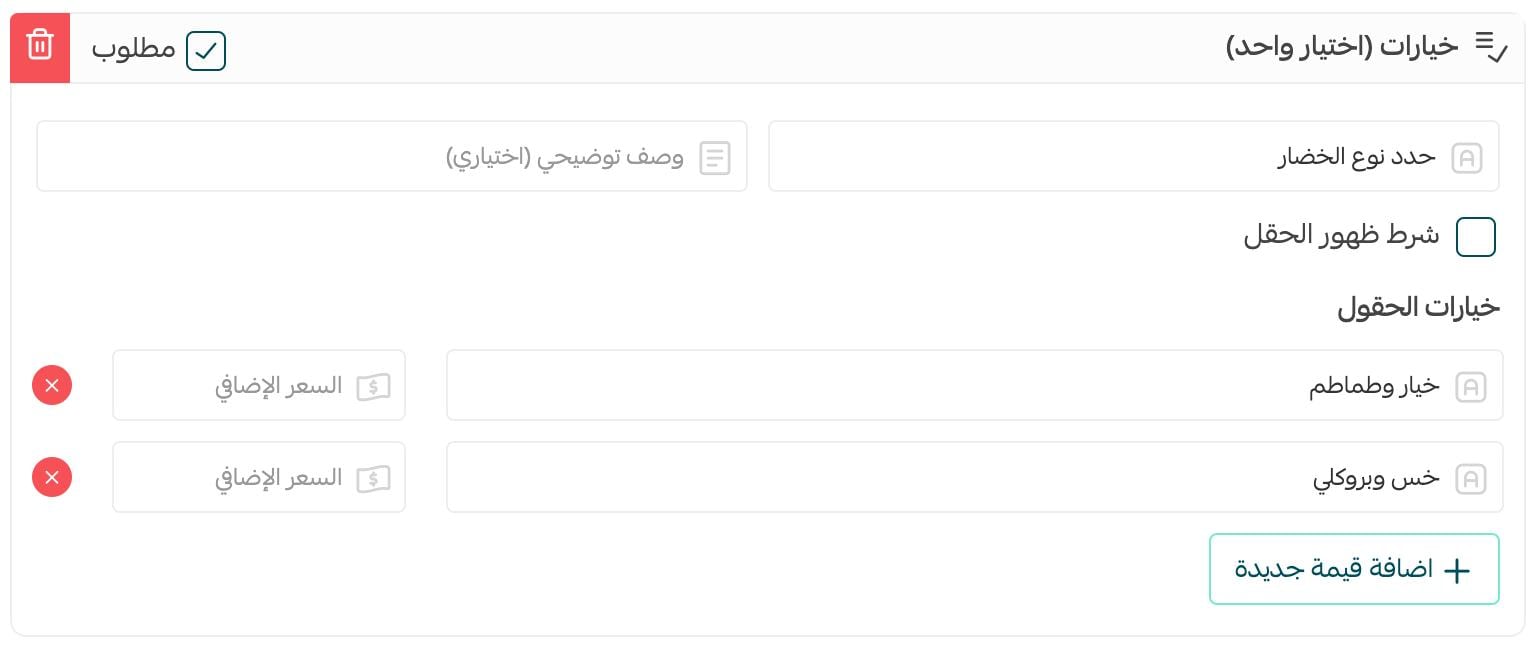
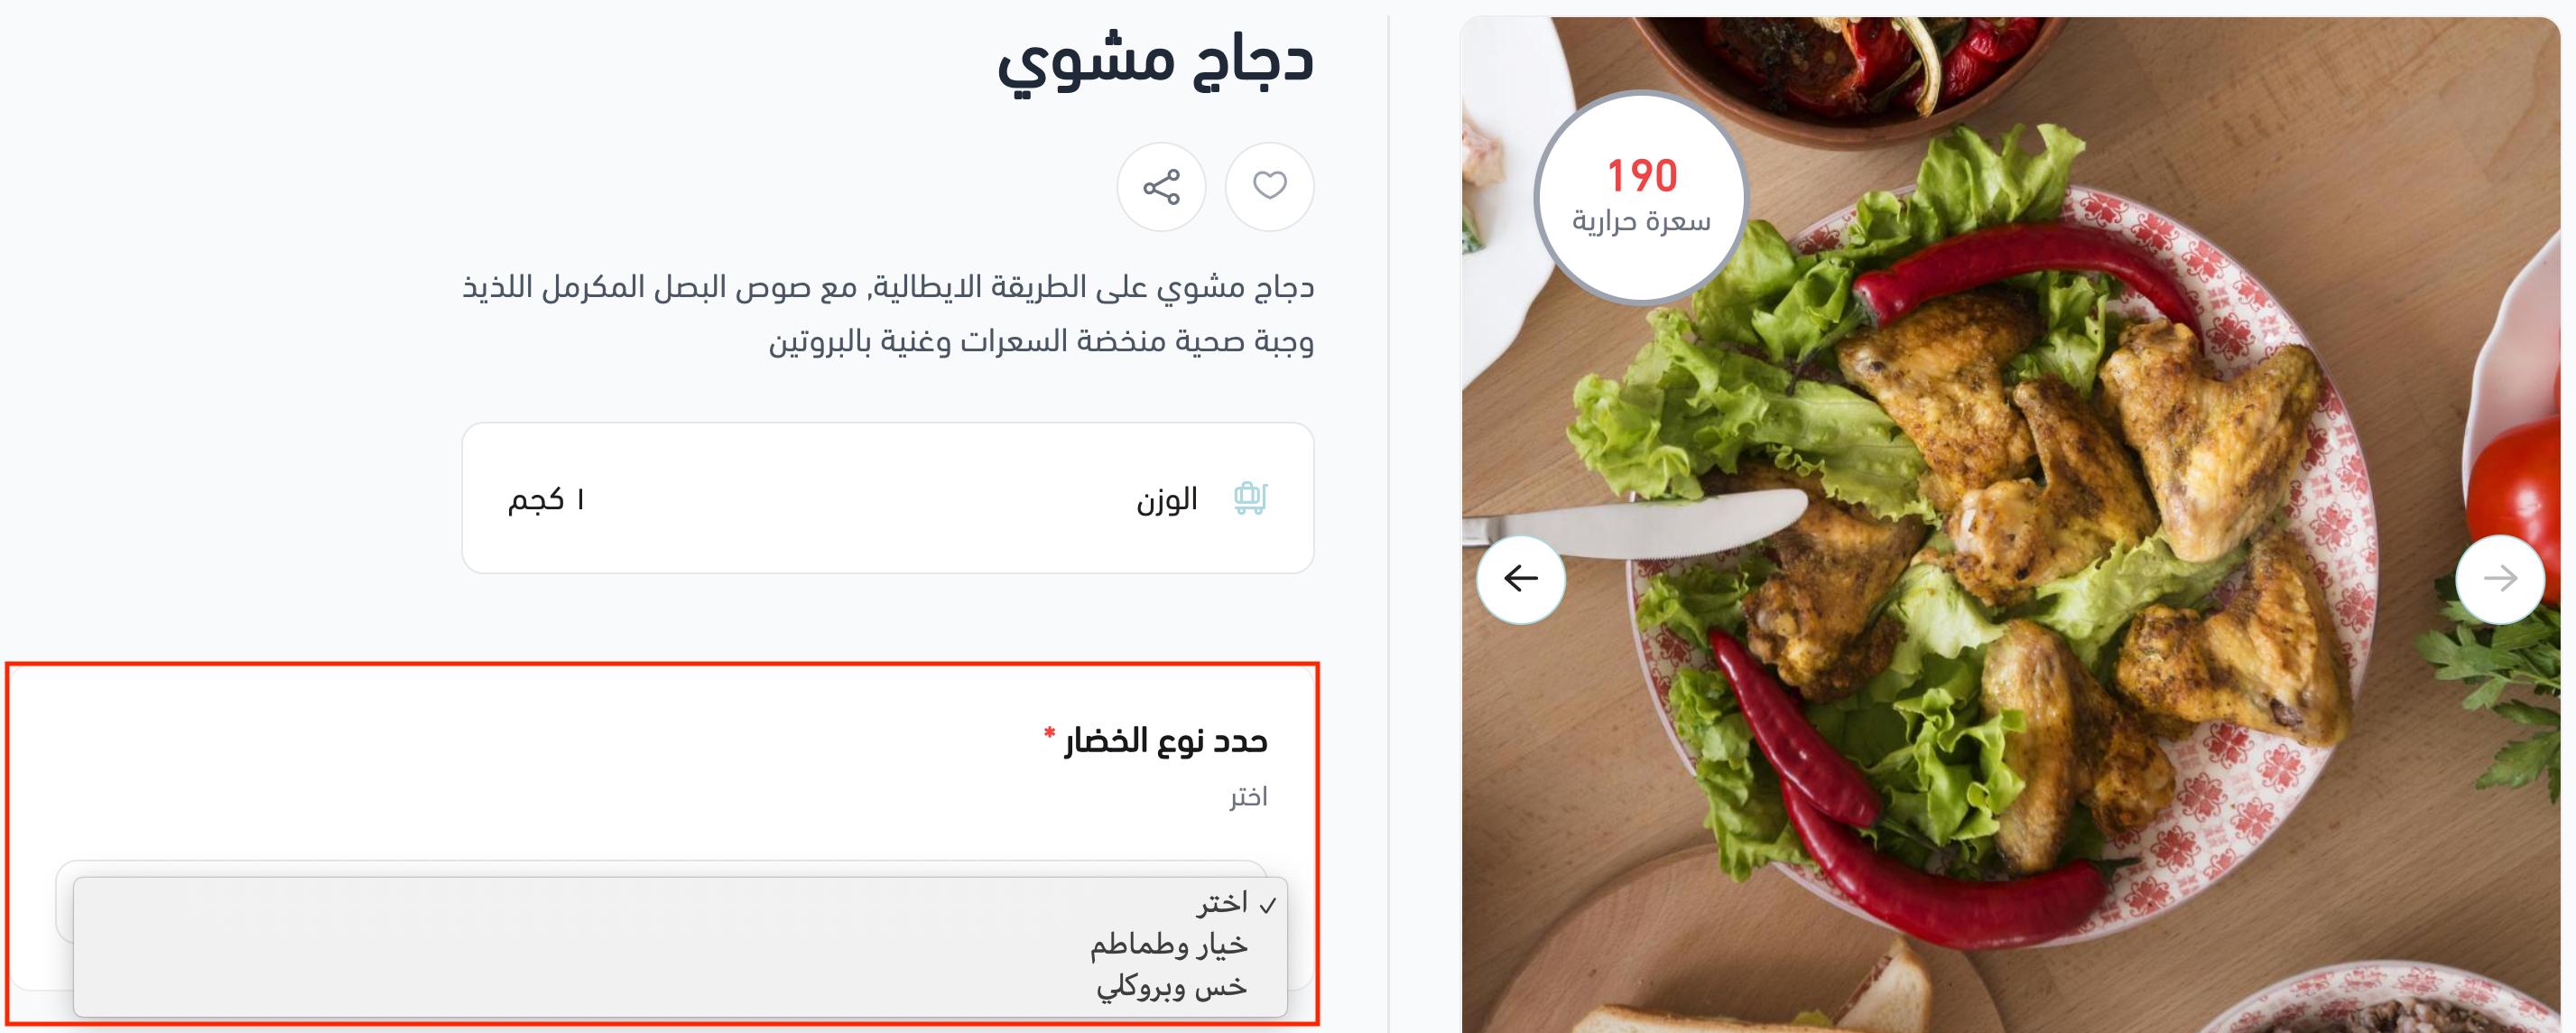
- Options (single choice): adds a list where only one item can be selected — for example, asking the customer which file type they want.
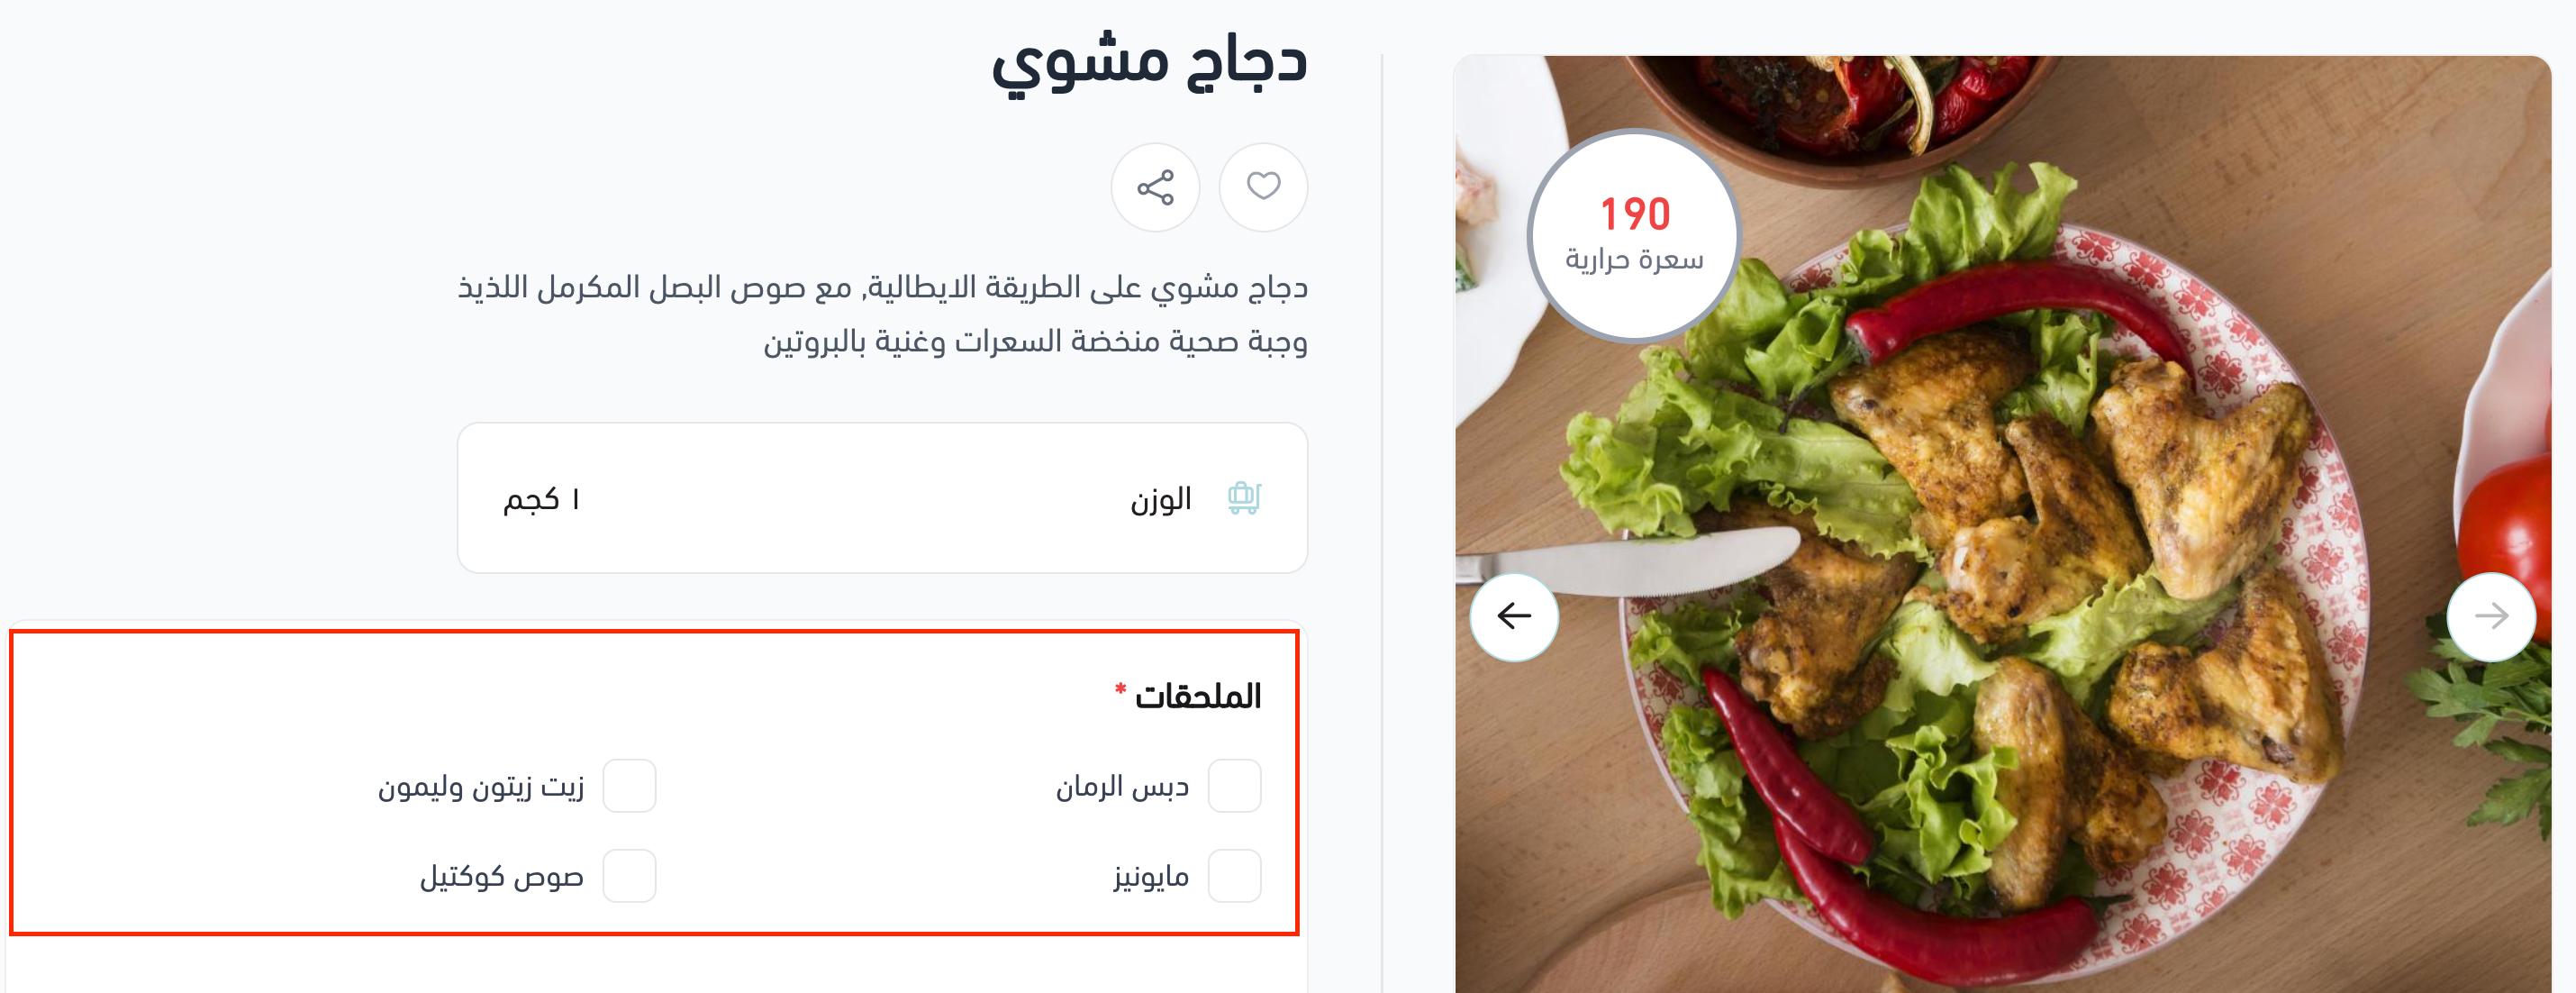
- Options (multiple choice): adds a multi-select box — for example, asking the customer about color preferences.
- Image upload: for when you want the customer to upload an image to be placed on the product, for instance.
- Date field: adds a date field to the order form — the customer can set the final date for receiving the work.
- Time field: adds a time field to the order form — the customer can set the time the work will be reviewed with their manager.
- Appointment field: includes both the date and the time of an appointment, such as delivery of a service or product.
- Separator: adds a divider between the different fields in the order form.
4. Fill in the details the field type requires, then click (Save product options).
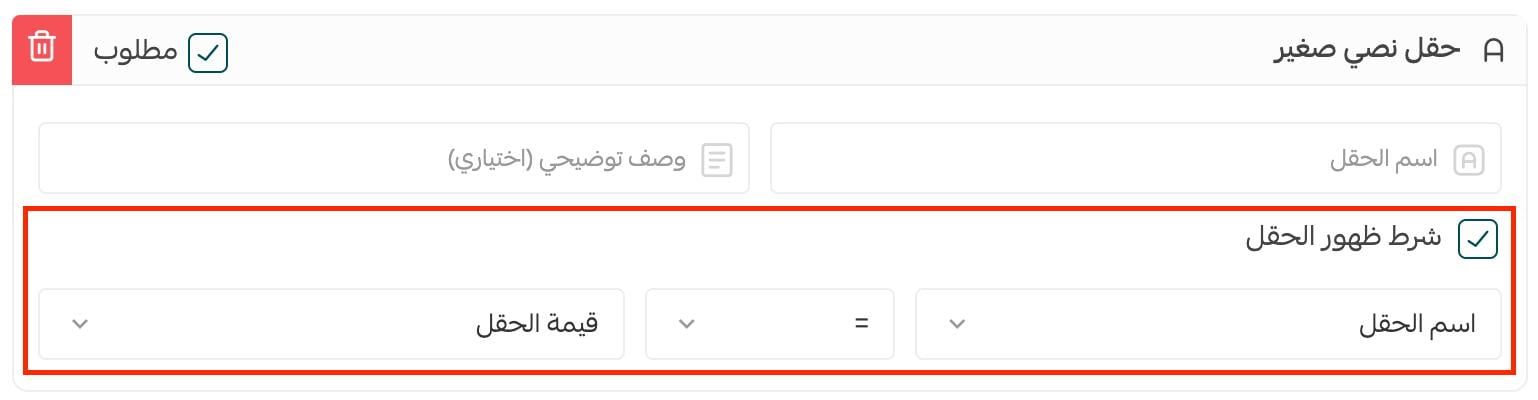
Set up a short text, long text, or number field
On the (Product data) page, open the (Order form) tab and add a short text field, a long text field, or a number field.
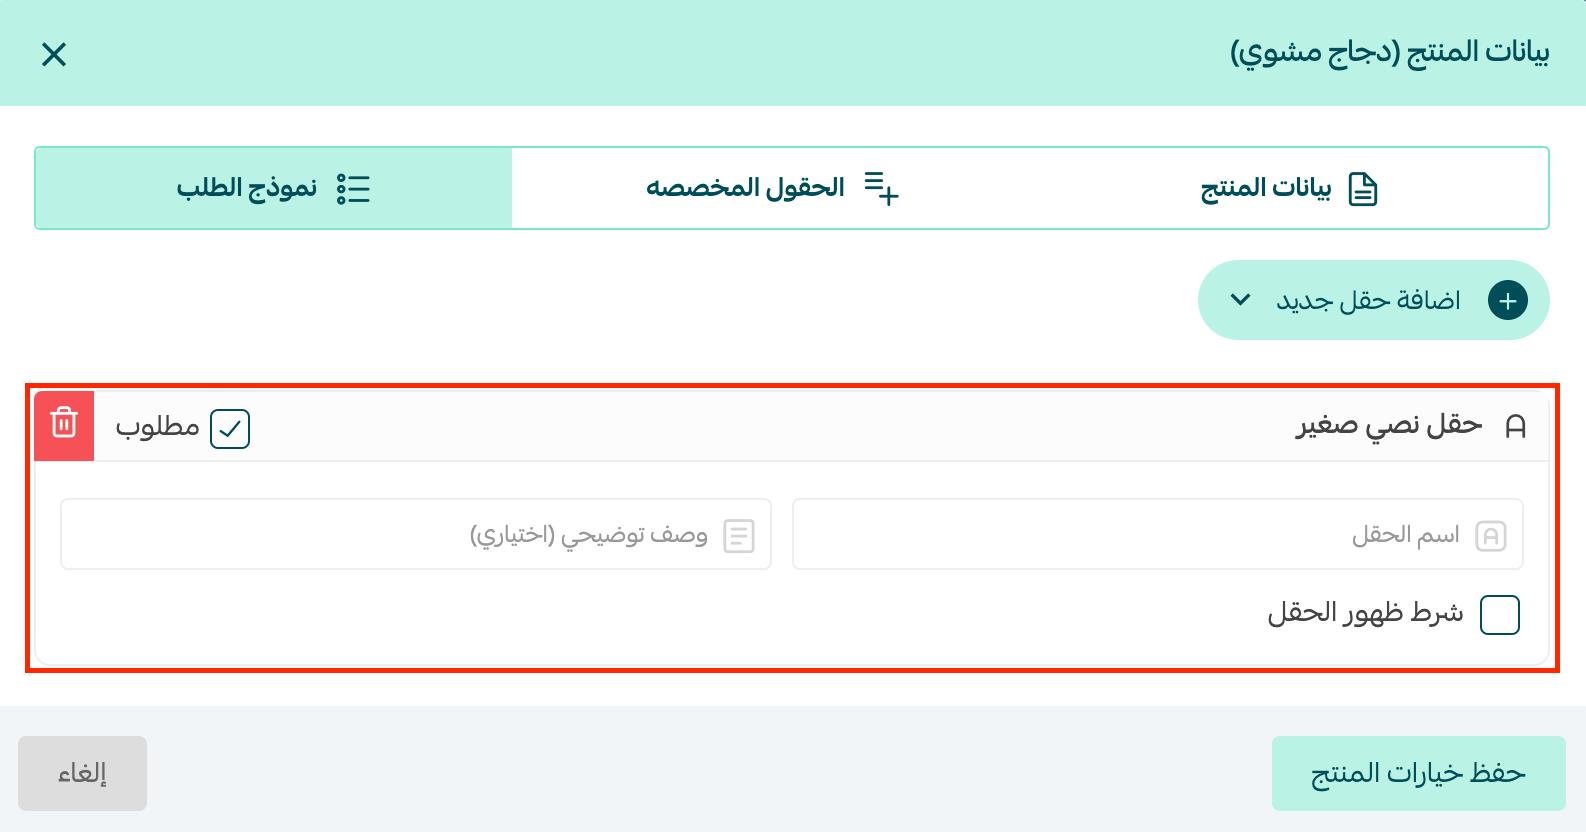
The details you enter are:
- Required: when this box is set, the order can't be completed until the customer fills the field in.
- Field name: keep it clear, short, and specific about what you're asking for.
- Field description: an explanation of what the field is for. Optional.
- Field display condition: the field stays hidden until the customer enters a specific value in another field. This is explained further below.
How a single-choice options field looks to the customer
Enter everything the options field needs, precisely and attractively: field name, field description, and the values the customer chooses between.
The field then appears on the product page like this:
How a multiple-choice options field looks to the customer
Enter everything the multi-choice field needs, precisely and attractively: field name, field description, and the values the customer chooses between.

The field then appears on the product page like this:
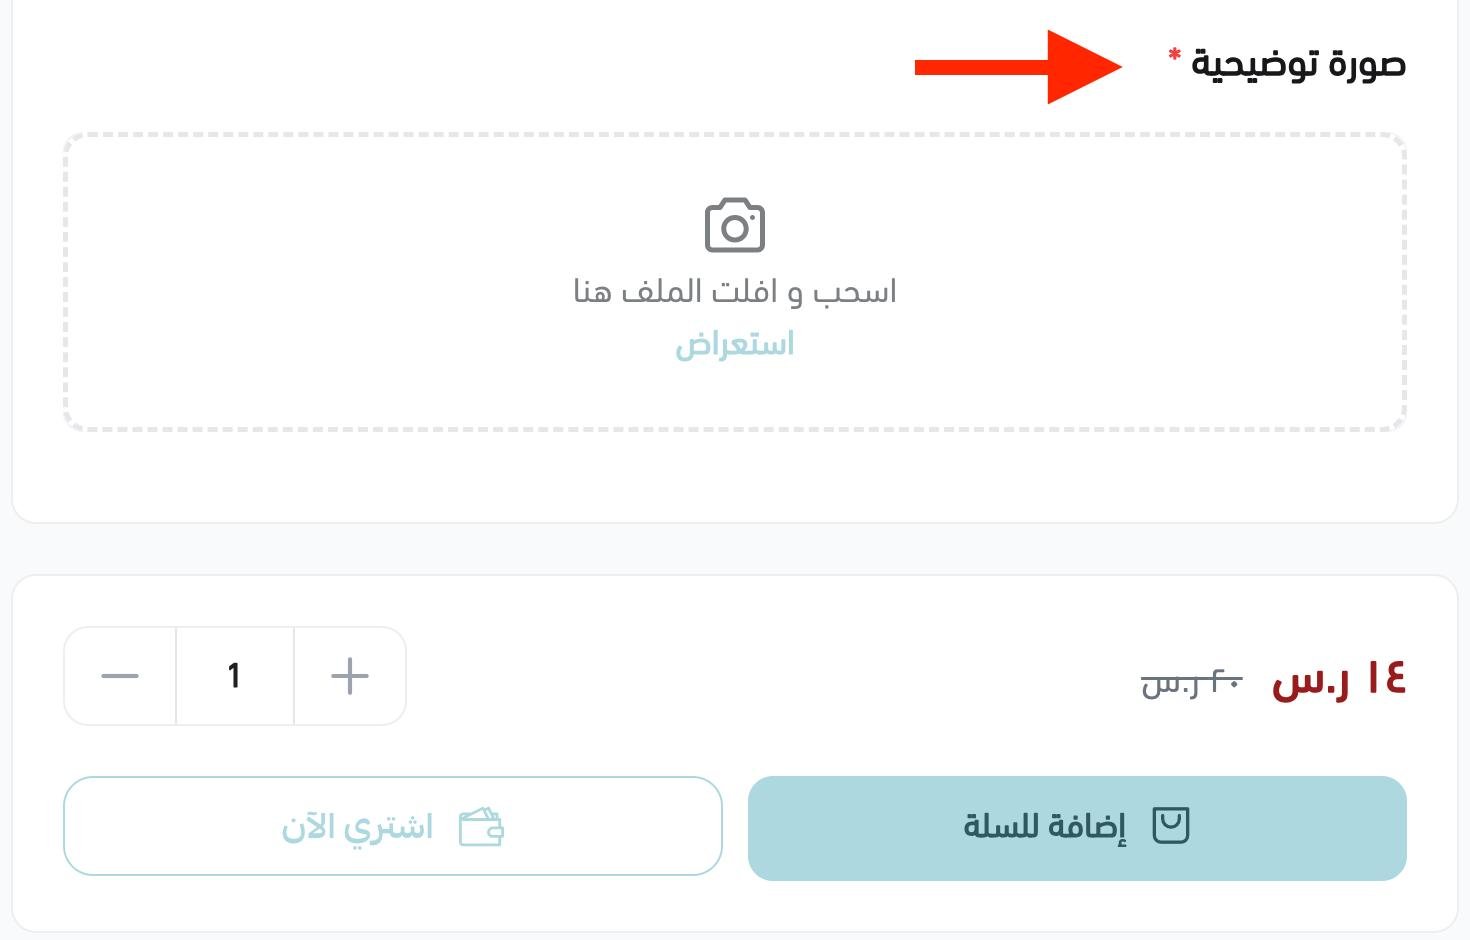
Let customers upload an image with their order
To show an image upload field, go to the (Order form) tab and add an image field.

Then enter the required details. The field appears on the product page like this:
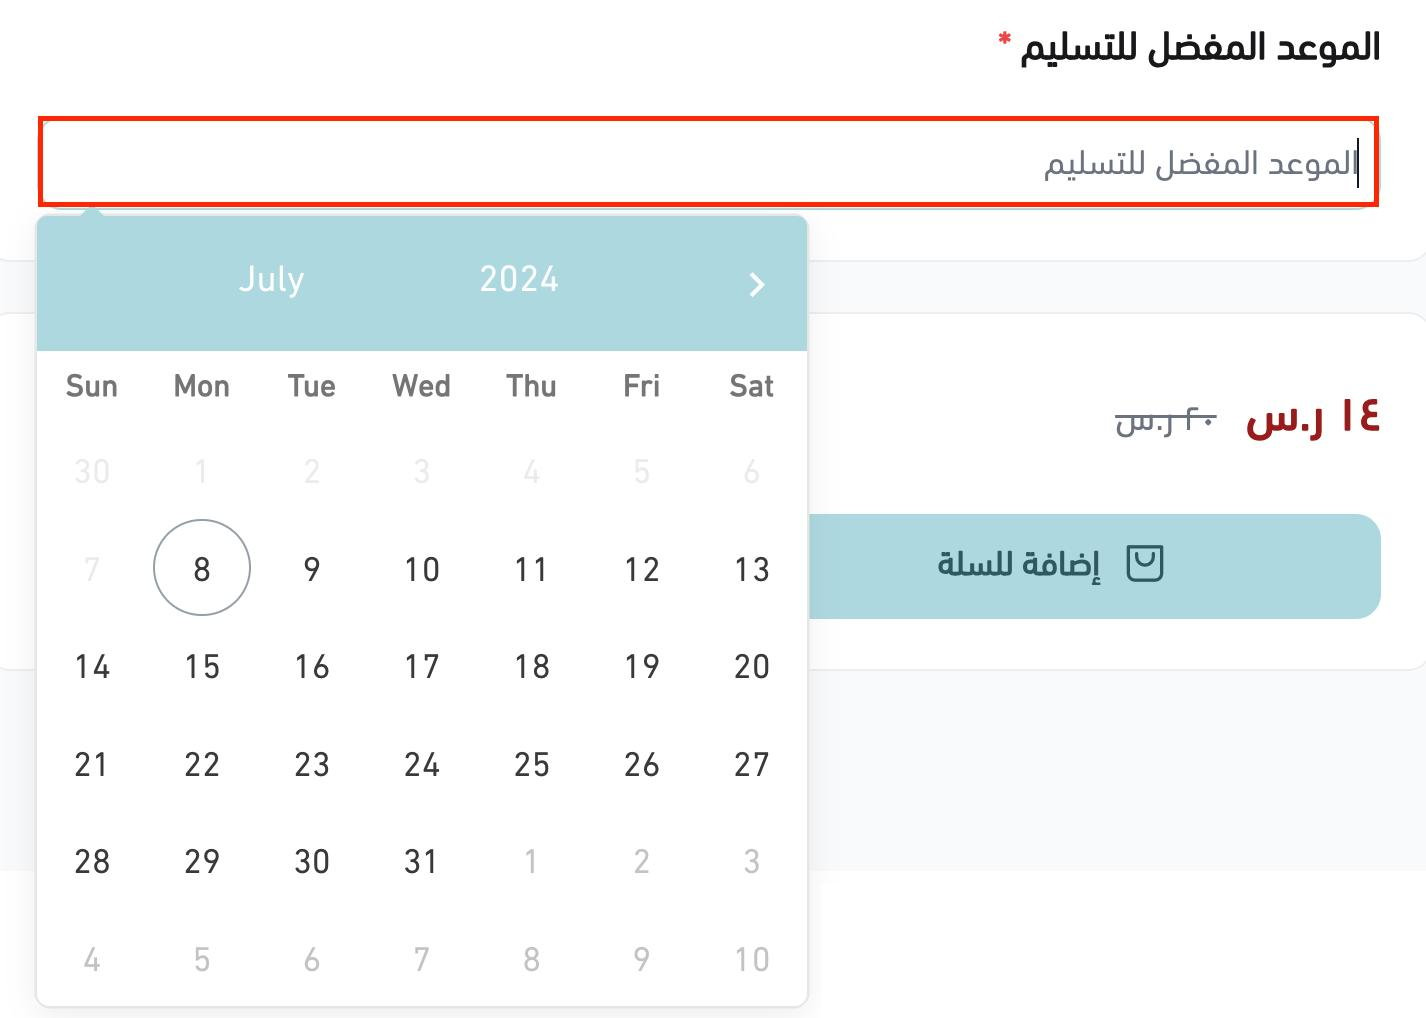
How a date field looks on the customer's page
It appears on the product page like this:
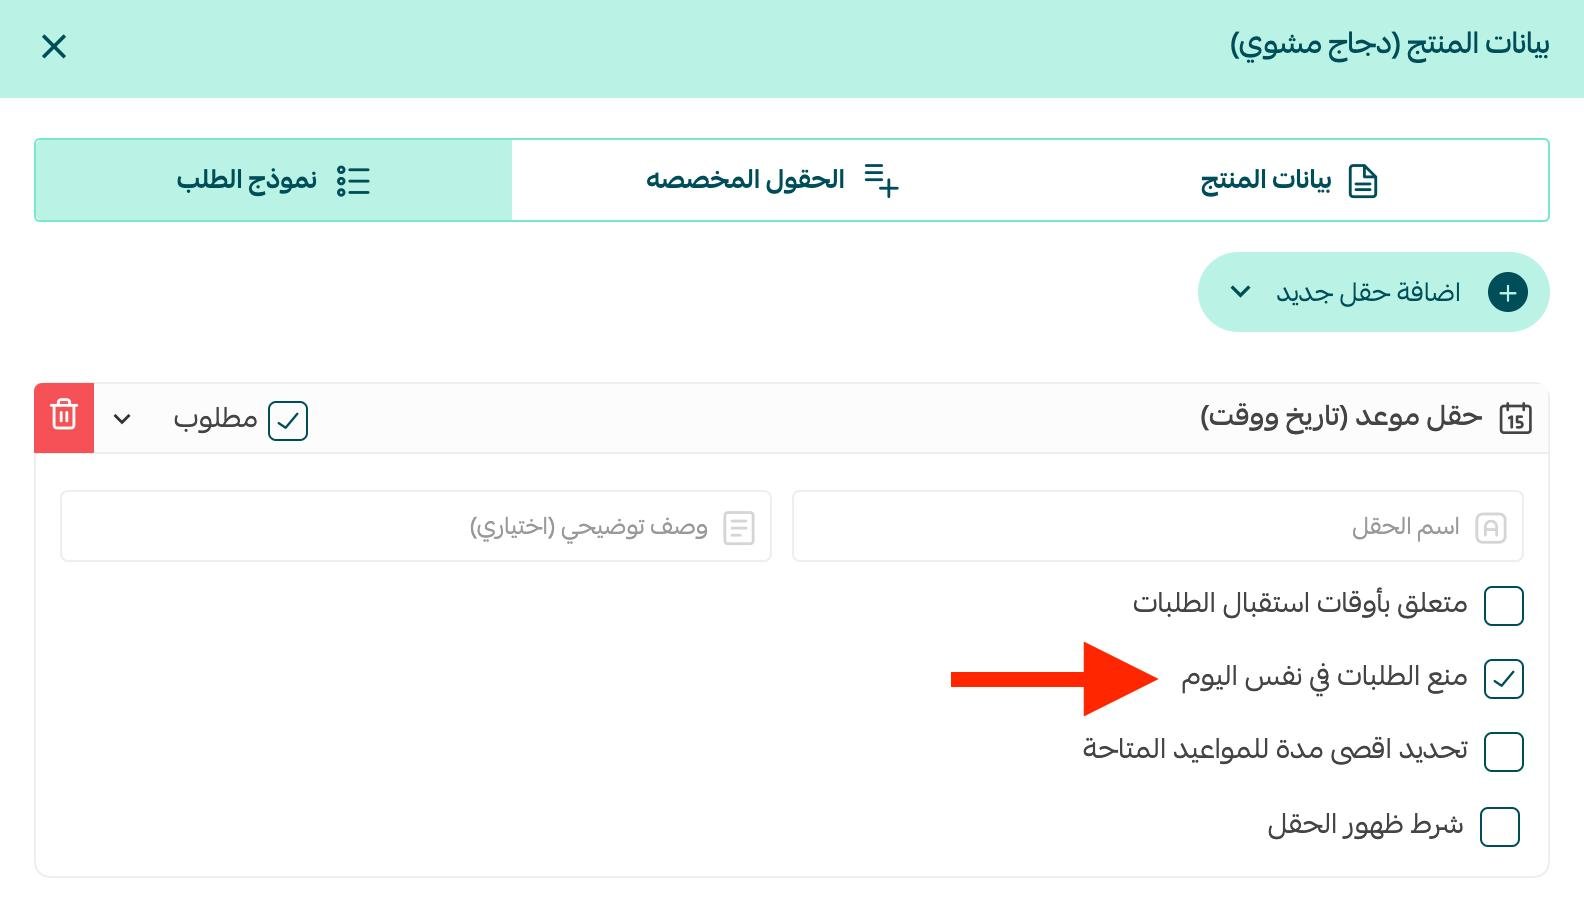
Block same-day appointments
In the appointment field, turn off the (Linked to order receiving times) option, select (Block same-day orders), then click (Save).
🔧 Controlling field order and conditional fields
Reorder a field or delete it
In the fields section, use the field's toolbar and the up and down icons to change its position.

The icons are, in order:
- Move the field up.
- Move the field down.
- Delete the field from the order form.
Show a field only when the customer's answer calls for it
On the product data page, in the (Order form) tab, every field you add has a setting called (Field display condition).
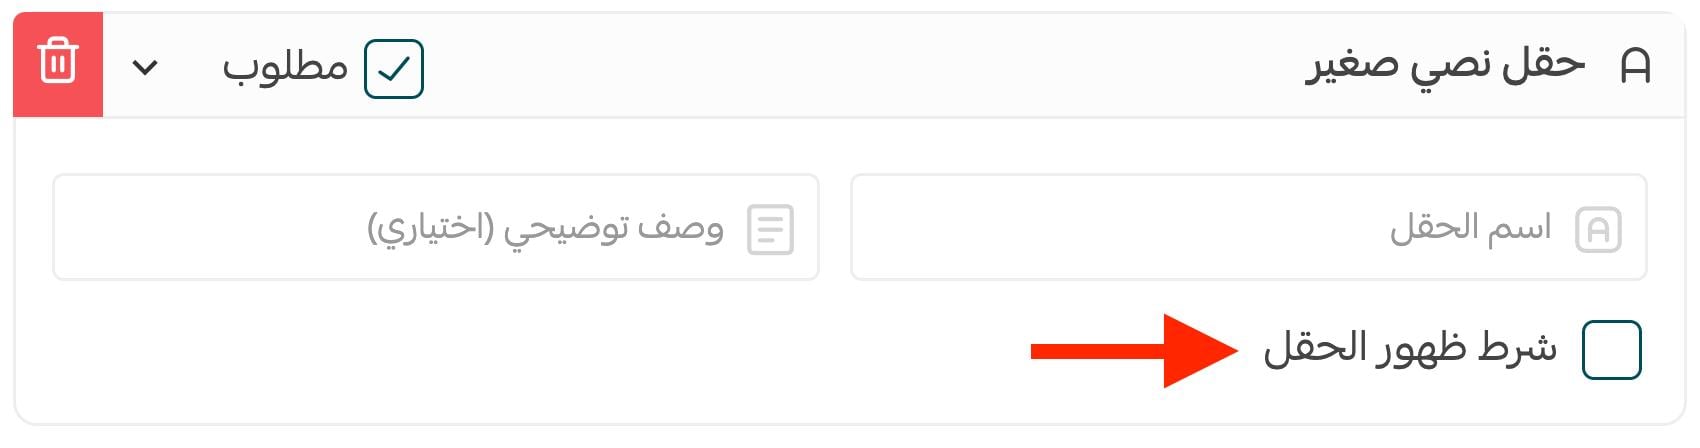
It means the field stays hidden until the customer enters a specific value in another field.

The settings are, in order:
- The name of the field whose value controls whether the current field appears.
- The comparison (equals, greater than, less than, not equal to).
- The field value.
💡 Example: the (Reference image) field stays hidden unless the customer sets the meal size to (Large, 25 pieces).
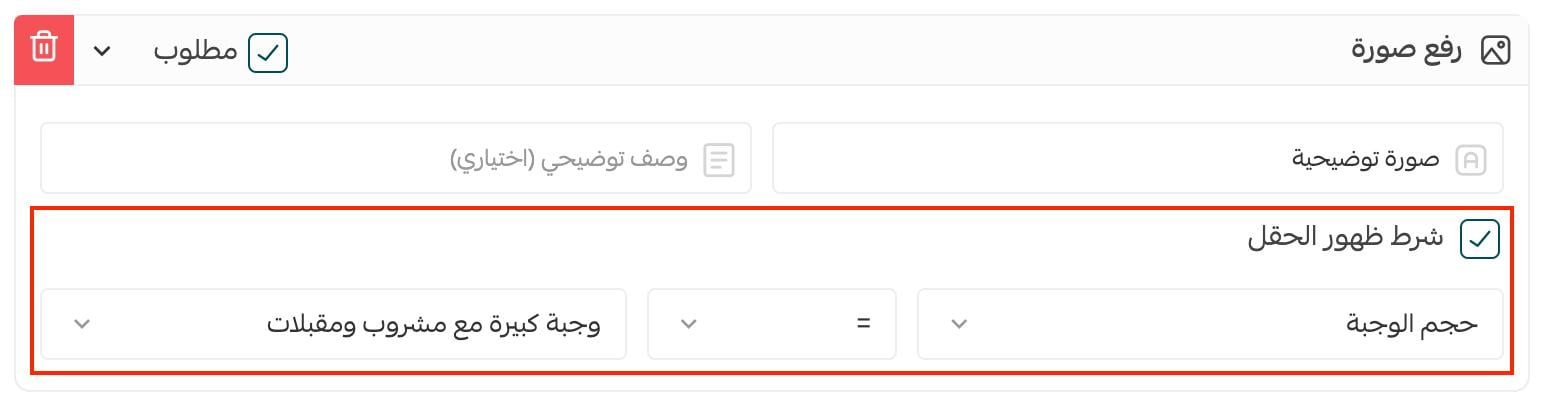
As shown here:
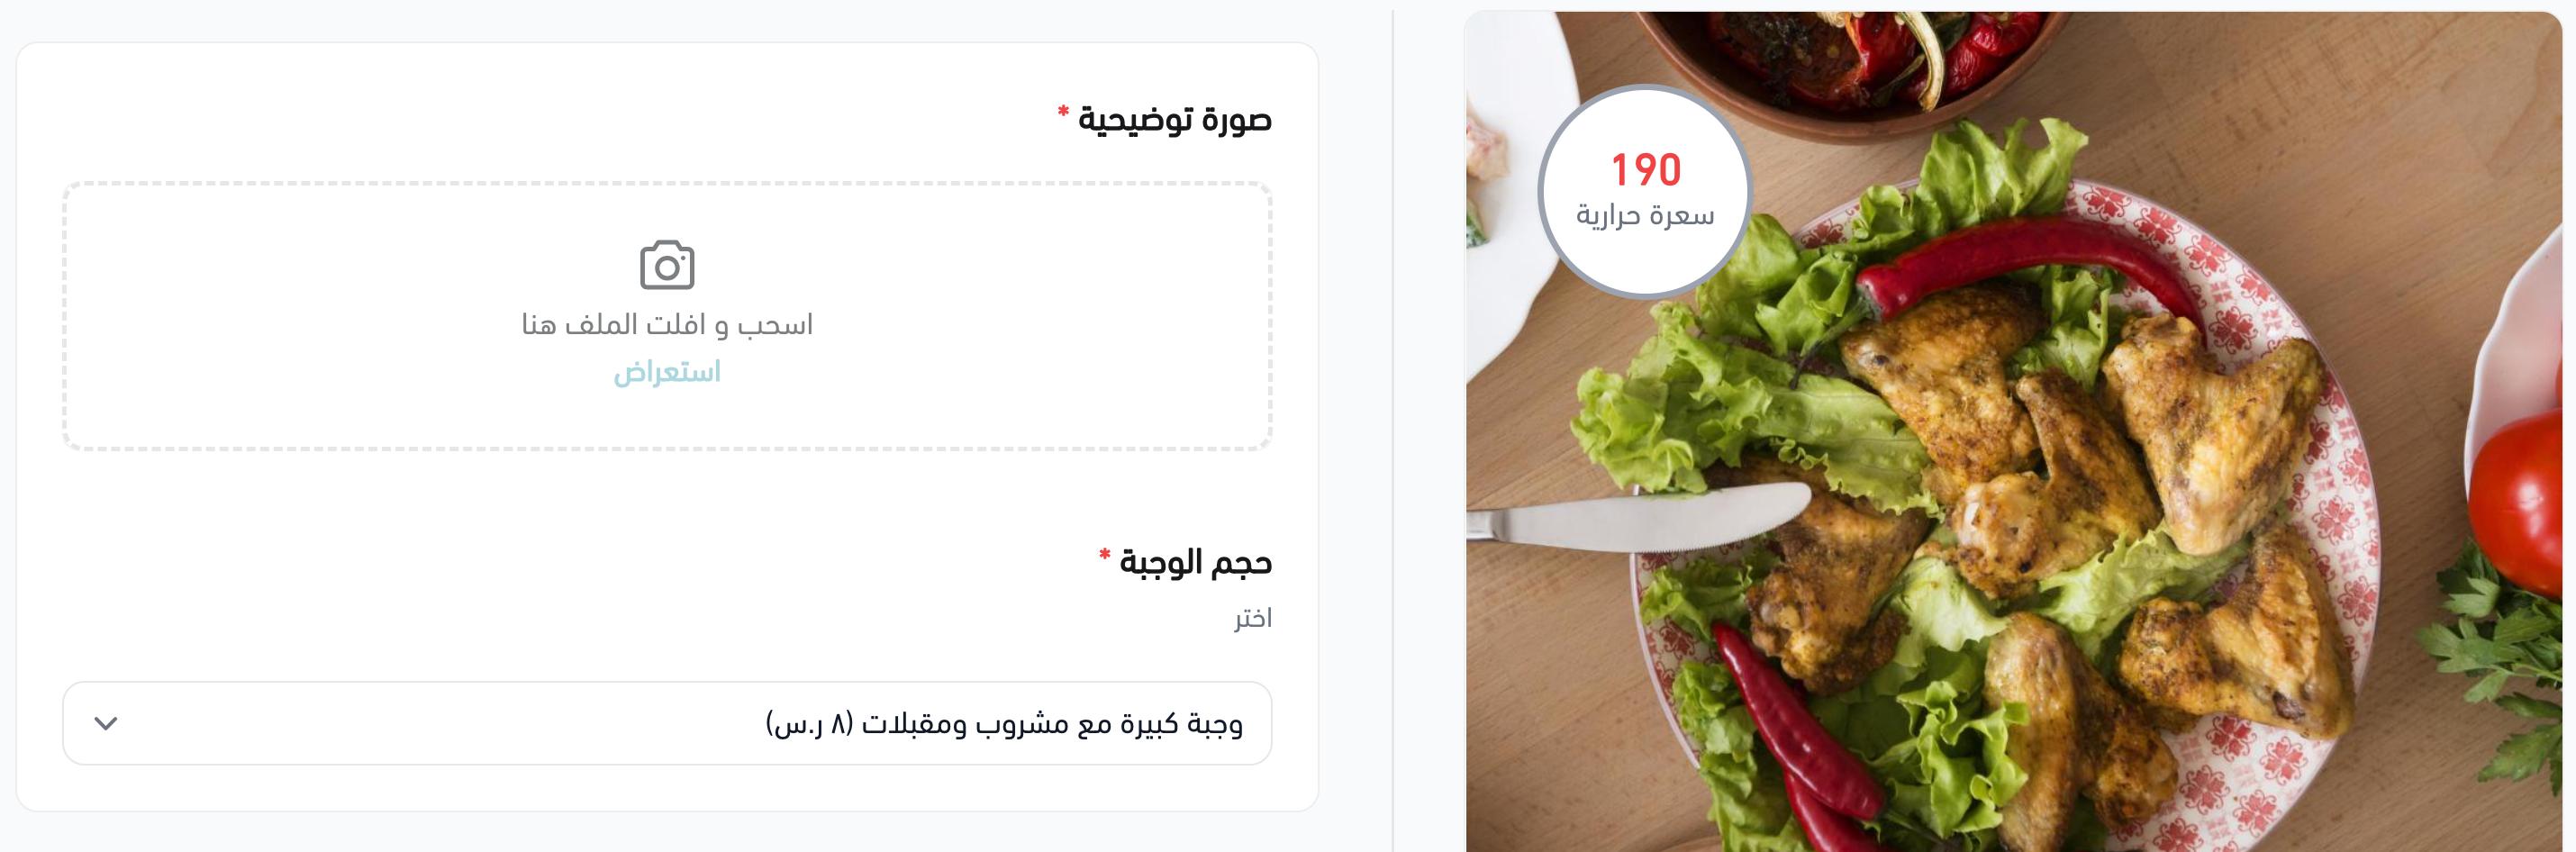
❓ Frequently asked questions
How do I show or hide a product in my store?
On the product data page, use the product display channels field to show or hide the product.

When you hide the product from both the store and the app, it appears faded on the products page with a hidden marker on its product card — so your customers won't see it:
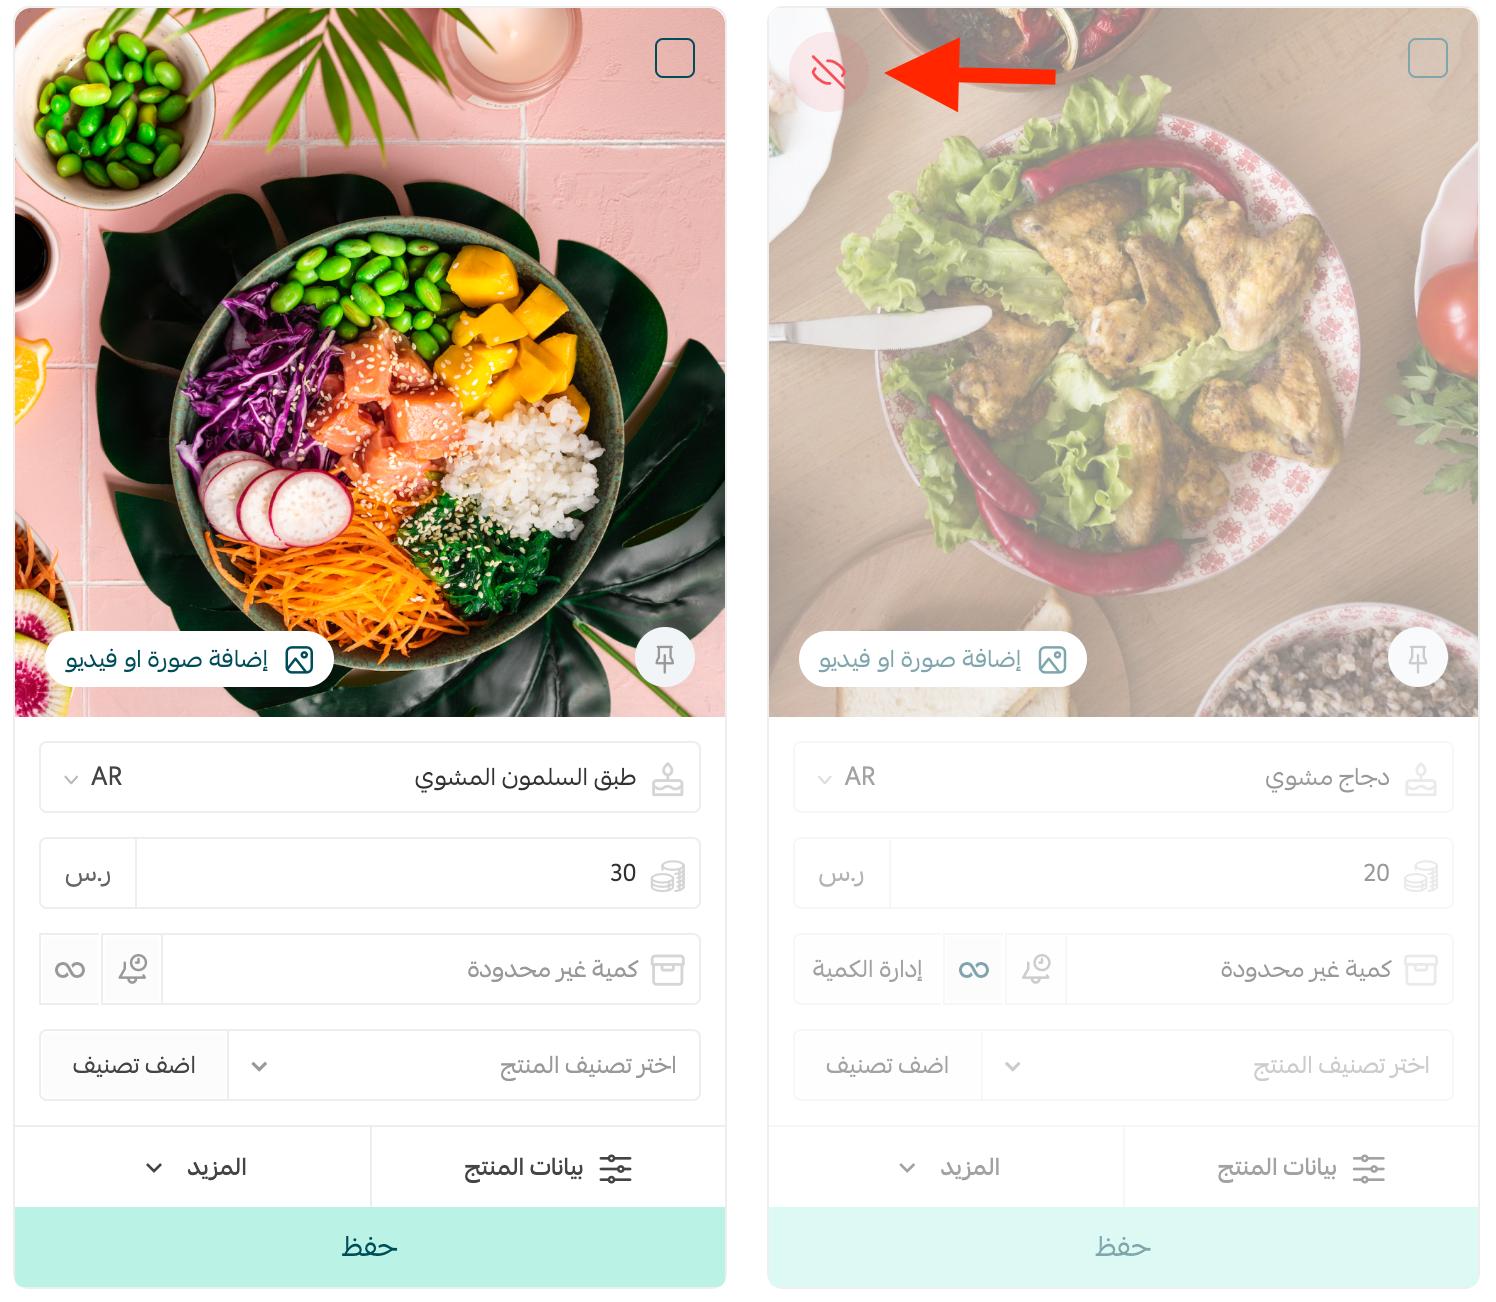
If you have a dedicated app for your store, an extra option appears for showing and hiding the product in the app. You have four choices:
1. Show the product on the store site only.

2. Show the product in the store app only.

3. Show the product on the store site and in the store app.

4. Hide the product completely from both the store site and the store app — don't select any display channel.

Can I make an order form field mandatory?
Yes. Set the (Required) box on the field, and the customer can't complete the order until they fill it in.
Where do the calories appear for my customers?
Once you save them in (Product data), the calories show on the product's page in your store.
Can I stop customers booking an appointment on the same day?
Yes. In the appointment field, turn off (Linked to order receiving times), select (Block same-day orders), and click (Save).
What's the difference between a date field and an appointment field?
A date field collects a date only. An appointment field collects both the date and the time.
If you'd like help adding your products, merchant services offers a product-adding service, along with image design and professional product description writing.