Email addresses on your own store domain make your brand look consistent and trustworthy, help customers remember your company name and your web address, reinforce your identity with every message you send, and give people a reason to actually open your mail.
An address like sales@yourstore.com does more work than a free inbox ever will. Creating email addresses on your store domain takes one of two routes on Salla: an email app from the Salla App Store, or an external mail service you link through your domain's DNS records. In this guide, you'll learn what domain-linked email addresses are, how to set them up through a Salla email app such as Zoho, and how to connect an external provider by adding DNS records in your store's domain settings.
There are two ways to create email addresses on your store domain. Install one of the email apps in the Salla App Store, such as Zoho, and add users there. Or get the DNS records from your hosting provider and add them under Store settings, Domain settings, DNS settings.
📌 Article overview
- What email addresses linked to your store domain are
- Method one: email apps in the Salla App Store
- Method two: connecting an external mail service
- Creating email accounts with Bluehost
- Frequently asked questions
🎯 What email addresses linked to your store domain are
Say your store domain is Mydomainname.com. You can create a range of addresses on it, such as:
- An address for general enquiries: info@Mydomainname.com
- An address for sales: sales@Mydomainname.com
- An address for each user or employee: username@Mydomainname.com
👣 How to create email addresses on your store domain
There are two ways to do it:
1. Email apps in the Salla App Store.
2. Connecting an external mail service.
Method one: email apps in the Salla App Store
Salla offers a number of email apps in the Salla App Store, including:
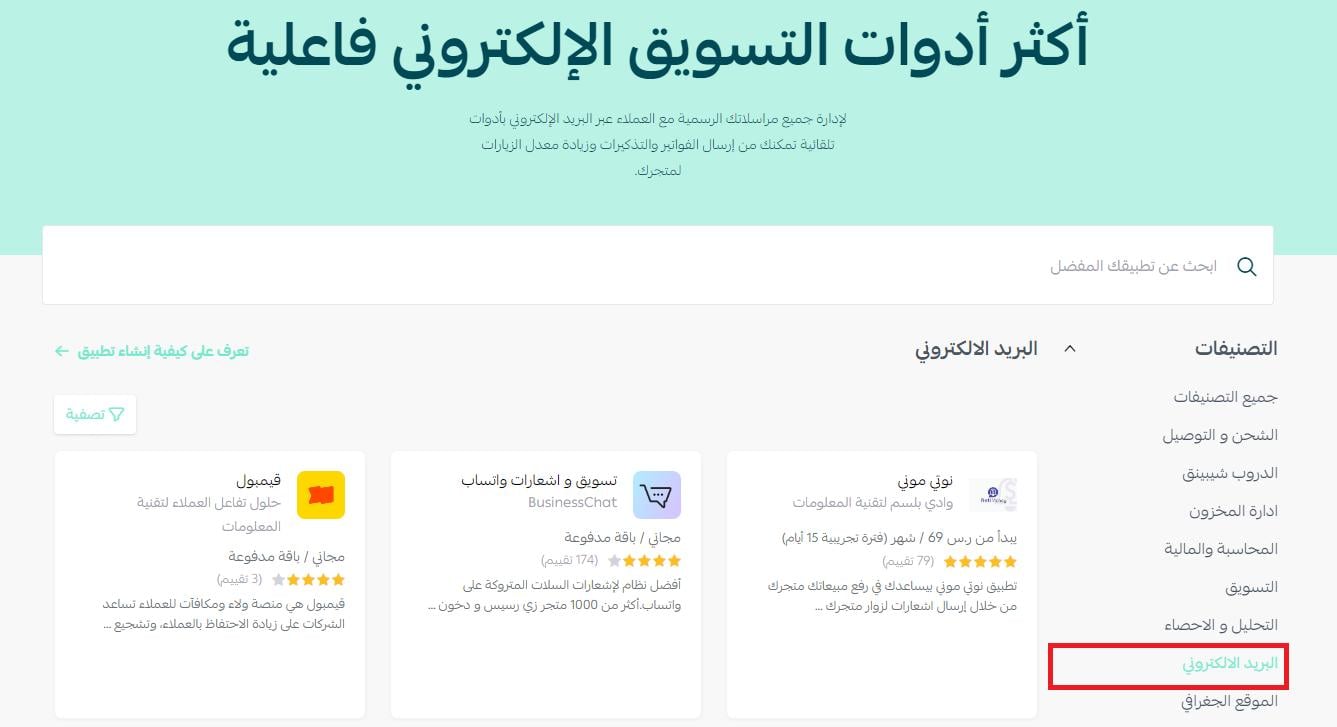
For more details on:
- creating a business email with Zoho
- connecting the Mailchimp mail service
Once the connection is working, you can create as many addresses as you need. Here is how it works on Zoho Mail, as an example.
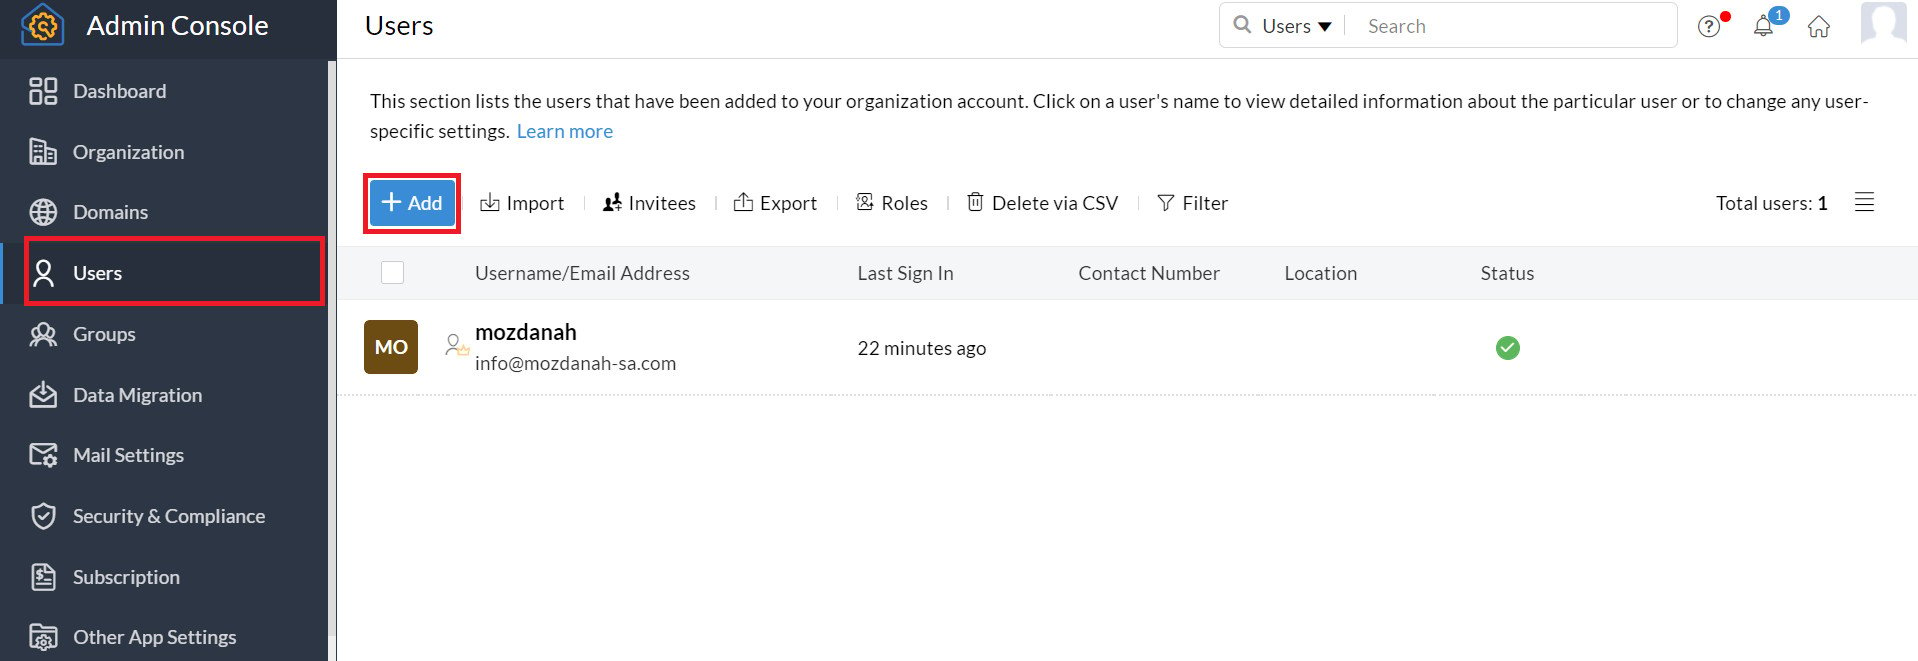
1. From the home page of your Zoho mail account, click (User Details) in the control panel, then click (Add User).
2. Enter the details of the new address — first and last name, username, and the password with its confirmation — then click (Add).
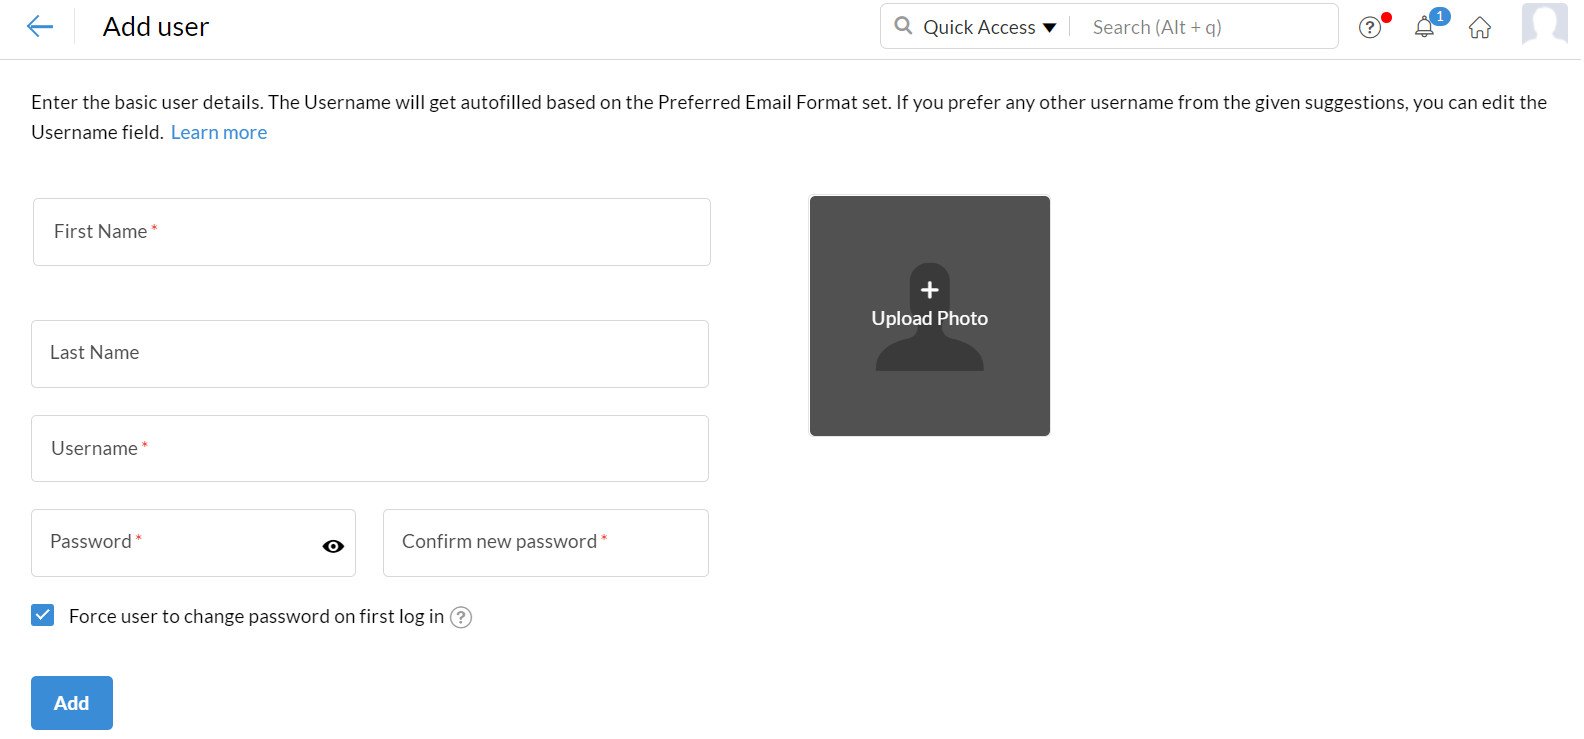
The new email address is now ready to use, with 5 GB of storage.
Method two: connecting an external mail service
Many of the large web hosting companies, GoDaddy and Bluehost among them, give their customers free email accounts. Connecting one takes two stages.
Stage one: contact your domain provider and ask for the DNS details that link email to your domain.
Those details come in one of these forms:
TXT: added through your store's domain settings.
MX: added through your store's domain settings.
SRV: added through your store's domain settings.
Stage two: add the DNS details to your store's domain settings.
1. From the side menu in your dashboard, click (Store settings).

2. On the Store settings page, click (Domain settings).

3. Click (DNS settings).
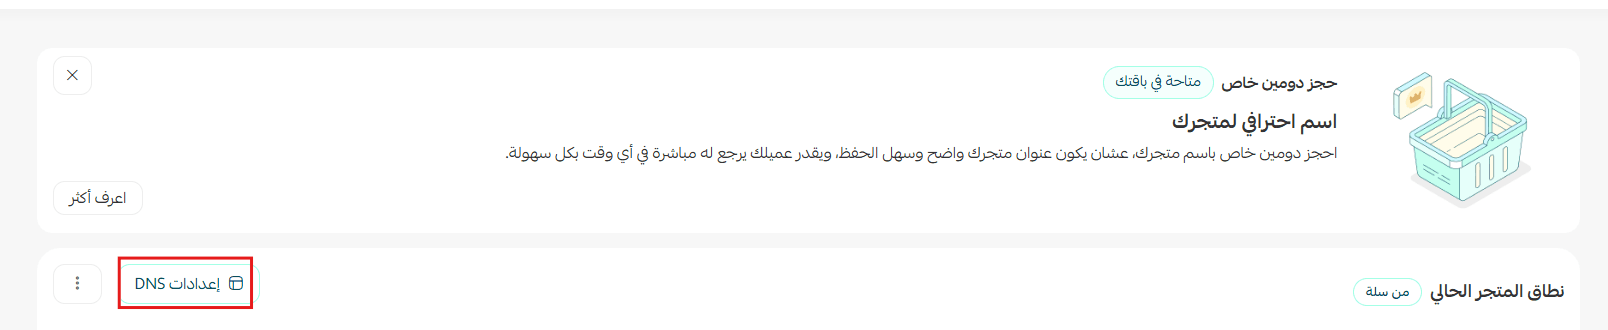
4. Click (+ Add new record).

Then enter the following details:
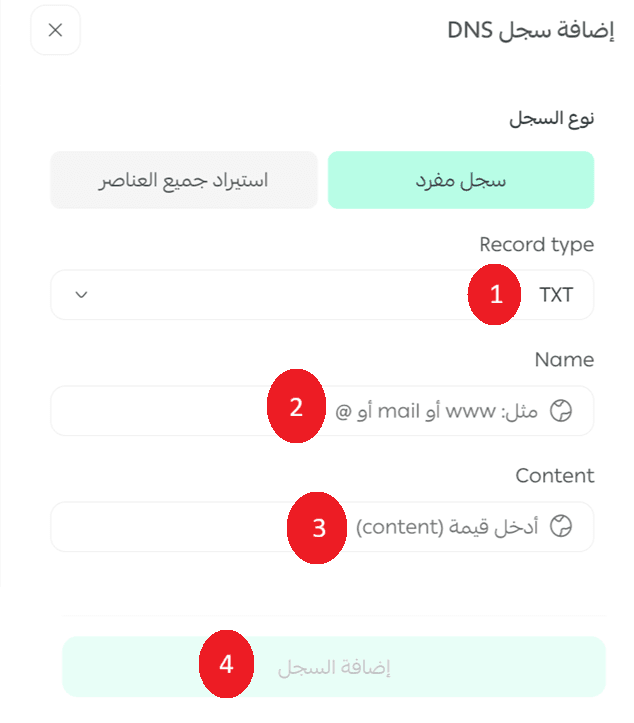
- Entering a TXT or MX record:
1. Type: choose the record type, TXT or MX.
2. Name: enter (@) only.
3. Content: paste the TXT or MX record you copied from the DNS details.
4. Click (Add record).
Repeat these steps for every DNS record your provider gave you. In the Bluehost example below, the process had to be repeated twice.
👣 How to create email accounts for your domain with Bluehost
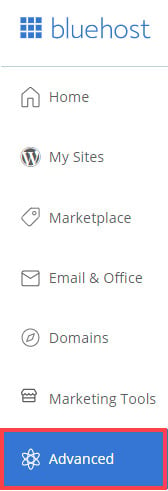
1. Sign in to your Bluehost panel, then open the (Advanced) tab in the main side bar.
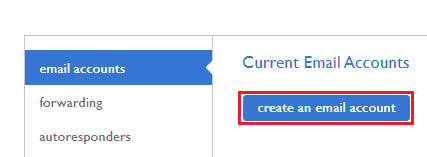
2. In the (Email Accounts) section, click (create an email account).
3. Enter the user details, then click (Create).
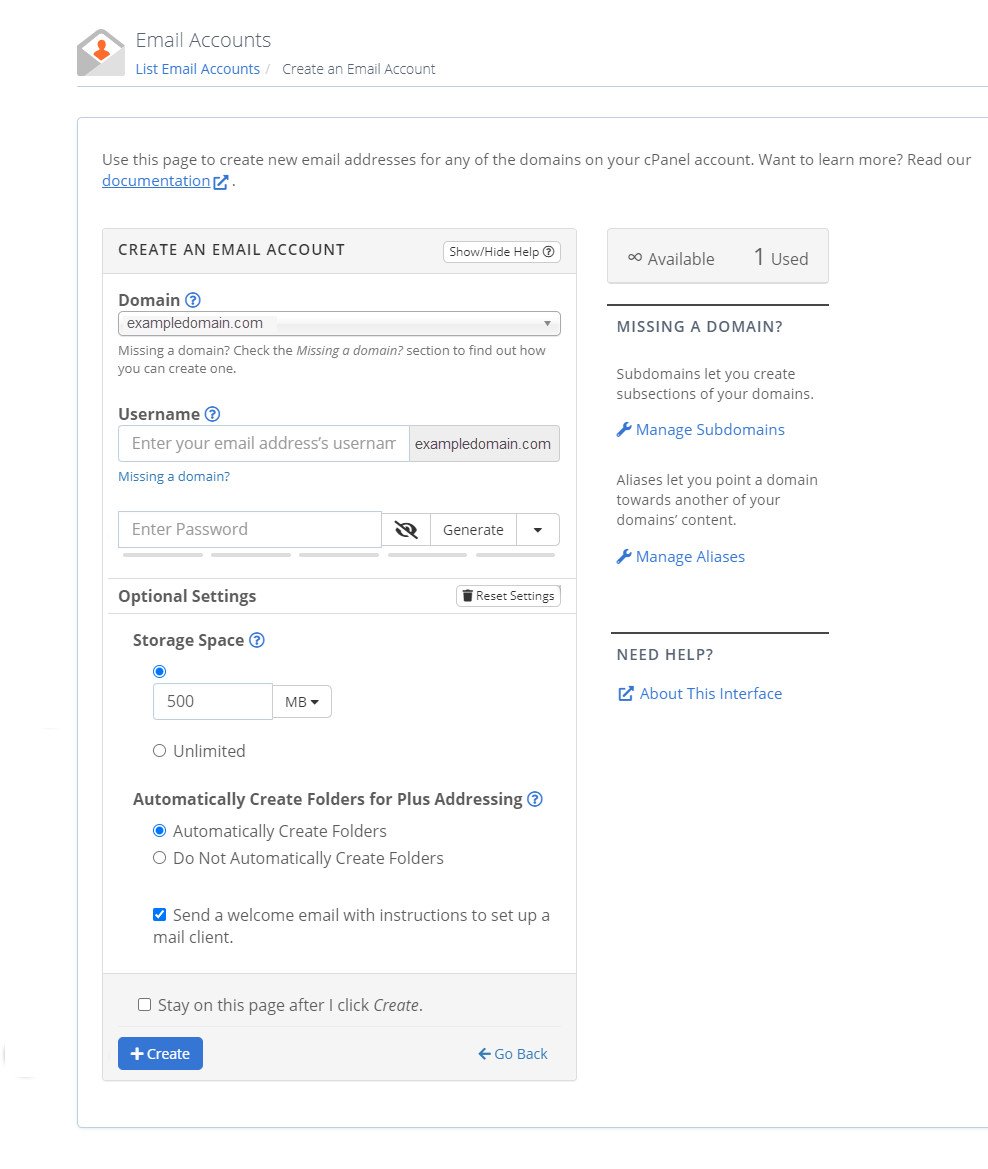
- Under domain, choose the specific domain you want to create the email address on.
- In the username text box, type the username you want to use (Fatima, for example).
- In the password text box, type the password you want for this email account. The password strength meter tells you whether what you entered is strong enough, and a strong password is well worth using.
- The mailbox quota text box (optional) sets how much of your total hosting storage this email account gets. The default is 500 MB, and you can raise or lower it depending on the hosting package you are on.
That's it — your email account is created and ready to work.
❓ Frequently asked questions
Which method should I choose?
If you want everything handled from Salla, install one of the email apps in the Salla App Store. If your hosting provider already gives you free email accounts, connect that service instead by adding its DNS records.
Where do I add DNS records for my store domain?
In your dashboard. Open (Store settings), click (Domain settings), then click (DNS settings) and use (+ Add new record).
Which record types can I add?
TXT, MX, and SRV records, all through your store's domain settings. Your domain provider tells you which ones your mail service needs.
Do I need to add more than one record?
Often, yes. Repeat the add-record steps for every DNS record your provider supplied — the Bluehost example needed two.
An email address on your own domain costs almost nothing to set up and quietly signals that you run a real business. Pick the route that matches where your domain already lives, and get info@ and sales@ working before your next campaign goes out.