Create your pages your way! With the HTML page type, you can build fully customized pages that add a professional touch to your store. In this guide, you’ll learn how to create and publish your page step by step.
📌 Article overview
- Requirements for creating an HTML page
- Steps to create an HTML page
- Practical example
- FAQ
Requirements
Before creating an HTML page, make sure you have:
- A Pro or Special plan
- A custom domain connected to your store
- Access to store design permissions
Steps to create an HTML page
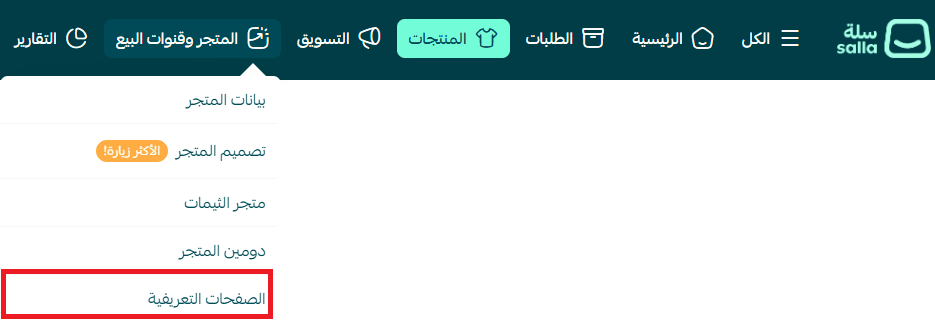
- From the main menu, go to (Store & Channels) → (Custom Pages)
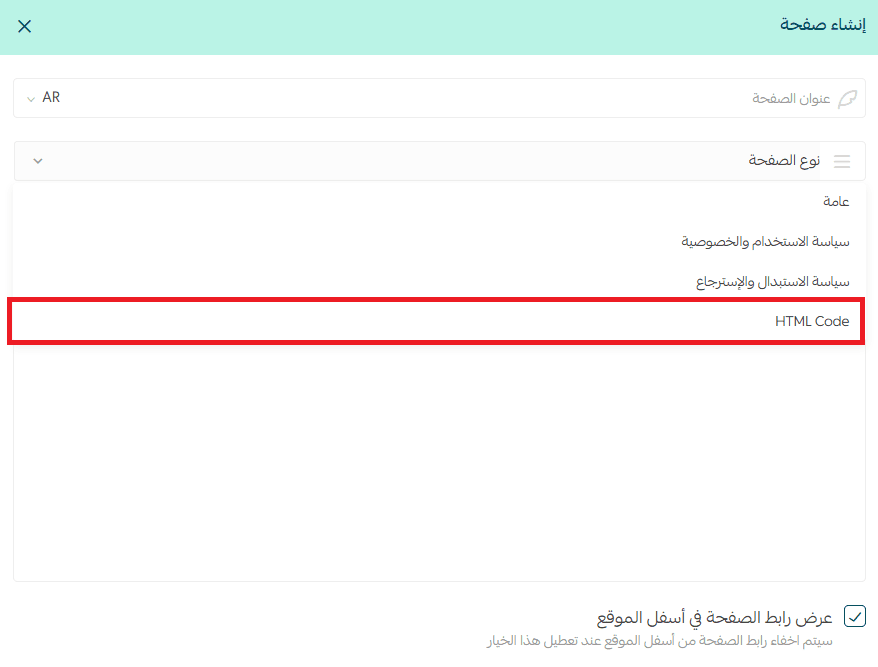
2. Click (New Page)

3. In the page creation screen:
- Enter the page title
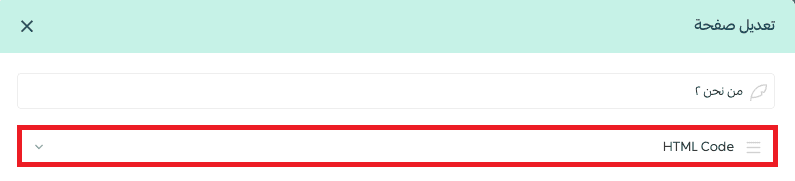
- Under Page Type, select (HTML Code)
- Add your content (plain text or HTML code for advanced formatting)
4. At the bottom of the page:
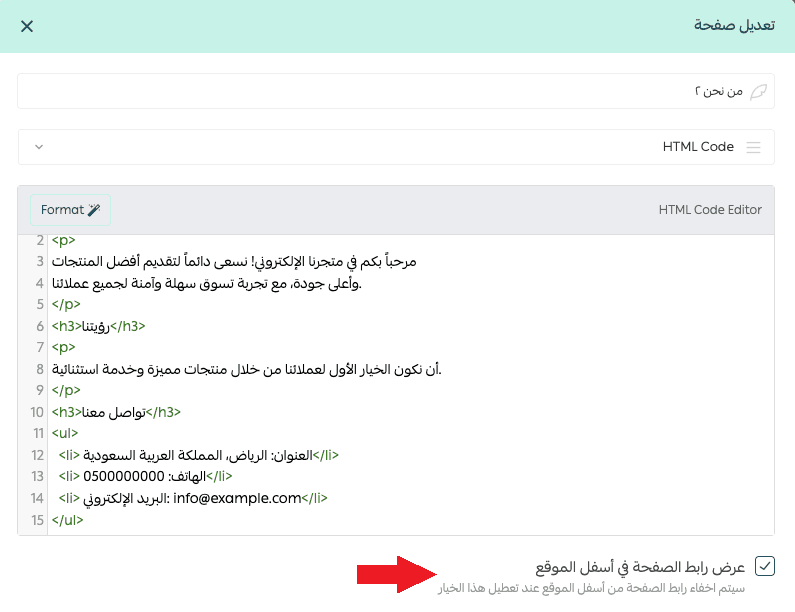
- Enable (Show page link in footer) to display it in your store footer
- Disable it to keep the page hidden but accessible via direct link

Practical example
To create a custom HTML page:
- Choose (HTML Code) as the page type
2. Add your HTML code in the editor
3. Click (Save)
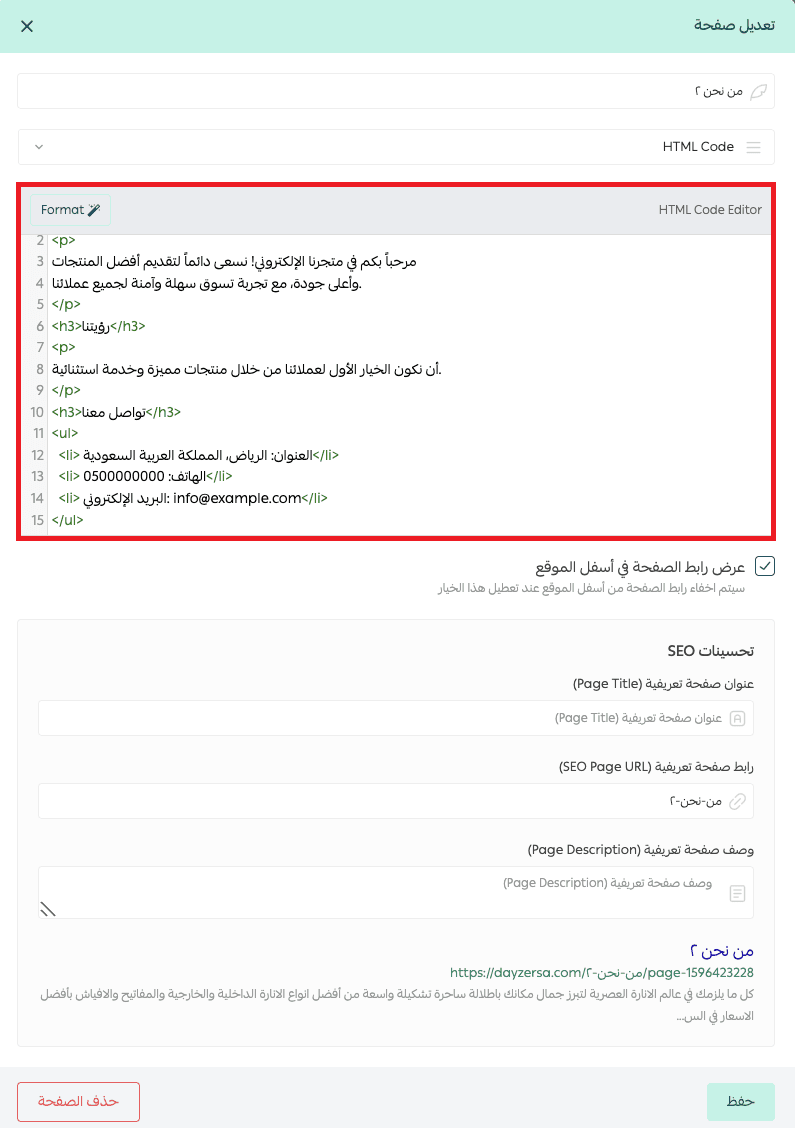
Note: For SEO improvements, the page URL is generated automatically based on the store language. It may change if you switch between languages (e.g., Arabic / English). After saving, the page will be created successfully and added to your store.

Frequently asked questions
Can I edit the HTML code after creating the page?
Yes, you can update the HTML code or content at any time and save the changes.
Can I hide the page without deleting it?
Yes, disable the option (Show page link in footer).
The page will remain accessible via its direct link but won’t appear in the store.
Tip: Your “About Us” page can be more than just text—use HTML to build a compelling, branded experience that builds trust and increases conversions.