Do you need to display different menus in the header or footer for each version of your store’s theme? You may feel limited by using a single menu that doesn’t reflect seasonal offers, campaigns, or the diversity of your products.
With menu customization by header and footer, you can now create multiple menus and assign them to specific theme versions, giving you full control over navigation and helping customers see what matters most every time they visit.
📌 Article overview
- Types of menus you can customize
- How to access menu management
- Creating a new menu
- Managing menu items
- Managing menus
- Frequently asked questions
🎯 Types of Menus You Can Customize
You can customize a wide range of menus depending on your business needs, including:
✅ Core Menus (Default Menus)
These are standard menus used in the header or footer across the store.
🔐 Important:
- These menus cannot be deleted or edited
- You can reorder their items
- You can duplicate them to create a customizable version
Example: Footer menu
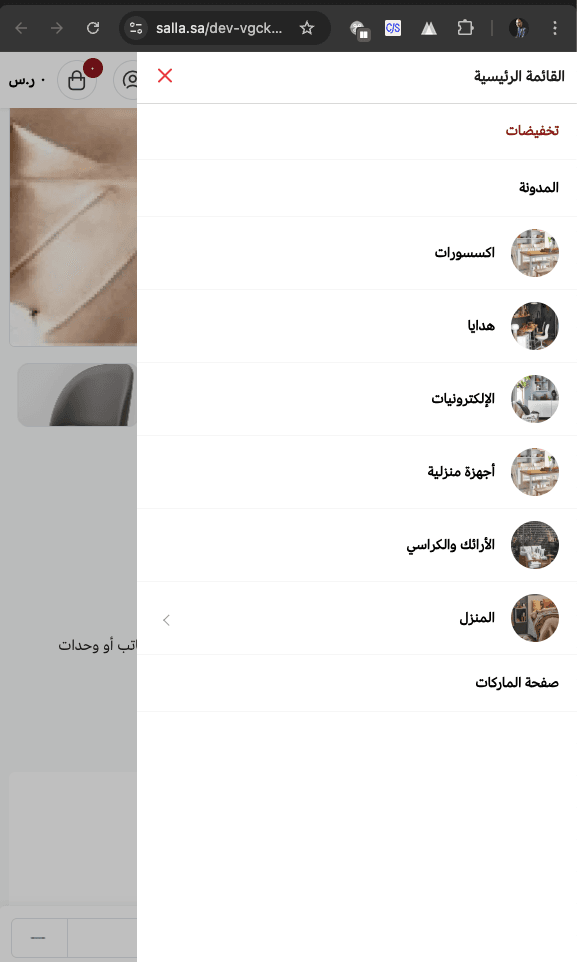
✅ Custom Menus
🔓 These menus offer full flexibility:
- Can be edited or deleted
- Items can be reordered
- Can be duplicated and customized
Example 1: 🛍️ “Our Special Offers” Menu
Used to highlight discounted or seasonal products and categories.
Example items:
- Summer Discounts
- Weekend Deals
- Products Under SAR/AED100

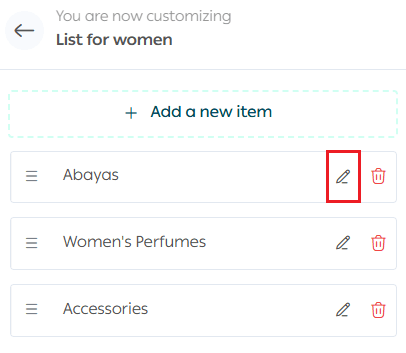
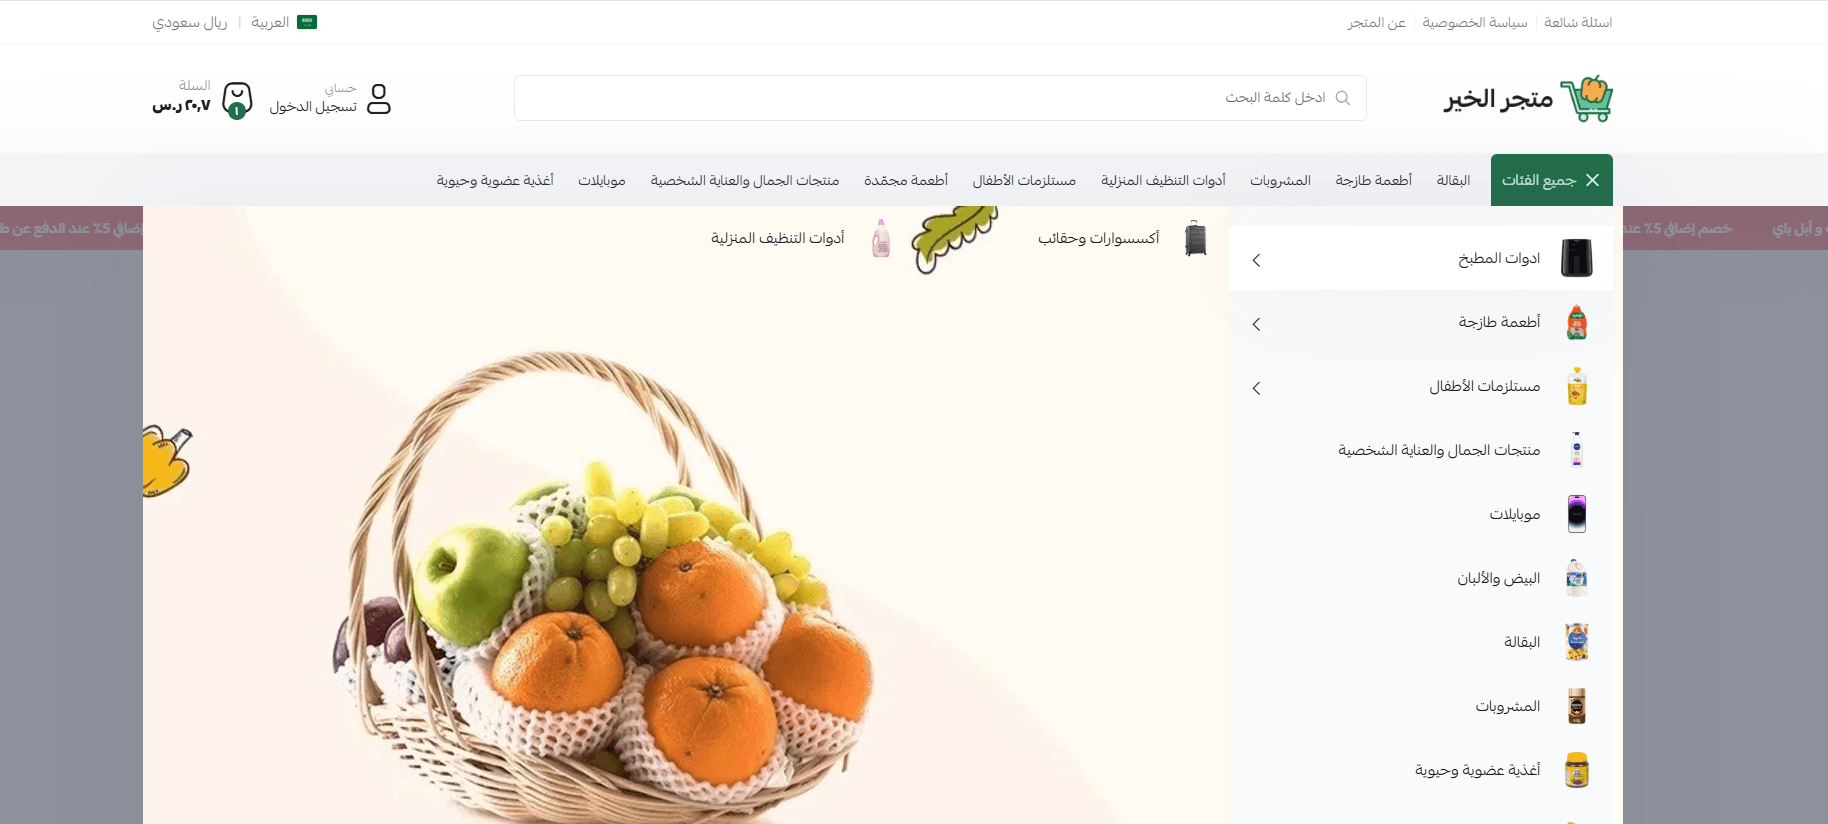
Example 2: 🧕 “Women’s Products” Menu
Helps customers navigate directly to targeted categories.
Example items:
- Abayas
- Women’s Perfumes
- Accessories

🚀 How to Access Menu Management
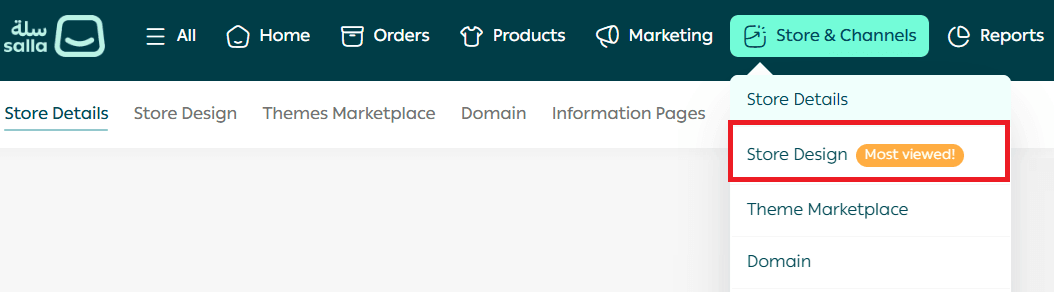
- From the main menu, go to Store & Channels, then click Store Design.
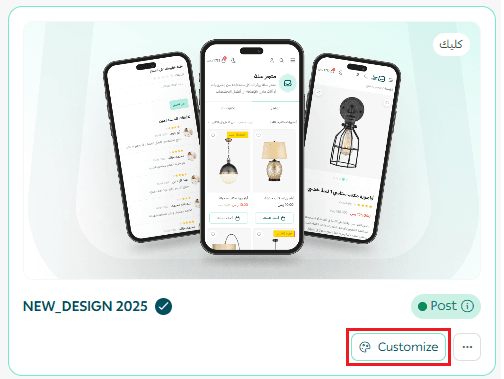
2. On the store design page, click Customize on the theme card.
3. From the side menu, click Menu Management.
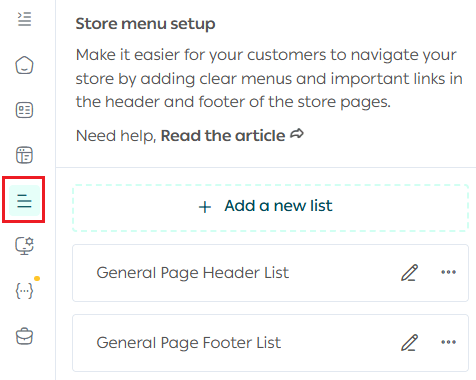
You’ll now see the Menus tab with all available menus.
🚀 Creating a New Menu
- From the store menu settings, click Add new list.
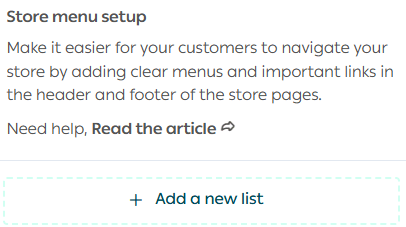
A new menu will be created automatically and is ready to be customized.
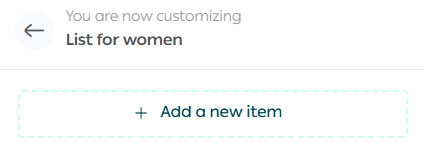
2. Rename the menu

Enter the new name and click ✅ to confirm.
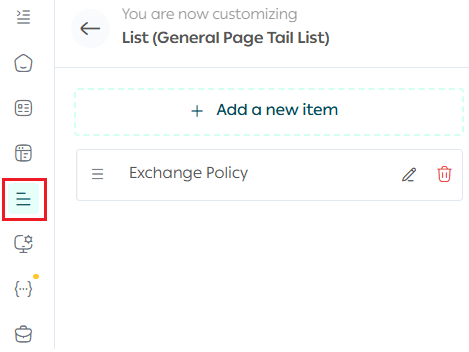
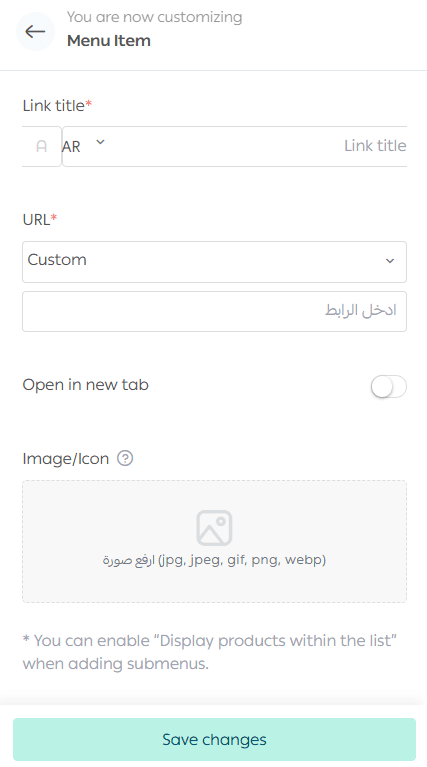
3. Add menu items

Click Edit, then select + Add New Item.
Enter the item details:
- Item title
- Link type
- Whether it opens in a new tab
- Optional item image
💡 Example:
Adding a menu item for products categorized under Normal Skin.
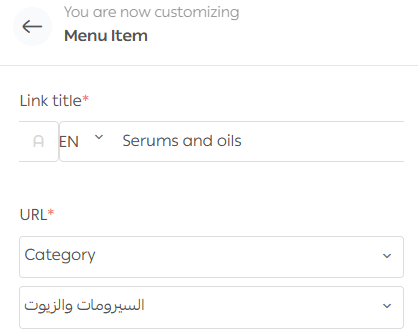
Once saved, the item will appear in the menu.
🧪 Managing Menu Items
1️⃣ Controlling Menu Visibility in the Store
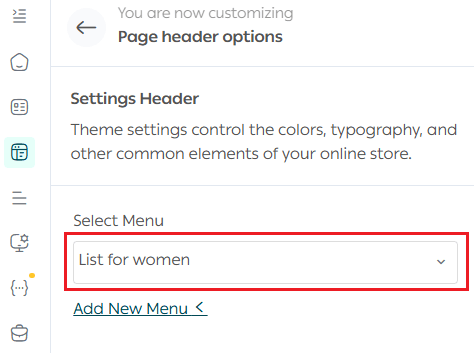
Using Header & Footer customization, you can:
- Choose which menus appear in the header or footer
- Assign different menus to different theme versions
📌 This allows you to create a smoother, more professional navigation experience.
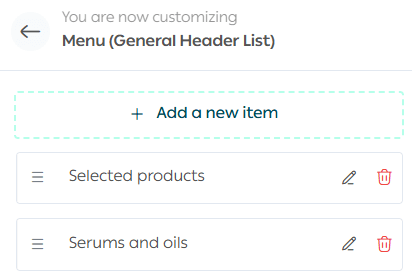
2️⃣ Reordering Menu Items
Drag and drop menu items to rearrange them as needed.

3️⃣ Editing Menu Item Properties
To modify an item, click Edit, update the details, and save your changes.
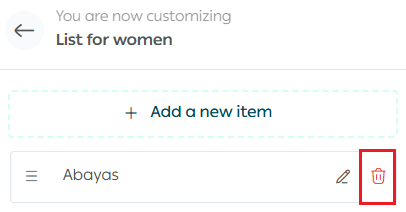
4️⃣ Deleting a Menu Item
To remove an item, click Delete.
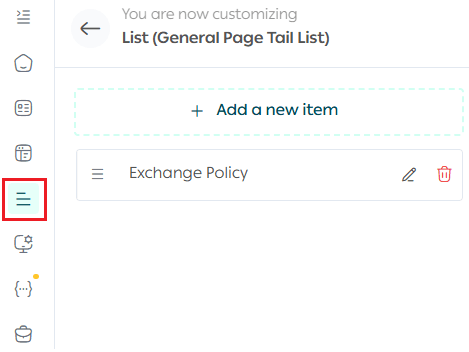
🧭 Managing Menus
1️⃣ Editing Menu Content
Click Edit to modify a menu’s items.
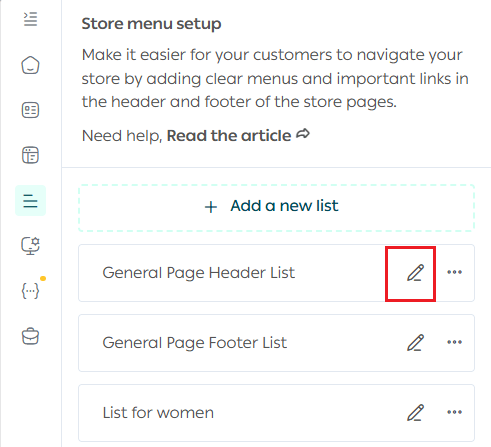
For both core and custom menus, you can:
- Add items
- Reorder items
- Remove items
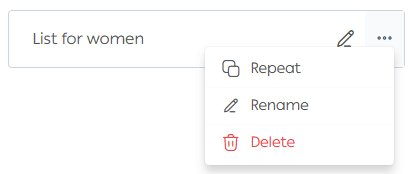
2️⃣ Duplicating a Menu
To duplicate any core or custom menu, click Duplicate, then customize the copied version as needed.
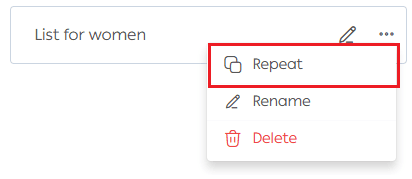
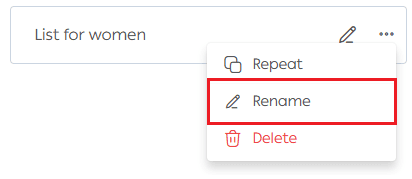
3️⃣ Renaming a Menu
To rename a custom menu, click Rename.
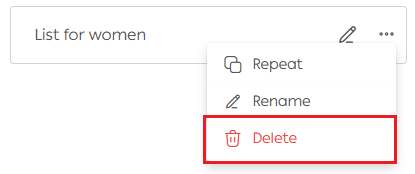
4️⃣ Deleting a Menu
To delete a custom menu, click Delete.
🛑 Important Notes
- Deleting a custom menu affects all theme versions using it
- Once deleted, the system automatically falls back to the default menu
- Default menus cannot be deleted or edited, only duplicated
✨ Activate menu customization today and give your store a flexible, tailored navigation experience for every season and campaign. 🚀
Frequently Asked Questions
What’s the difference between core menus and custom menus?
Do menu icons appear in all themes?
Menu icons appear in some themes and in certain cases on mobile.
💡 Examples:
- Market Theme
- Raed Theme (Mobile version)
🚀 Enable menu customization now and build a navigation experience designed precisely for every campaign and theme version!